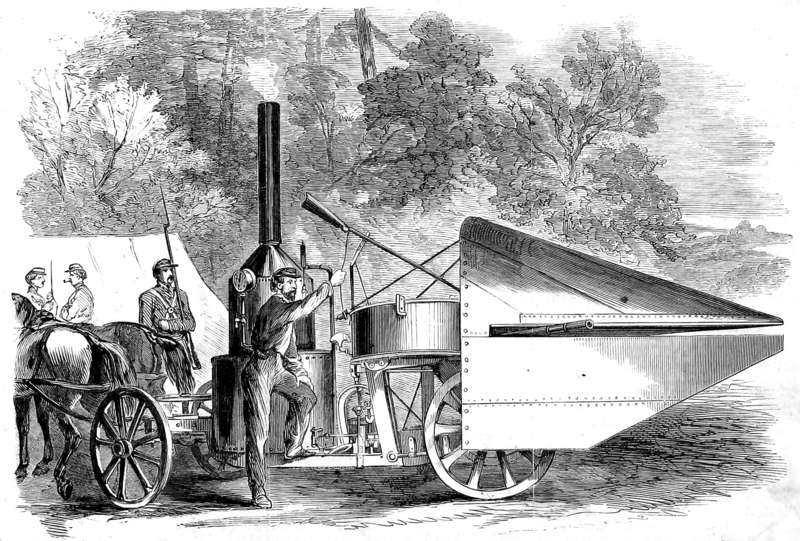
The Winans Steam Gun in the hands of Union troops. Engraving from Wikipedia.
This was a steam-powered, self-propelled cannon that was capable of a very high rate of fire. No gunpowder was used – the balls were “fired” by the centrifugal force generated by a steam turbine. People who had seen it demonstrated in Baltimore prior to the war thought that it had great potential as a weapon against infantry and artillery. One observer wrote this in the Baltimore News after seeing a test firing:
Against a brick wall about a foot thick, heavy timbers, each a foot thick, were piled up. When finally placed ready for the test, there was about three feet of wood and one foot of brick ready to receive the discharge of the gun. The gun was some 30 or 40 feet away from the target. At a given signal an awful uproar was begun. In less than a minute the gun had been stopped. In that short time the heavy timbers had either been smashed or thrown into the air. Every one of us was convinced that the discharge would have mowed down a whole regiment.
Clearly, it would be a bad thing if this technology fell into enemy hands. On May 11, 1861, Butler halted the noon train from Baltimore to Ellicott’s Mills (present day Ellicott City) to commandeer it. As many as 500 men from the 6th MA, as well as 2 of Cook’s guns were quickly loaded on the train in the hopes of intercepting the experimental weapon.
The gun was in fact traveling along the Frederick Road in a mule-drawn wagon. Its smugglers were trying to disguise it as a piece of farming equipment in an attempt to avoid suspicion.
Butler’s efforts paid off. The Union troop train arrived just in time to stop the contraband in its tracks somewhere between Illchester and Ellicott’s Mills and the smugglers (including the gun’s probable inventor, Charles S. Dickinson) hardly put up a struggle. Four of them were immediately arrested. The weapon and prisoners were brought back to Relay.
The Union forces at Relay were very interested in testing-out their new capture, but found the results to be much less than what they expected. Aside from the issues they saw of how to keep the weapon properly fueled and loaded with ammunition in the midst of a battle situation, the performance of the gun was just pitiful. Rounds seemed to dribble out of the barrel haphazardly. It was hard to imagine this as a purported super weapon.
What these men did not know was that there was a second wagon traveling with the gun, and several of the important parts of the gun had been removed and placed in the other wagon prior to departing Baltimore. When the gun itself was captured, the second wagon escaped. The steam gun was useless to the Union forces, but in that, it also left the impression that the technology itself was flawed and further attempts to develop the weapon went nowhere.
Of course no one knew it at the time, but this was the most excitement that the area would see during the war. The B&O was too important not to be defended, and troops would rotate through this post until the end of the war, but the feared attacks never came.
In the next post, we’ll finally bring it back to Peter Thorn.
In the last post, we looked at the Baltimore Riot that took place early in the war. To Union forces in 1861, Baltimore was hostile territory.
Not wanting a repeat of the experience that the 6th MA had, the next group of troops coming in from the north stopped at Perryville, MD and boarded boats. They were heading to Annapolis – using the Chesapeake Bay to route around the potentially-troublesome city of Baltimore.
These men were from the 8th MA, under the command of Brig. General Benjamin Butler. His orders were to open up the route into Washington, D.C. from the north so that troops and supplies could continue to flow.
Butler landed his men at the Naval Academy on April 21, 1861, and began the work of repairing the sabotaged railroads – first, the line leading from Annapolis to the Washington branch of the B&O at Annapolis Junction, and then the Washington branch itself. Once those lines were secured, Butler turned his attention to the north, taking possession of Relay – a very small town in the Patapsco river valley – on May 5, 1861 with the 6th MA, the 8th NY Militia, and Major Cook’s battery of Boston Light Artillery.
Relay was especially important because it is the northernmost point on the Washington branch of the B&O. It’s where the line began, and where it met with the main line from Baltimore to points west in the Ohio valley. And – most importantly – at the time of the Civil War, this was the ONLY railroad going into Washington, D.C.
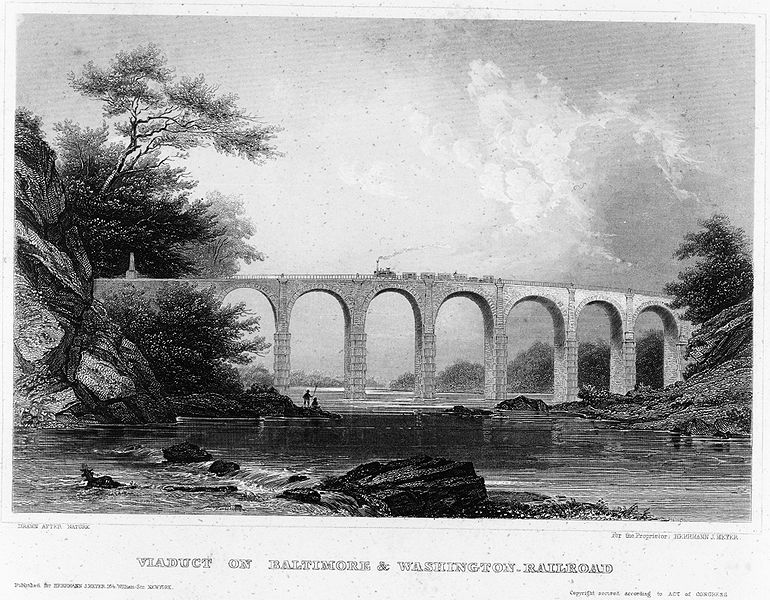
In order for the Washington branch to be built in the first place, a bridge had to be constructed to cross the Patapsco river. That bridge is the Thomas Viaduct – named for the first President of the B&O railroad – and it remains the longest stone-arch bridge on a curve in the world, still carrying trains on their way to the capital to this day.
This bridge and the junction next to it were of extreme strategic importance to the Union cause. The army HAD to control this place, and being just 7 miles from Baltimore, it was facing real threats.
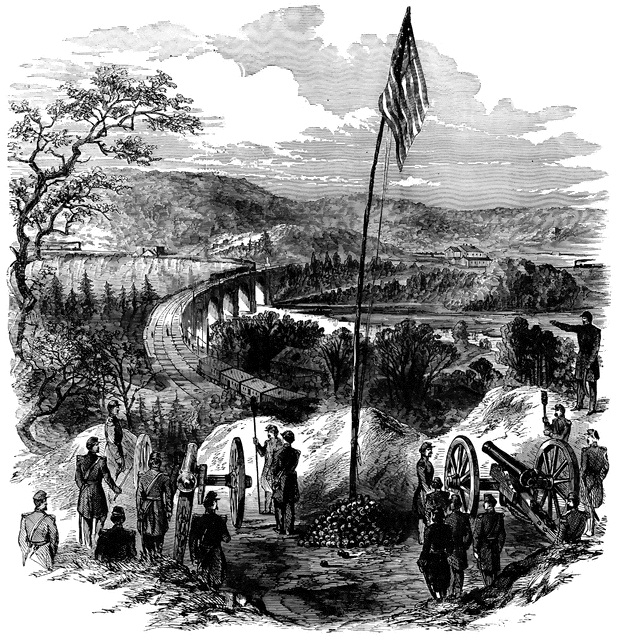
The Bouquet Battery: Two of Cook’s guns overlooking the Thomas Viaduct from the Howard County side.
Butler placed his guns and deployed his 2,000 troops along the tracks in the area to ensure that no more sabotage could take place. All trains out of Baltimore were stopped and inspected to see if they were carrying men or materiel destined for the Confederacy, but this policy didn’t last long. At the request of the owners of the B&O, Butler agreed to back down somewhat and only perform random searches.
There will be one more exciting incident along the B&O, though. A tip about a secret Confederate weapon will cause some of Butler’s men to leave Relay to find and capture some potentially-threatening cargo.
In preparation for the infantry assault against the center of the Union line on Cemetery Ridge, General Lee ordered a massive artillery barrage. It would be the largest of the war.
Nearly 150 guns from all three Confederate corps would participate. With any luck, the concentrated fire of all these weapons would damage the Union guns and cause the infantry to flee in panic. It would have to be perfectly executed, as the Confederates had little ammunition to spare.
Lee gave Longstreet overall command of the attack, and he assigned the artillery portion to Col. E. Porter Alexander, the I Corps artillery chief. Alexander was a brilliant up-and-comer in the Army of Northern Virginia, and had the ability to look at situations very objectively. Before the day was out, he’d be placed in a very awkward situation.
150 years ago right now, the firing commenced. It didn’t take long for the Union guns to respond. With both sides blasting away, the area around Gettysburg became a loud, smokey mess – so loud in fact that the barrage was heard as far away as Washington, DC and Pittsburgh, PA. It was impossible to see what the enemy was doing through all of that, and whether your own fire was having an effect.
Despite this fog of war, it also didn’t take long for the Brig. General Henry Hunt – Chief of Artillery for the Army of the Potomac (and the man who literally wrote the book on artillery before the war) – to recognize that this wasn’t merely an artillerist’s duel. This was the clear prelude to an infantry assault. The Rebels would charge across those fields as soon as they thought they’d inflicted enough damage – Hunt was sure of it. He ran around to each of his battery commanders and told them to slow down. The infantry commanders were furious – the artillery should be returning fire vigorously!
There was a method to Hunt’s seeming madness. Not only would slowing down conserve ammunition for the coming infantry attack, it would lull the Confederates into thinking that there was a steadily decreasing number of guns firing back at them – perhaps they were damaging the Union defenses!
After an hour and a half of this, the Confederates were running low on ordnance, and were taking too much damage from the Union return fire. The Rebel artillery was going to be forced to stop soon.
While the fighting resumed on Culp’s Hill early in the morning, General Lee came up with his strategy for the day’s action.
Originally, he wanted to repeat the attacks on the left and right from yesterday, hoping that more ground could be gained this time. Lt. General Longstreet convinced him that the Union left was well-situated on the ridges south of town. Lee changed his strategy – he would launch an attack that would become famous against the center of the Union line, and his cavalry would have a part to play this time.
The Confederate artillery would break up the Union defenses, the infantry would push the Yankees off Cemetery Ridge, and the cavalry would be waiting to mop up the remains.
J.E.B. Stuart was to go around the Union right, probing for the rear of the enemy. Once he found it, he should signal General Lee to let him know that the cavalry was in position.
150 years ago right now, four cannons fired off on Cress Ridge near the Rummel Farm – one blast in each compass direction. This was the signal. Unfortunately for Maj. General Stuart, his commander wasn’t the only person to hear it.
One of the things that I’ve become more interested in over the years is artillery – especially the artillery that was used during the Civil War. I started a series a few months ago to explain some of the basics of these weapons – it is best to see that article first to get familiar with the “anatomy” of the guns. Last time, we looked at some examples of bronze guns from the period. Today, I want to explain how to identify some of the different types of iron cannons, using familiar examples from the collection at Gettysburg.
There are a few main types of iron guns that we’ll be looking at today:
Parrott Rifle
Overview: Designed by Robert Parker Parrott at the West Point Foundry, this weapon was popular in the US arsenal because it was relatively cheap to make. The main part of the gun tube was made from cast iron, and the thicker reinforce around the breech was made from wrought iron. Unfortunately, metalworking technology wasn’t what it is today, and the foundries of the period had trouble fitting the two metals together. Sometimes a gap or bubble would form under the reinforce, and after repeated use, the cannon might burst at that seam. This was more of a perception problem than a real one, but the reputation stuck nonetheless.
Photos:
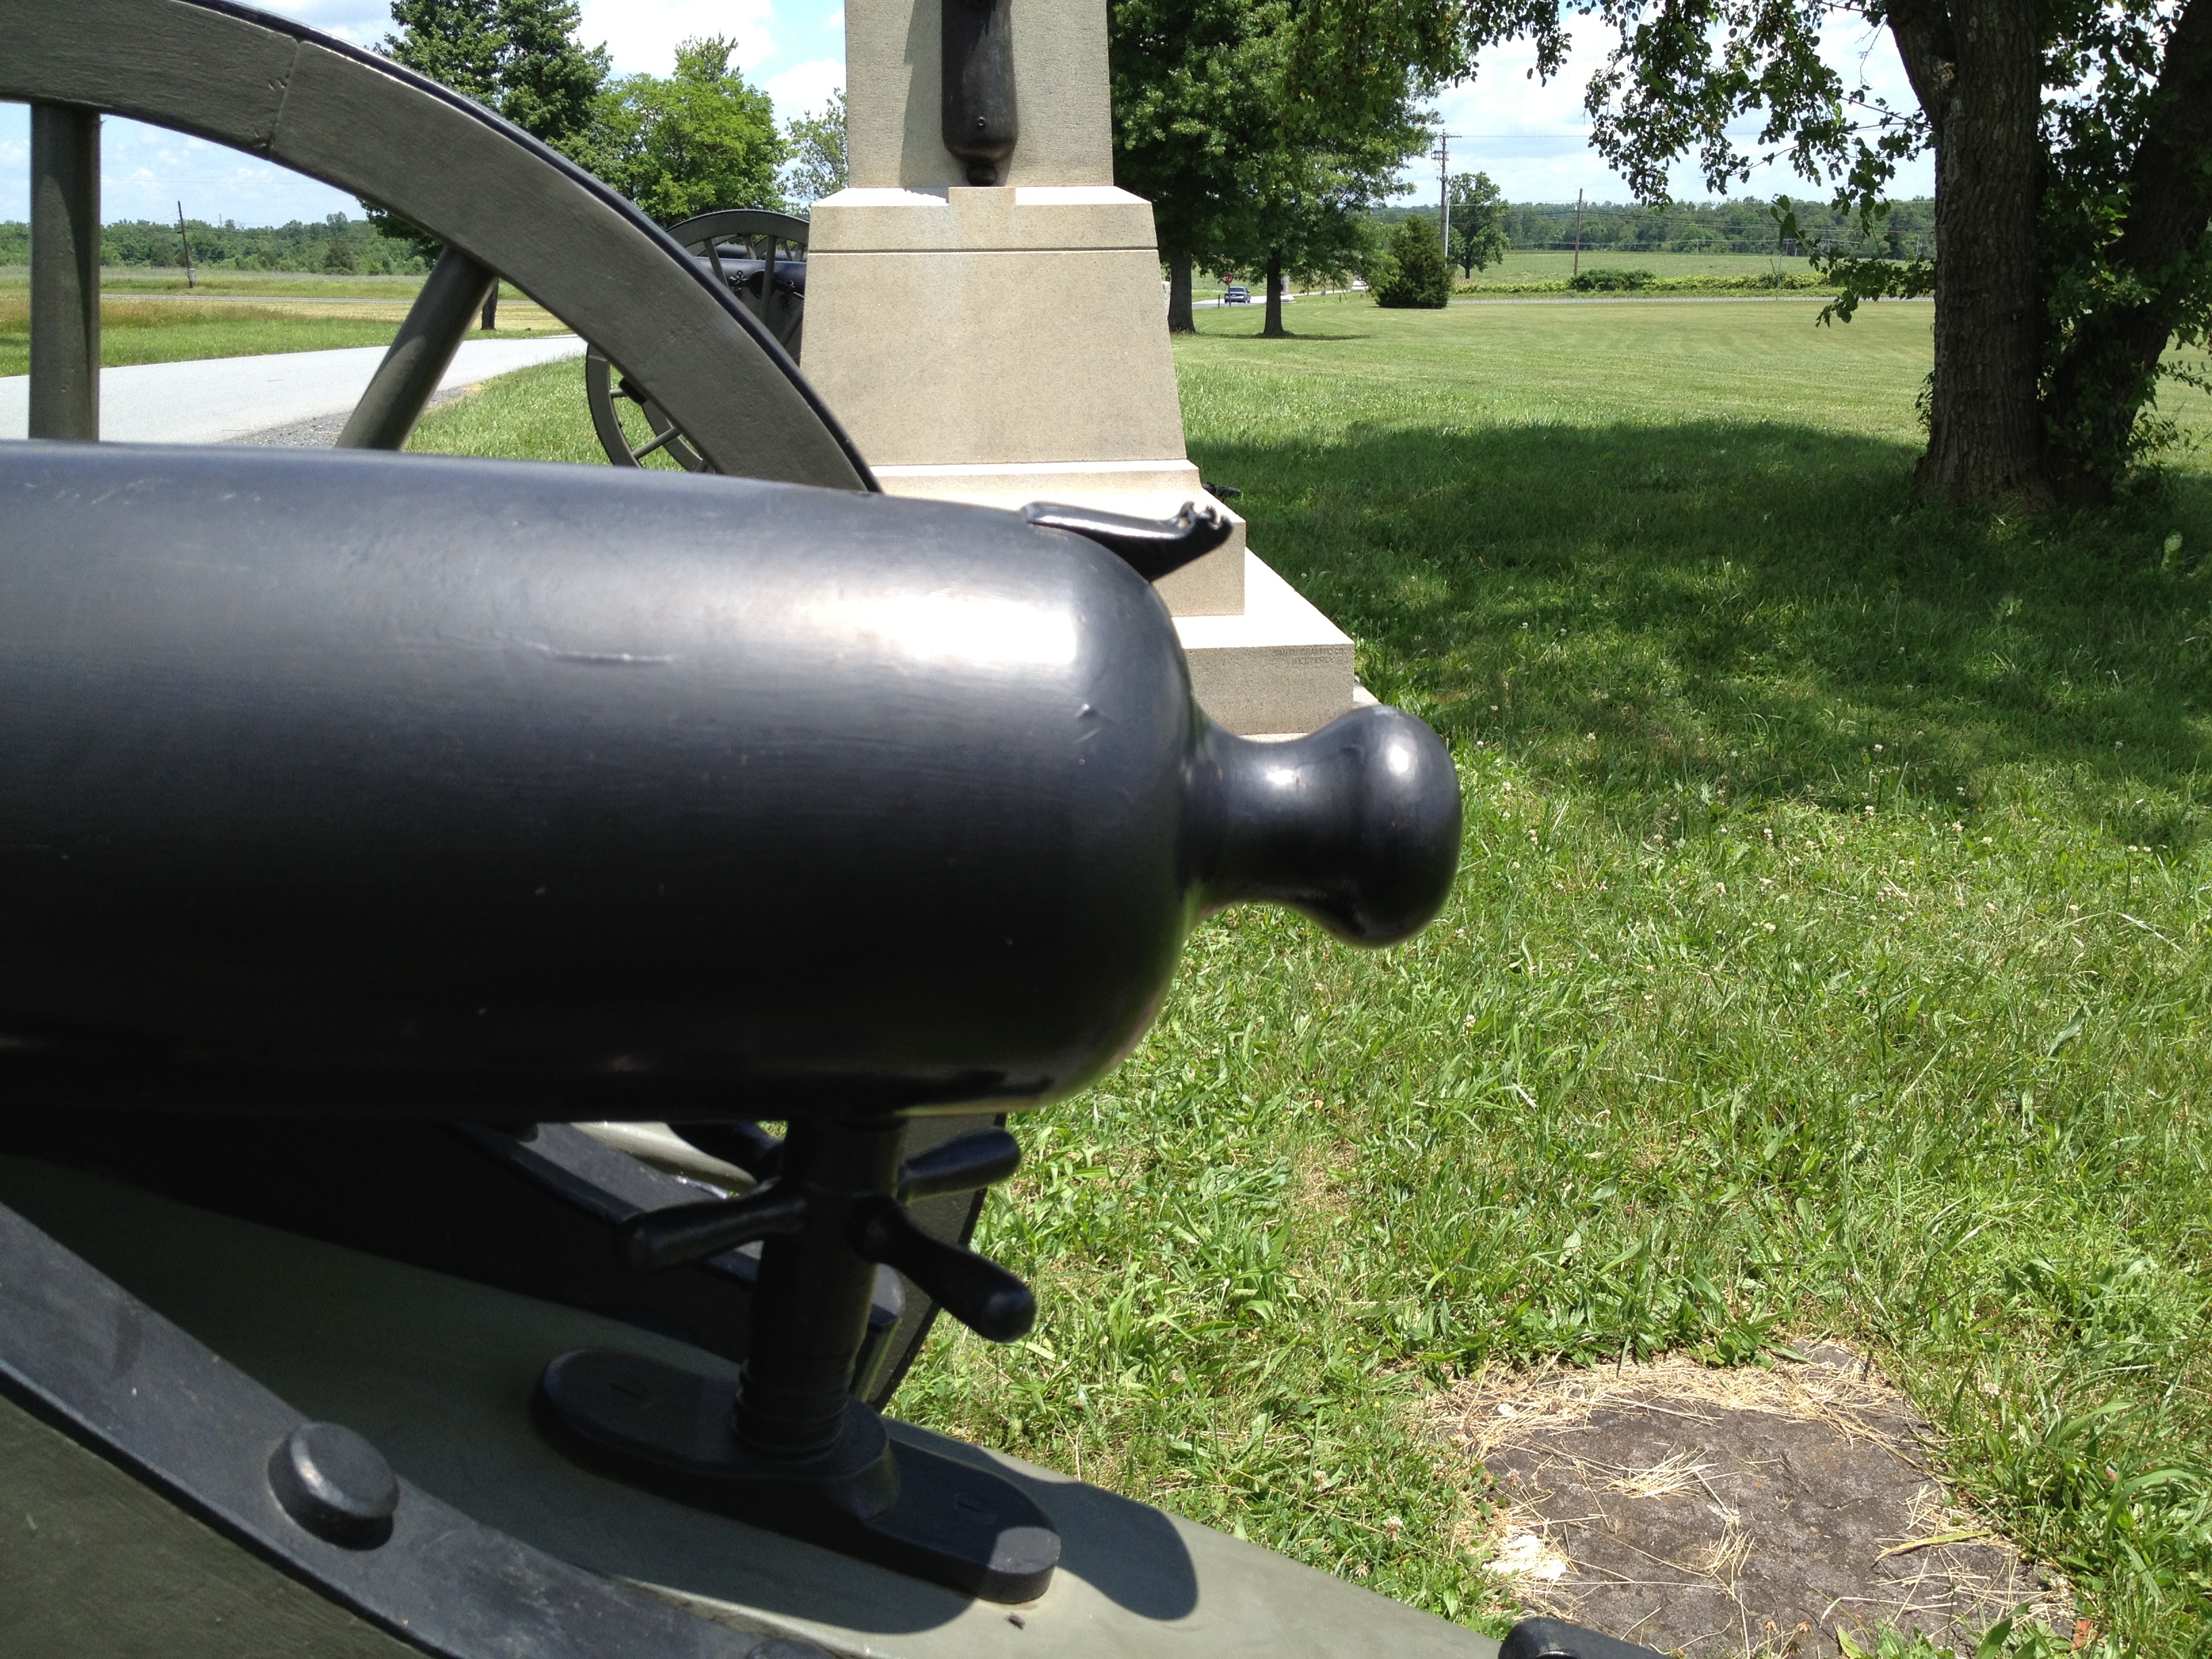
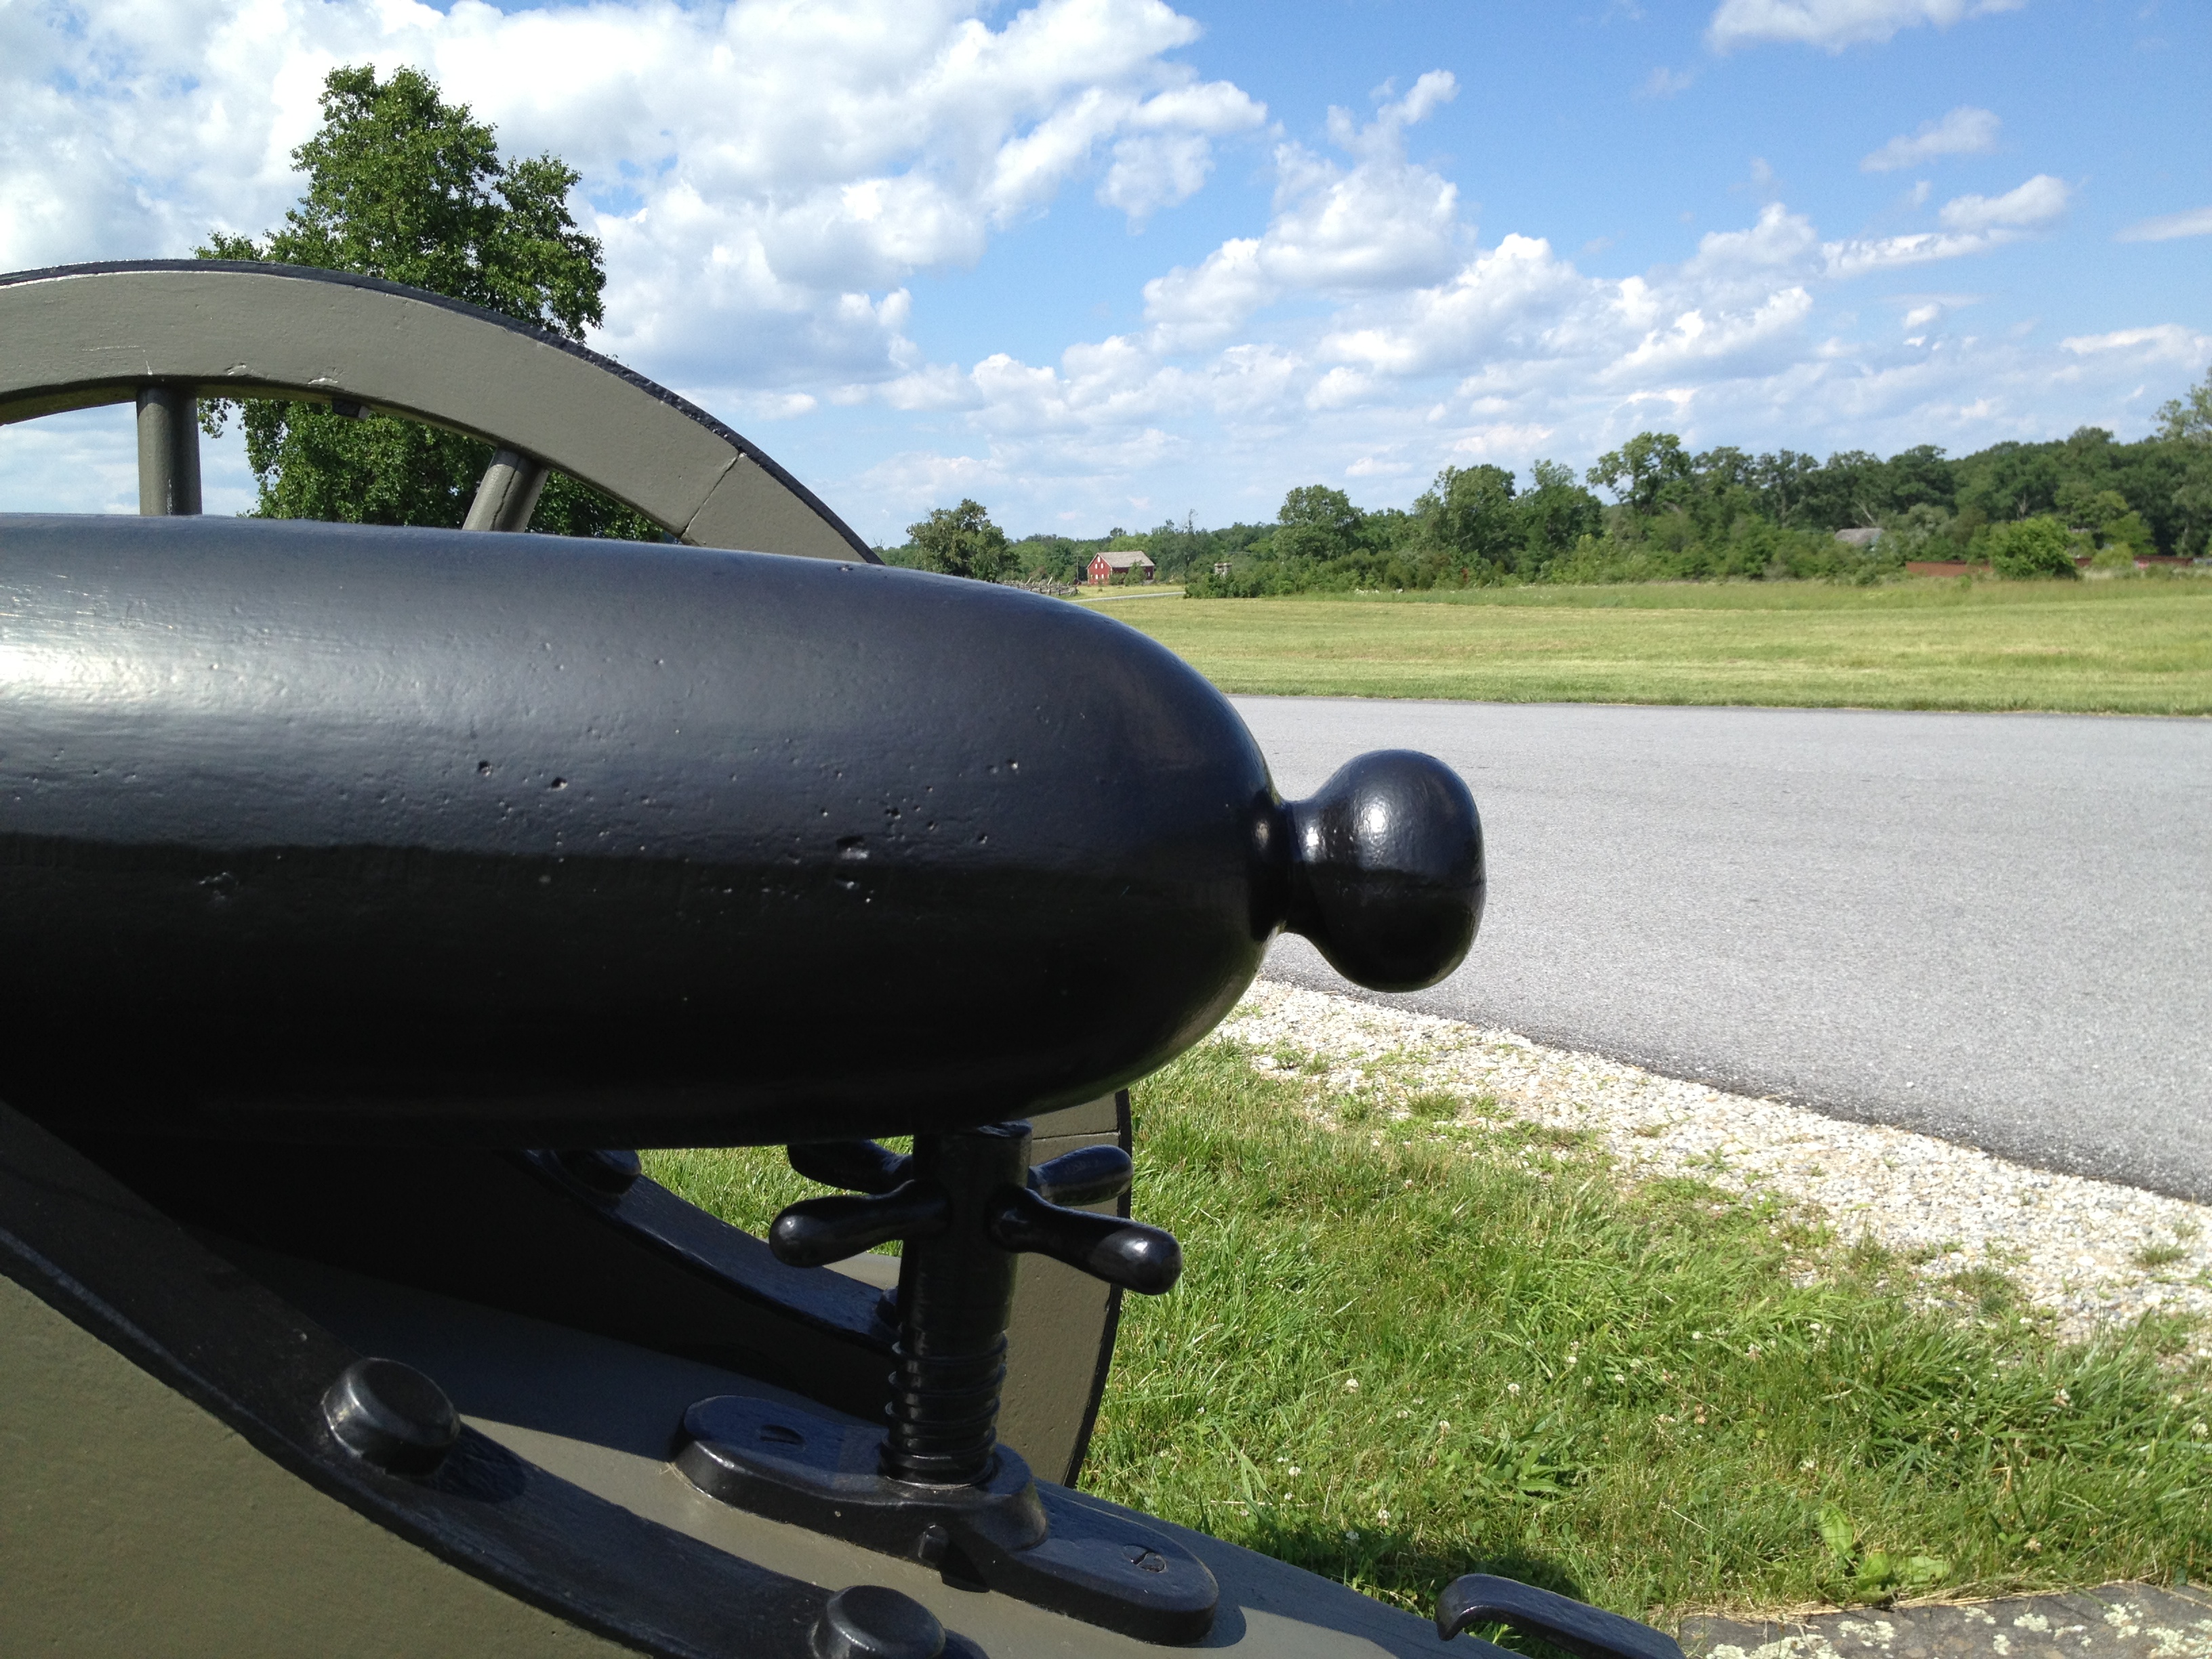
Front View of the Parrott Rifle.Rear View of the Parrott Rifle.
How to Identify: Look for black guns with a thick band around the reinforce. They’re very unique-looking. Actual pieces will have markings on the muzzle, and an “R.P.P” (for Robert Parker Parrott) and “W.P.F” (for West Point Foundry) on the end of the trunnions. There are both 10-pounder and 20-pounder versions at Gettysburg, with the 20-pounders (like the one pictured above) obviously being somewhat larger. Some of the earlier 10-pounders have a slight muzzle flare. There are plenty of fake Parrotts on the field, too.
Exceptions: Not all the guns of this design were made at the West Point Foundry. There were Confederate copies made at Tredegar and other facilities, and once you’ve seen one, you can tell that they are definitely of a lesser quality. There are a couple Confederate “Parrotts” on the field at Gettysburg right below the Longstreet Tower.
Fakes: As I said above, there are plenty of fakes when it comes to Parrotts. These can be hard to spot from a distance, though. Of course, any gun without any discernible markings on the muzzle, trunnions, or breech is suspect. The best long-distance indication that I’ve found is a horizontal casting seam running the length of the gun. Real cannons aren’t cast in halves like this:
A Fake “Parrott”. Note the casting seam running down the length.
I also noticed on this particular example that the muzzle swell is quite severe. It’s got a short length and a wide diameter. Real Parrott muzzle swells are more gradual.
Model 1861 3-inch Ordnance Rifle
Overview: An advanced weapon for the time, this was a very strong and light gun made entirely from wrought iron. These technologically-advanced weapons were made by “P.I.Co.” or the Phoenix Iron Company, headquarted just northwest of Valley Forge, PA.
Photos:
Front View of a 3-inch Ordnance Rifle.Rear View of a 3-inch Ordnance Rifle.The Cascable and Knob on a 3-inch Ordnance Rifle.Another Cascable, this time with a rear sight.
How to Identify: Being iron weapons, the guns on display are all painted black. The 3-inch Ordnance Rifle has a very sleek shape, with a smooth taper going from breech to muzzle. This is the same shape we talked about for the 14-pounder James Rifle in the previous post. It’s obviously pretty easy to tell the difference between this and the Parrott, as there’s no reinforcing band.
Exceptions: Every 3-inch Ordnance Rifle I’ve seen is the same design. Gettysburg does have at least 1 that was made in 1866, so we know for a fact that it was never actually used in battle. There were Confederate copies, too, but I don’t think that Gettysburg has any out on the field.
Fakes: Just like the fake Parrotts, fake 3-inch Ordnance Rifles lack muzzle, trunnion, and breech markings and will also have a casting seam running the length of the barrel. Spotting them from a distance is even easier though, as they have a totally different, much pointier shape at the back. Just look at this cascable and compare it to the real one above (also – see the casting seam?):
The Cascable and Knob on a fake 3-inch Ordnance Rifle.
Whitworth Rifle
Overview: My favorite guns on the field at Gettysburg, these are totally unique British-made weapons. The Confederates had 2 of these at the Battle of Gettysburg, and there are 2 on the field today (though probably not the actual ones that were used in 1863) placed near where they were for the battle – on Oak Hill right behind the Eternal Light Peace Memorial.
The Whitworth design was so advanced, it was actually ahead of its time. The most obvious thing about it is that it’s a breechloader like modern cannons. The gun had a maximum range of almost 6 miles, but this wasn’t as useful as it sounds. In an age when you’re only going to fire at what you can see, any range more than a mile is pretty much wasted. In the case of the Whitworth, the extra range was used for counter-battery work – these were used to pick off enemy cannons outside of the enemy’s range, and they were deadly accurate when used like this.
All of this technology wasn’t without problems of course: the breech didn’t seal properly all the time causing gases to leak out, weakening the force of the explosion. The hinge that opened the breech would seize up frequently if not properly maintained, forcing the gun to be used as a muzzleloader instead. The barrel wasn’t rifled in the traditional sense, but was instead a very severely twisted hexagonal tube. This required very specialized ammunition, which was another problem – especially for the blockaded and agrarian Confederacy. That severe twist also exerted so much torque when the weapon was fired, that the wooden wheels frequently broke off of the gun carriages.
Photos:
Front View of the Whitworth Rifle.Rear View of the Whitworth Rifle.
How to Identify: A very cylindrical weapon, the initial indicator on these is the ring around the barrel at the trunnions. Viewed from the rear, the obvious feature is the opening breech. There are two knobs on the breech for cranking the back open, and a giant hinge on the right side.
Exceptions: I’ve only ever seen the 2 that are at Gettysburg. So far as I know, they all share the same design. One of the ones that Gettysburg has does have a field modification, though. There is a guard on the back of the breech to keep the friction primer from popping out when the weapon was fired. That was not part of the original design.
Fakes: I’ve never encountered any fake Whitworths, though I’ve seen people build their own re-creations of the weapon from old plans.
One of the things that I’ve become more interested in over the years is artillery – especially the artillery that was used during the Civil War. I started a series a few months ago to explain some of the basics of these weapons – it is best to see that article first to get familiar with the “anatomy” of the guns. Today, I want to explain how to identify some of the different types of bronze cannons, using familiar examples from the collection at Gettysburg.
There are a few main types of bronze guns that we’ll be looking at today:
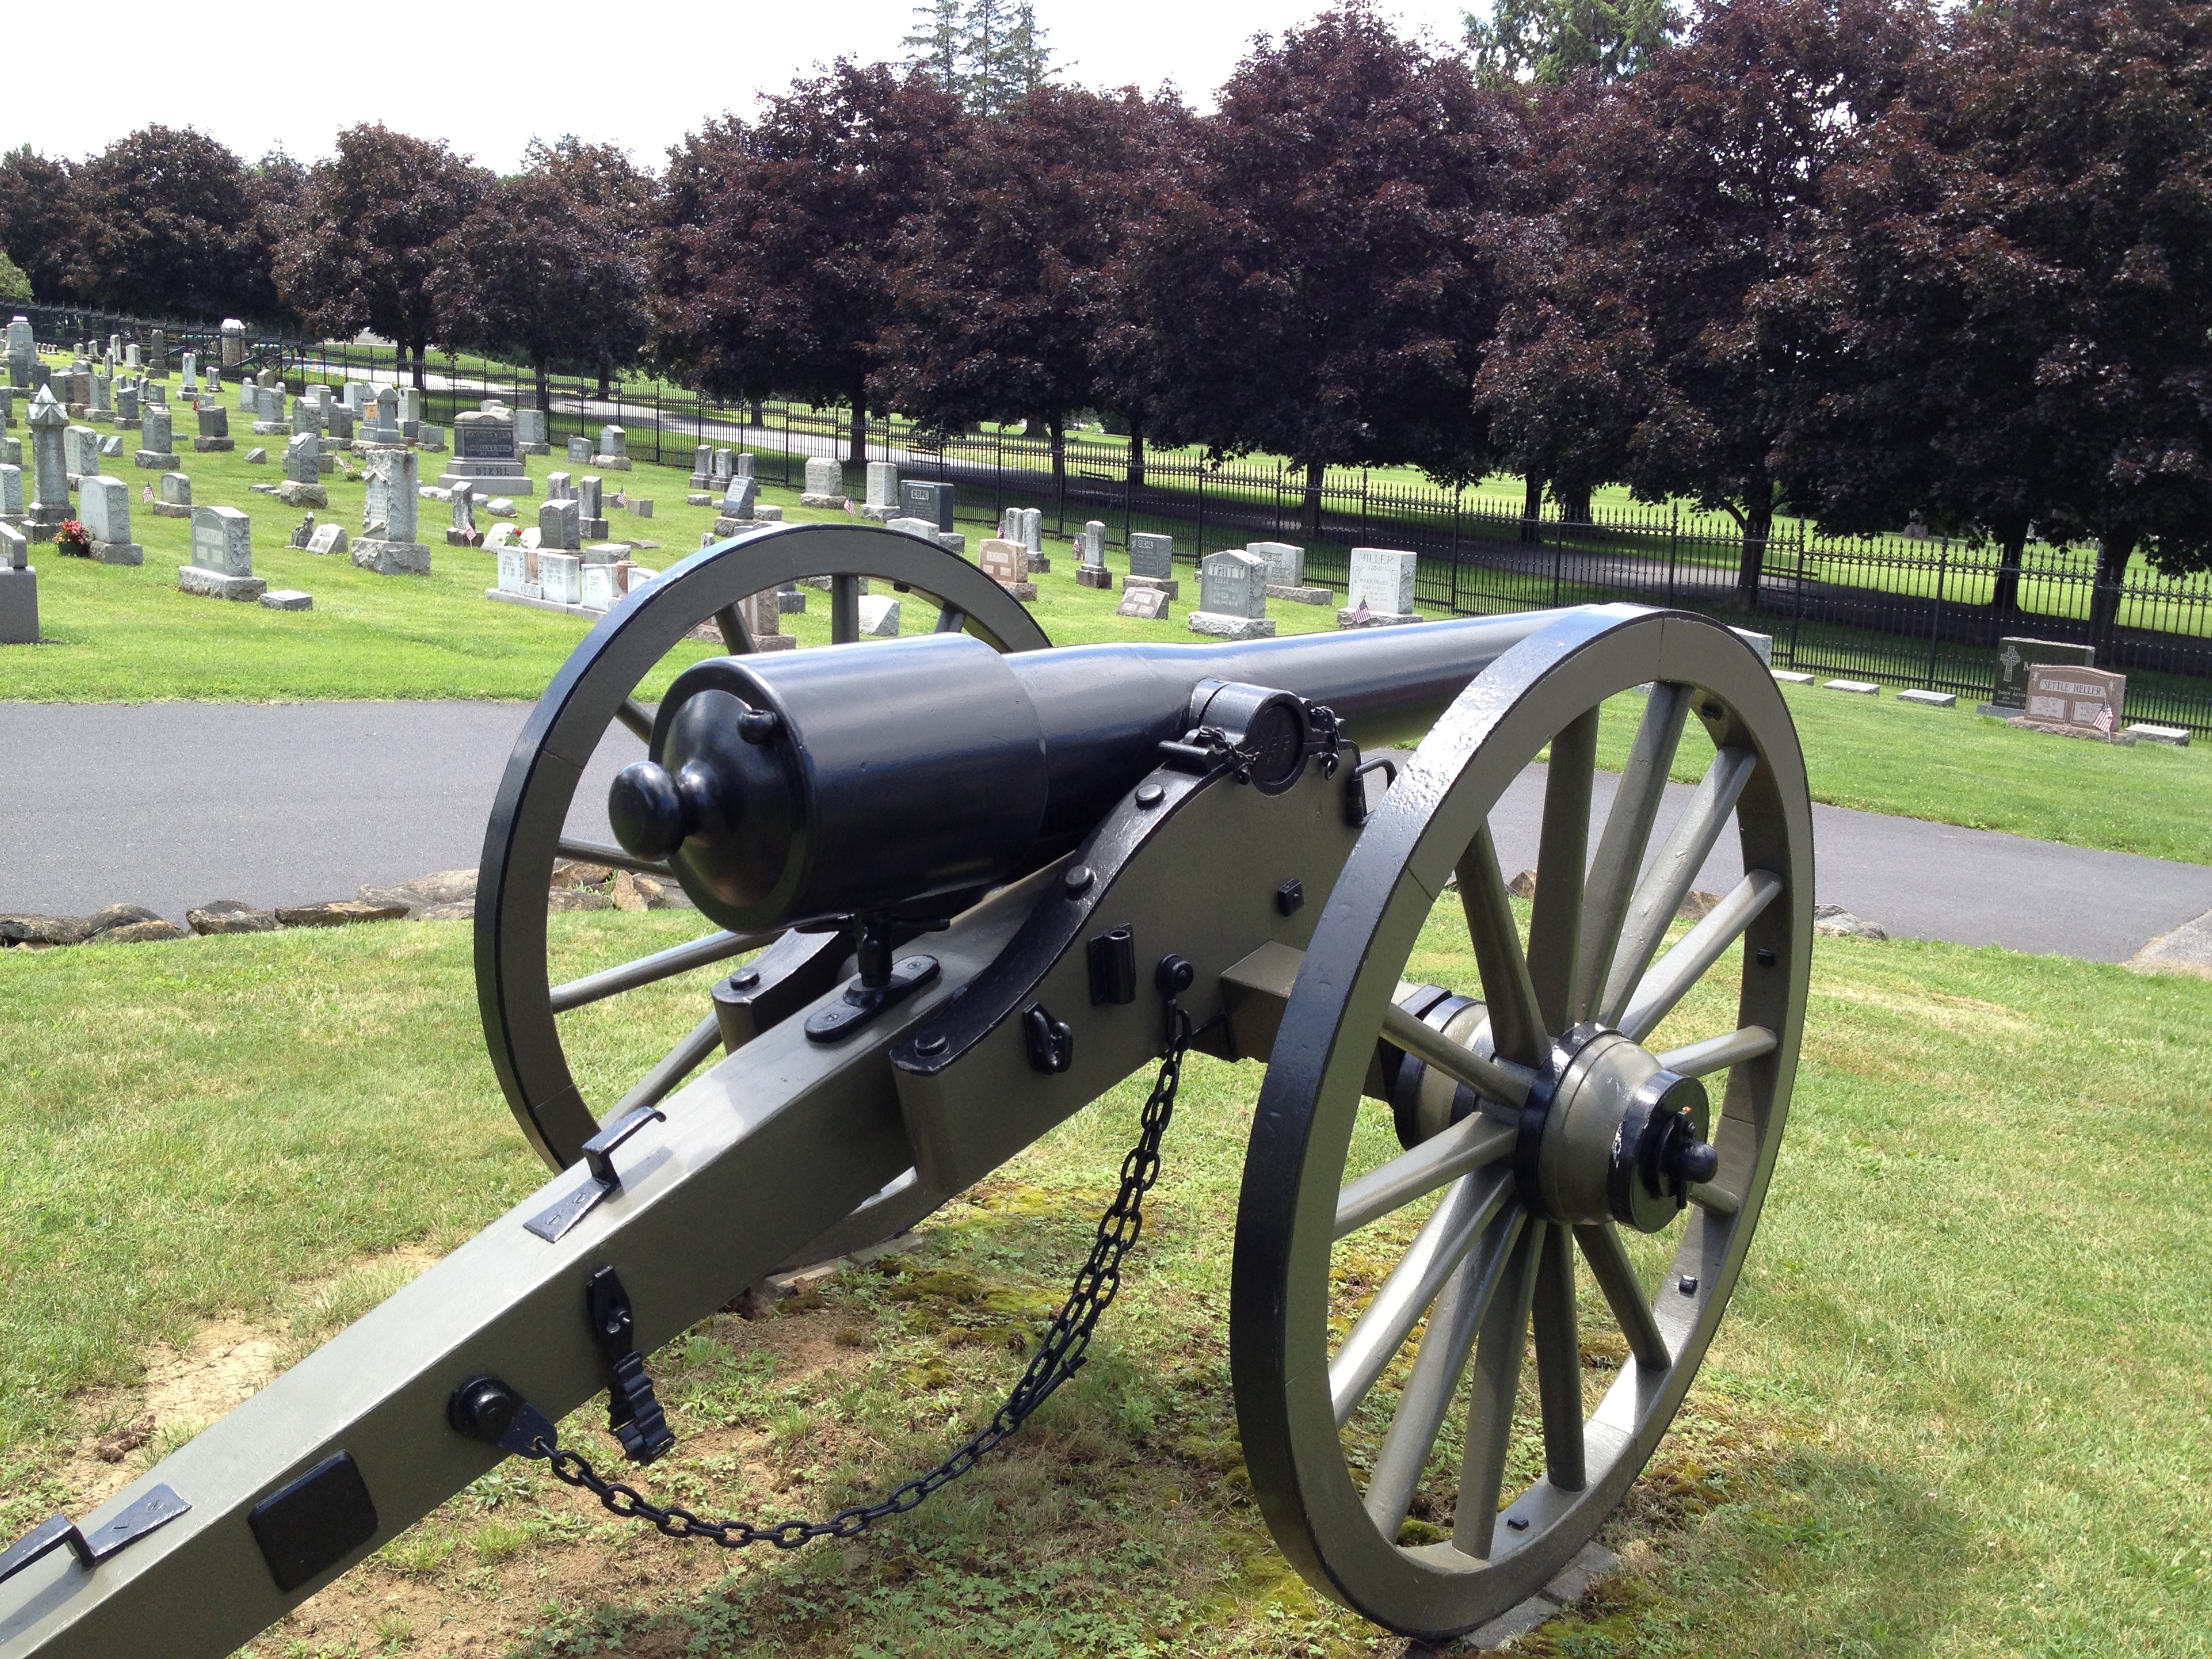
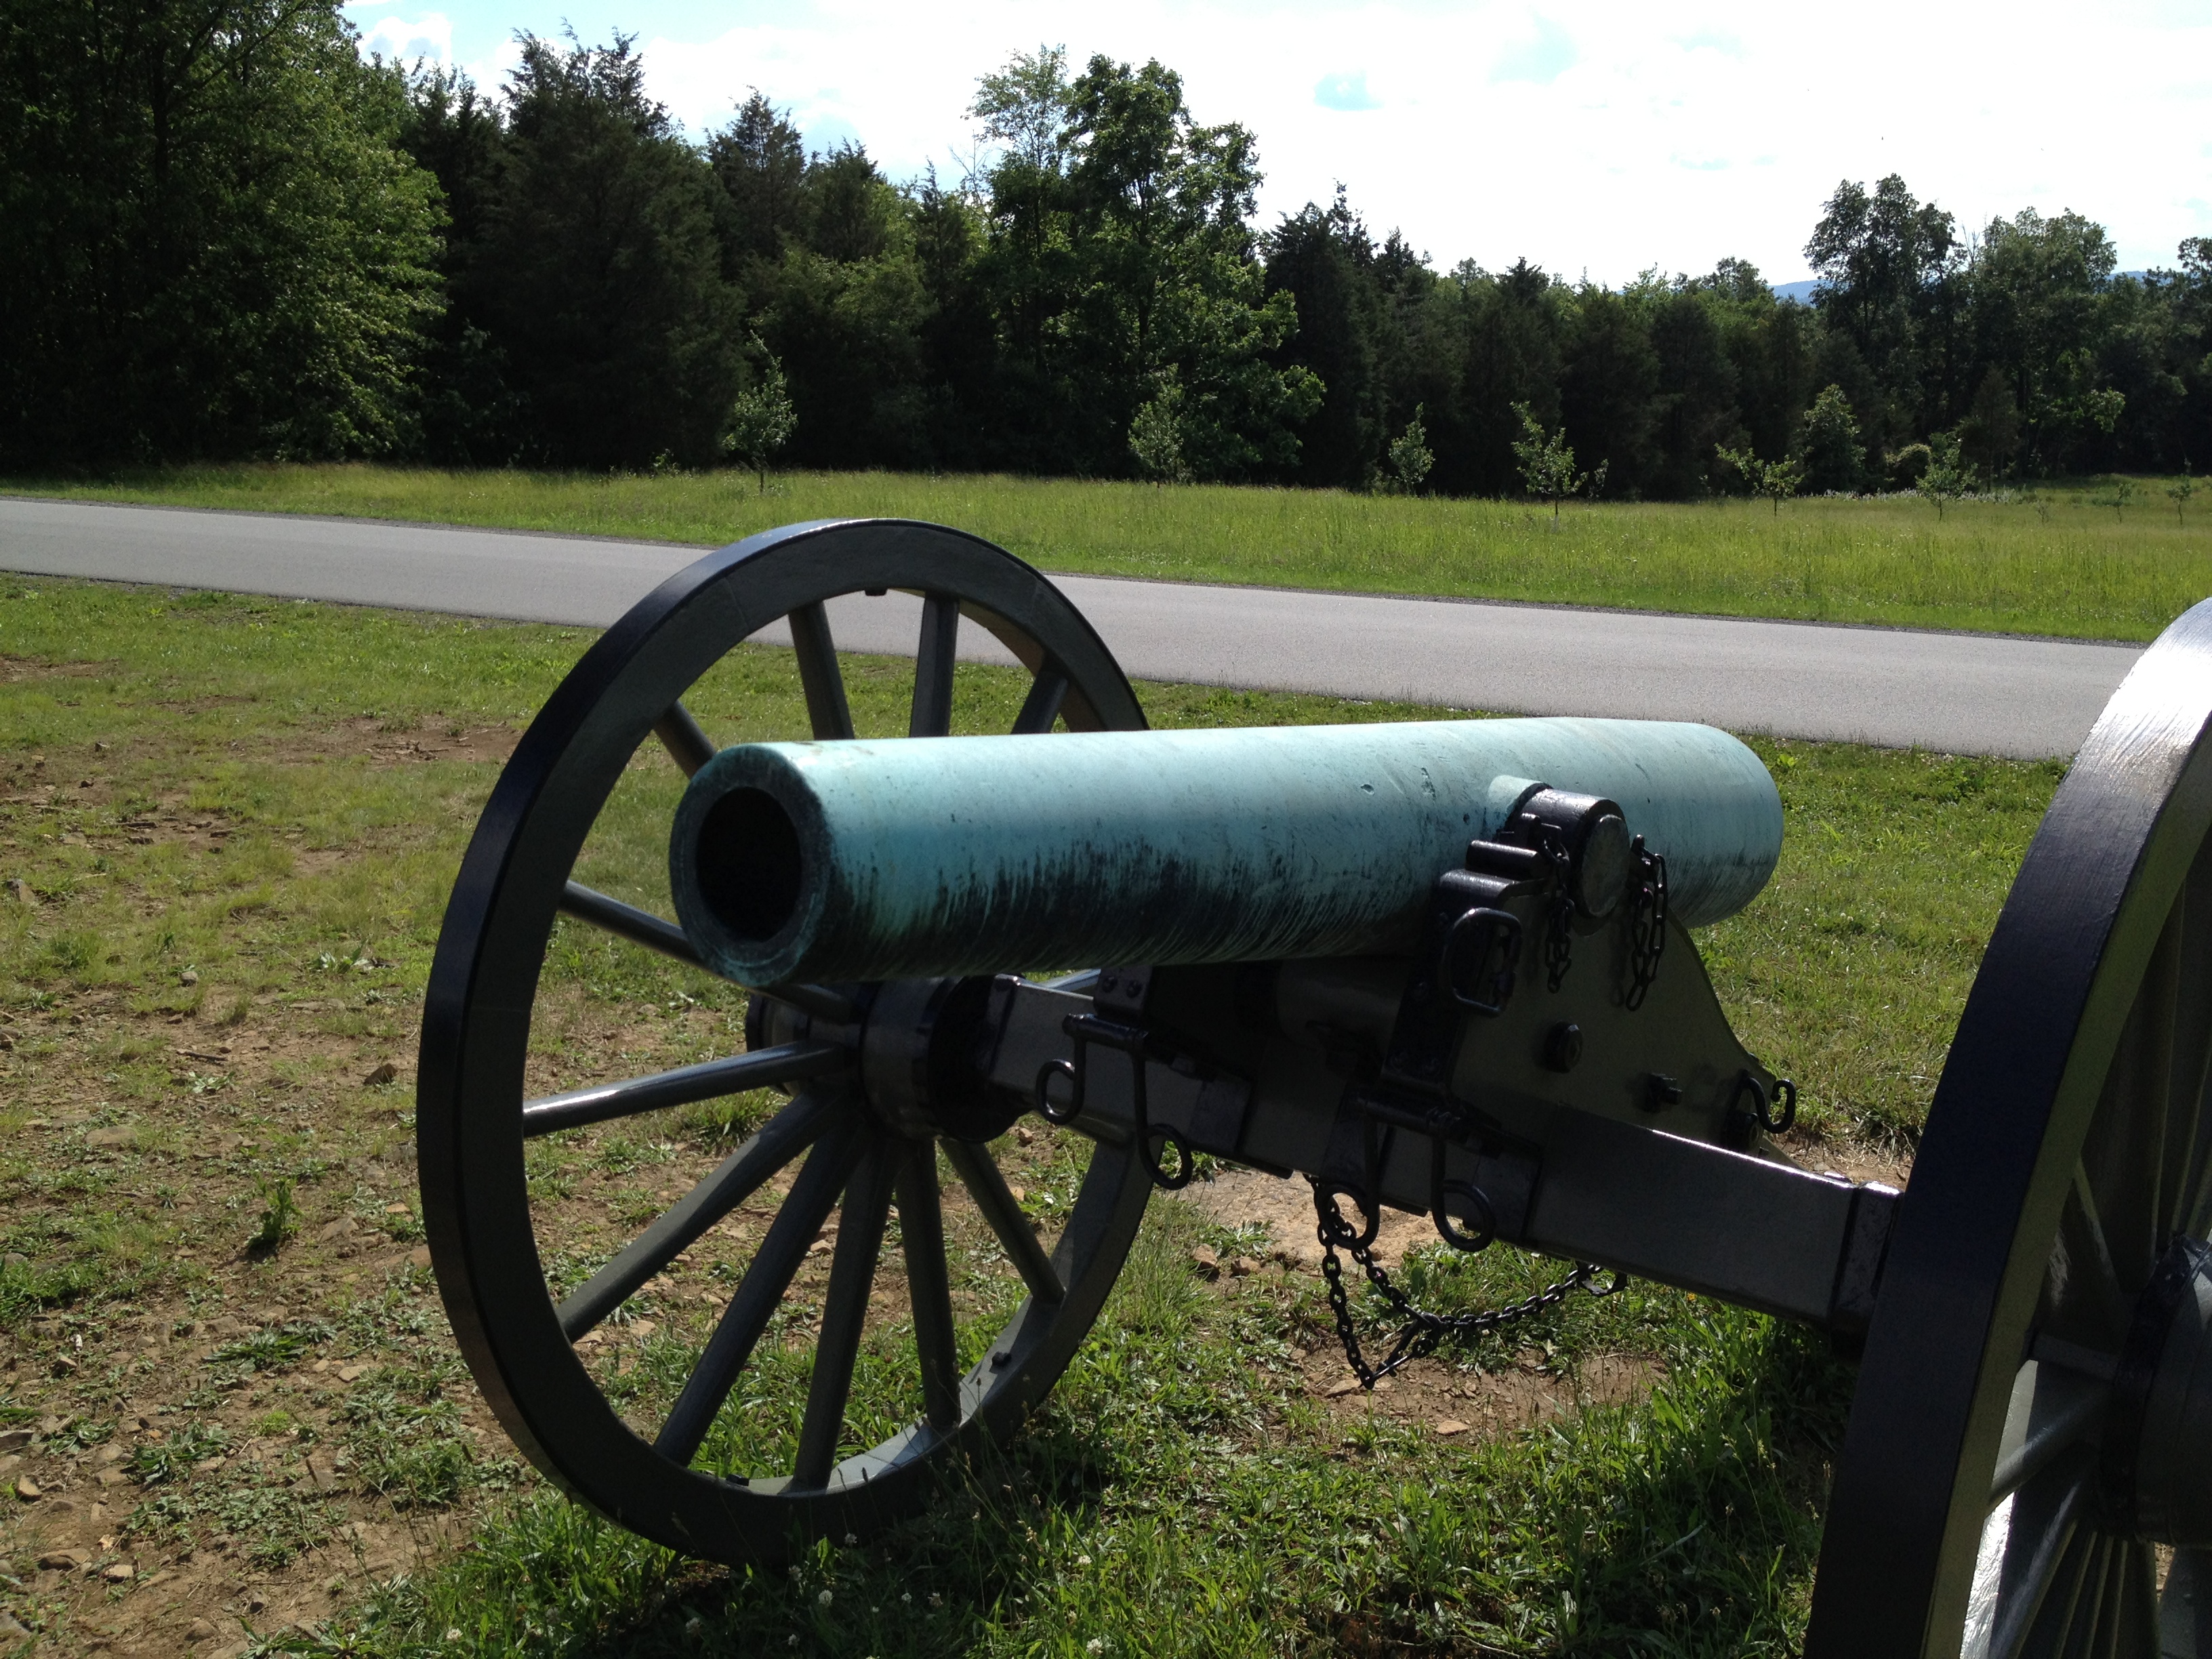
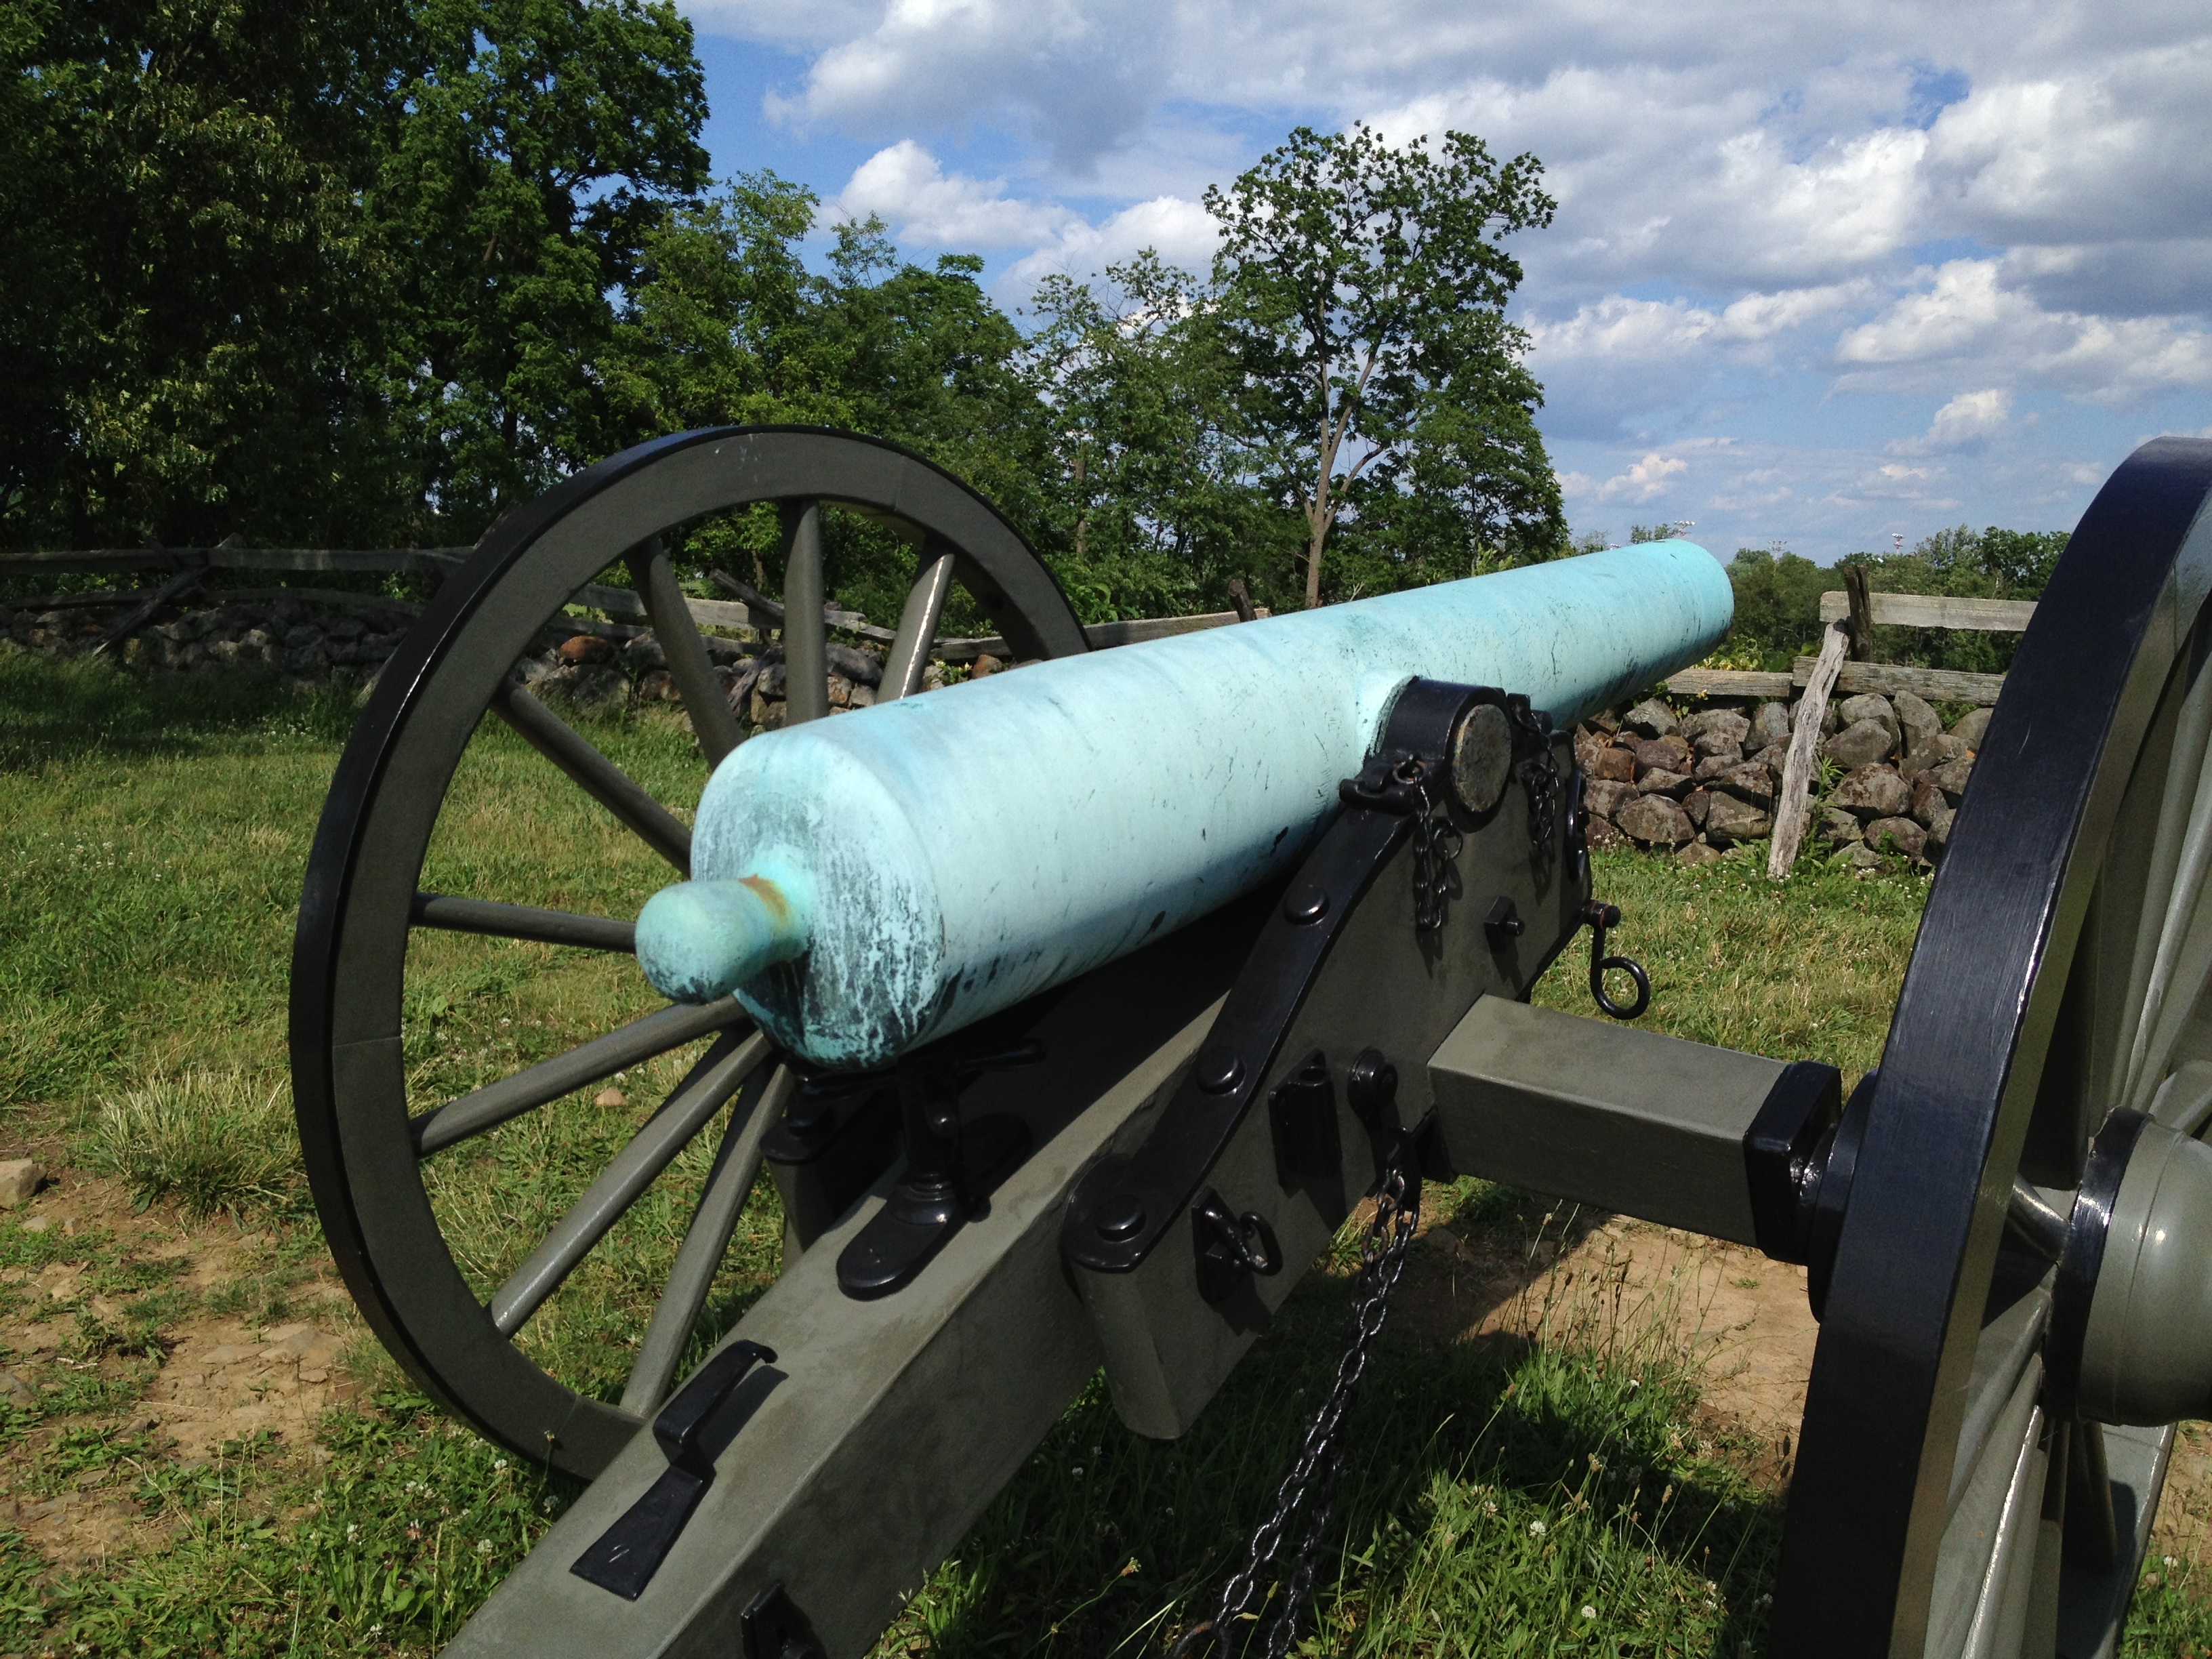
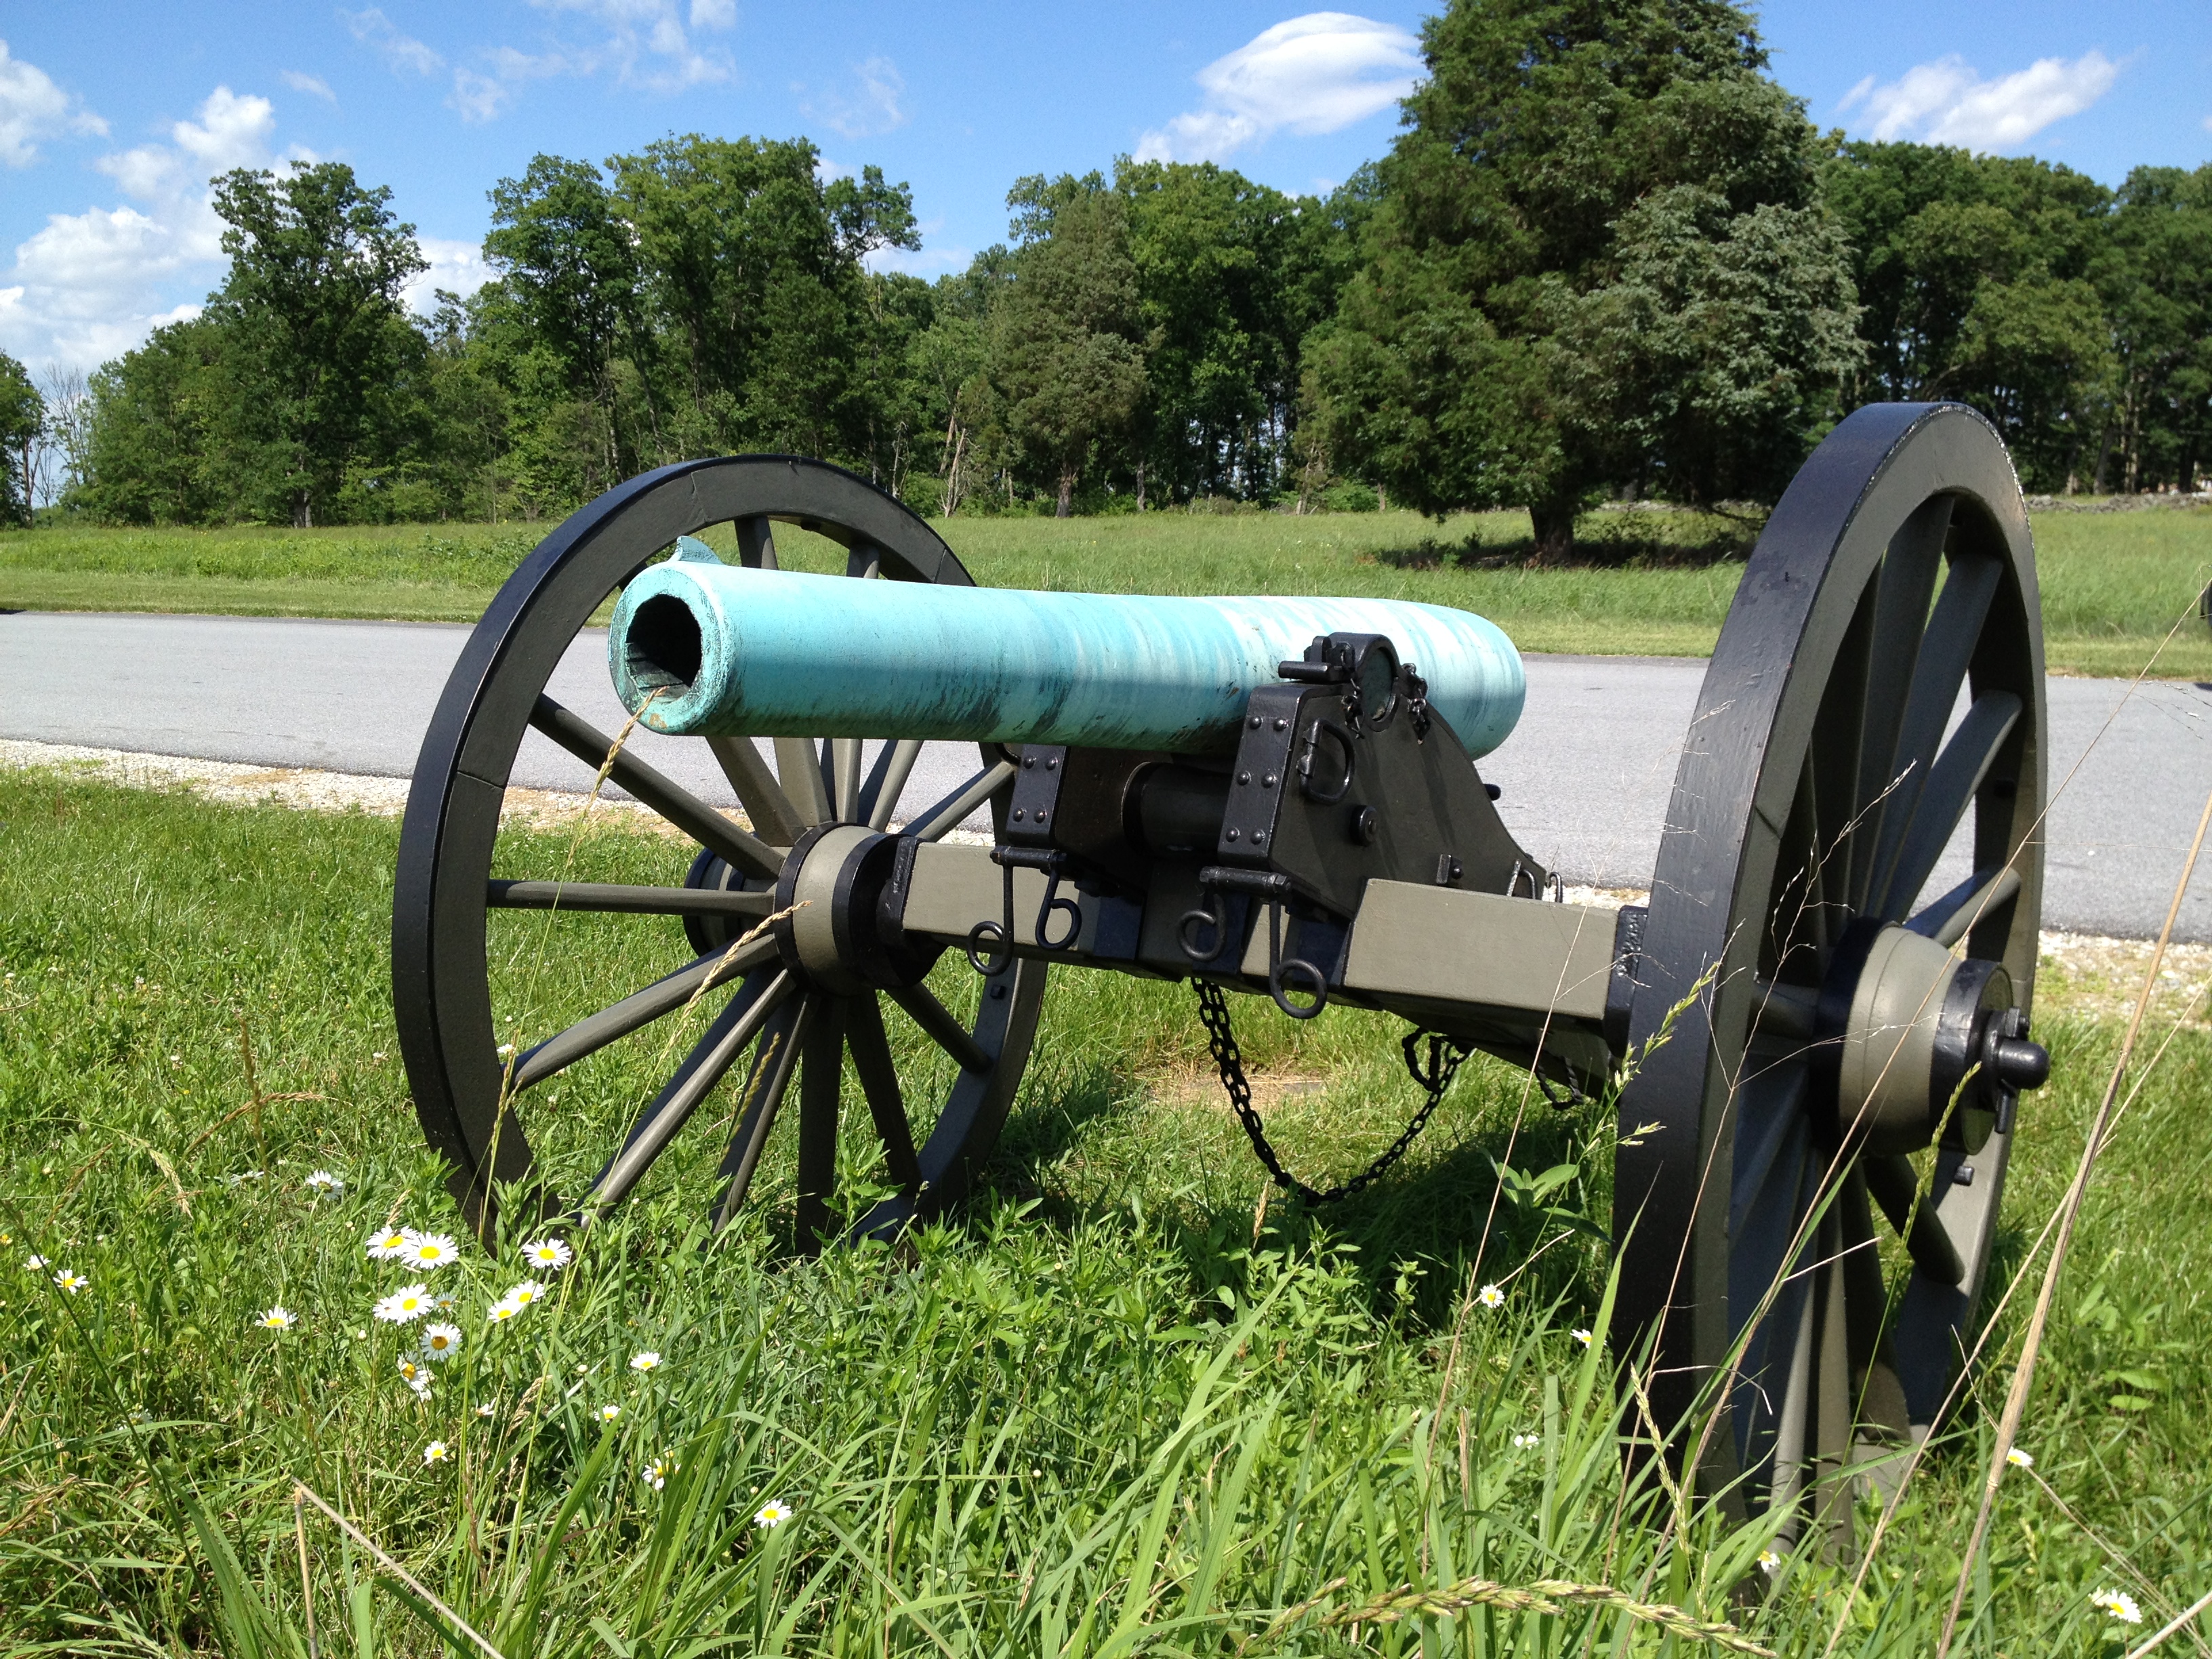
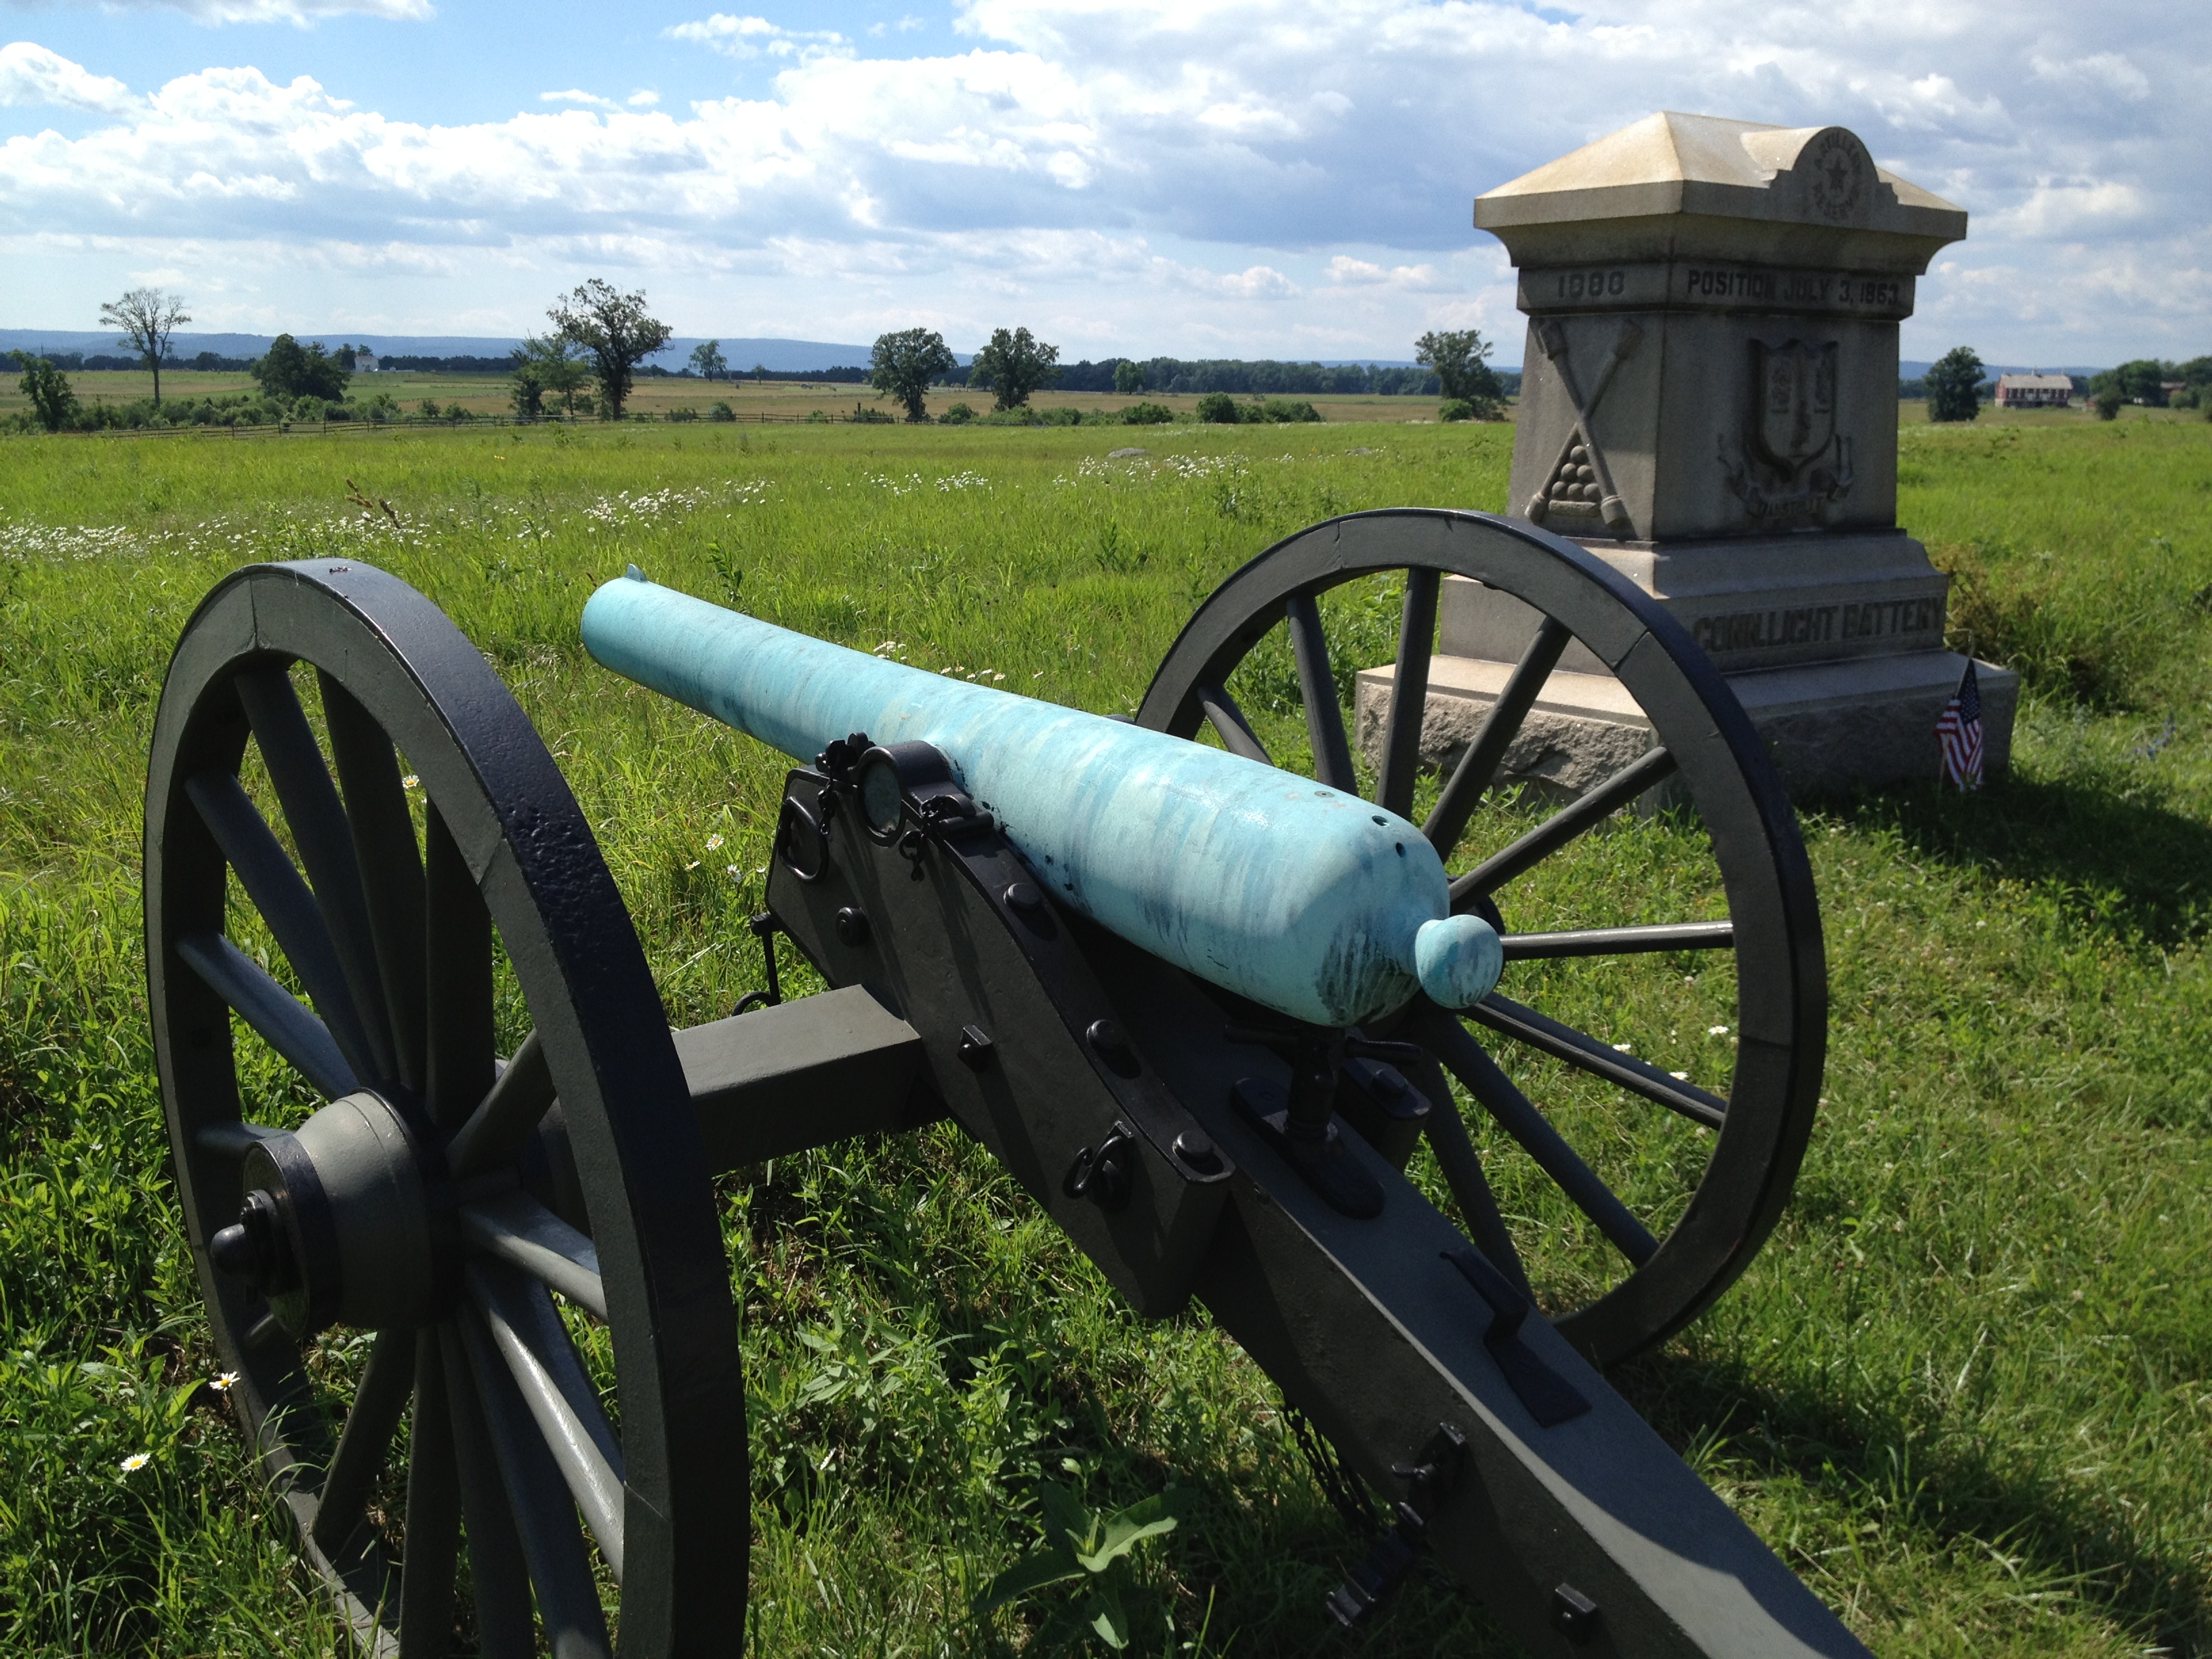
Model 1857 12-pounder Field Gun (The “Napoleon”)
Overview: The most common type of bronze gun during the Civil War was the Model 1857 12-pounder Field Gun, commonly known as the “Napoleon” since this was an American copy of a French design that was popular with the famous general. There were 244 (though not all made from the US pattern) of these present at the Battle of Gettysburg.
While still a seemingly old-fashioned smoothbore, these weapons represented an innovative design, and were officially referred to as Gun-Howitzers, as they could operate effectively firing at either low (like guns) or high (like howitzers) angles. The “12-pounder” aspect of its name refers to the weight of the solid-shot projectile it would have fired. While a rifled weapon is more accurate at long range, the Napoleon’s large, smooth bore (4.62 inches in diameter) made it very well suited to fire canister rounds, making it absolutely deadly against troops at close range.
Photos:
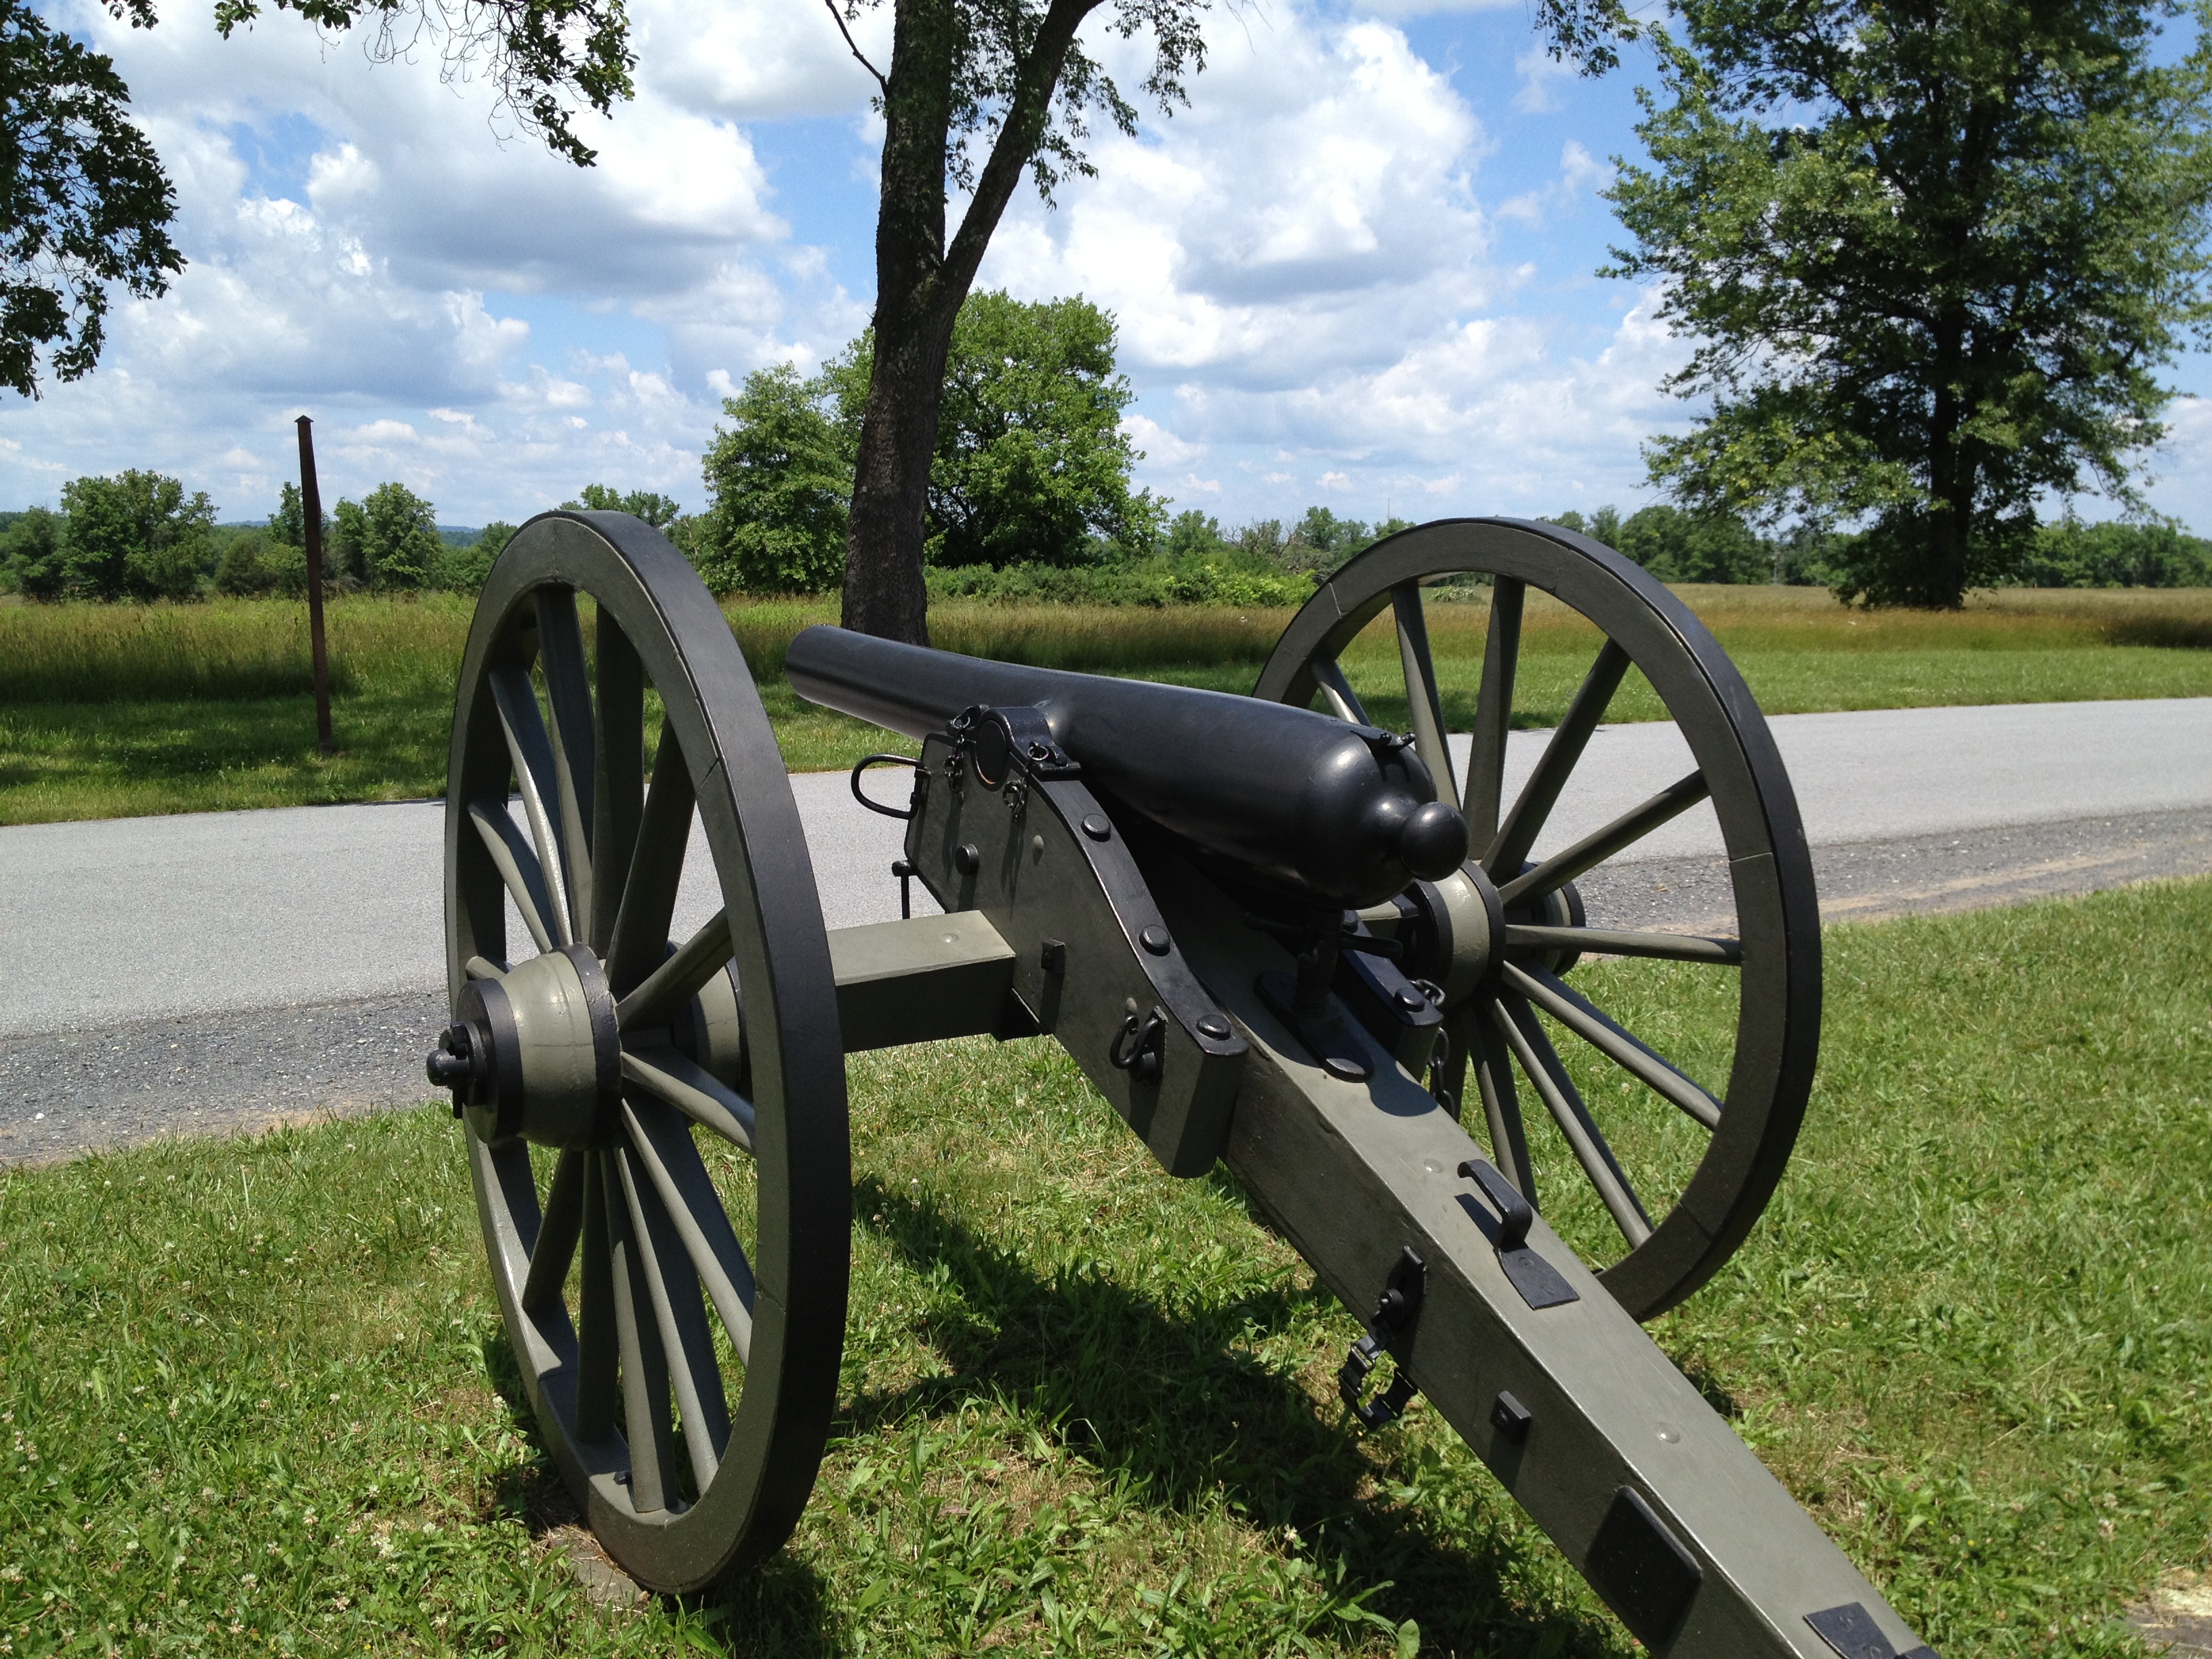
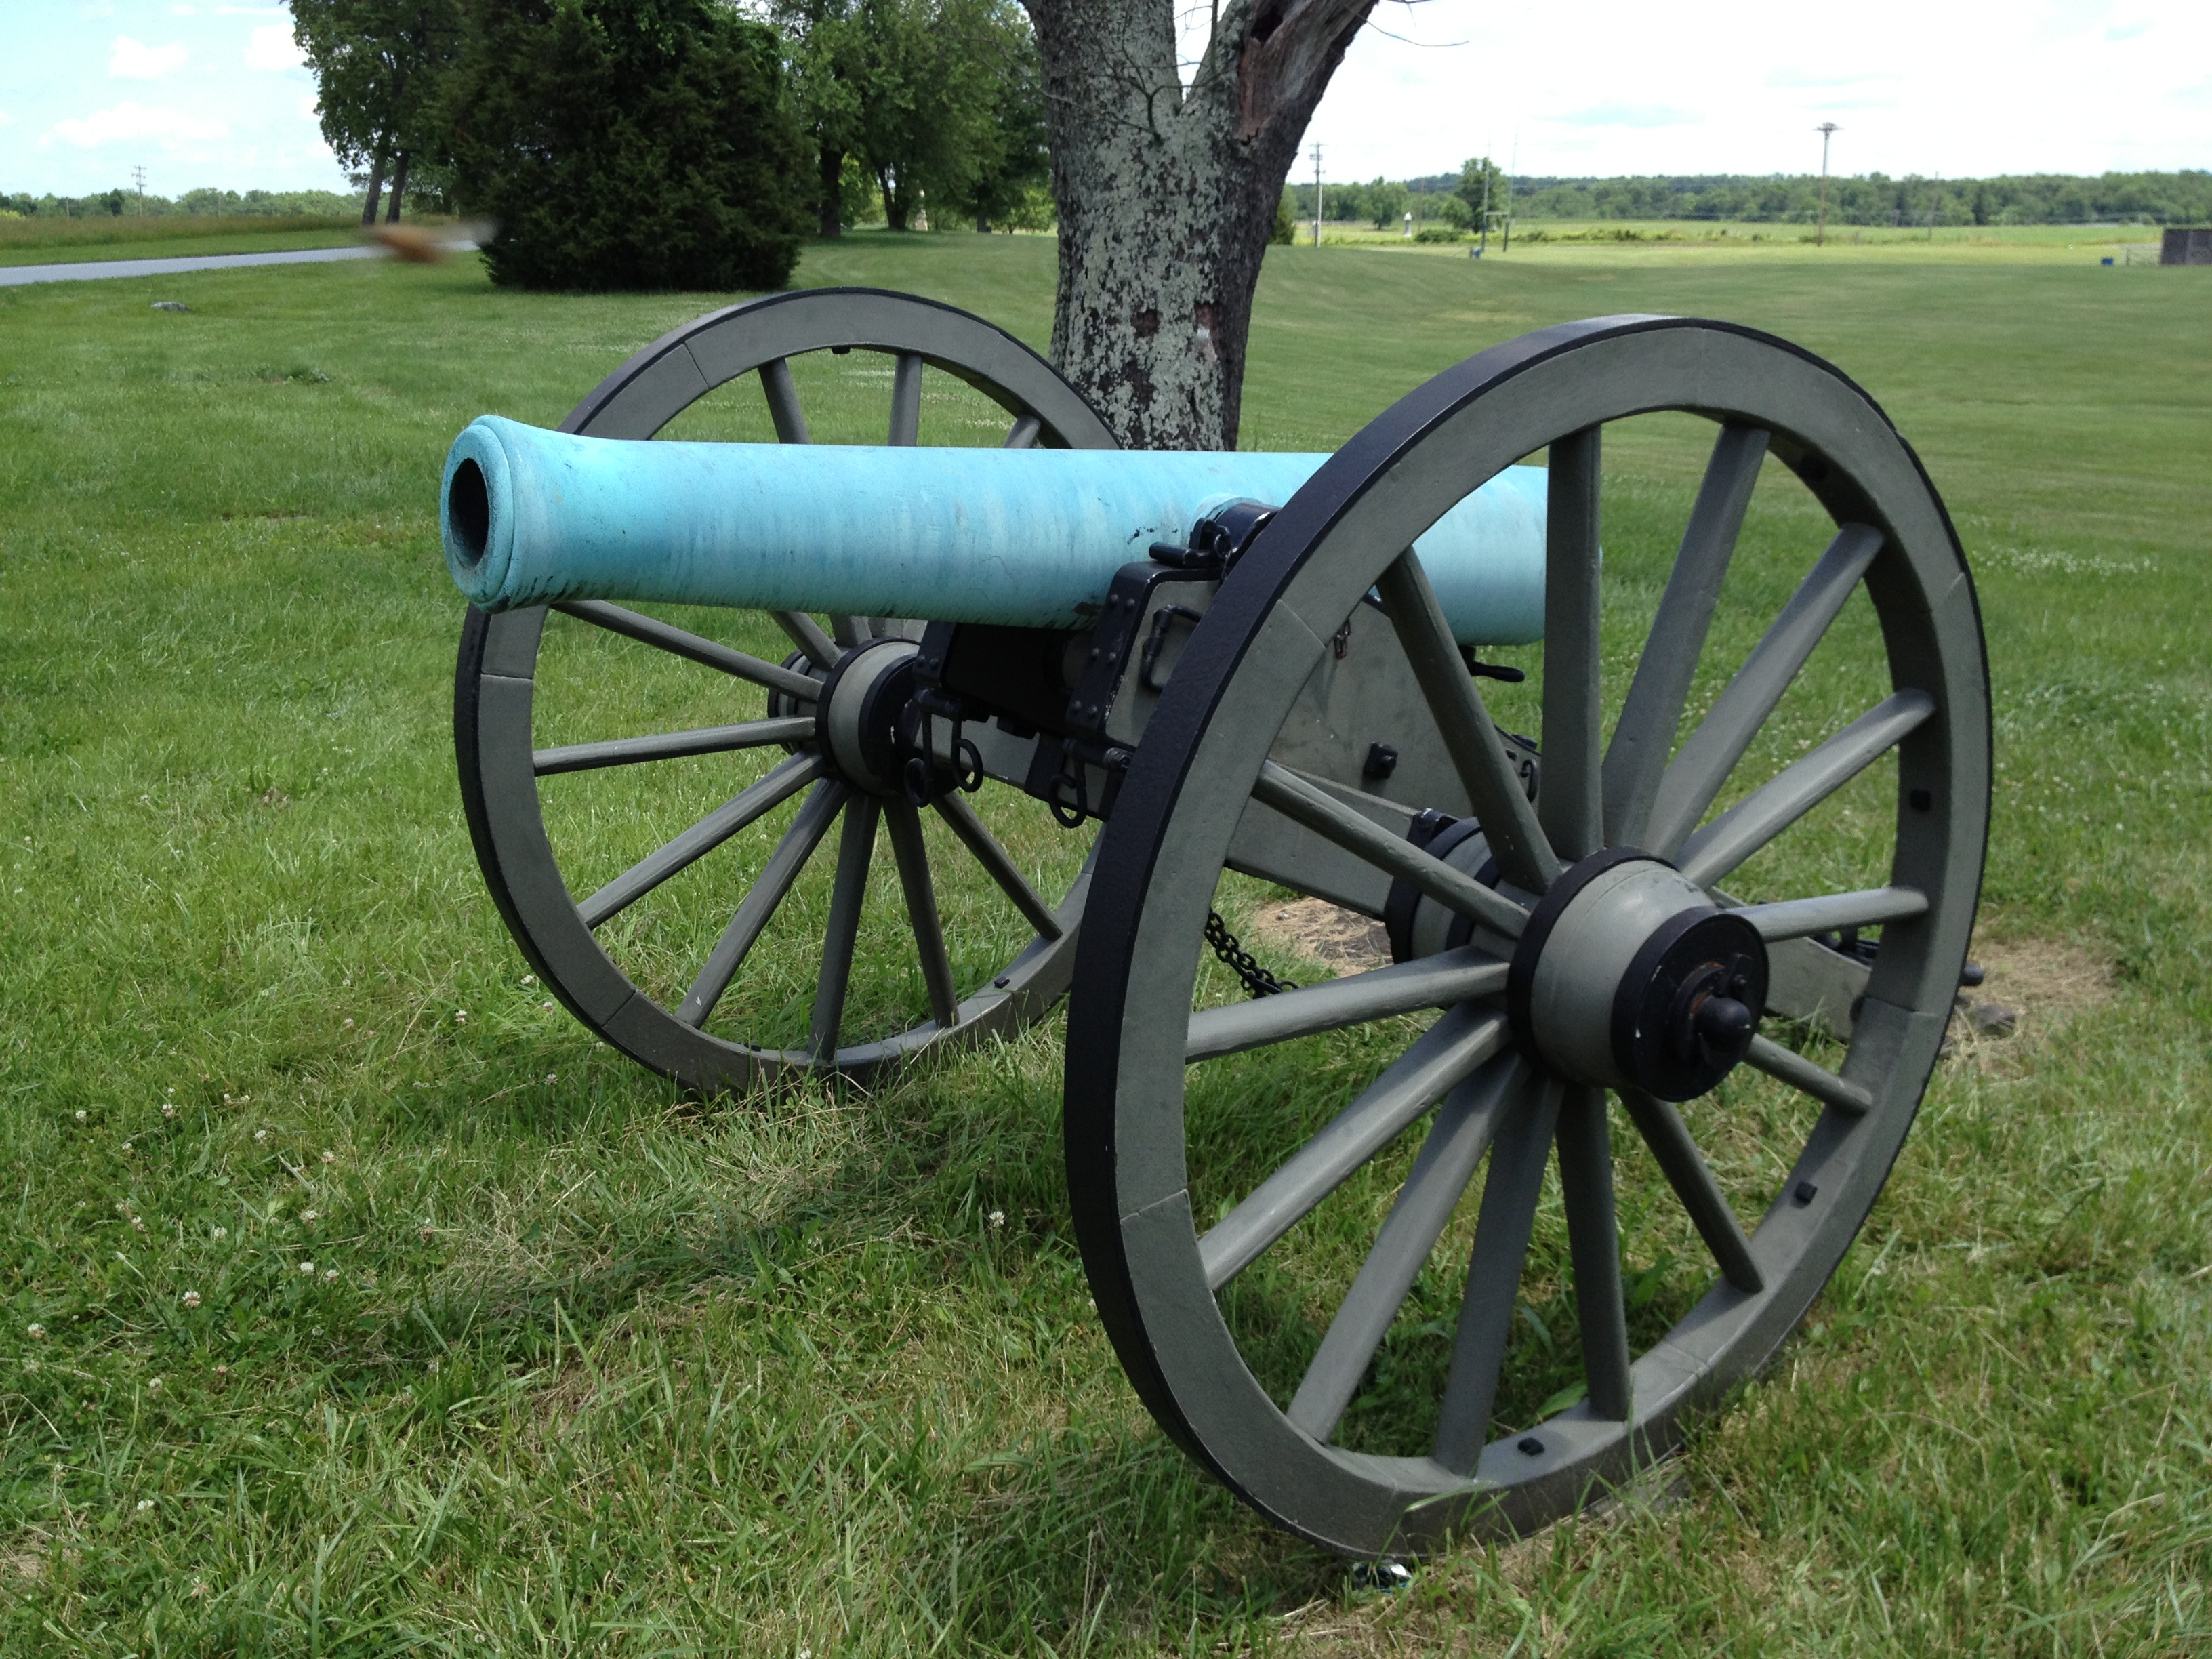
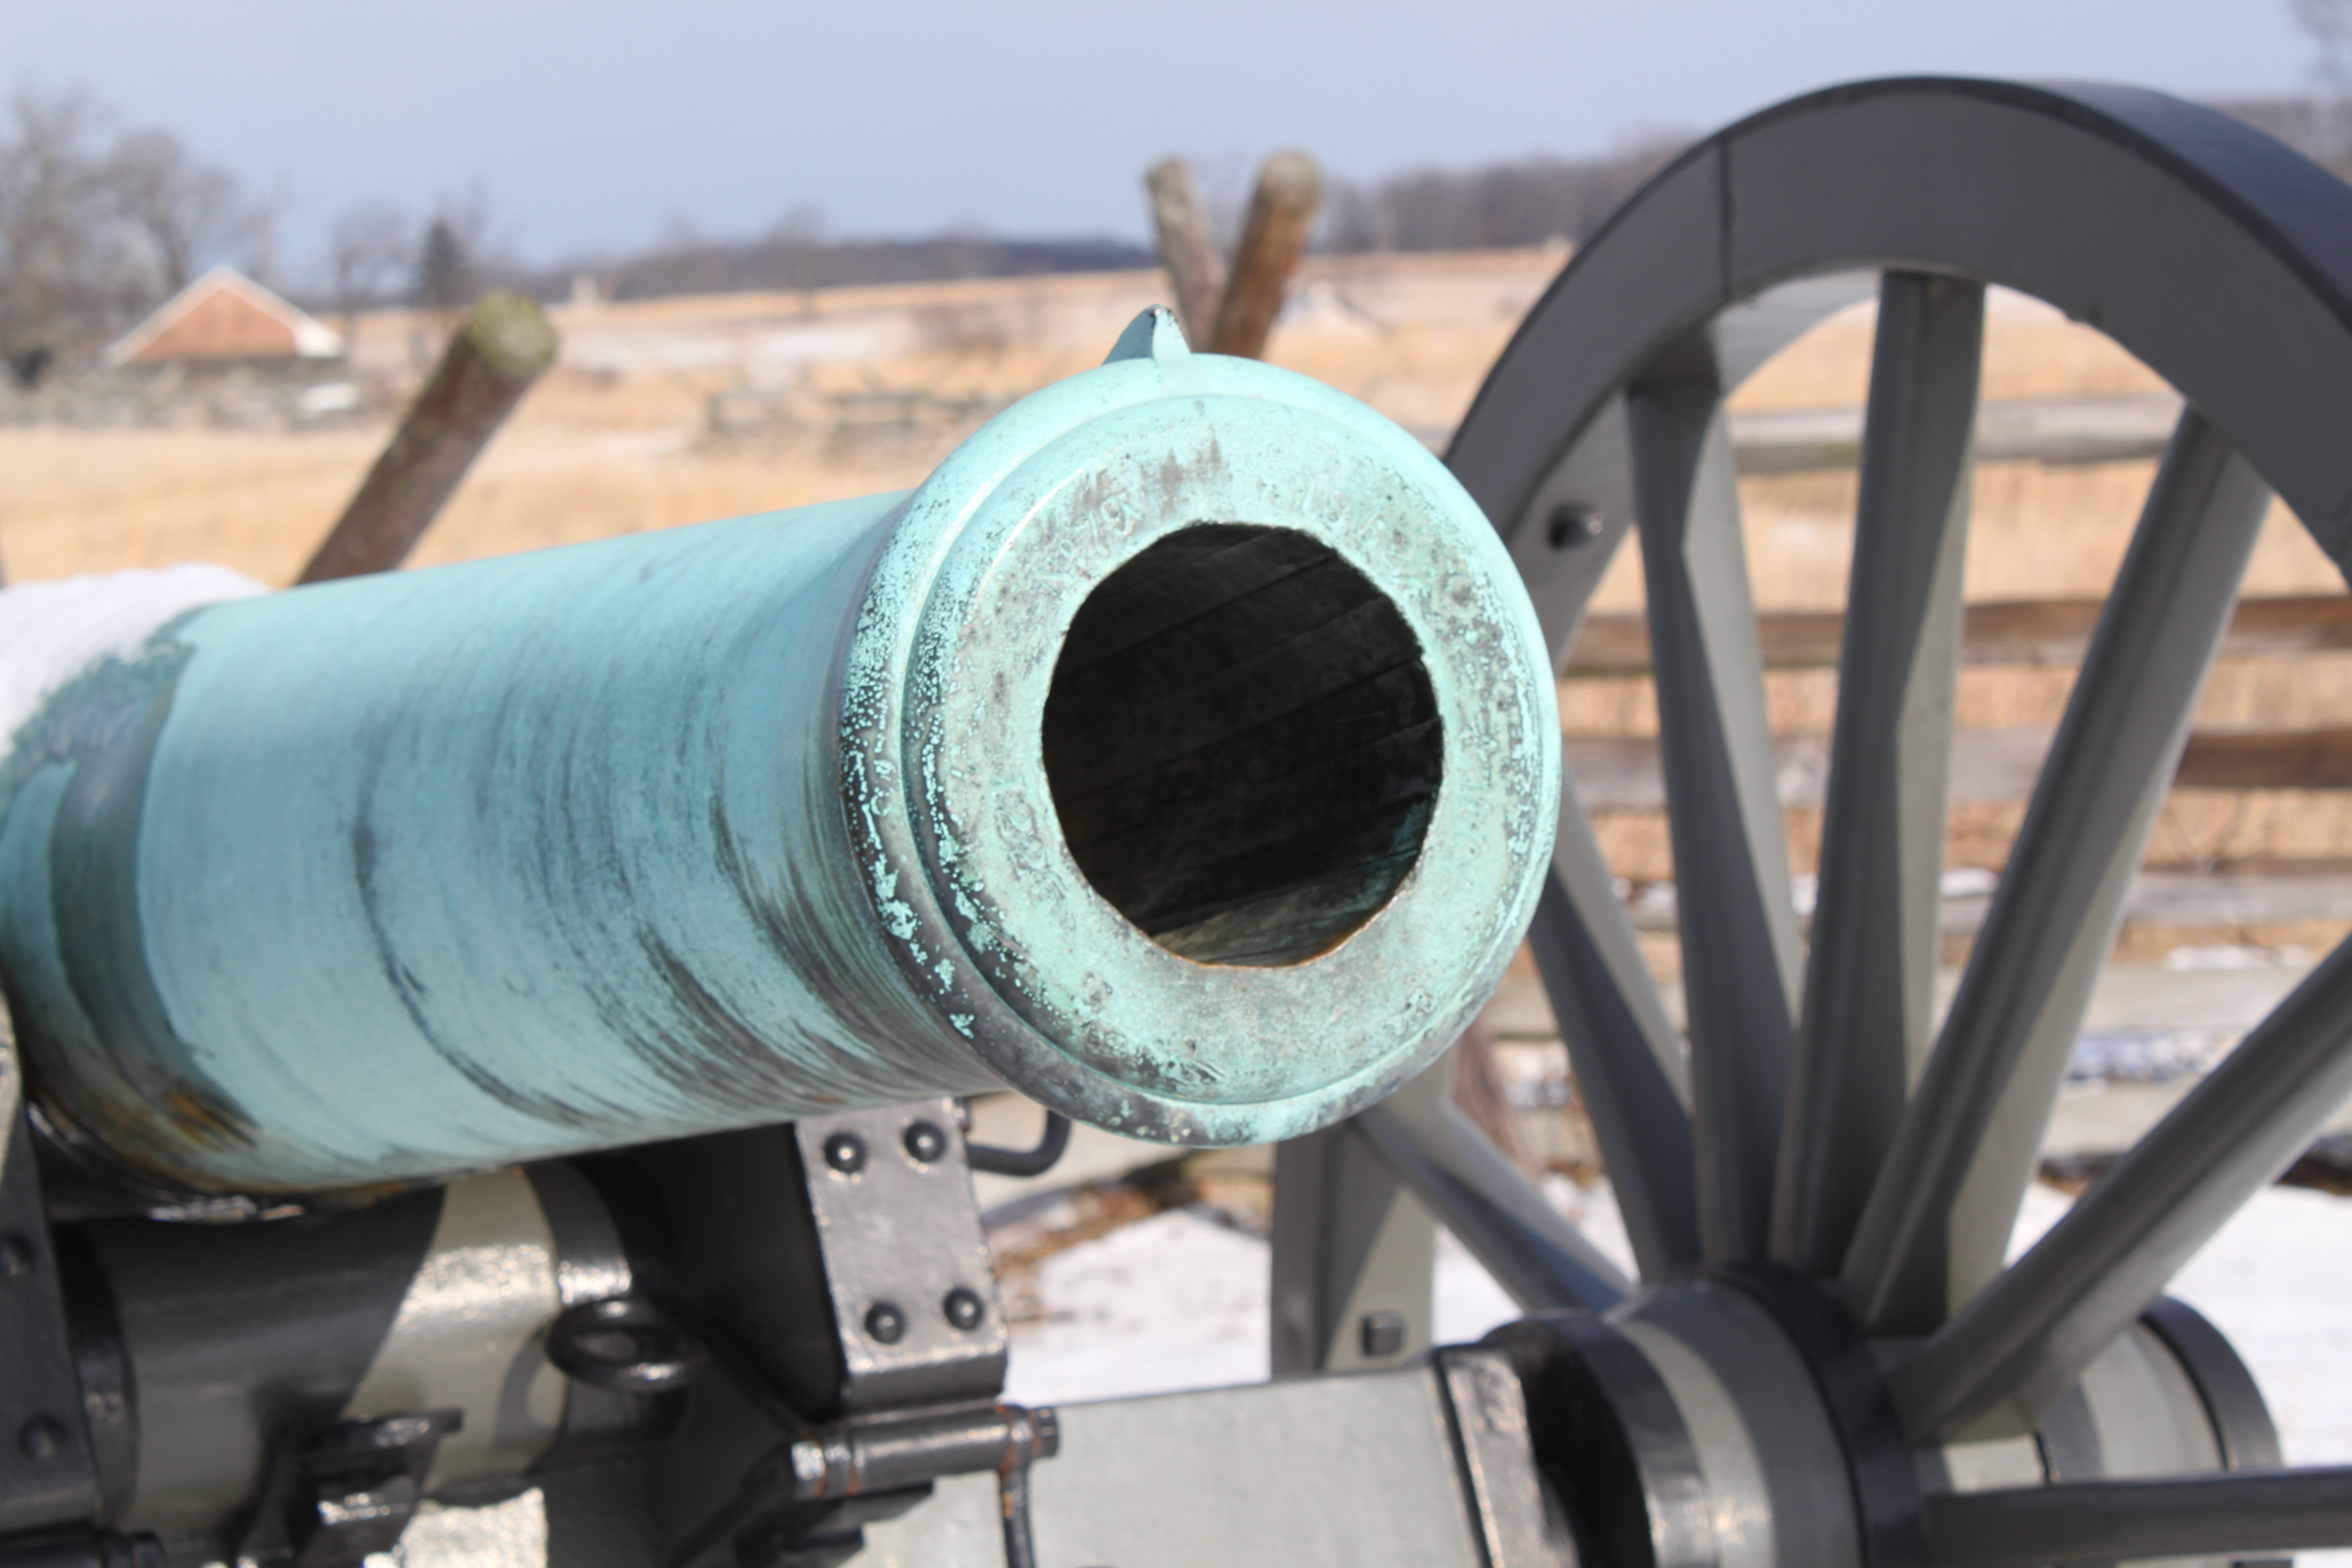
Front View of the Model 1857 12-pounder.Rear View of the Model 1857 12-pounder.
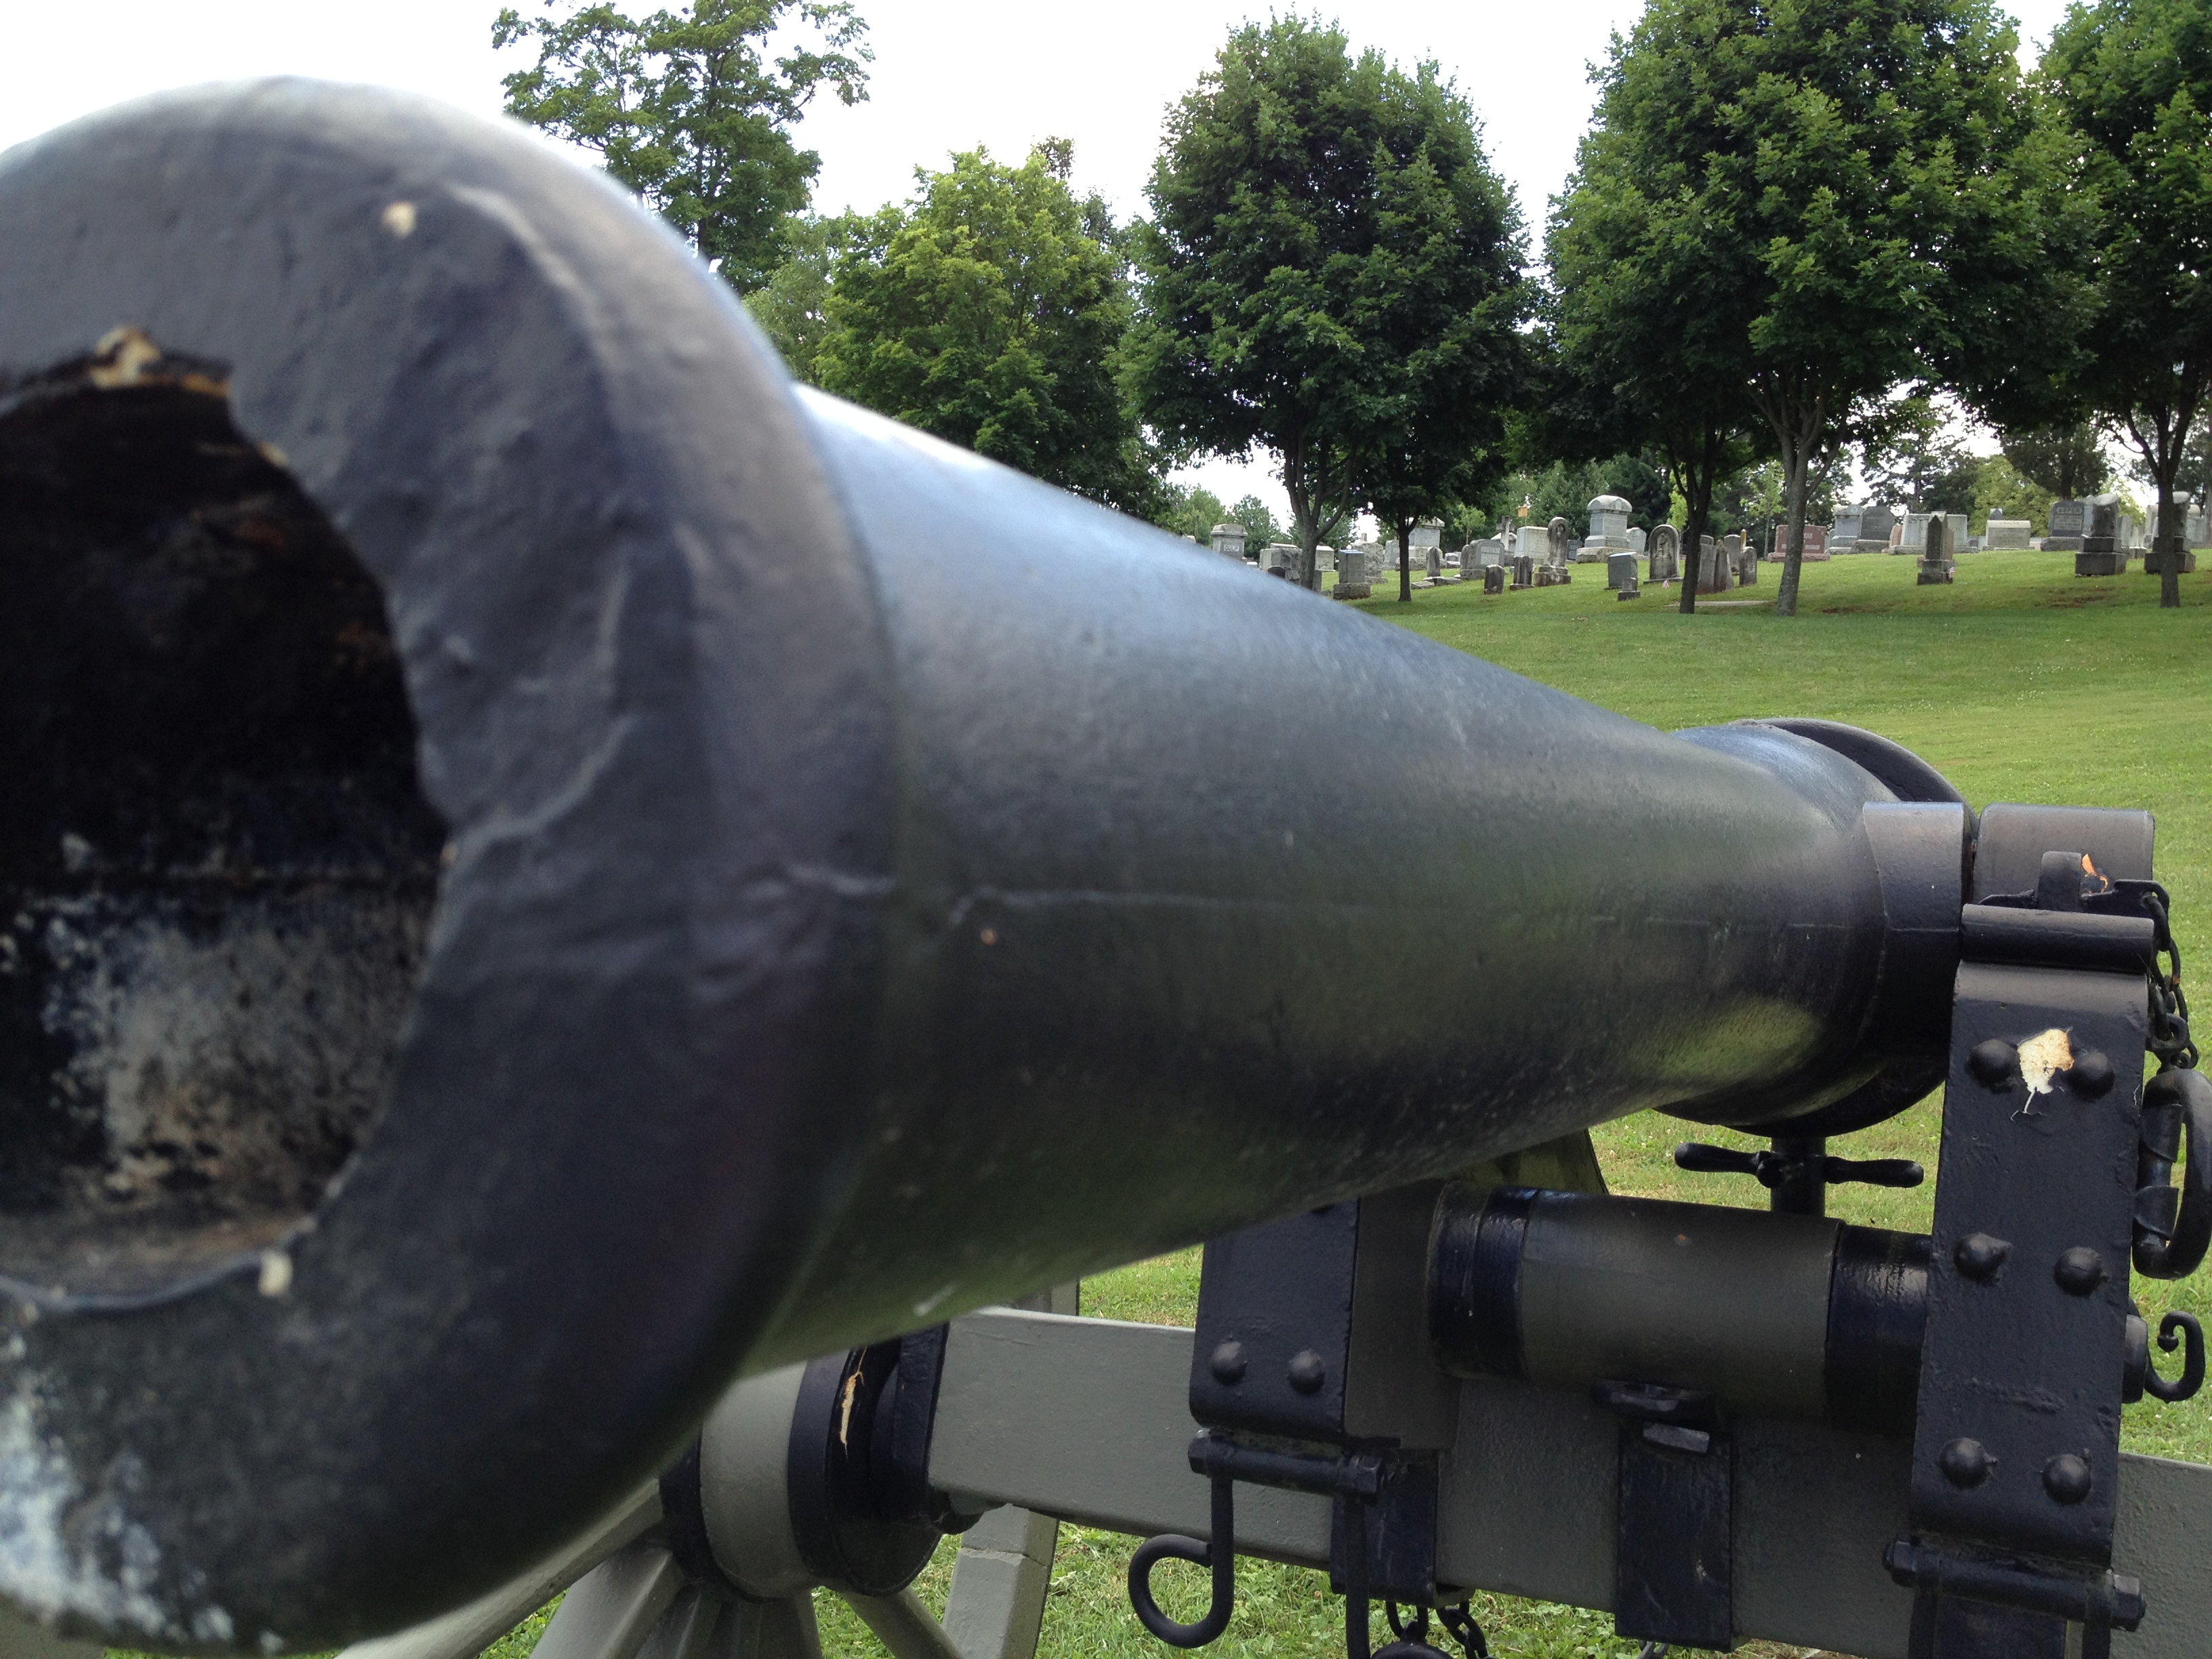
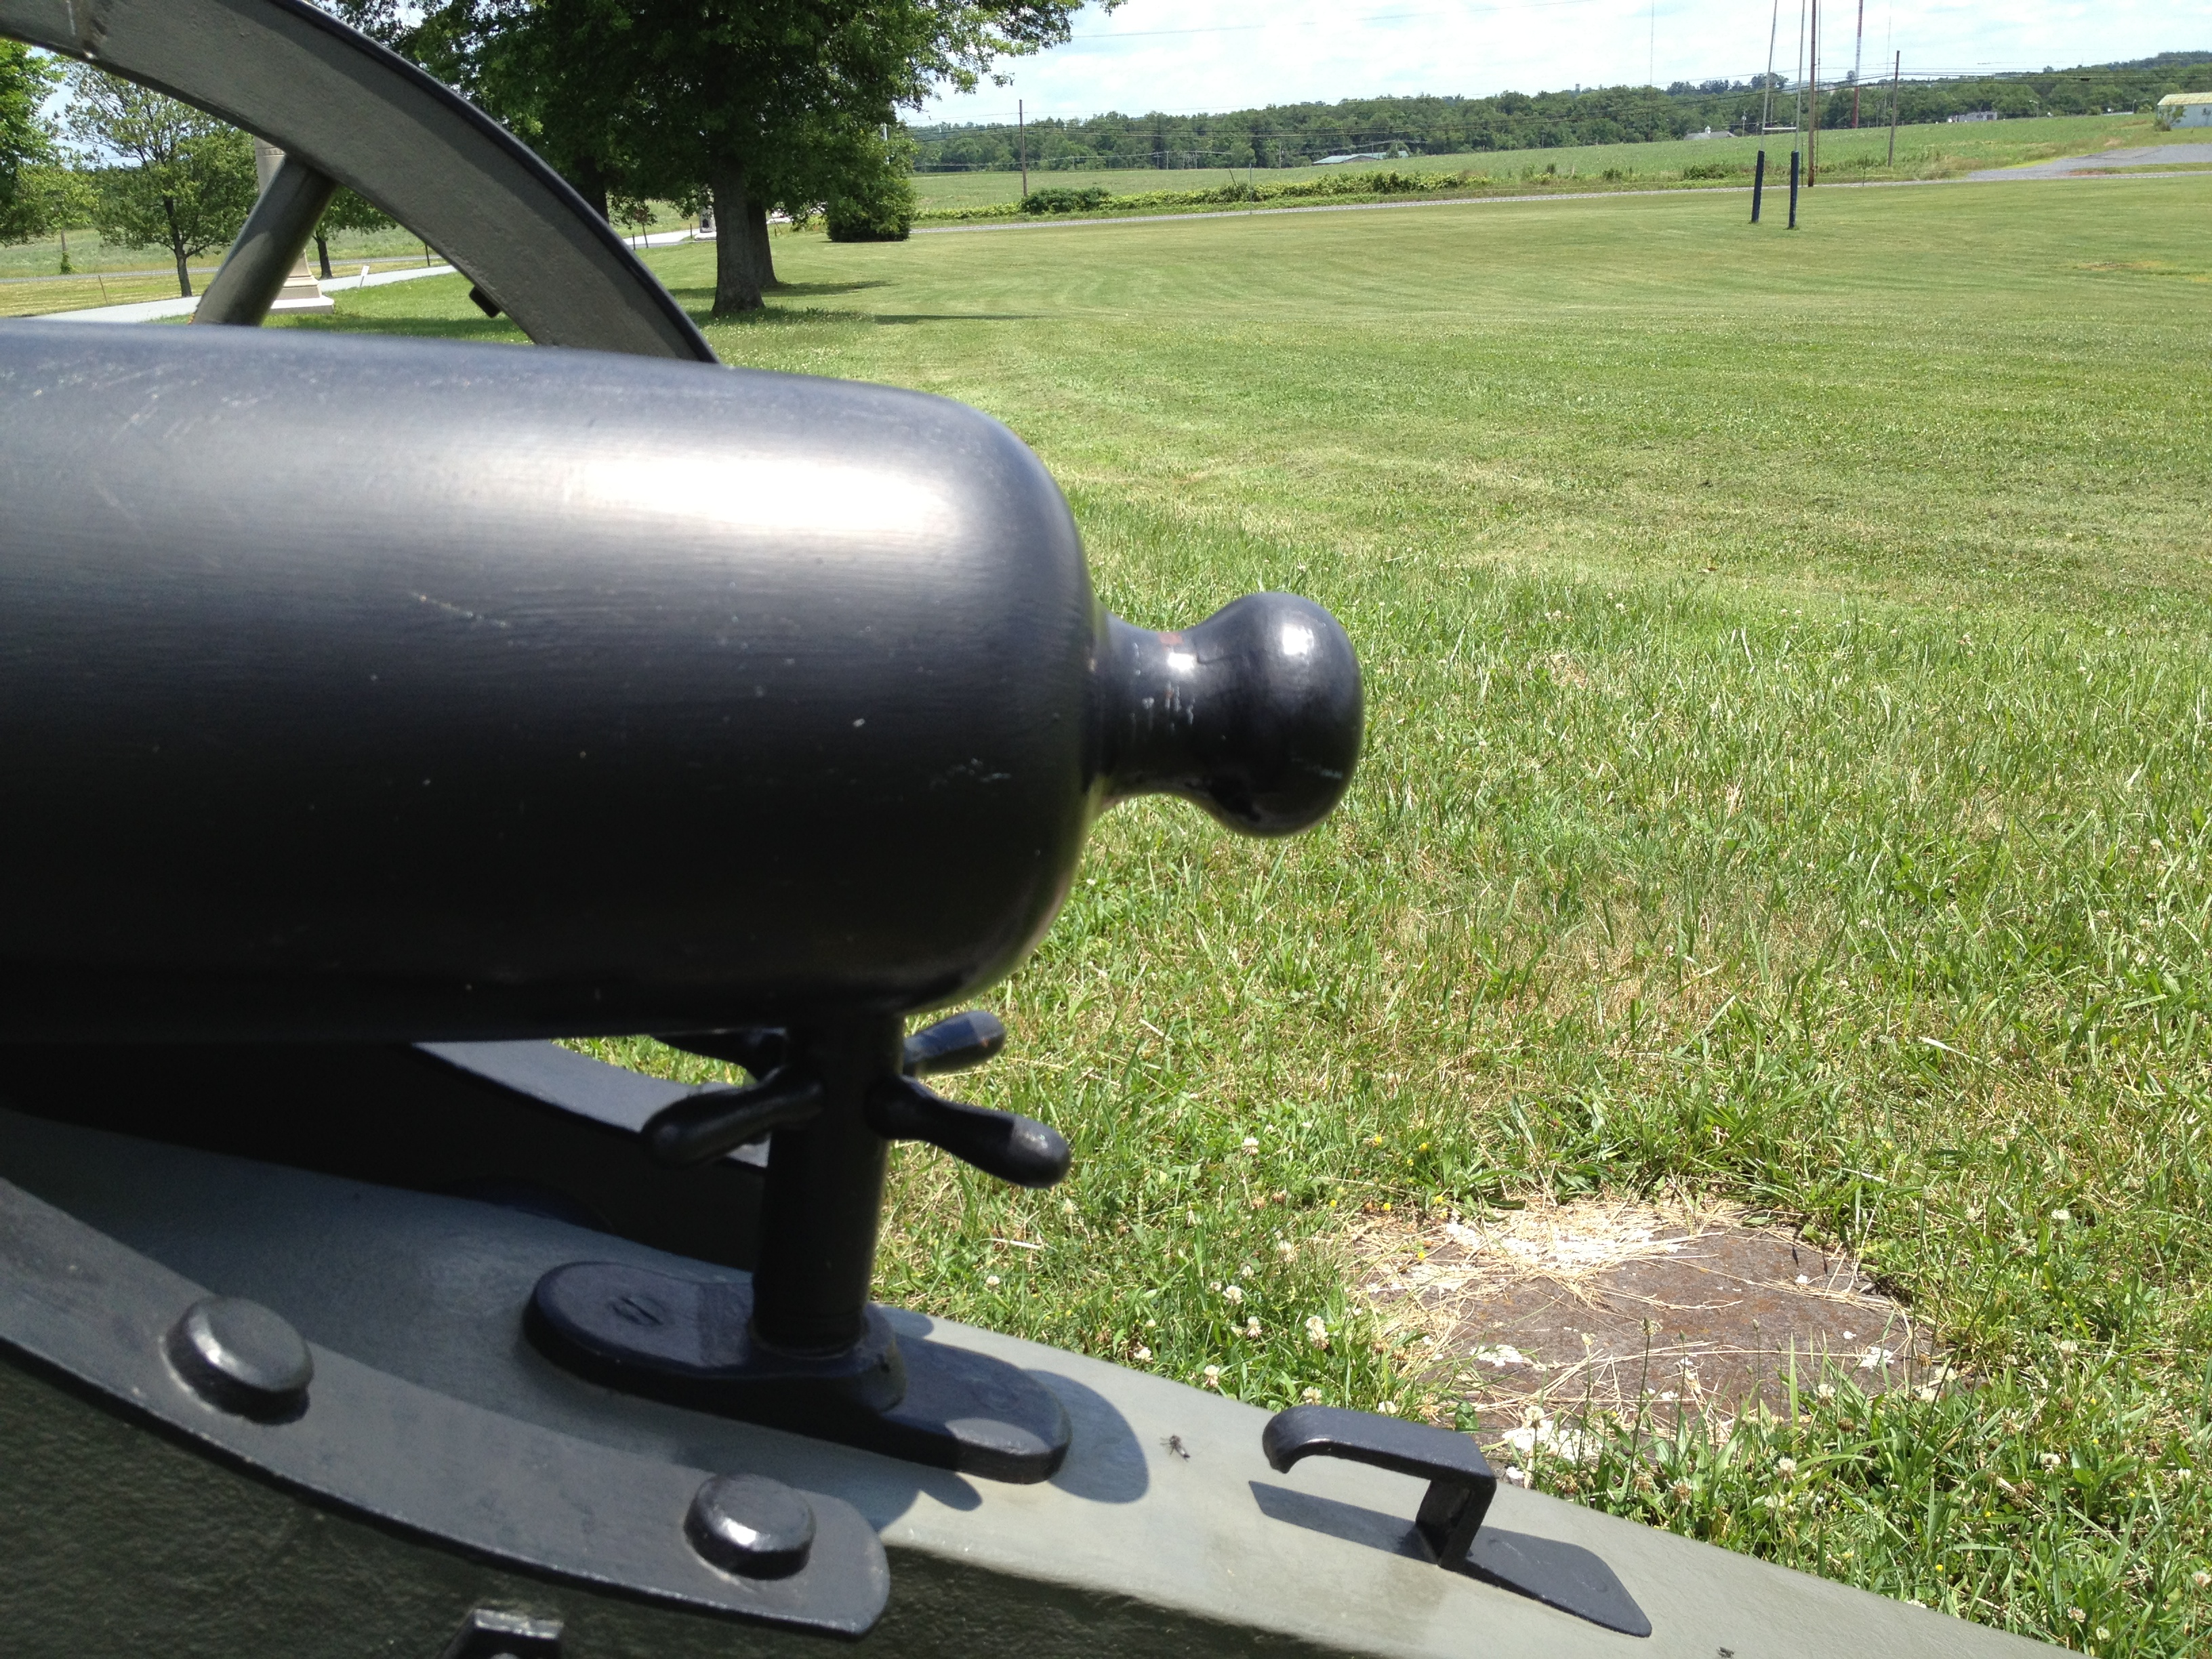
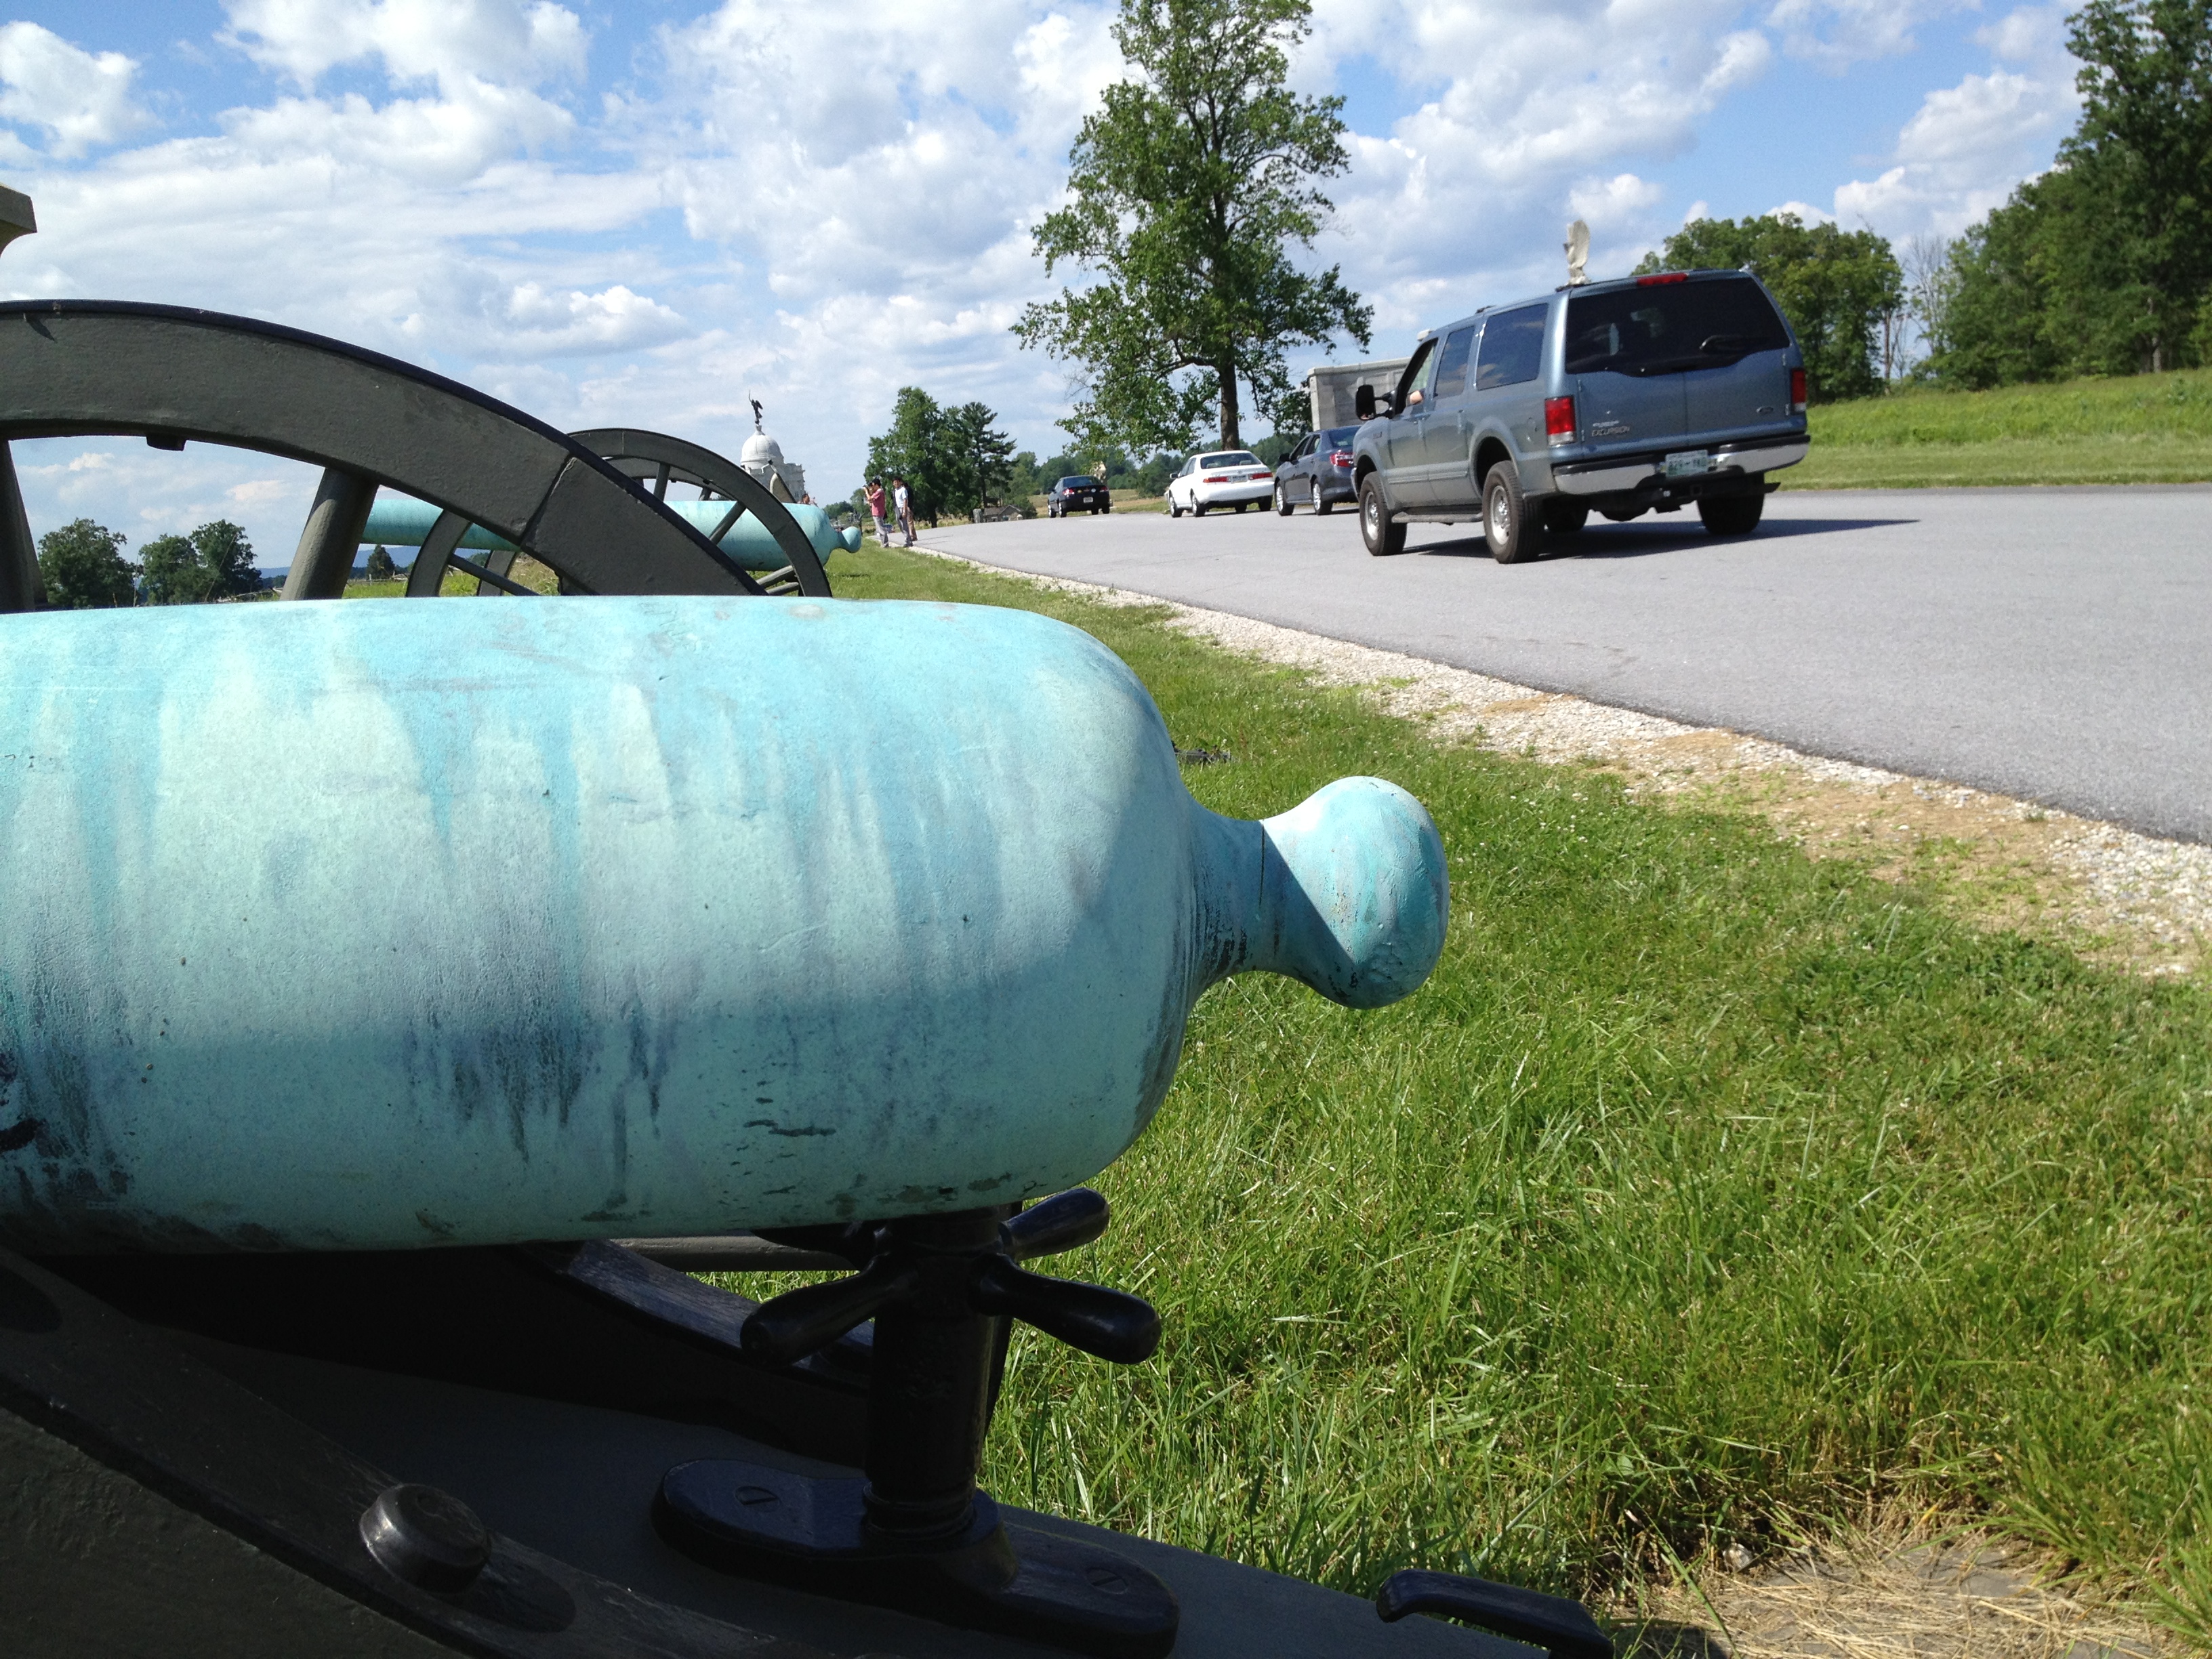
How to Identify: The most obvious clue from a distance is the color, of course. Since the Napoleons are bronze, they will be greenish in color. The shape of the gun is smooth. There are no ornamental beads running around the tube like you see on the older 6-pounders. The tube is tapered from the breech down to the muzzle, which is flared out. The breech of the gun is relatively flat on the back, with a flattened area on the bottom of the tube where the gun rests on the elevating screw. Napoleons generally have markings on the front of the muzzle, and a “US” acceptance mark on the top of the barrel between the trunnions. There may also be markings on the breech, and the ends of the trunnions, as well as a foundry serial number on one of the rimbases.
Exceptions:Gettysburg has a few Napolens in the collection that were rifled. There were 6 of these produced, and so far as anyone knows, these were experimental weapons. They can be easily identified at a distance – while they are shaped like regular Napoleons, they have a fin-shaped front sight on the muzzle as you see on the example below:
Experimental Rifled Napoleon. Note the front sight at the top. Photo by John Dolan.
Fakes:There are a few – about 15 – “False Napoleons” at Gettysburg (and maybe on some other fields, too). Since Napoleons are in short supply, and they share a similar shape, these are actually Model 1841 6-pounders that were modified in the post-war years to look like Napoleons so that they could be placed in battlefield displays. If you look closely, you’ll see marks on the barrel near the muzzle where the astragal was removed, as well as in front of the trunnions where the lip has been smoothed down, and on the breech where the base ring was shaved-down. These guns have also had the first 6 inches or so of their bore increased in diameter to the 12-pound size – the rest remains the 6-pound gage – so that they look right from a distance. This is the easiest clue to know that you’re dealing with a “False Napoleon”. See the section below on the Model 1841 6-pounder to get an idea of what I’m talking about.
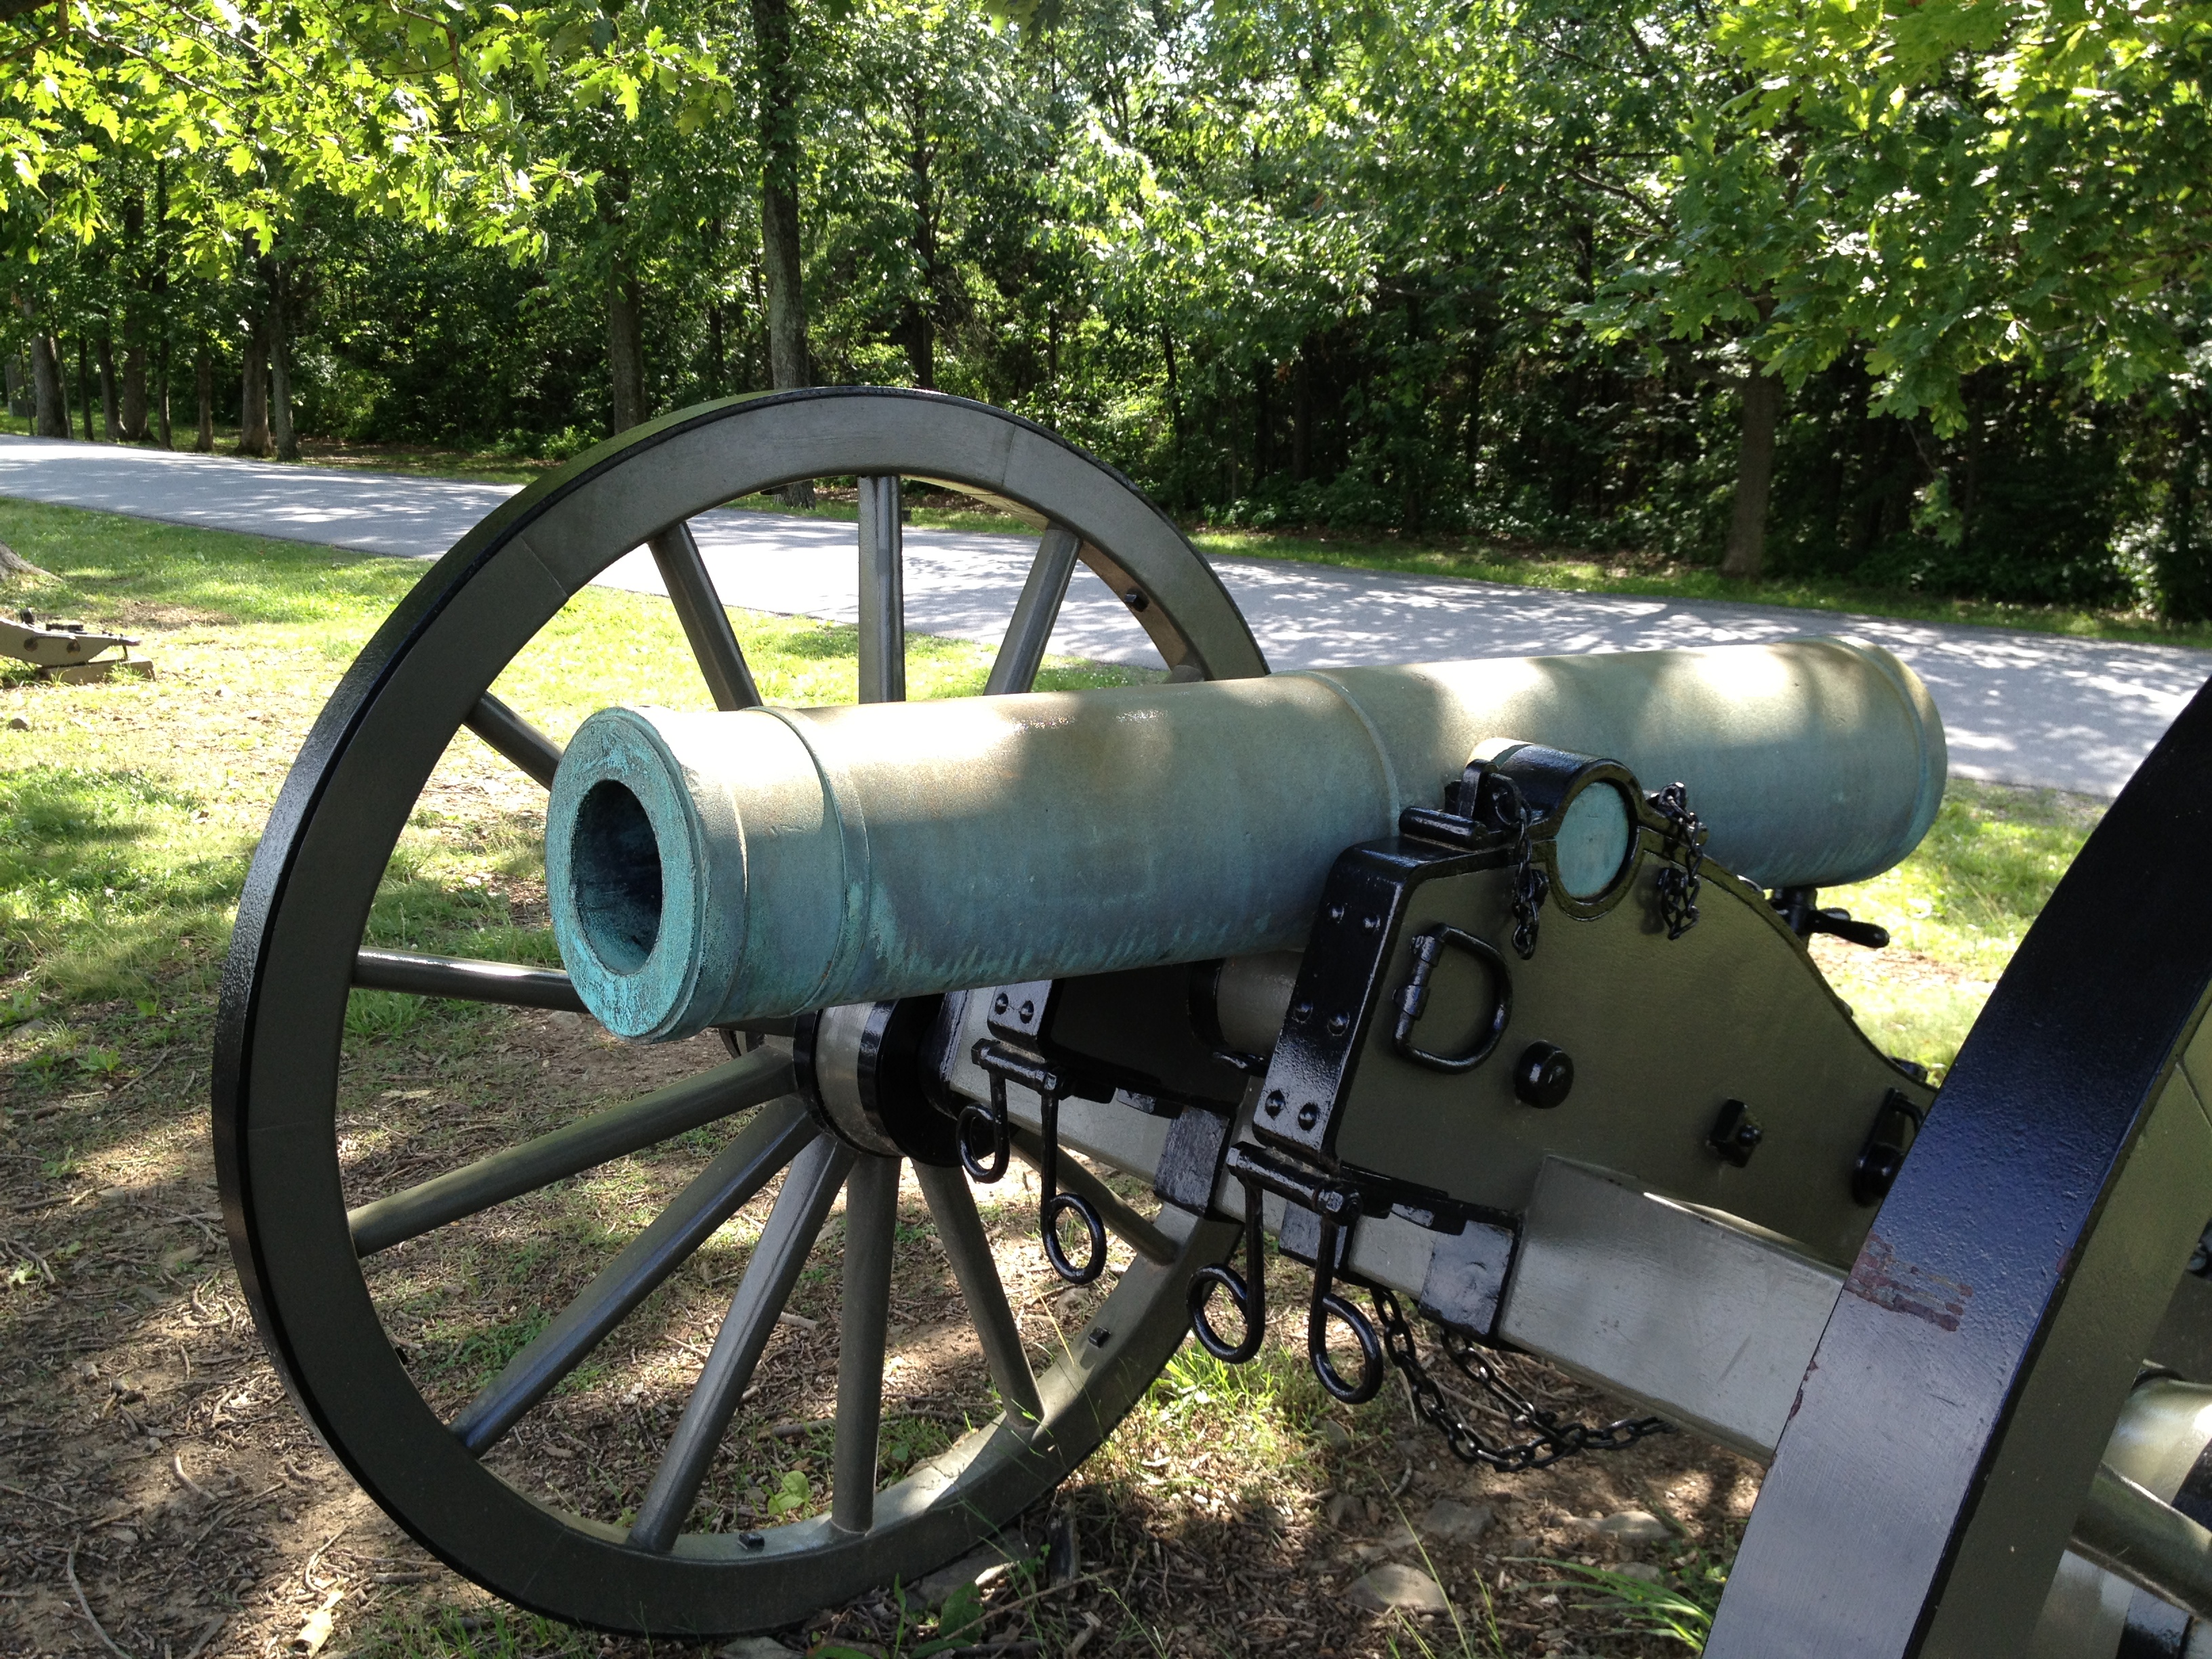
The Confederate “Napoleon”
Overview:This is the Confederate copy of the smoothbore US Model 1857 12-pounder design. Because of a lack of resources (both in material and manufacturing capability) these are generally pretty stripped-down copies. There isn’t a muzzle flare on these, for example.
Photos:
Front View of the Confederate “Napoleon”.Rear View of the Confederate “Napoleon”.
How to Identify:These are about the same size as a US Napoleon, but there is no flare at the muzzle – that’s the main visual difference. The tube still has a taper from the breech to the muzzle. Since the Confederacy had some difficulty acquiring a supply of copper (especially as the war went on) some of their guns have a dingy gray-ish appearance rather than the bright green you normally see on an old bronze gun. This was due to lead or other metals being mixed-in in place of copper in the bronze (though not in the example above, it appears). Like their US counterparts, these will have markings on the muzzle, breech, or trunnions.
Exceptions: There is at least 1 Confederate Napoleon at Gettysburg that was manufactured by Quinby and Robinson. This particular gun has a very simple, flat astragal around the muzzle. There may be other slight variants.
Fakes: None that I know of.
Howitzers
Overview: Not terribly popular for field use (there were only 33 of all types present at the Battle of Gettysburg), these weapons were designed to lob munitions over fortification walls at a high angle. They have short, very cylindrical barrels. Gettysburg has both the 12-pounder and 24-pounder varieties in their collection.
Photos:
Front View of a Howitzer.Rear View of a Howitzer.
How to Identify: The short, cylindrical barrel is your best indication – you just have to learn to eyeball it. As you can best tell from the “front” photo above, there is no taper to the barrel – that’s your best clue. You’ll also note that the howitzer above has an astragal, a slightly thicker reinforce beginning just before the trunnions, and a raised base ring.
Exceptions: In the collection at Gettysburg, there are 2 Austrian-made 24-pounder Howitzers, currently located near the Mississippi Monument. These are easily identifiable by the large handles on top of the barrel at the trunnions.
Fakes: None that I know of.
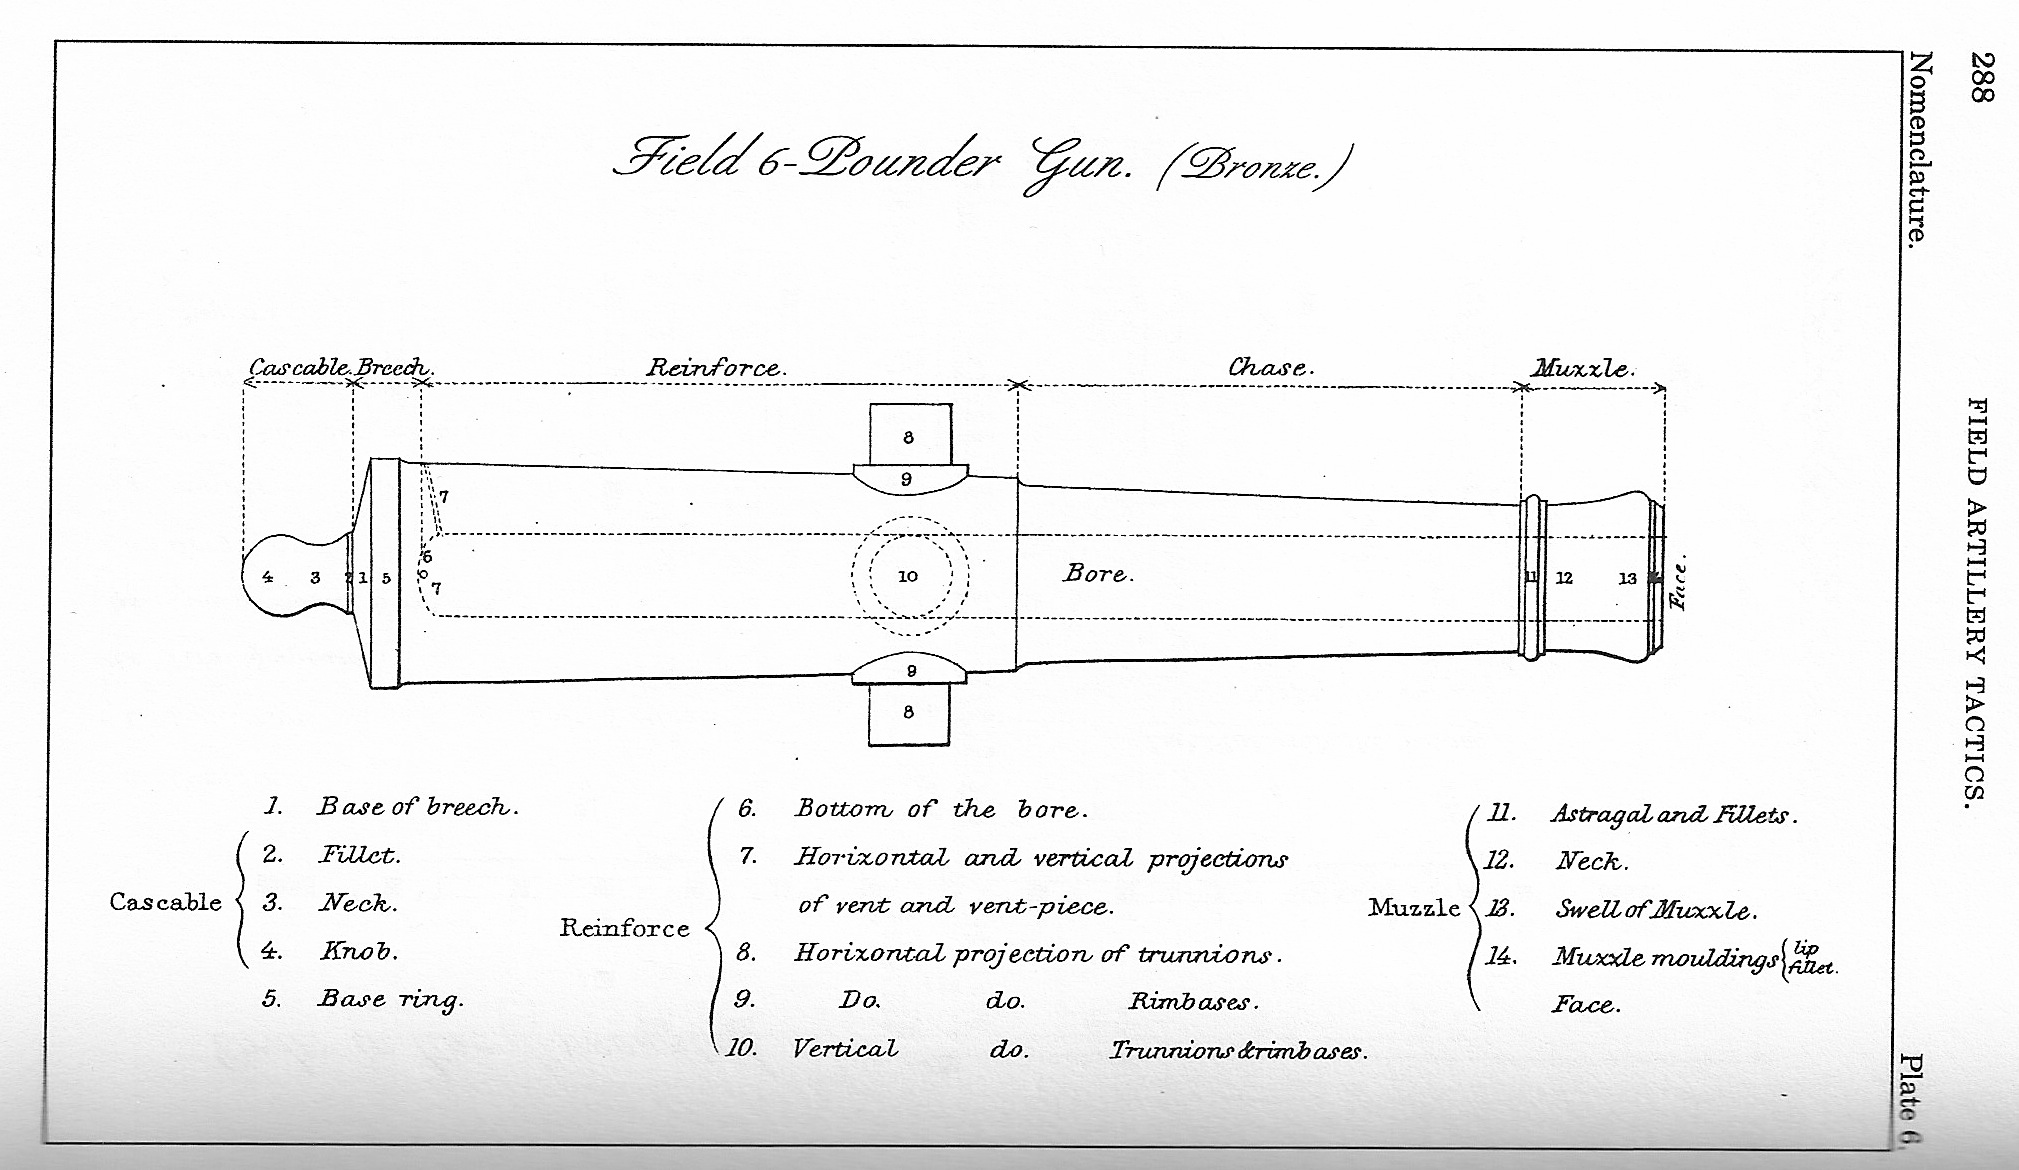
Model 1841 6-pounder Guns
Overview:By the time of the Civil War, the 6-pounder gun was basically a pea-shooter. It was not powerful enough to really be considered serviceable in light of the advancement in weapons like the Model 1857 “Napoleon” 12-pounder, or the newer iron rifled guns. The Confederacy couldn’t always be so choosy though, and they had 1 of these guns in service at the Battle of Gettysburg.
Photos:
Model 1841 6-pounder Gun diagram. From the 1864 US Army Field Artillery Tactics manual.
How to Identify: While physically smaller than the Model 1857 12-pounder Napoleon, they share a similar shape. Where the Napoleon is smoothly tapered from breech to muzzle, the Model 1841 6-pounder has a thicker reinforce that drops off sharply to the chase just in front of the trunnions, as you can see above. There is also a raised base ring, and an astragal near the muzzle. These elements give the guns a “fancier” look than the Model 1857.
Exceptions: There are 16 of the Model 1841 6-pounders on display at Gettysburg, but only 1 that is still in original condition. It is located along South Condeferate Ave., across from the Texas Monument. The other 15 have been converted to the “False Napoleon” design that I talked about above for battlefield display purposes.
Fakes: Since these weren’t in heavy use during the Civil War and there is plenty of supply, there’s been no need for fakes.
James Rifles
Overview: Another rare weapon (there were only 4 at the Battle of Gettysburg), the James was a relatively unsuccessful rifled bronze gun patterned on the 3-inch Ordnance Rifle design. Since bronze is a soft metal, it had a tough time holding rifling – repeated firings would wear the grooves down. Unlike the experimental rifled Napoleons, these guns were designed from the outset to be rifled. They fired a slightly heavier 14-pound round.
Photos:
Front View of a James Rifle.Rear View of a James Rifle.The Breech and Cascable Knob on a James Rifle.
How to Identify: As I explained above, this weapon is a bronze copy of the 3-inch Ordnance Rifle pattern, so it looks like a green 3-inch Rifle in its shape. It has a nice smooth taper down to the muzzle, and that fin-shaped front sight that the rifled Napoleons have. The 2 that are on the field at Gettysburg are along Hancock Ave., south of the Pennsylvania Monument.
Exceptions: As far as I know, there aren’t any variations on the James pattern, although there was a Confederate copy of this design.
Fakes: None that I know of.
In the next installment, we’ll look at some of the iron weapons on display at Gettysburg, and how to tell them apart.
Before we get into more details about the weapons themselves, let’s look at the types of rounds they would have fired, and what they’d have been used for. Understanding these is critical to interpreting official reports from the battles, and getting a sense for what soldiers in the Civil War faced when they were in combat.
There are 5 main types of Civil War ordnance:
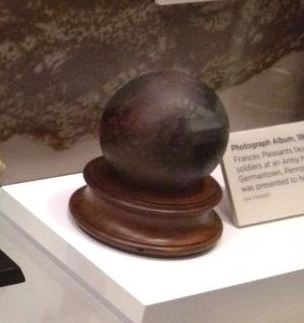
Solid-shot
A type of long-range ammunition, this is what people commonly think of as a “cannon ball”. In a smoothbore weapon, this type would be round, and probably called a “ball”; while in a rifled weapon, it would be more conical or “bullet”-shaped, and would normally be referred to as a “bolt”.
12-lb Solid-shot from a Napoleon. (Image from my recent trip)
As the name implies, this is a solid hunk of metal (usually iron) that is fired out of the cannon. It was used primarily against buildings or soft fortifications, but could also be fired into trees, turning them into deadly flying splinters, or heavy falling logs for anti-personnel purposes. Fired at a low angle against lines of troops in open fields, solid-shot would tend to bounce through the waves of men, taking them out 2 or 3 at a time as it did. This had more of a psychological impact than a physically-destructive one.
In some cases (like during J.E.B. Stuart’s bombardment of Carlisle) these rounds would be placed in a fire or furnace right before being loaded into a cannon so that they would become red hot. In this way, when fired against wooden buildings, the structures would likely catch on fire.
Shell
Another long-range munition, the shell is just that – a hollowed-out ball (for a smoothbore) or “bullet” (for a rifled gun) that contains some form of explosive (in the Civil War, that was gunpowder). The idea was to create a flying bomb that would detonate and spray shrapnel and fire in all directions. This was especially deadly against enemy artillery and munitions.
There were two mechanisms used to detonate the rounds: the newly-invented percussion fuse, or a more traditional timing fuse. These were screwed into the shell at the time of firing, so the cannoneer could select how his fire was going to behave each time.
The percussion fuse was designed to explode on impact. The jolt of the gun being fired armed the round, and then as soon as it struck something – the ground, a building, a tree – it would detonate. Since this was a relatively new technology, and the south didn’t have very good manufacturing facilities, their percussion fuses had a very high failure rate. Many Confederate rounds equipped with this type of fuse failed to detonate.
The timing fuse was used much more commonly. This consisted of a selectable paper fuse that would be ignited by the blast of firing the weapon, and explode after a few seconds. The idea was to time it so the ordnance would explode over top of other cannons, ammunition wagons, or troops so that the shrapnel would rain down on them.
Case-shot
A cut-away illustration of case-shot. (Image from Wikipedia)
Very similar to shell, this is a hollowed-out round that contained not only gunpowder, but small iron or lead balls, too. This was shell’s anti-personnel cousin. All the same information about fuse types and their purposes that I talked about for shell also applies to case-shot.
This type of munition was very commonly used (and with great effect) during the Civil War, and you’ll see it mentioned in official battle reports from both artillery and infantry commanders frequently. In some of those reports (especially when referencing rounds from smoothbore weapons) this round may be referred to as “spherical case“.
When used with timed fuses, the round could be configured (by cutting the paper fuse extremely short) so that it exploded just before it left the barrel. This method could be used in place of canister in a last resort, low-ammunition situation. Because of the dangers associated with knowingly setting off an explosion that could very easily end up just a few feet in front of your own men, this was not the preferred use.
Canister
This was the really nasty, short-range, anti-personnel stuff. Basically, it’s a large tin can (like an over-sized soup can) filled with saw dust and dozens of lead or iron balls. When fired, the can would shred immediately, creating additional shrapnel. Canister rounds effectively made a cannon into a giant shotgun.
A disassembled canister round. (Image from Wikipedia)
As you can well imagine, this was brutally deadly against the types of line-of-battle formations that were used during the Civil War. It certainly gives you an appreciation for what the men in Pickett’s Charge must have been thinking, knowing that they were walking into this type of ordnance.
Less commonly-used by the time of the Civil War, this was the precursor to the more effective anti-personnel rounds (like case-shot and canister) that came later. In battle reports, this type may simply be referred to as “grape” – a name that comes from its visual similarity to a bunch of grapes hanging on a vine.
There were several variations of this type of munition, but generally the round consisted of medium-sized iron balls, arranged on plates with a rod holding them together. The whole thing was then placed in a canvas sack. When fired, the round would split apart with the bottom plate pressing forward, sending the balls spreading out through the air toward the enemy.
You can see how the less-bulky and awkward case-shots and canisters would be much better than the heavy, overly-complicated grape-shot. Once troops began using trenches and other breastworks that couldn’t be effectively hit from straight on, case-shot (which could be exploded from above and had a much longer range) became the favored anti-personnel round.
So that’s the general overview of Civil War ordnance types. We’ll start examining how to identify the different models of field pieces used during the war in the next installment of the series.
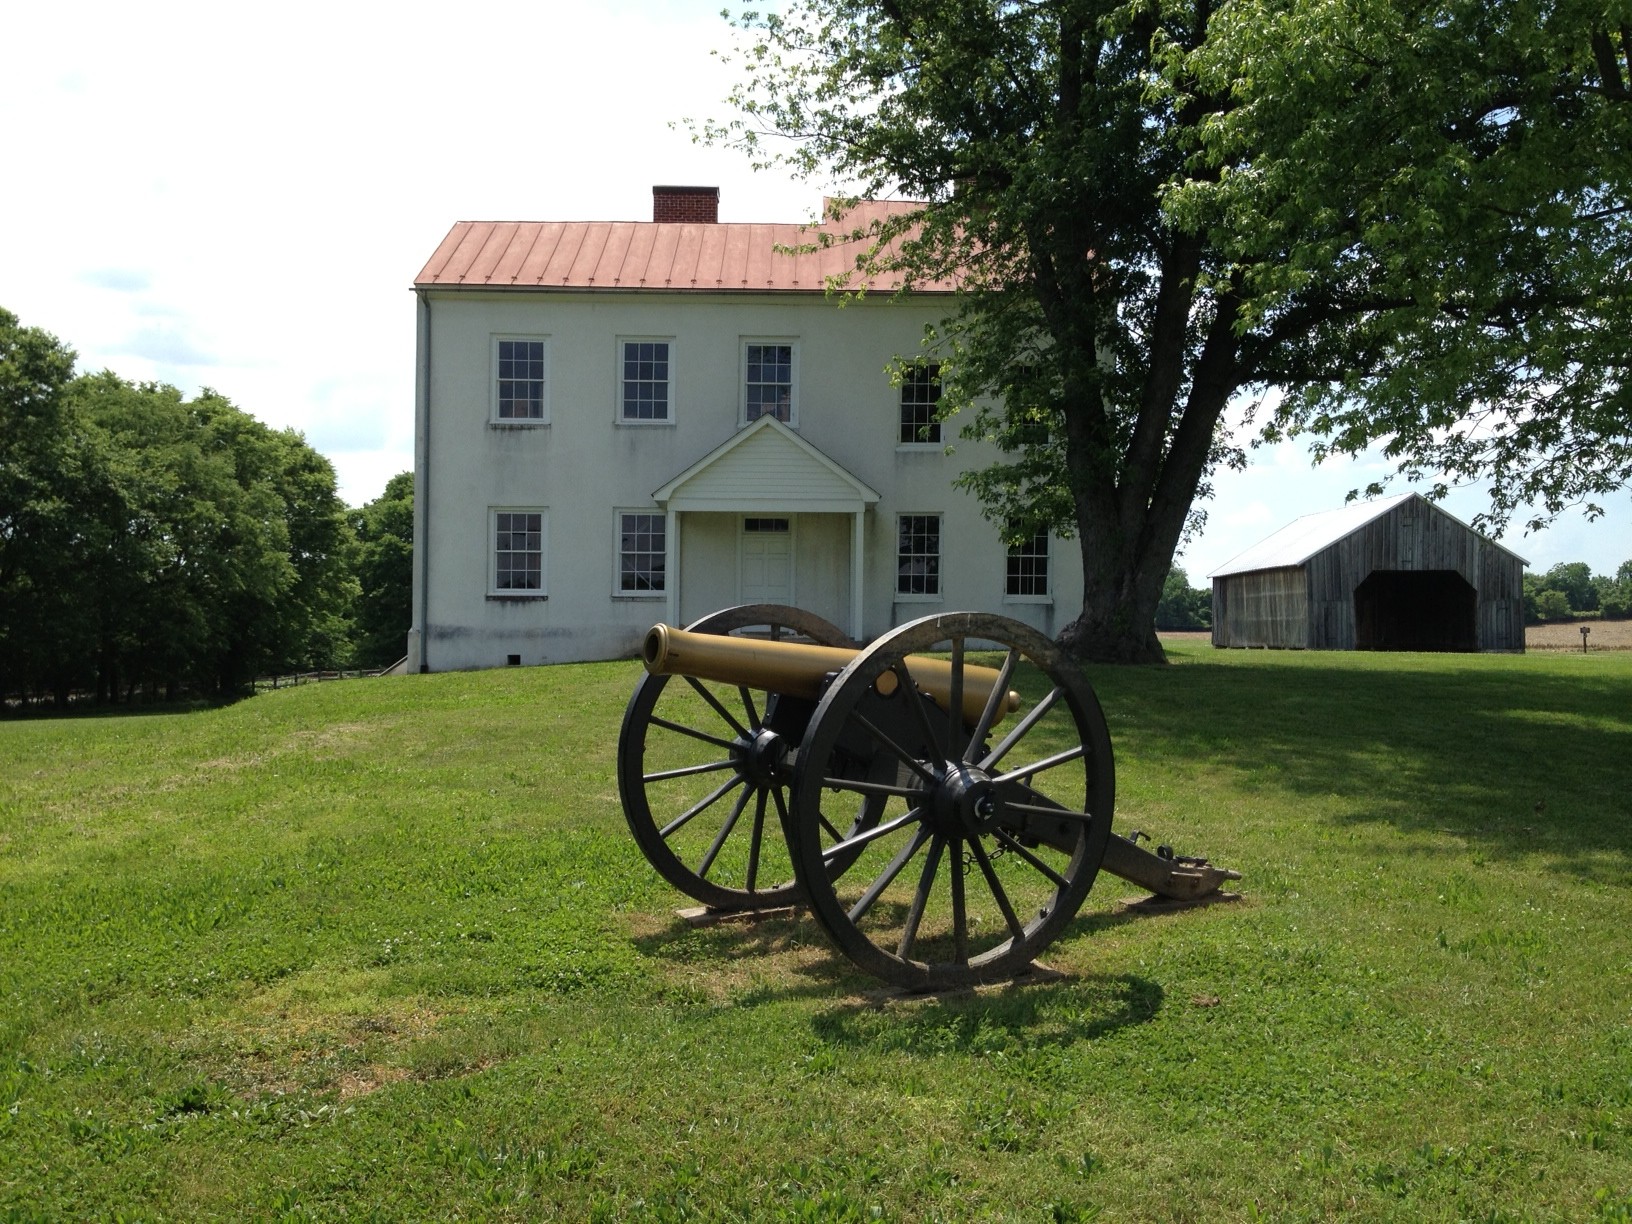
Earlier this week, a friend sent me a photo that she took at Monocacy. She knows that I’m interested in Civil War battlefields, and that I have a collection of photos that my friends and I have taken over the years on my work computer that I use when my screen is locked.
It got me thinking though – I’ve never been to Monocacy. I go to Gettysburg constantly. I’ve been to Antietam and Manassas a few times. I’ve even started to branch out to the Fredericksburg / Spotsylvania battlefields. But I’ve never been to Monocacy, and it’s closer to my house than any of those other fields. Since my wife was working this weekend, and I’d have to watch John anyway, I figured that we might as well have an adventure.
I wanted to do my homework first. I went looking for information about the battle in my “new” Time-Life Civil War books. Strategically, I thought the Battle of Monocacy was part of the Overland Campaign, but there was no mention of Monocacy in the book that covers it. No mention in the book about the Petersburg siege either. It wasn’t until I checked the book about the Shenandoah Valley that I found info. While Early did travel to Maryland via the valley, I don’t think I’d consider his move a part of those campaigns. Regardless, there was a decent overview of the action, and it gave enough context that I wouldn’t be lost when I got to the field.
The basics are these: The Confederate Army of Northern Virginia has been bottled up in the defenses of Petersburg, VA following Grant’s horribly bloody Overland Campaign. In an attempt to relieve some of the pressure of the siege, Lee sends Lt. Gen. Jubal Early with 15,000 men, north to threaten Washington, DC. Since the capital’s defenses had been more-or-less cleared-out to strengthen Grant’s army, Early didn’t expect much resistance. Major Gen. Lew Wallace, commanding the Middle Department, called for help from all quarters. He was able to pull together about 6,600 troops from militia units, emergency volunteers, and even the Washington defenses, and set out toward Frederick hoping to meet the advancing Confederates. Wallace knew he didn’t have much of a chance to defeat Early’s overwhelming number of battle-hardened troops, but he hoped to do exactly what he ended up doing – delay Early’s advance long enough for the reinforcements that Grant was sending to arrive in the capital.
Armed with my basic understanding, I packed John up this morning and got on the road west to Frederick after lunch. It took less than 45 minutes to get to the visitor center.
Now this was a pretty small battle by Civil War standards – only about 20,000 troops in total were engaged, and there were less than 25 cannons present between the two armies, so I went into this experience not expecting any artillery nerdery. My arrival at the visitor center got my hopes up though:
Revere Napoleon#46 in front of the visitor center.
Between the parking lot and the building itself, there’s a real, live Napoleon, and it’s a Revere. The muzzle markings are in fine shape and are as follows:
My source shows this weapon as being held by the Antietam National Battlefield a few miles down the road, so this piece must have been recently transferred. That happens from time to time. According to the Register of Inspections, this gun was accepted into service on May 20, 1862, so not only would it have been on the field in time for Gettysburg, but for Antietam, too – which is probably why they were the owners of the piece at one time. Like the other Reveres, it has the ornate “U.S.” acceptance mark on the top of the barrel between the trunnions. This was fun (and unexpected) to see.
The visitor center is on the small side – it’s comparable in size to Chancellorsville’s. There’s an information desk and gift shop on the main floor, and museum exhibits upstairs. There’s more flashy interactive stuff there than actual artifacts, but it’s very well put-together. The whole building seems very new, although I’m not really sure when it was built.
I got my park map, and started out on the auto tour. One of the other nice things that the park management has put together is a downloadable audio component to complement the tour – it’s also sold as a CD in the visitor center for less than $3. Having that audio really made for a nice experience. Each of the 5 tour stops has about a 5 minute clip associated with it. Combined with well-produced wayside markers at each stop, and the fact that the battle only lasted for 1 day and didn’t have too many moving pieces, you can easily get a good understanding of what happened here back in 1864.
I had to do an artillery-related double-take at tour stop 1, though:
“Napoleon” at the Best Farm.
From a distance, I saw a bronze-colored Napoleon. I’ve never seen this on a battlefield before (outside of a gun brought by re-enactors). This is what the guns would have actually looked like during the war – the familiar greenish patina on the bronze weapons is what happens to copper when it “rusts”. Was this an extremely well-kept Napoleon?
Sadly, no. On closer inspection, it was obvious that this was an iron weapon that had been painted a bronze color – there were areas on the gun where the paint had chipped and you could see black (or even rust) underneath. There are no markings on the trunnions, rimbases, or muzzle. These are clearly reproduction guns meant only for display. While that’s disappointing, it’s nice to see a gun presented to the public on a battlefield, looking the way it would have looked at the battle. I’m a little torn on this.
I saw one other reproduction gun like this one on the Worthington Farm (stop 3 on the tour), and no other weapons anywhere on the field. That’s a pretty accurate portrayal of the artillery at this battle so far as I can tell.
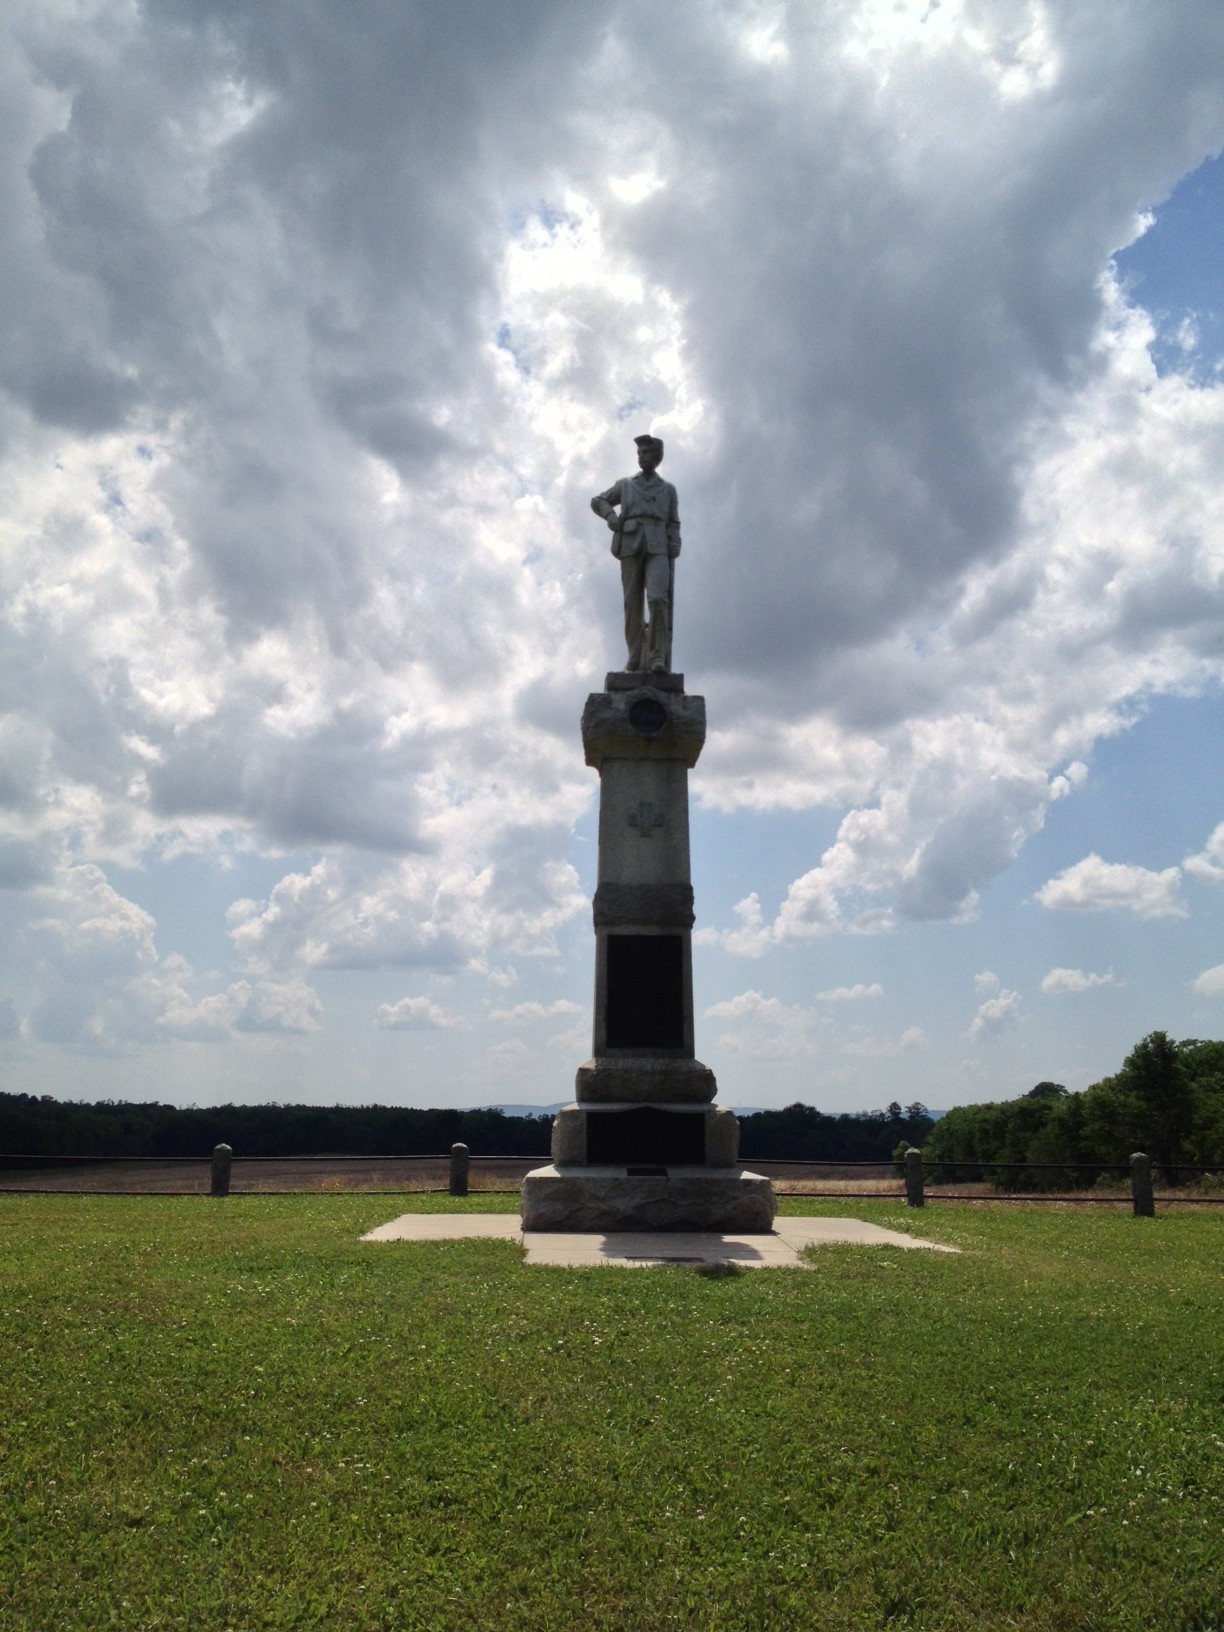
Monument to 14th NJ near Monocacy Junction.
It’s a similar situation for monuments. While explanatory waysides were plentiful, I counted only 5 commemorative monuments. One of these – and certainly the grandest one – was a monument to the 14th New Jersey Infantry, which became known as the “Monocacy Regiment” because it had served in this area early in the war defending the railroads, and then returned after a stint with Grant in the Overland Campaign to defend it once again. While I haven’t established a full service history for him yet, I’ve known that a distant cousin, John B. Skillman, served with the 14th NJ at some point during the war. Since it would be a family connection to this battle, and since my infant son is named John, too, this may be one of those things that I need to research further.
Other monuments include one placed by the United Daughters of the Confederacy next to a more descriptive one placed by the State of Maryland. There are also two other unit monuments: one remembering the 87th Pennsylvania, and another across the road for the 10th Vermont. None of these is easy to visit because of parking challenges, though.
There are a few walking trails on the property, and from what I can tell on the maps and from looking at the ground in person, they look like they’d be nice. Several of them go right down to the Monocacy river. The scenery is peaceful, and there’s plenty of interesting old farm buildings, too. It was oppressively hot today, and I didn’t have a good way of carrying John with me, so I didn’t attempt to walk them myself.
All-in-all, I’m glad I went to see the field. To my mind, it’s a relatively minor and simplistic engagement tactically, but it does end up buying time to bolster the defenses of Washington, DC – stifling any chance that the Confederates had of creating serious political problems for Lincoln right before the 1864 election. In this light, it is strategically important to the war, and a strategic Union victory.
It’s worth taking a couple hours to pay tribute to the men who fought here and learn a little about this part of our history.
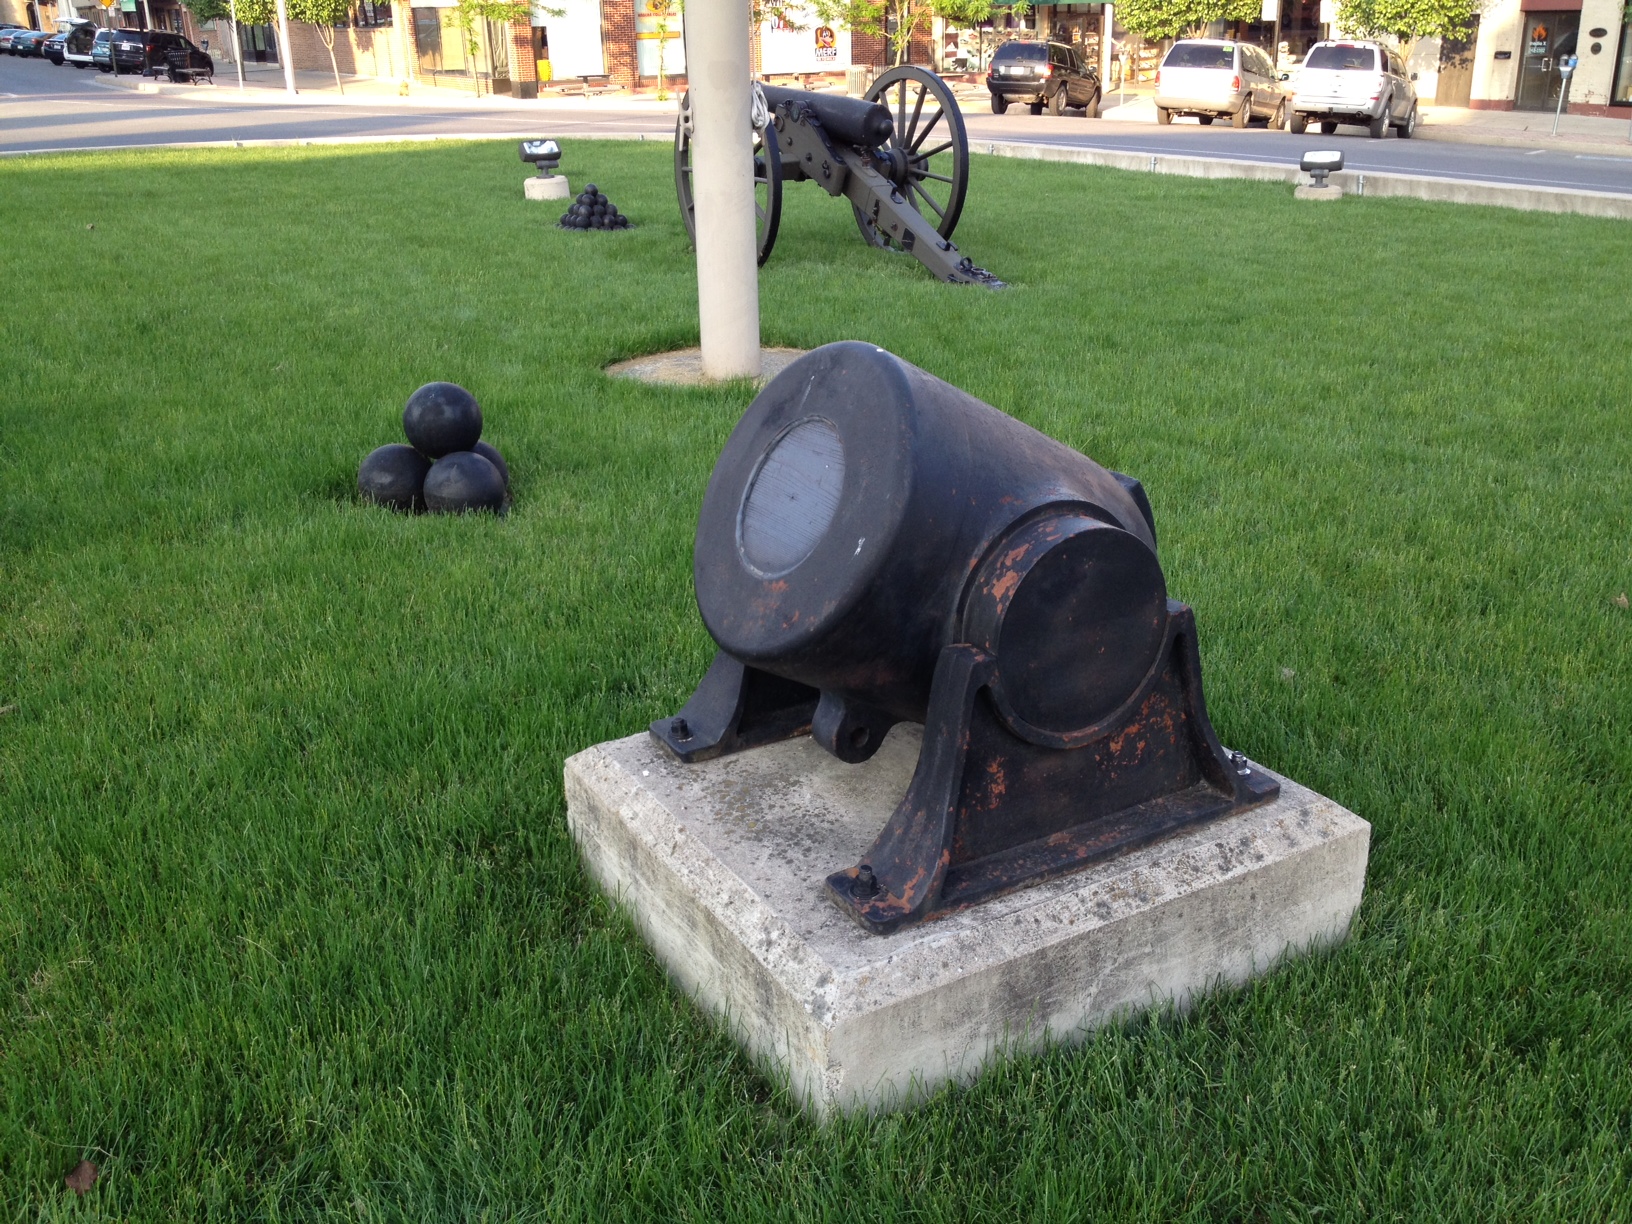
While I was up in Lewistown, PA for my grandfather’s funeral, I took a ride around town with my dad to get some photos of a few of the downtown buildings. My dad got some great nighttime shots, but I turned out to be more interested in getting some daytime shots yesterday, because the dominant feature in the town square is a Civil War monument with some guns on display surrounding it. I had to get a better look at that artillery!
All the guns in the square are real weapons, but two of them may not have ever been fired in anger. We’ll start with those:
10-inch Siege Mortars in Memorial Square
On each of the “skinny” sides of the square (the northwest, and southeast fronts) there are 10-inch siege mortars on display. You can see in the picture above a protrusion from the “bottom” of the weapon with a hole through it – this was used to lift the weapon from its mounts. That being said, it should be on the top – these weapons are mounted upside-down. The stats for both weapons are below:
“Northwest” Mortar
Manufacturer – S. McM. & Co.
Year Built – 1865
Serial Number – 7
Weight – 1950 lbs
Inspector – S.C.L.
“Southeast” Mortar
Manufacturer – S. McM. & Co.
Year Built – 1865
Serial Number – 23
Weight – 1959 lbs
Inspector – S.C.L.
The manufacturer of these weapons is listed on the muzzle as “S. McM. & Co.” this stands for Seyfert, McManus & Company, which made several different models of heavy siege guns for the U.S. Army in Reading, PA about 100 miles or so east of where the guns rest today. They were inspected by “S.C.L.”, or US Army Ordinance officer, Stephen Carr Lyford. Since these weapons were made in 1865, and the war ended in April of that year, I doubt these ever saw active service – they were probably made to fulfill a contract. If either of them did make it to the field, it would probably be the #7 one.
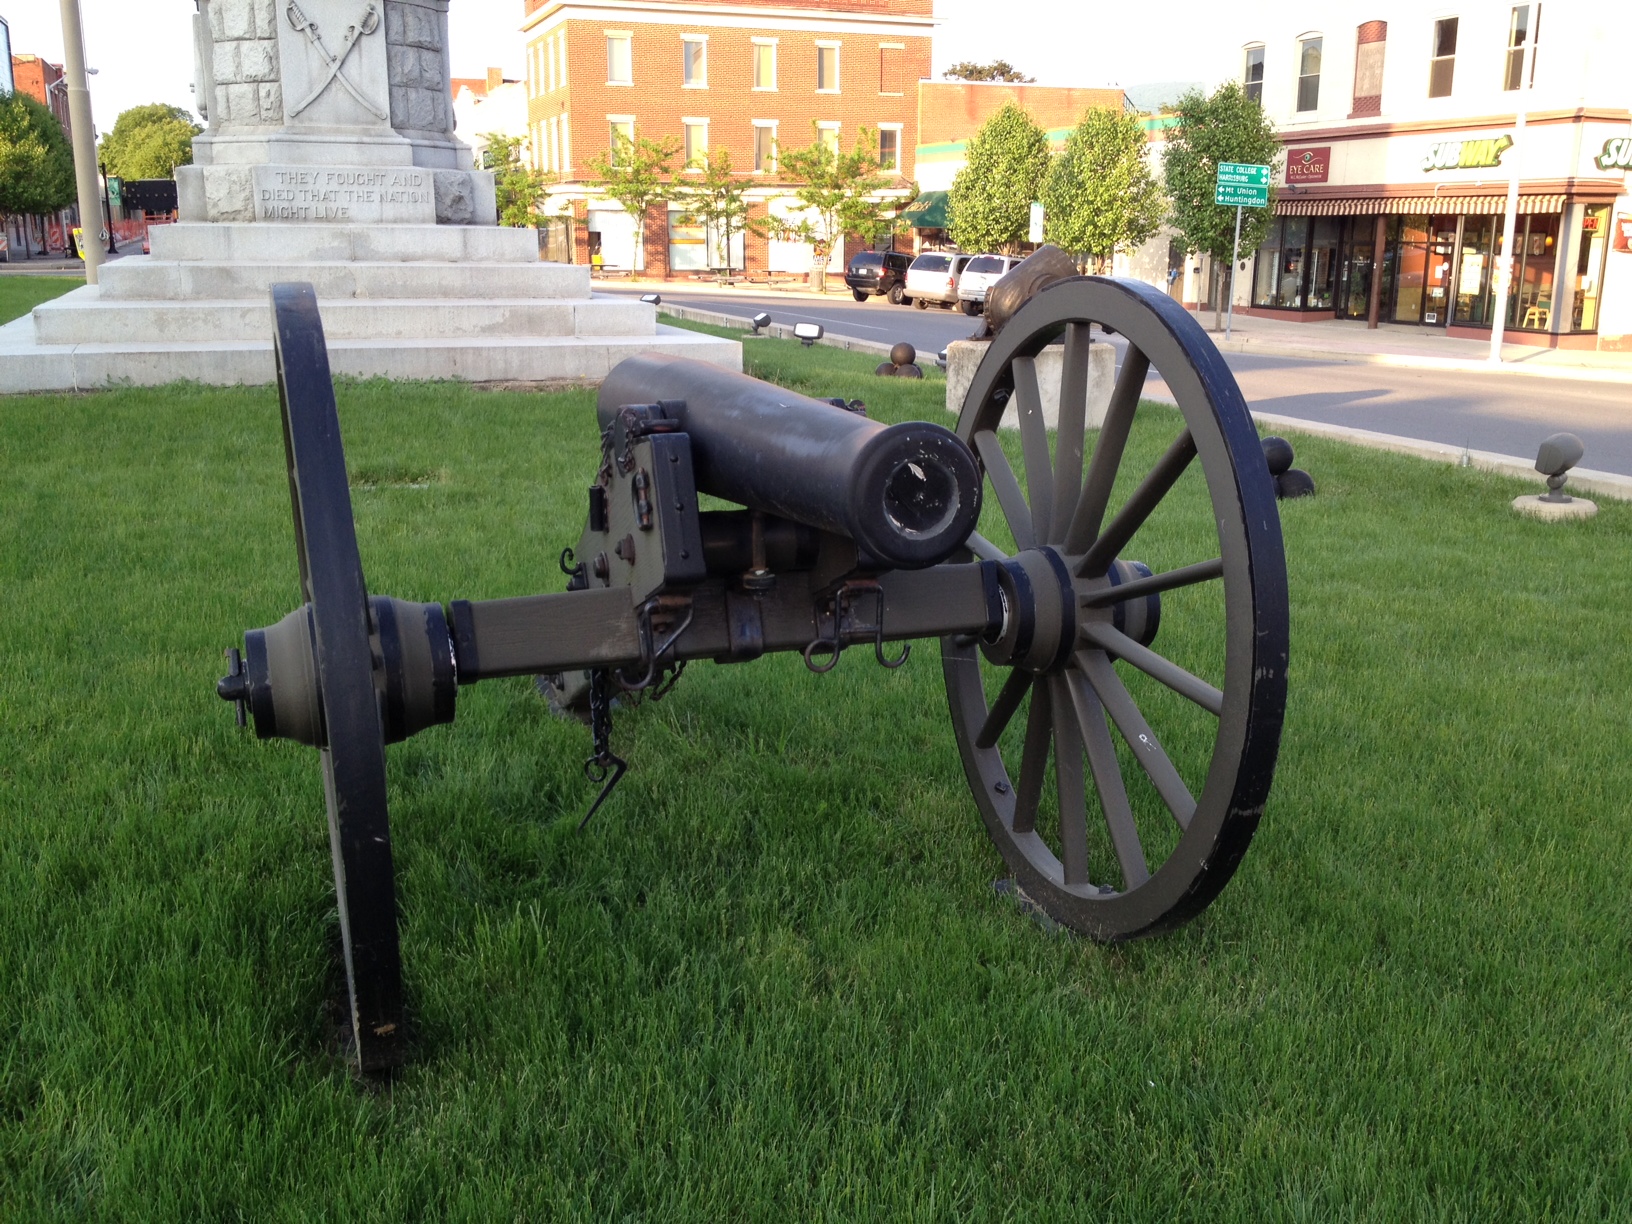
The other weapons in the square are what I was really interested in. These were 12-pounder Napoleons that someone – for some unknown reason – decided to paint black, forever destroying their beautiful bronze patina (though some streaky green shows through a little bit). This is especially sad, I’m sure, for one of these guns.
Ames Napoleon
The first of these guns is on the southwest side of the square. Despite being painted black, its markings are still plainly visible:
Muzzle Markings on the Ames
Manufacturer – A. M. Co.
Year Built – 1862
Serial Number – 58
Weight – 1224 lbs
Inspector – A. R. D.
As you can see, this gun is exciting for me because it’s certainly possible that it was at Gettysburg. There were 244 12-pounder Napoleons at Gettysburg on both sides, and since this gun was made sometime in 1862 (the Register of Inspections shows that it was inspected and accepted into Federal service on May 31, 1862), it’s absolutely a sure thing that it would have made it to the field by the summer of 1863. The only question is whether this gun went to one of the eastern or western armies. “A. M. Co.” is an abbreviation for Ames Manufacturing Company which still exists today. In fact, you may have used their more recent products in your garden. Their cannon manufacturing operations were headquartered in Chicopee, MA just north of the US Armory at Springfield. The inspector for this piece was Alexander Brydie Dyer, who was the commander of the Springfield armory at the time.
The second Napoleon, on the northeast side, is the one that makes the black paint especially sad. That one is a Revere:
Revere Napoleon
It is gut-wrenching to see this gun painted-over. Every one of the Revere Napoleons that I’ve ever seen has the most beautiful, bright, consistent green patina. It’s the mark of extremely high-quality metals and processes being used to make them. For a reason I will never understand, the people in Lewistown decided that these guns would be better off hiding their brilliant craftsmanship and masquerading as iron weapons.
Despite the abysmally ugly black paint, the markings on the Revere Napoleon here are in great shape:
Muzzle Markings on the Revere
Manufacturer – Revere Copper Co.
Year Built – 1863
Serial Number – 226
Weight – 1248 lbs
Inspector – T. J. R.
Once again, we have a gun that could have been at Gettysburg. The Register of Inspections is unclear on this particular serial number, but given the pattern of inspections from previous months, this gun was probably accepted into Federal service sometime in February of 1863, giving it enough time to have made it to the field by that summer. We still have the east or west question just like the Ames Napoleon above, too. The inspector, Thomas J. Rodman – the inventor of the Rodman Gun, and a more efficient type of gunpowder – is one of those legendary ordinance officers in the Civil War.
I’m going to try to dig into these pieces a little further to see if I can find any definitive service history for these serial numbers, but I doubt that any such document exists. We’re left to speculate by ourselves about the work these guns might have done 150 years ago.
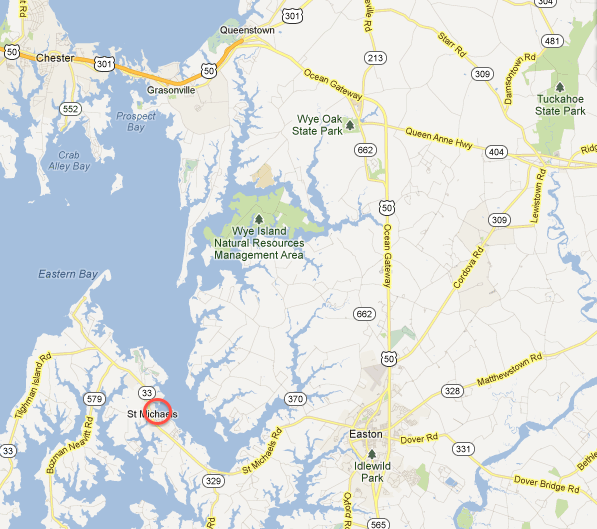
The final stop on my tour was also inspired by an entry at the HMDB: St. Michaels, MD. I saw a marker mentioning a series of attacks on the town by the British during the War of 1812, and I just had to see what that was all about.
St. Michaels, MD
After finding a parking spot in town, I took a walk around. St. Michaels seems to be a weekend getaway town for the Baltimore / DC Metro area. There are a lot of bed & breakfasts, and a ton of shops and restaurants along the main drag of Maryland Route 33. With beautiful views along the river and harbor, even a scenic boat tour available, I can definitely see the appeal.
A View of St. Michaels Harbor
As far as history goes, the town is well-stocked. It bills itself as “The Town That Fooled the British”. Legend has it, during a nighttime bombardment by the British navy, the citizens hung lit lanterns up in trees to throw off the range of the British gunnery. This tactic was apparently successful. The militia also managed to halt two attempts by British land forces to advance up the peninsula.
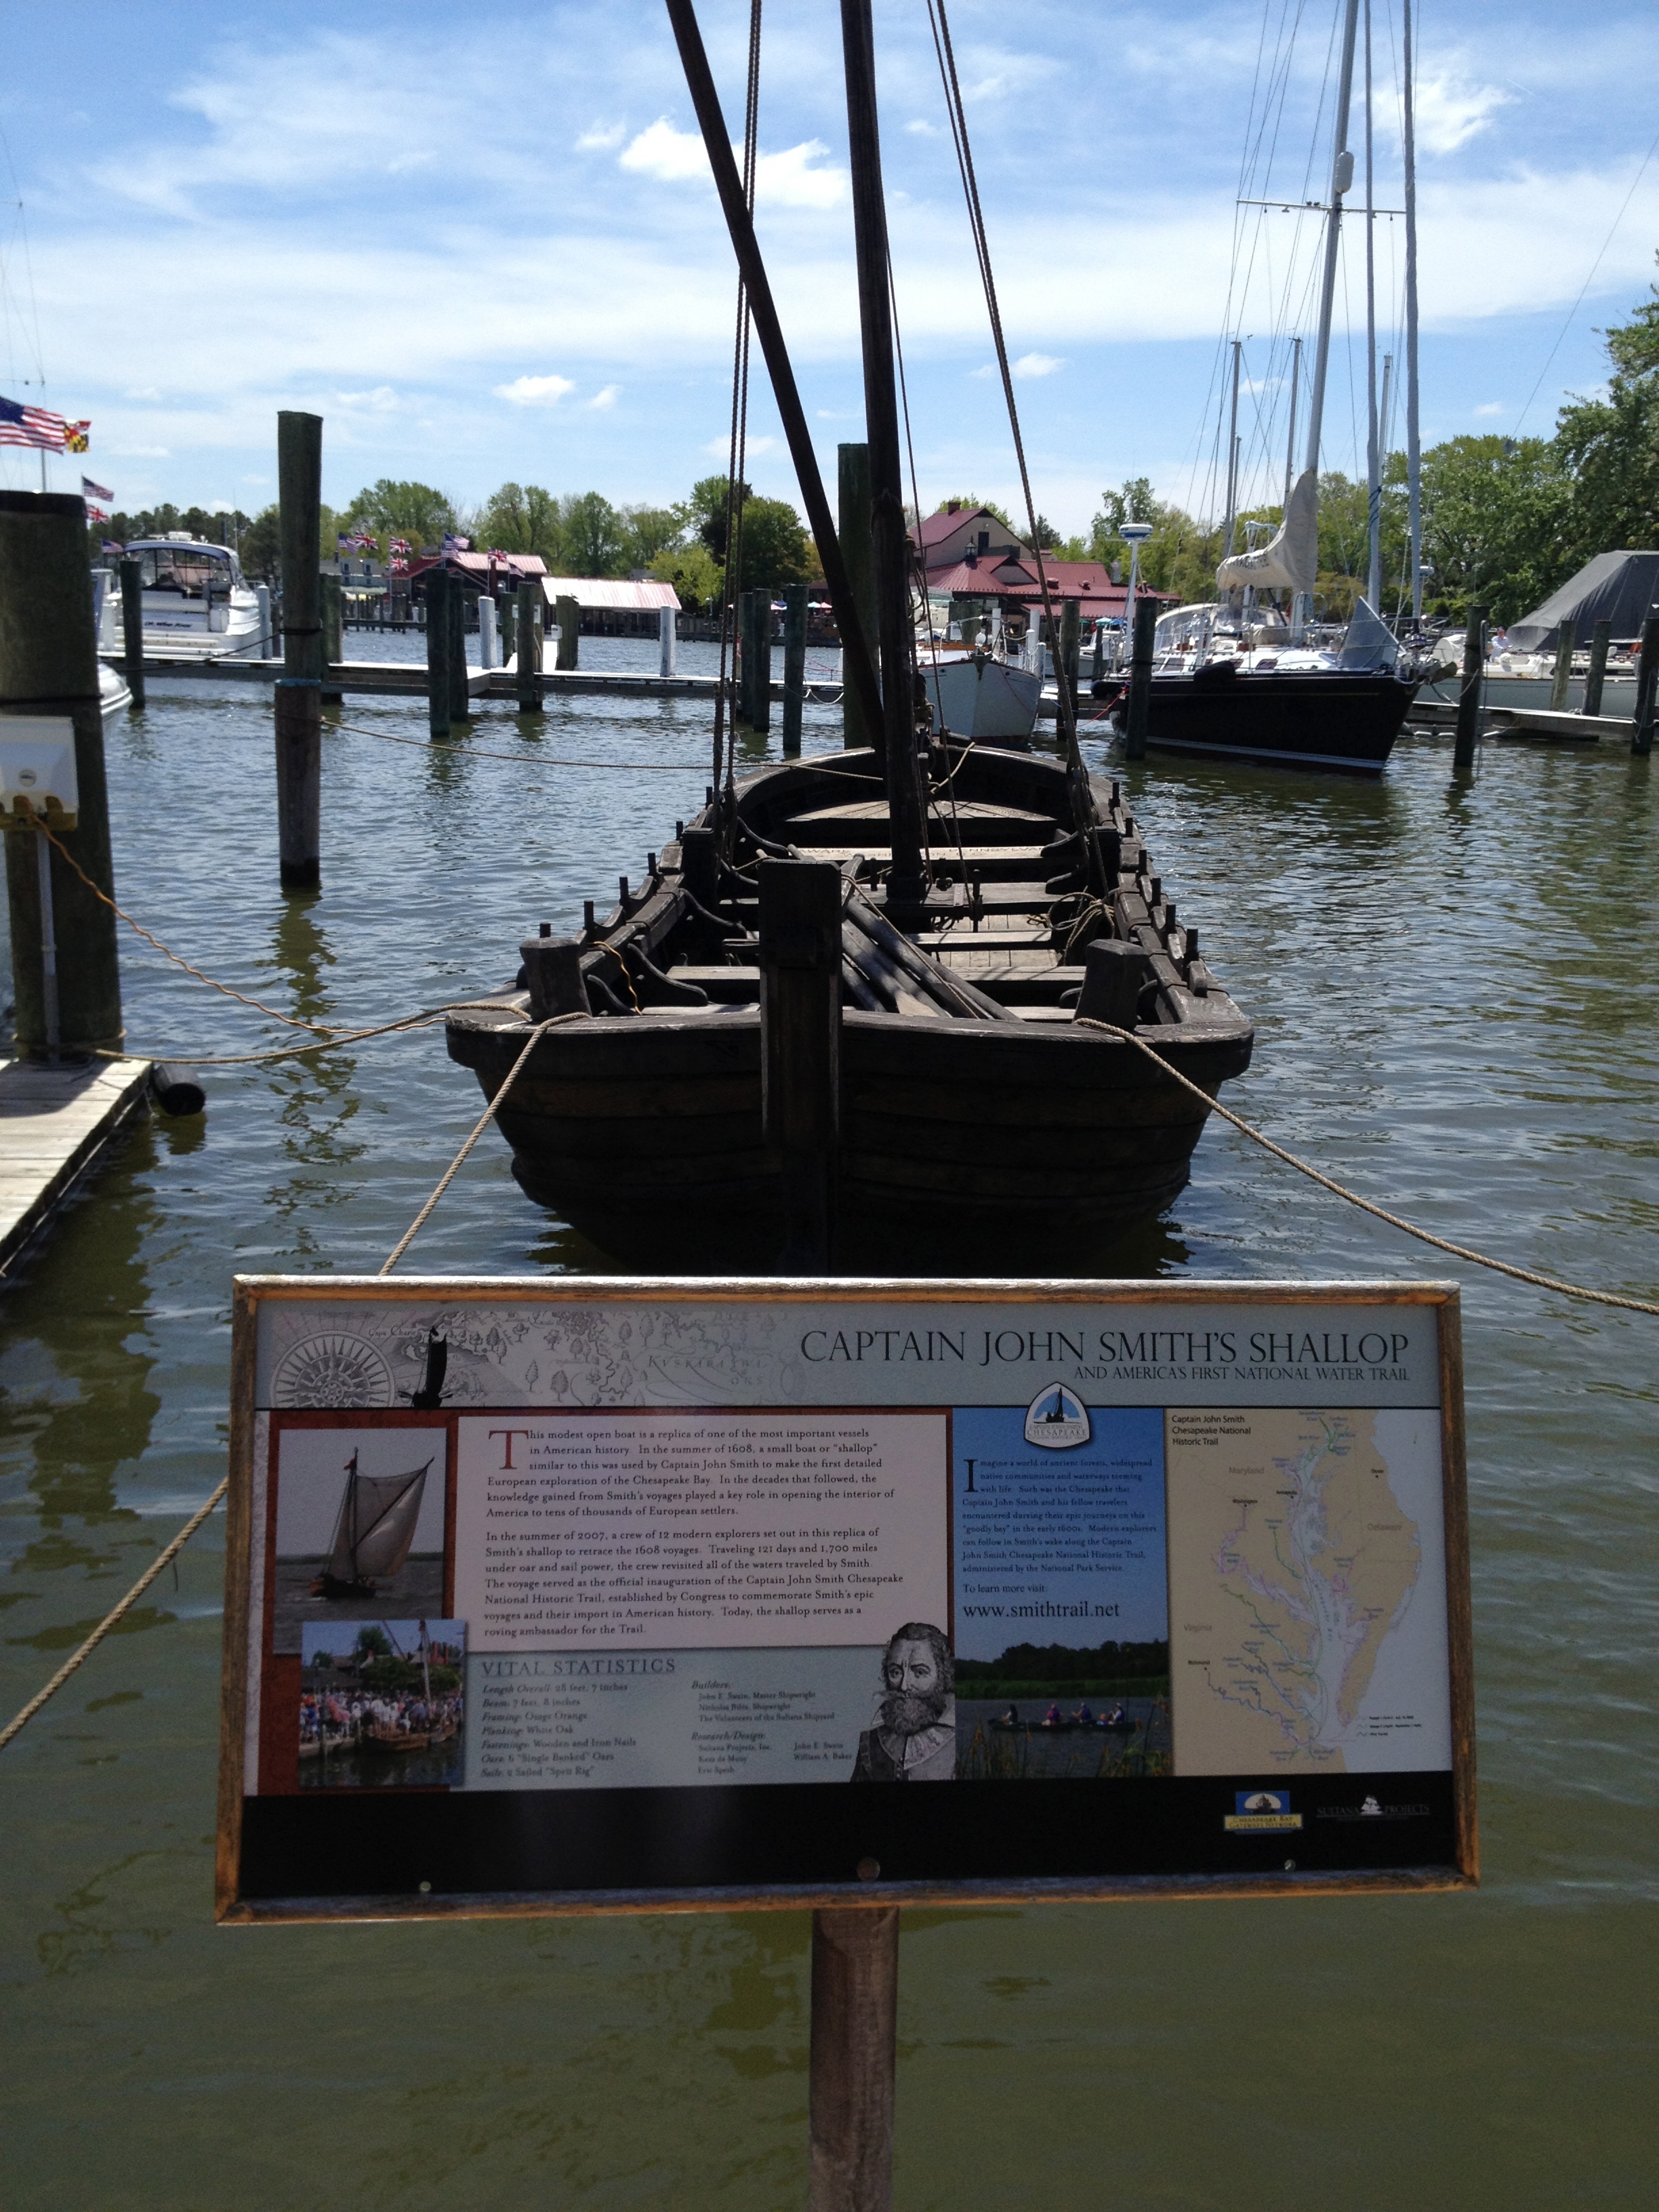
A recreation of John Smith’s Shallop used to explore the Chesapeake in 1608.
The Chesapeake Bay Maritime Museum is there, too. While I didn’t go through it myself, it did look like it had a good variety of exhibits about life on the bay. There’s a small park along the harbor near the museum where a model of the type of boat that John Smith used to do the initial explorations of the Chesapeake Bay is moored. This particular boat was built for the 400th anniversary of the event 5 years ago, and retraced Smith’s historic route in celebration.
I walked down through town toward the town square – which doesn’t seem to be much of a “square” at all, actually – in search of an artillery piece that was used in the defense of the town back in 1813. Once I got there, I stumbled on to the St. Michaels Museum which was open for the first time this season. There was an assortment of small exhibits – mostly pieces of equipment from everyday life used by people in the area. The lady working as the hostess on Saturday was extremely welcoming and knowledgeable about the area. They expect this year to be a big one for them – with the bicentennial of the battles on the horizon this summer.
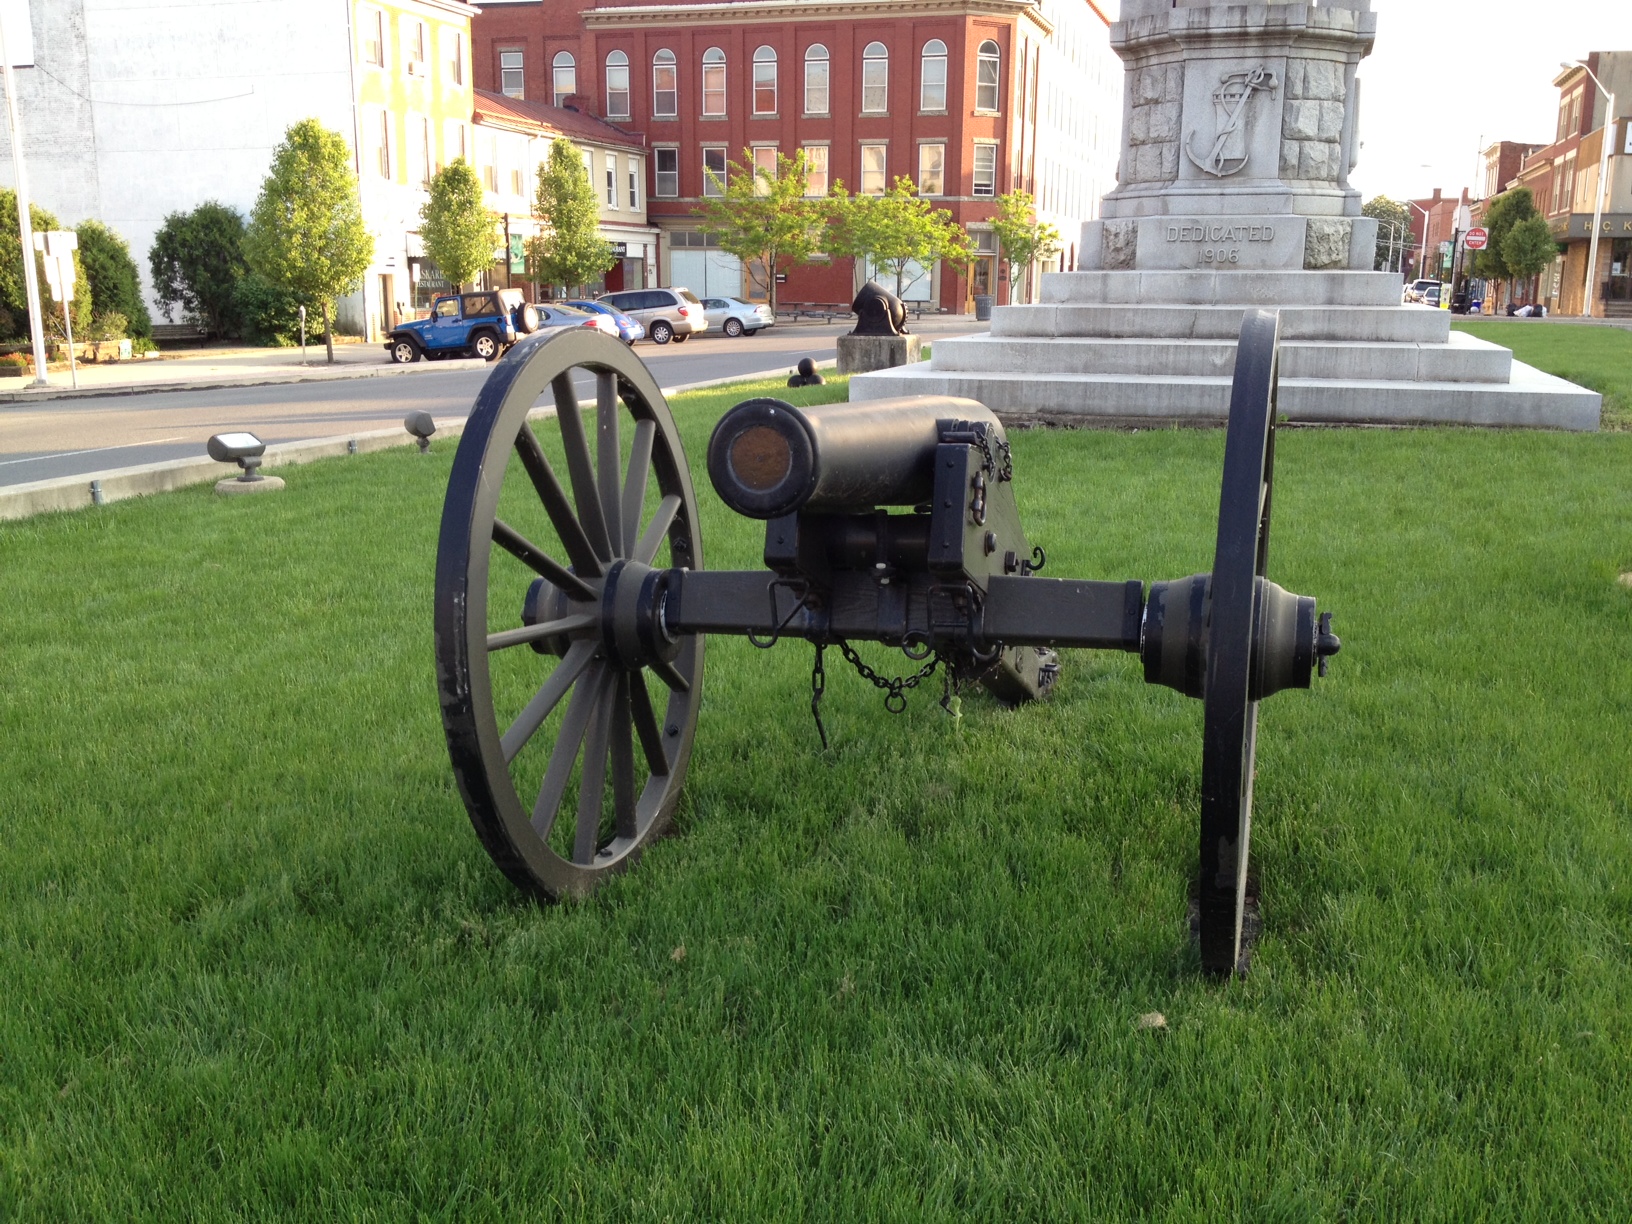
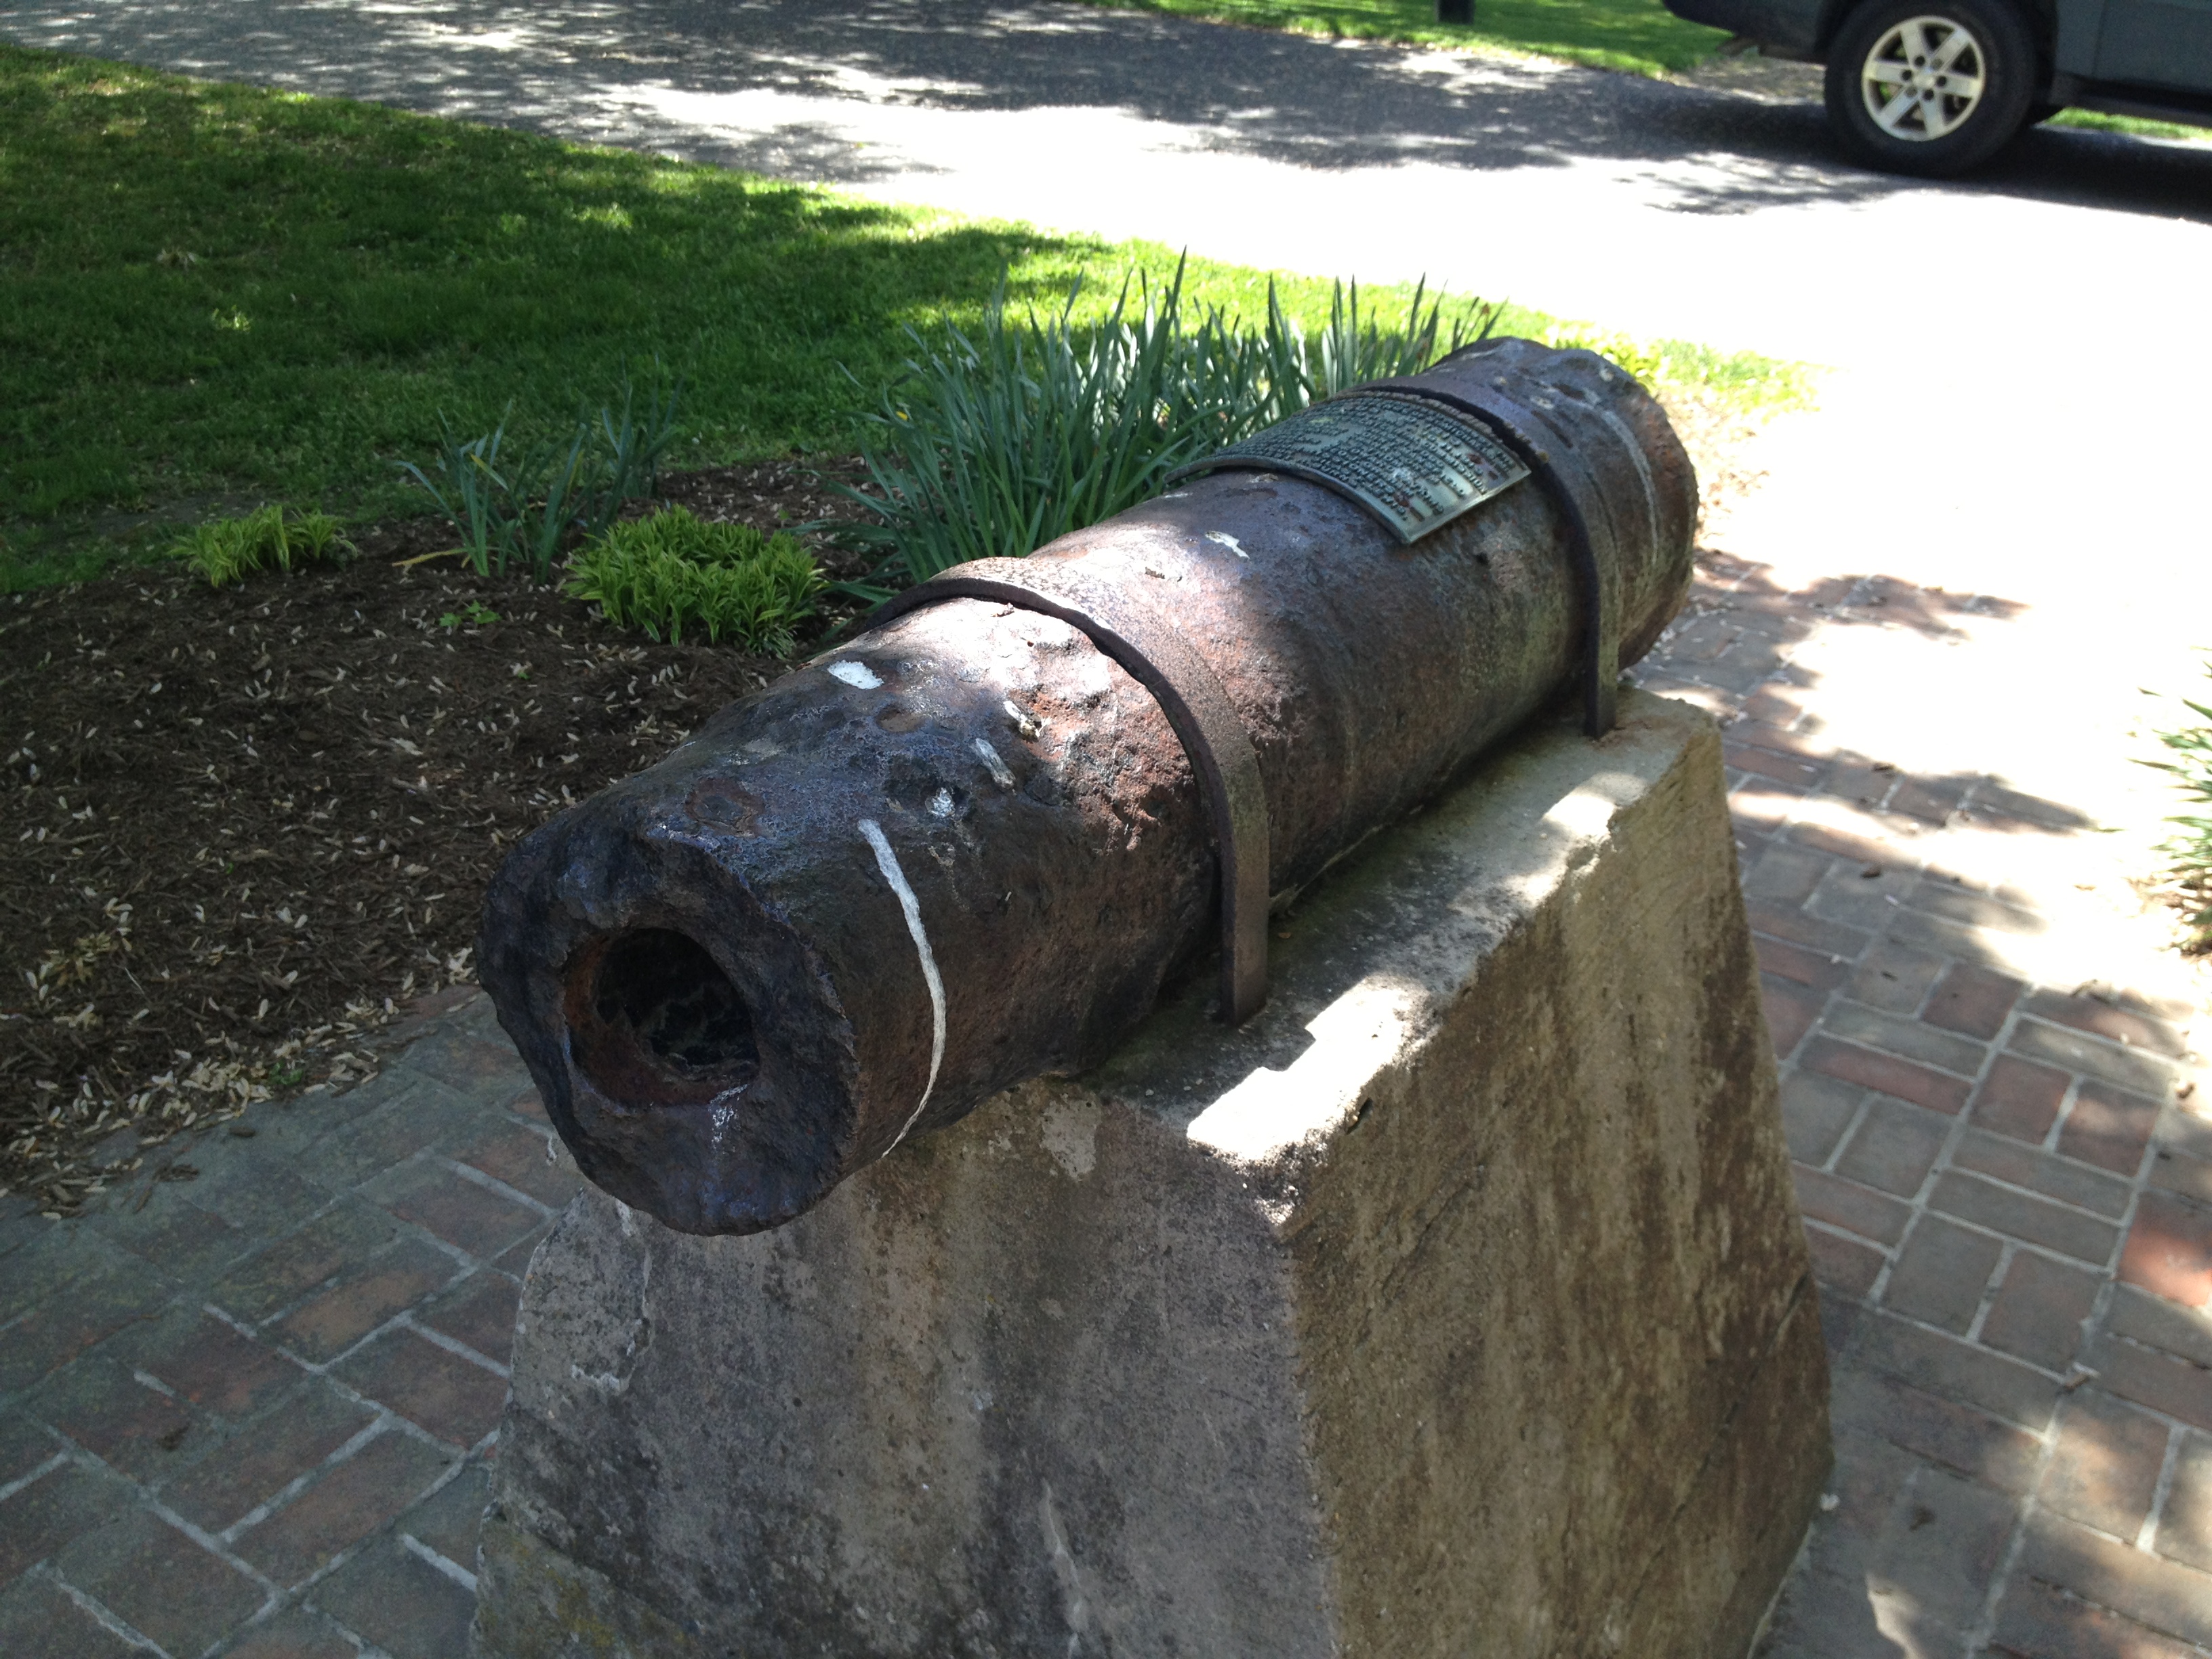
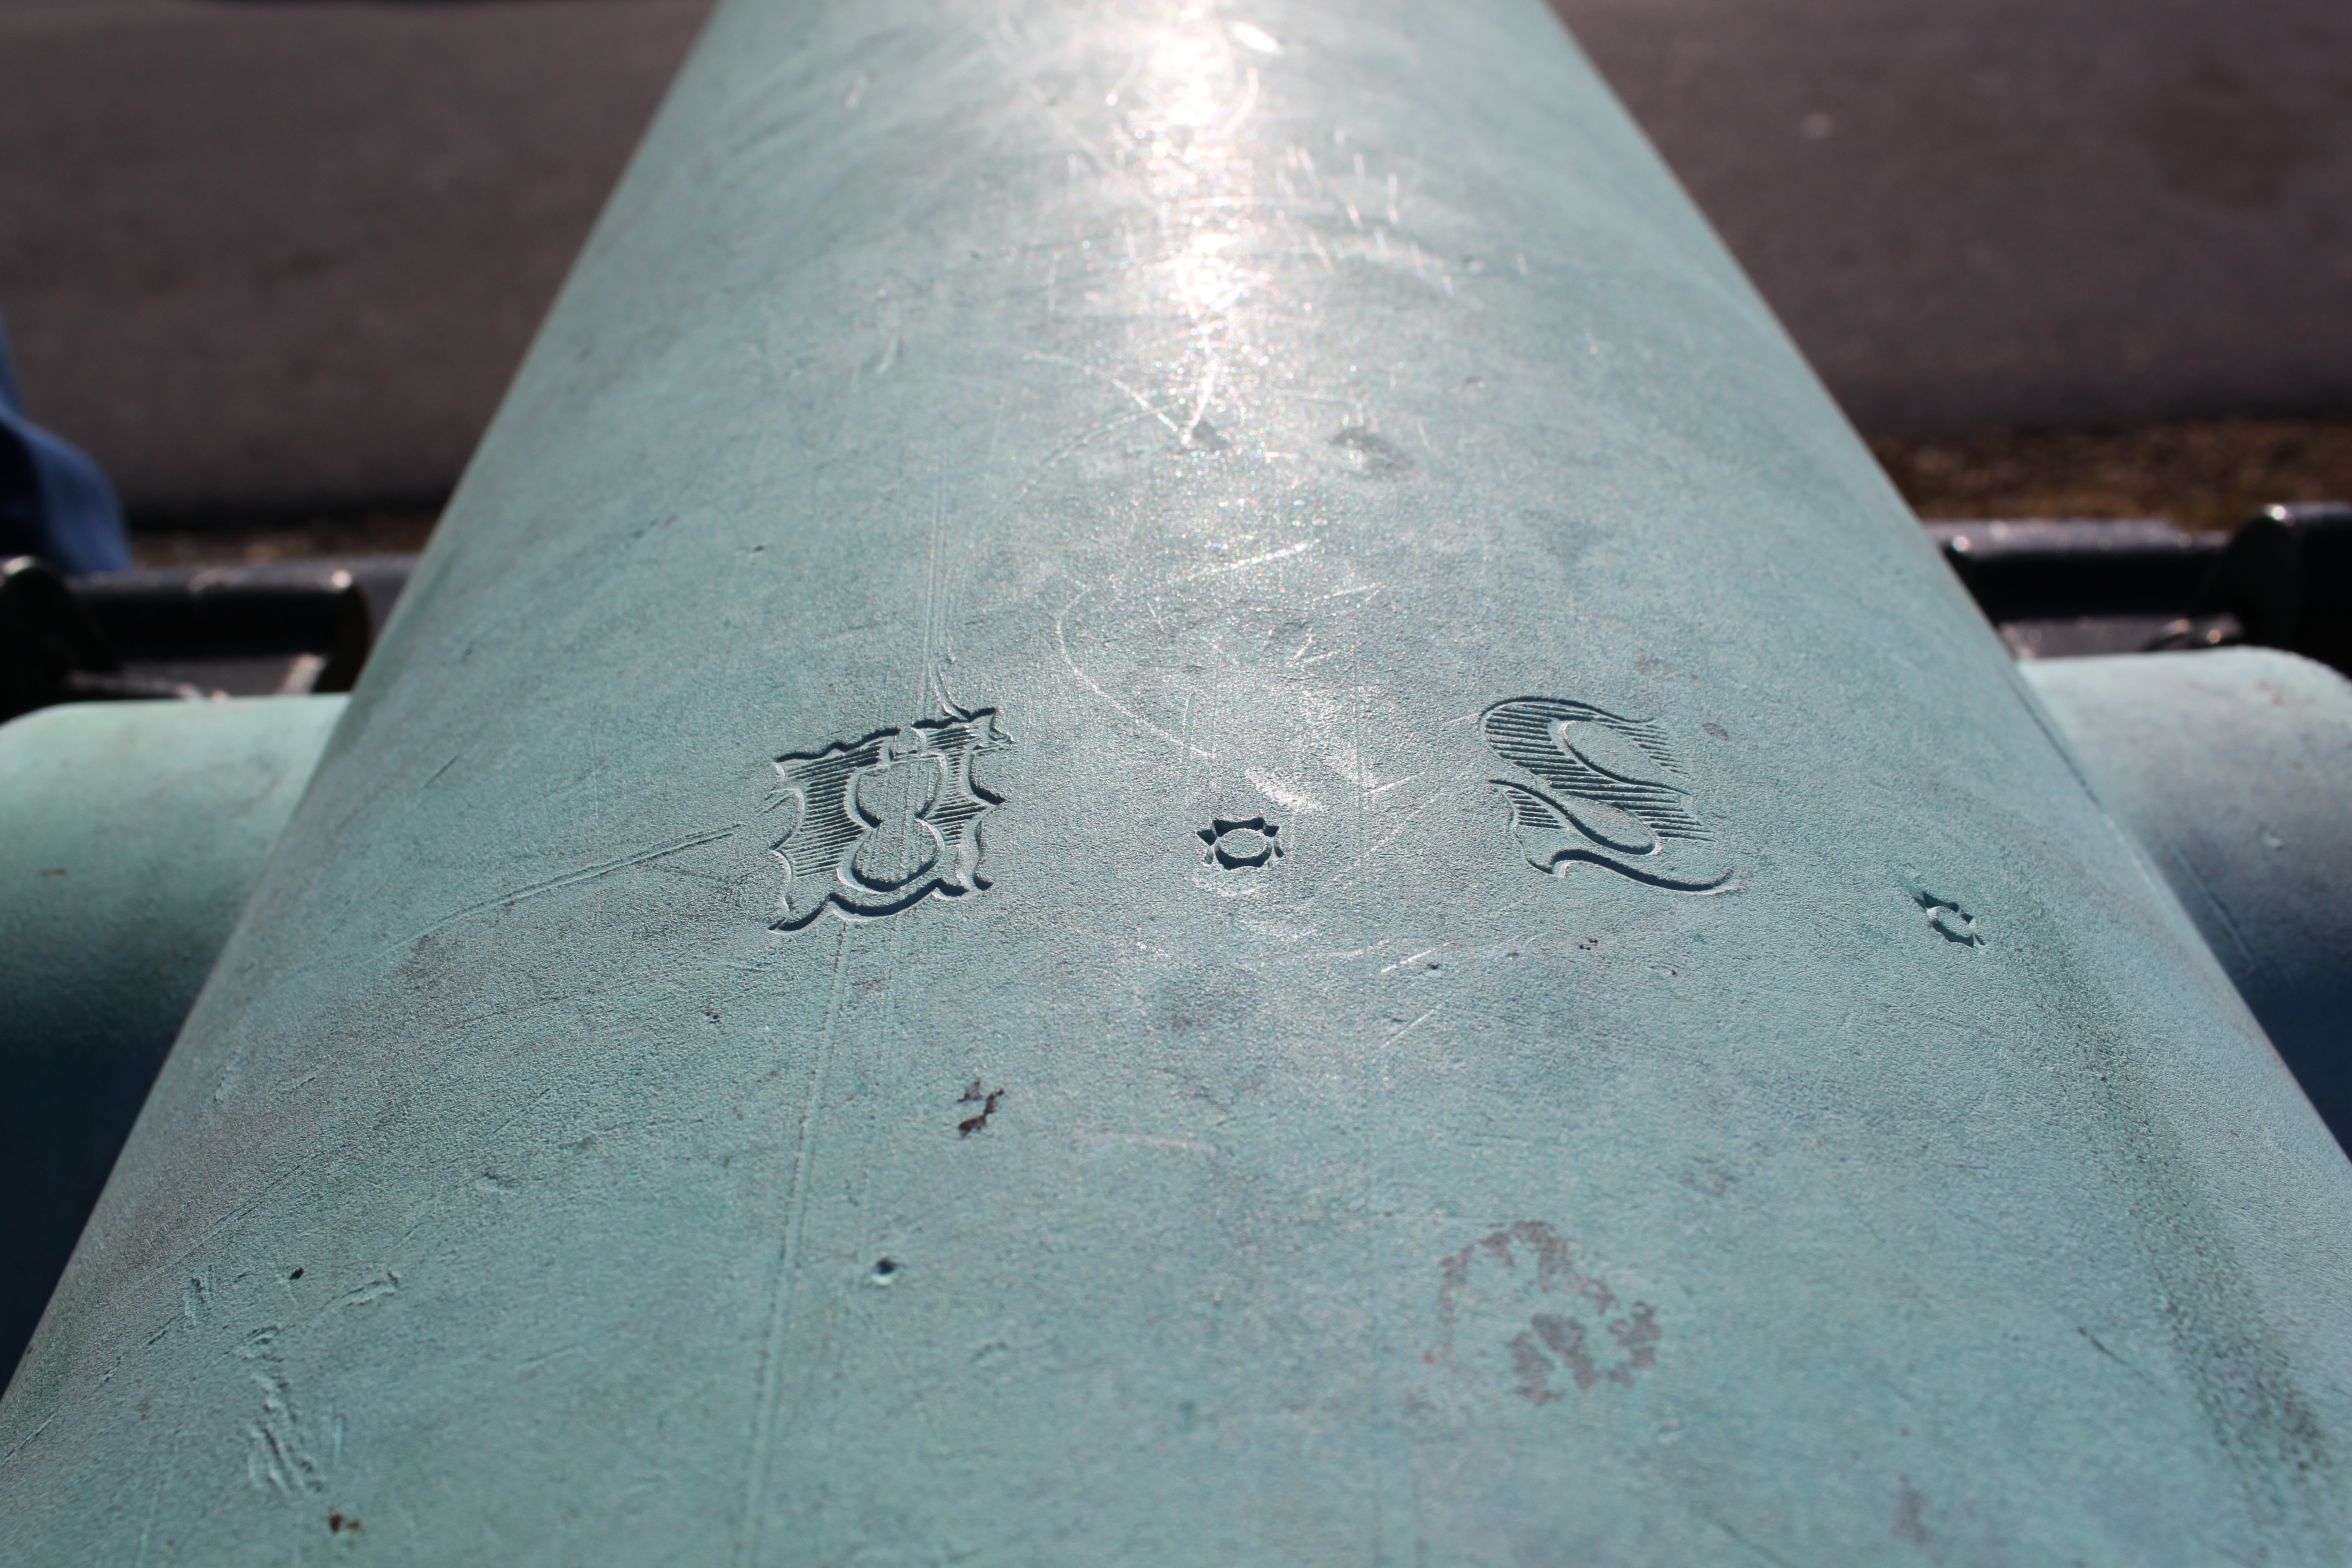
6-pounder cannon used in the defense of St. Michaels, MD.
Of course the other draw in the town square is the cannon used in the defense of the town back on August 10, 1813. The weapon was placed here in 1913 during the centennial celebration of the battle. It’s a 6-pounder – so by my Civil War artillery standards, it’s a pea-shooter – and in extremely rough shape as you can probably tell by the photo. That being said, it may be the oldest artillery piece I’ve ever seen. The oldest cannon on the field at Gettysburg is a howitzer that was manufactured in 1837, so this piece has my personal record beat by probably at least 30 years. There’s an almost identical one across the street from the Revolution (so presumably even older), and in just as rough a condition.
There is one more point of interest on the square, pointed out by the nice lady at the museum:
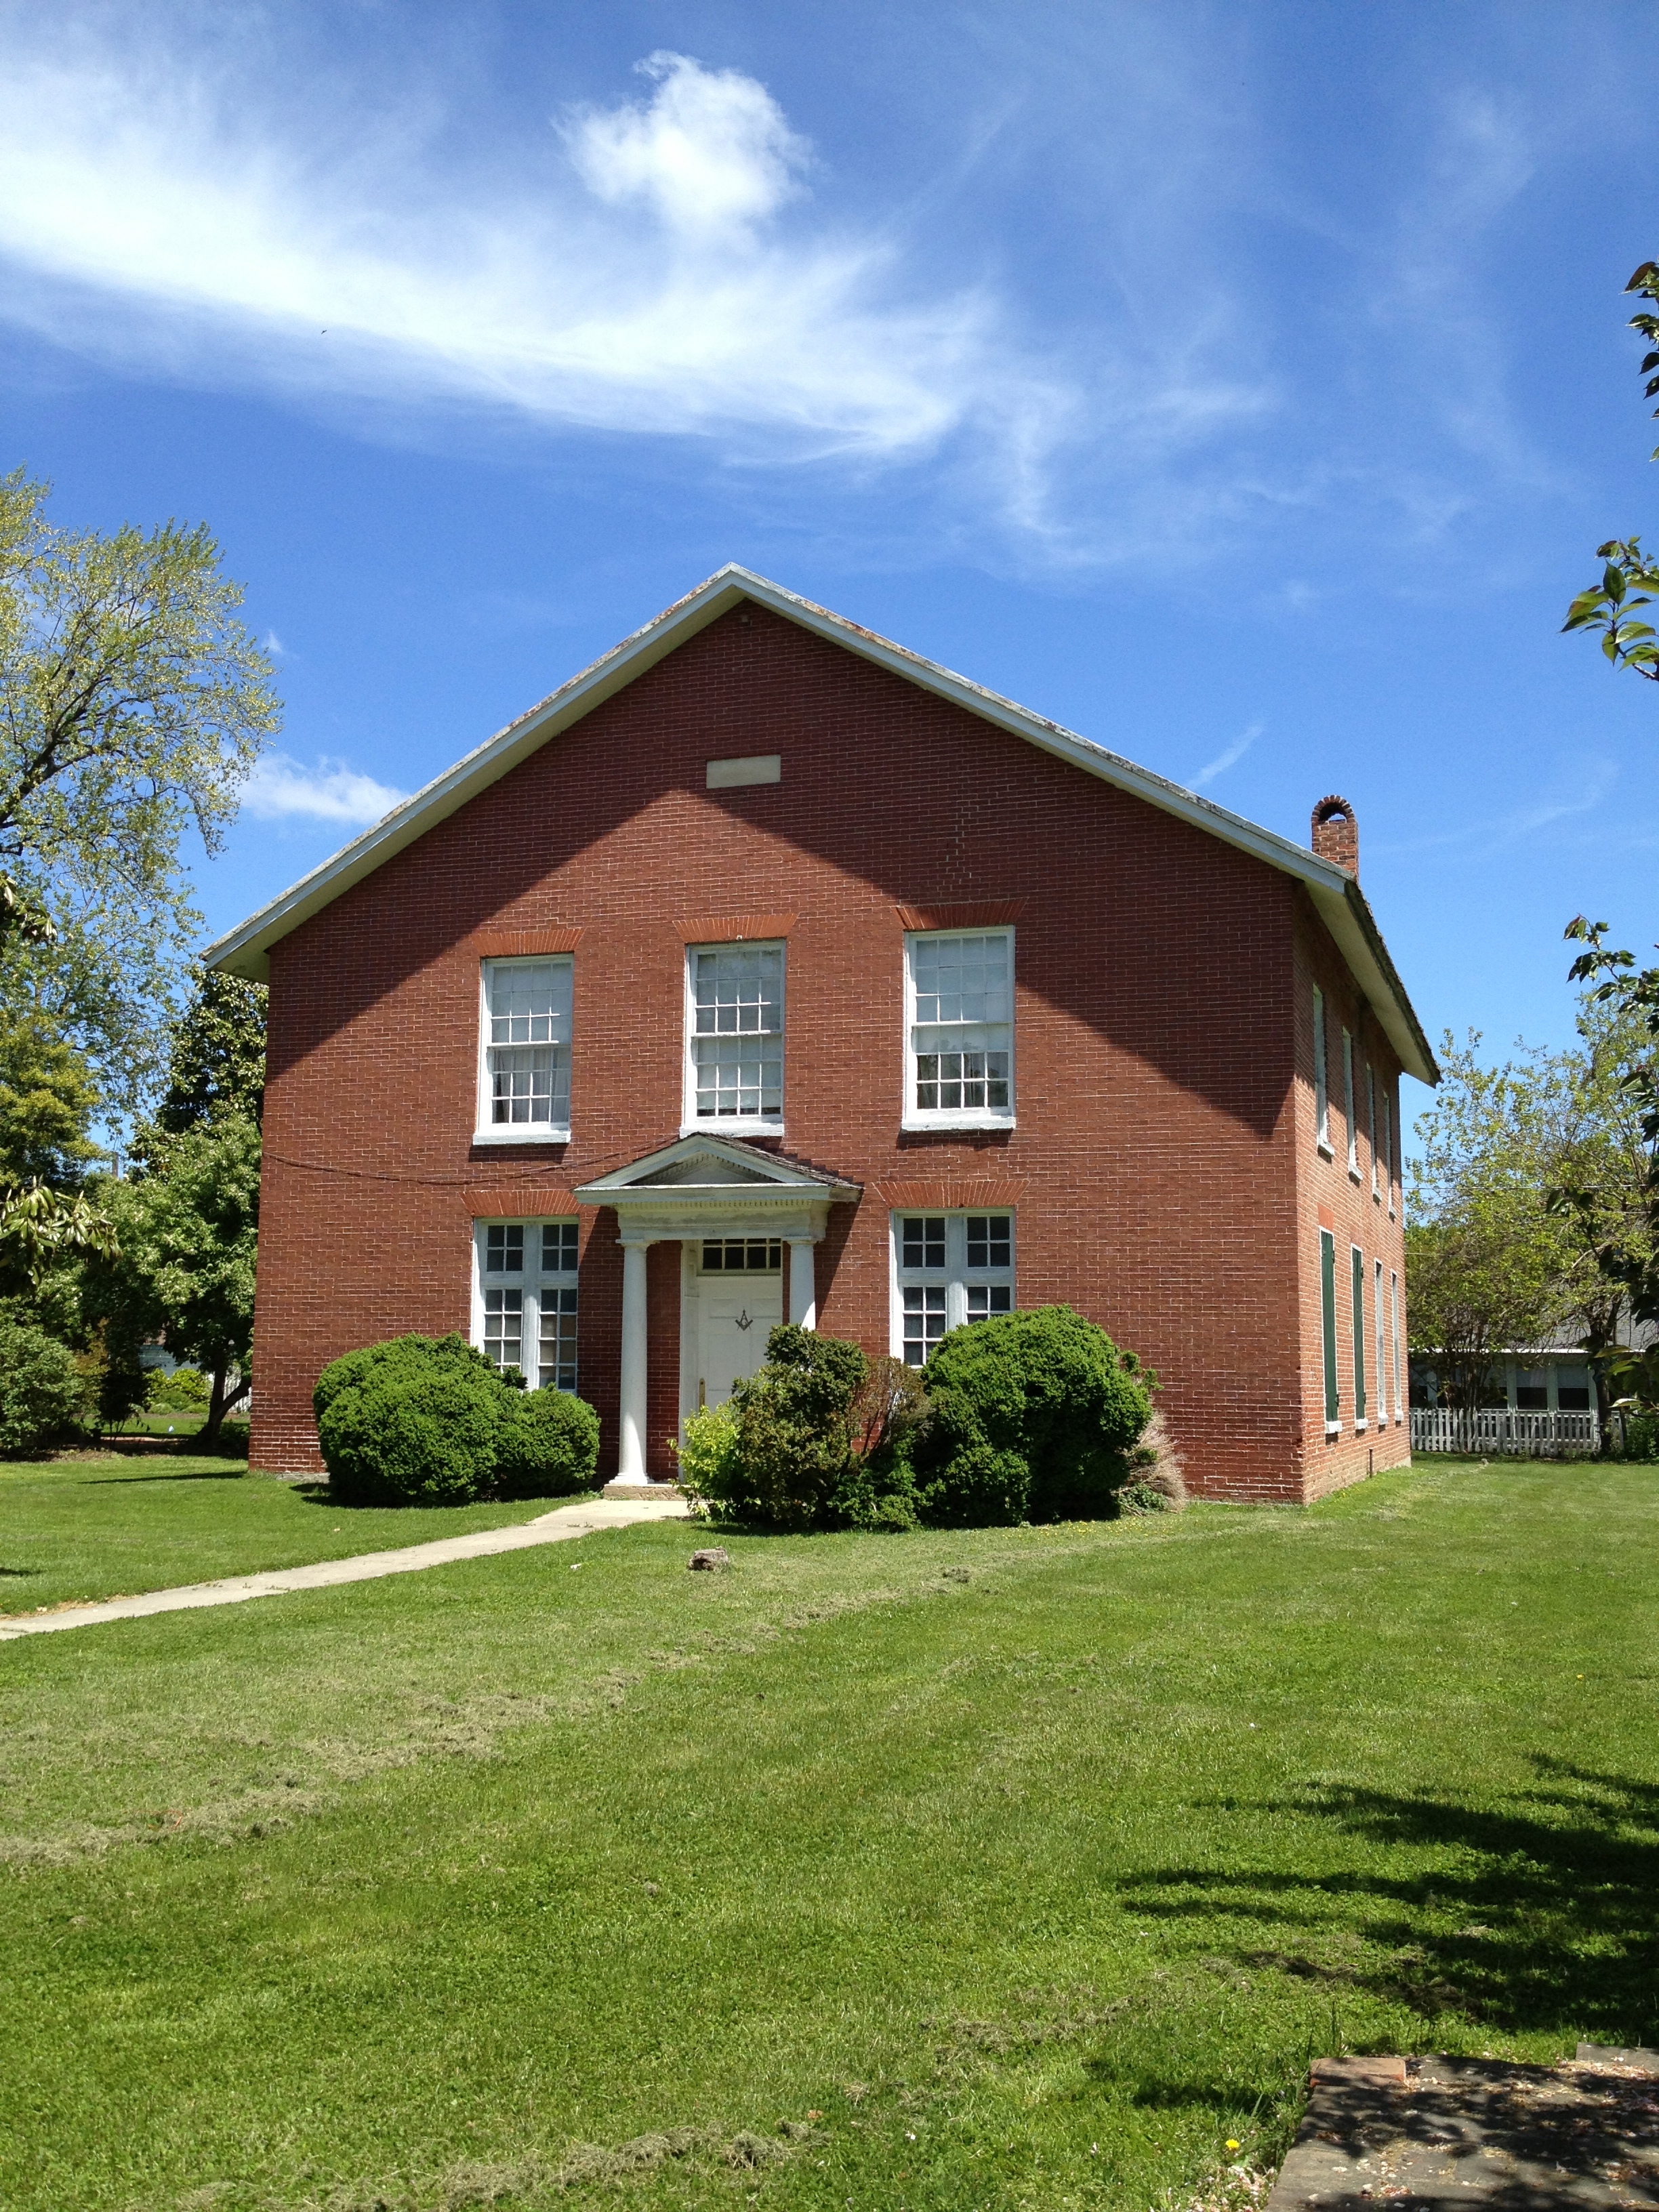
Frederick Douglass went to church here for a time.
Apparently Frederick Douglass spent a little time in St. Michaels before he moved north to escape slavery. The building above, currently used by the Masons, was a church in Douglass’ day, and he attended services in the upstairs room. And with that discovery, the circle was complete on my day of historical tourism.
I have to say, I was pleasantly surprised with the amount I was able to squeeze in. There’s a lot to explore over there, and it has raised my interest in learning more about the history of slavery in Maryland. There’s certainly a rich vein there – especially on the eastern shore.
So get out there and see what you can find in your own back yard. And keep an eye out for those roadside markers – you never know what you’ll discover!


