Civil War Artillery: Basics
One of the things that is often over-looked (or mistreated, in my opinion) by most visitors to a battlefield is the artillery pieces that are on display. In most cases, these are actual weapons used during that period and fired in anger at the opposing force. They exist today because of careful preservation efforts and we’d like to keep them around for generations to come. This means that you probably shouldn’t let your kids treat them like playground equipment, OK?
Well, I’m not here to lecture you – at least not about your parenting. I’m here to talk about the guns themselves. Mini-rant over.
Gettysburg National Military Park has one of the best collections of Civil War-era artillery anywhere. While there are some fakes among the guns on the field (which have their own interesting history), most of the collection consists of the real thing. In this post, I’d like to focus on laying out some of the basics of Civil War artillery so that you too can become as much of a nerd for this stuff as I am!
First, let’s examine some of the different kinds of guns that were used during the Civil War.
As you may know, the Civil War marked several turning points in warfare. It was certainly a transitional period for tactics, but also for the technology employed in weapons and their manufacture. Some of these advances didn’t catch on right away, but you can see the beginnings of modern artillery in some of the pieces from this era.
The most visually-obvious advance was the use of metals other than bronze in the casting of cannons. Bronze was still in heavy use in the construction of weapons like the Model 1857 12-pounder Light Field Gun (the “Napoleon”), and in the Howitzers of the day, but iron was beginning to make an impact in weapons like the Parrott Rifle (mostly cast iron, with a wrought iron reinforce), and the 3-inch Ordnance Rifle (made entirely from wrought iron). These weapons were very strong and lighter-weight than their bronze counterparts. They were cheaper to produce (especially the Parrott design), and also did a much better job with another big innovation: rifling.
So we’re able to develop a basic identification guideline already: if a weapon is green (or greenish) it is made of bronze. If it is black, it is made of iron. The iron guns are ALL rifled (UPDATE: Well, maybe not). Very few of the bronze ones are.
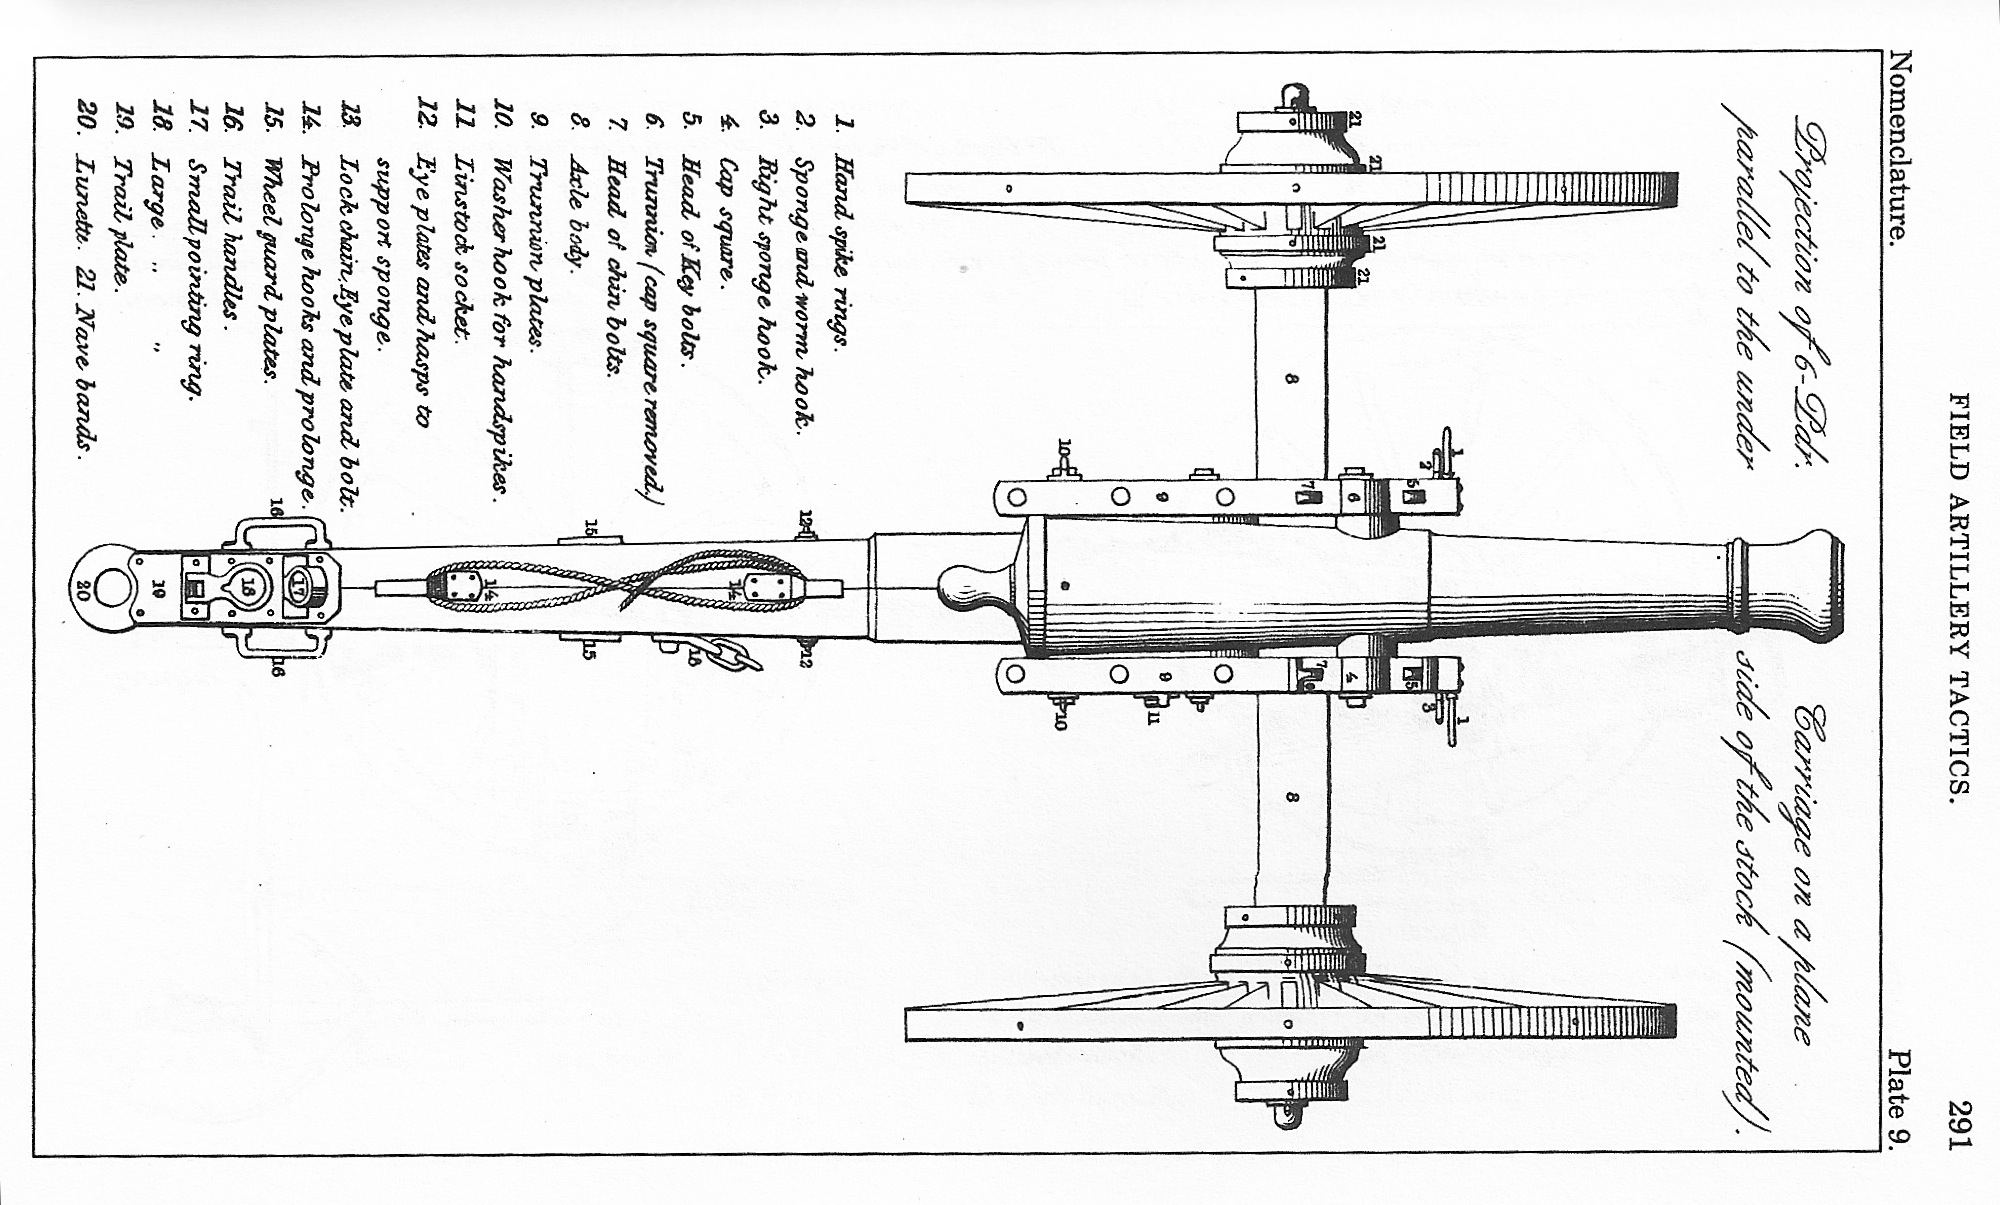
Now let’s have a look at some of the basic anatomy of these weapons:
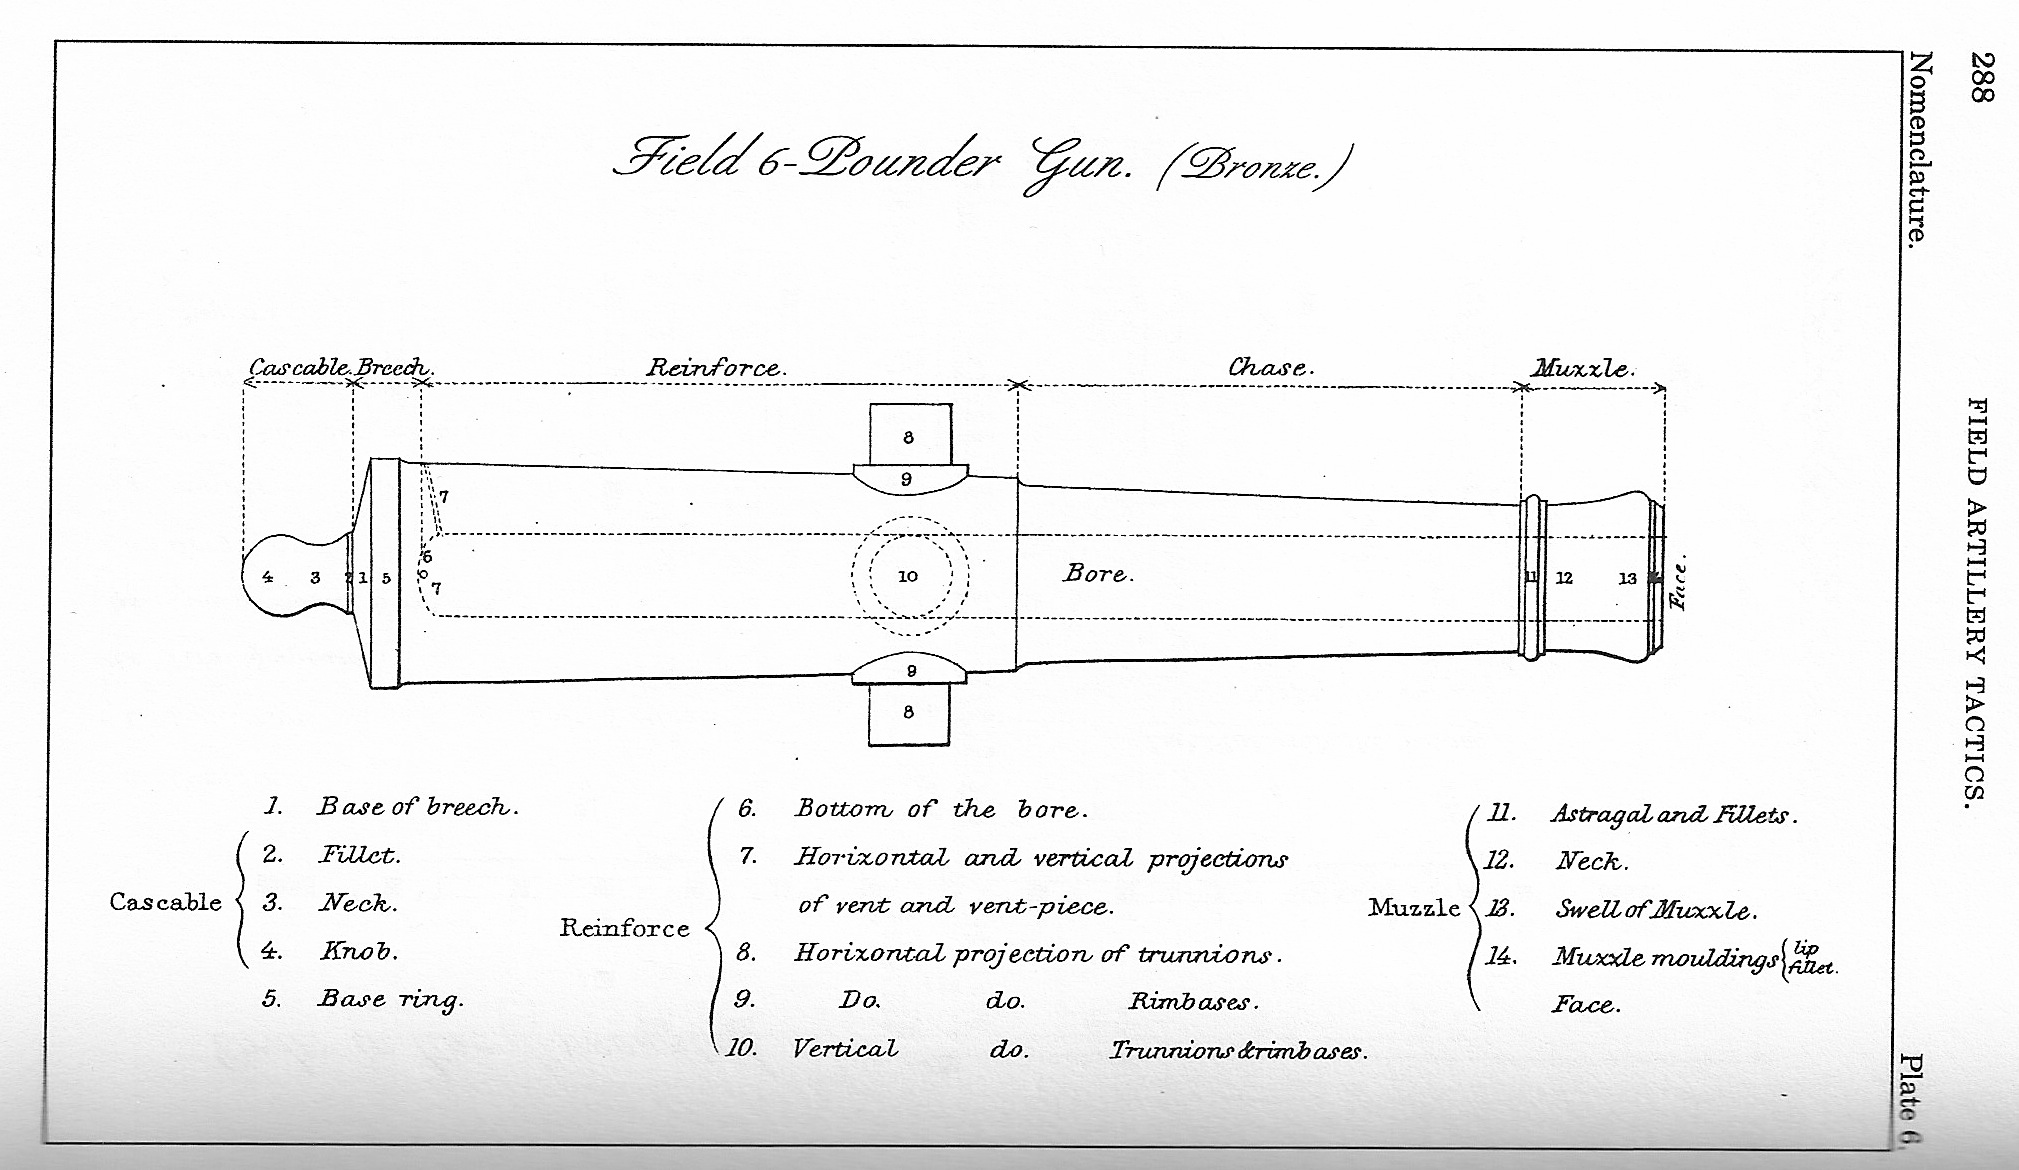
While this diagram specifically refers to a 6-pounder gun (which was basically obsolete by the time of the Civil War), the same terms apply to all the other weapons of the period.
The important parts to note here are the breech, the muzzle, and the trunnions. These are the places where a cannon will bear marks that will help you to identify it. Information stamped onto a piece might include it’s manufacturer, serial number, weight, year of manufacture, and inspector’s initials. No visible markings on the piece is a pretty clear indication that it is a fake.
Let’s have a look at an example from Gettysburg:
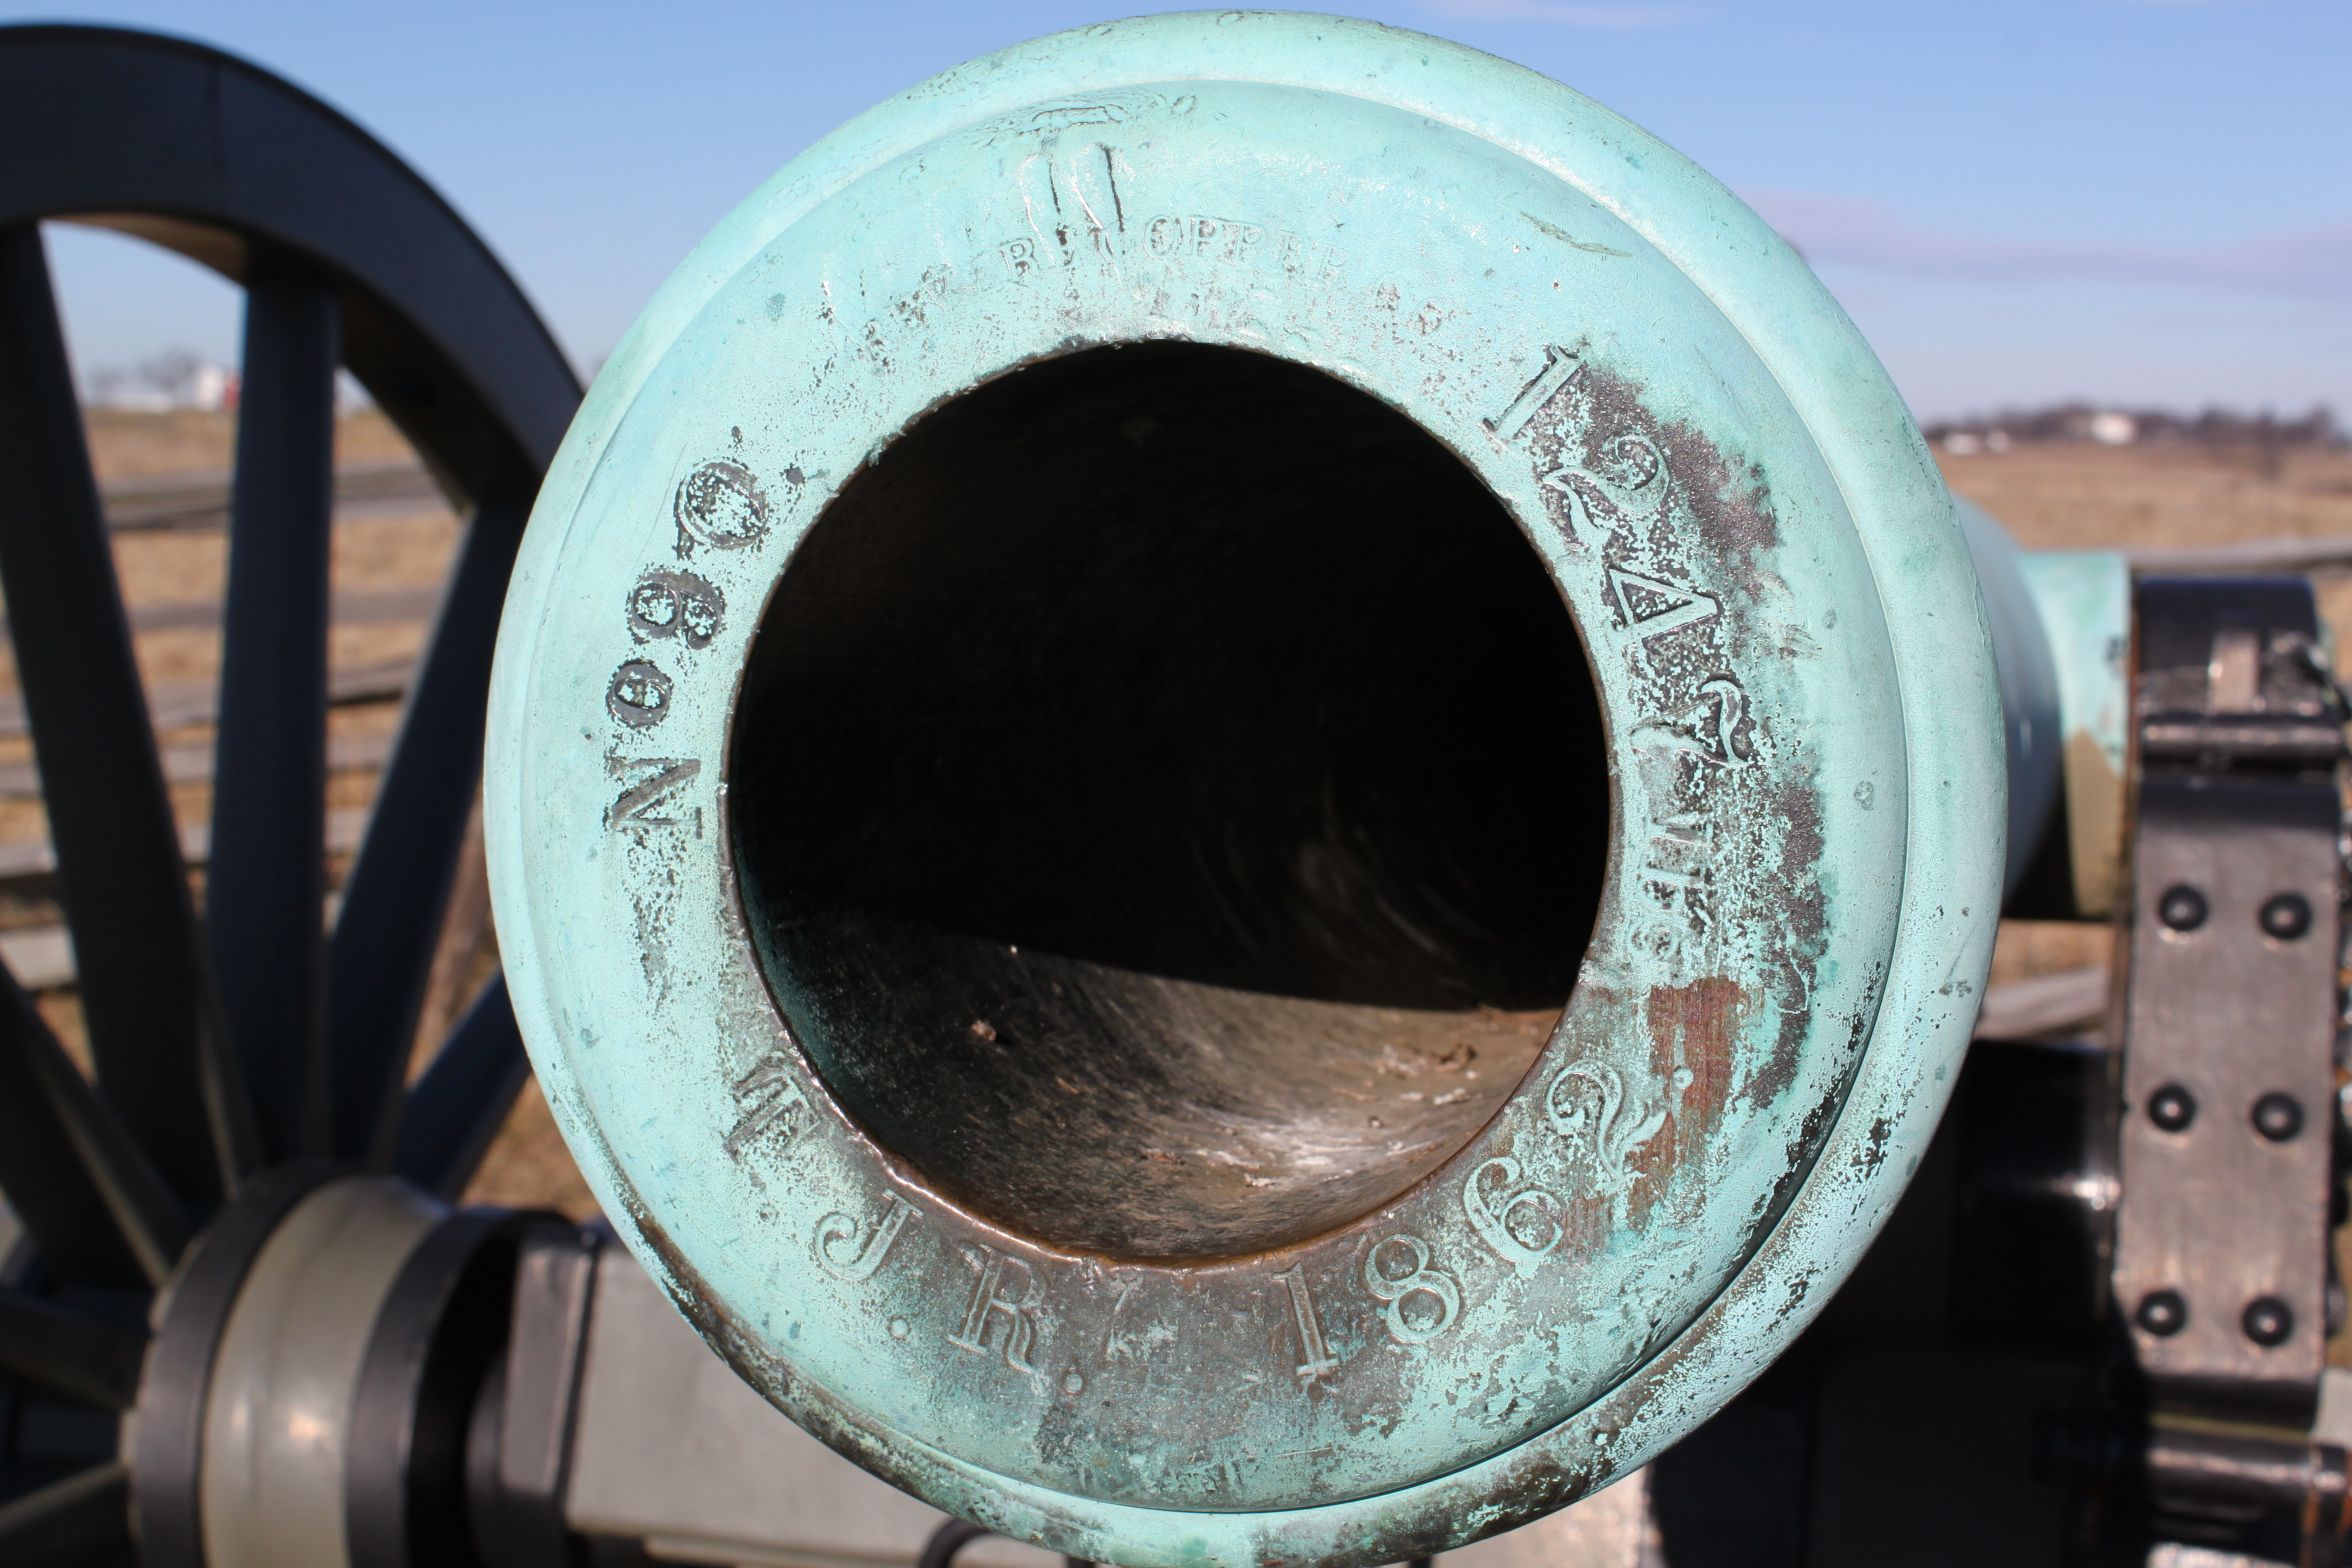
On the left, the “No. 90” refers to this weapon being serial number 90. The serial numbers were unique to each manufacturer, so there may be as many as 6 or 7 U.S. number 90s. Sometimes the serial numbers were also done by orderer. This is especially true of the Parrott rifles. There was a “No. 1” that was made for the U.S. Army, AND a “No. 1” that was made for the Pennsylvania militia. It can get rather confusing.
Below the “No. 90” marking, are the initials “T.J.R” – this is the inspector’s mark (in this case, Thomas Jefferson Rodman) who ensured that the gun was fit for service. If it was, a “U.S.” mark was applied on the top of the barrel, near the trunnions. Moving counter-clockwise, we come to the “1862” mark, referring to the year this weapon was cast. The next marking, “1247 lbs.” obviously refers to the weight of the gun tube itself (not the full weight with the carriage and all).
On this example, the manufacturer’s mark is at the top of the muzzle:

It says “Revere Copper Co.” for those of you who have trouble reading it. Yes, it’s THAT Revere. While we all know him for his revolutionary exploits (including a certain late-night ride), that was not his entire life story, of course. His real business was silversmithing and in the post-revolutionary period he did so well for himself that he expanded his business into copper, brass, and iron works. While not the largest supplier of artillery, there are a few examples of his company’s work at Gettysburg, and to my eye, they are the ones with the highest level of craftsmanship. They seem to always have a very bright and consistent green color and just take a look at the “U.S.” stamp on top of the tube:
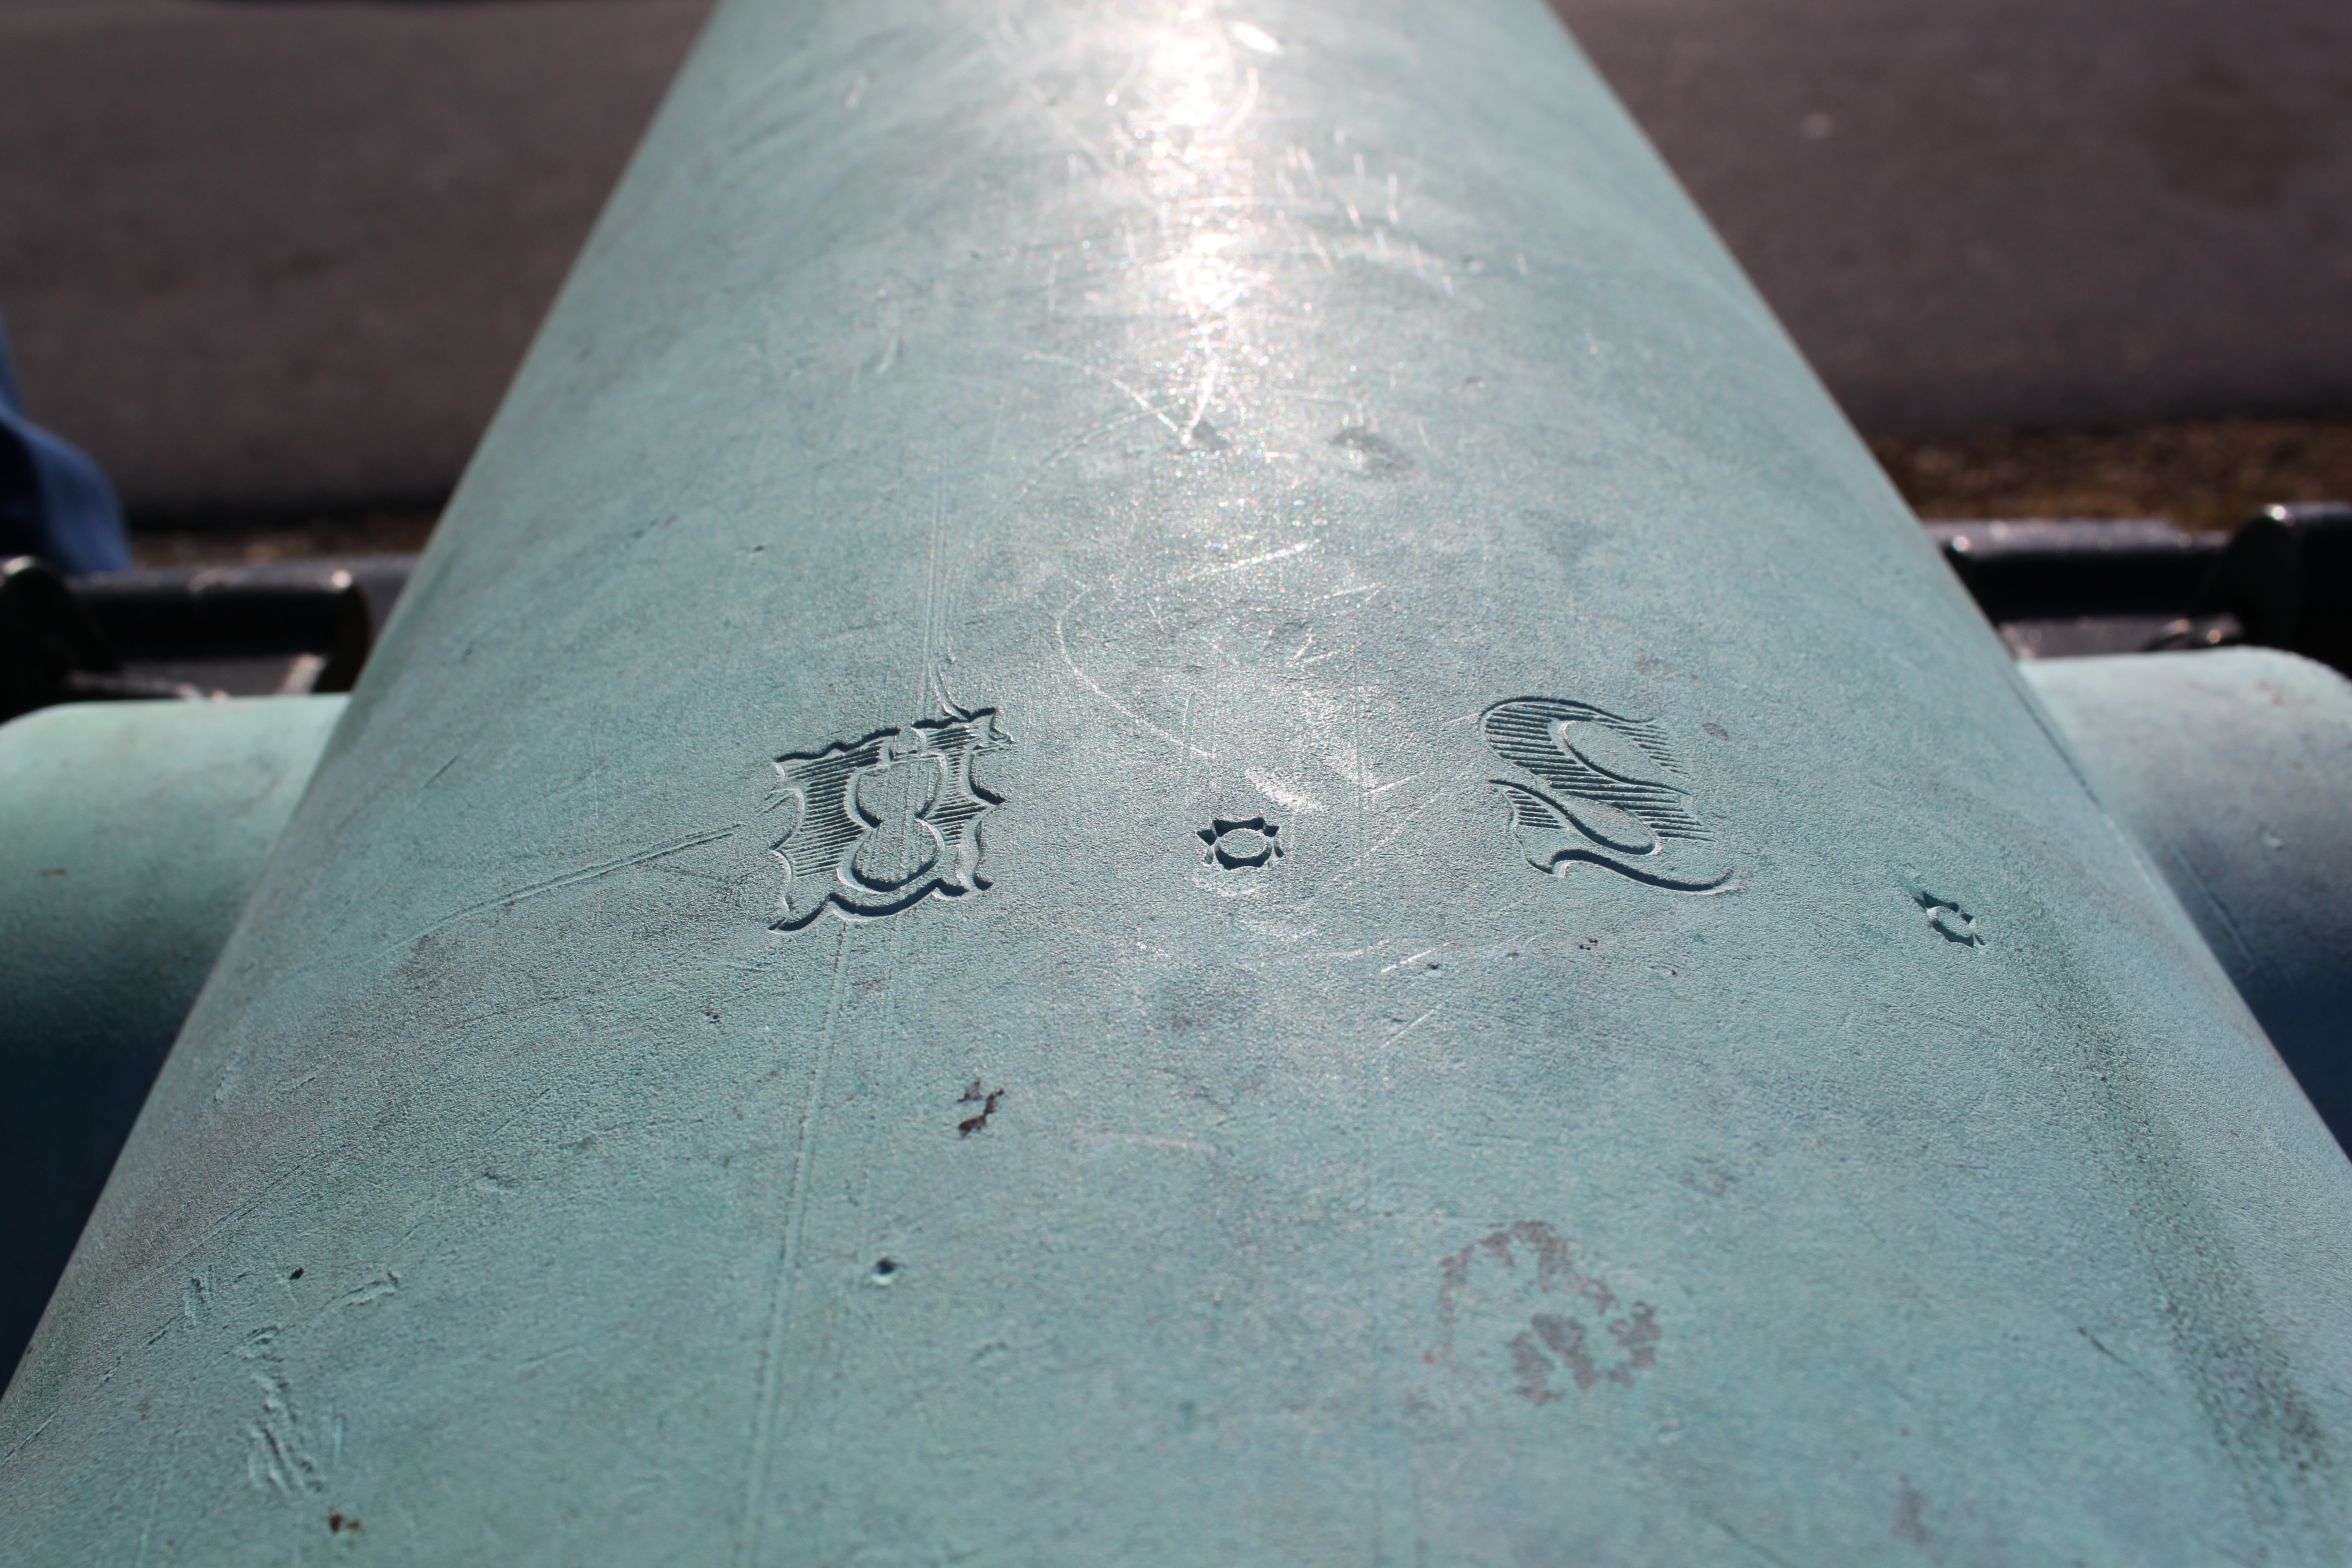
So we can tell a lot about this particular weapon by the markings. First, it is a REAL one. Since we know it was made by Revere Copper Co. in 1862 with a “U.S.” mark, we can also deduce that it was made in Boston, MA and purchased by the U.S. Army specifically for the war effort (since the war went on from 1861-1865). It was likely actually used in battle. The weight of the piece determined the price (usually between $0.40-$0.50 per pound), so that tells us that it probably cost the government between $500-$600 at the time (between $11,500-$13,000 in 2010 dollars) to buy. The fact that it is a bright, consistent green color tells us that it used a pretty high-quality bronze. Some of the Confederate guns in particular are a dingy grayish-green color; a result of metals like iron and lead being mixed into the bronze because the south couldn’t produce or smuggle-in enough copper. Confederate guns may also have bright green dots scattered on them. These are plugs that were put in after the gun was cast to fill in imperfections in the metal.
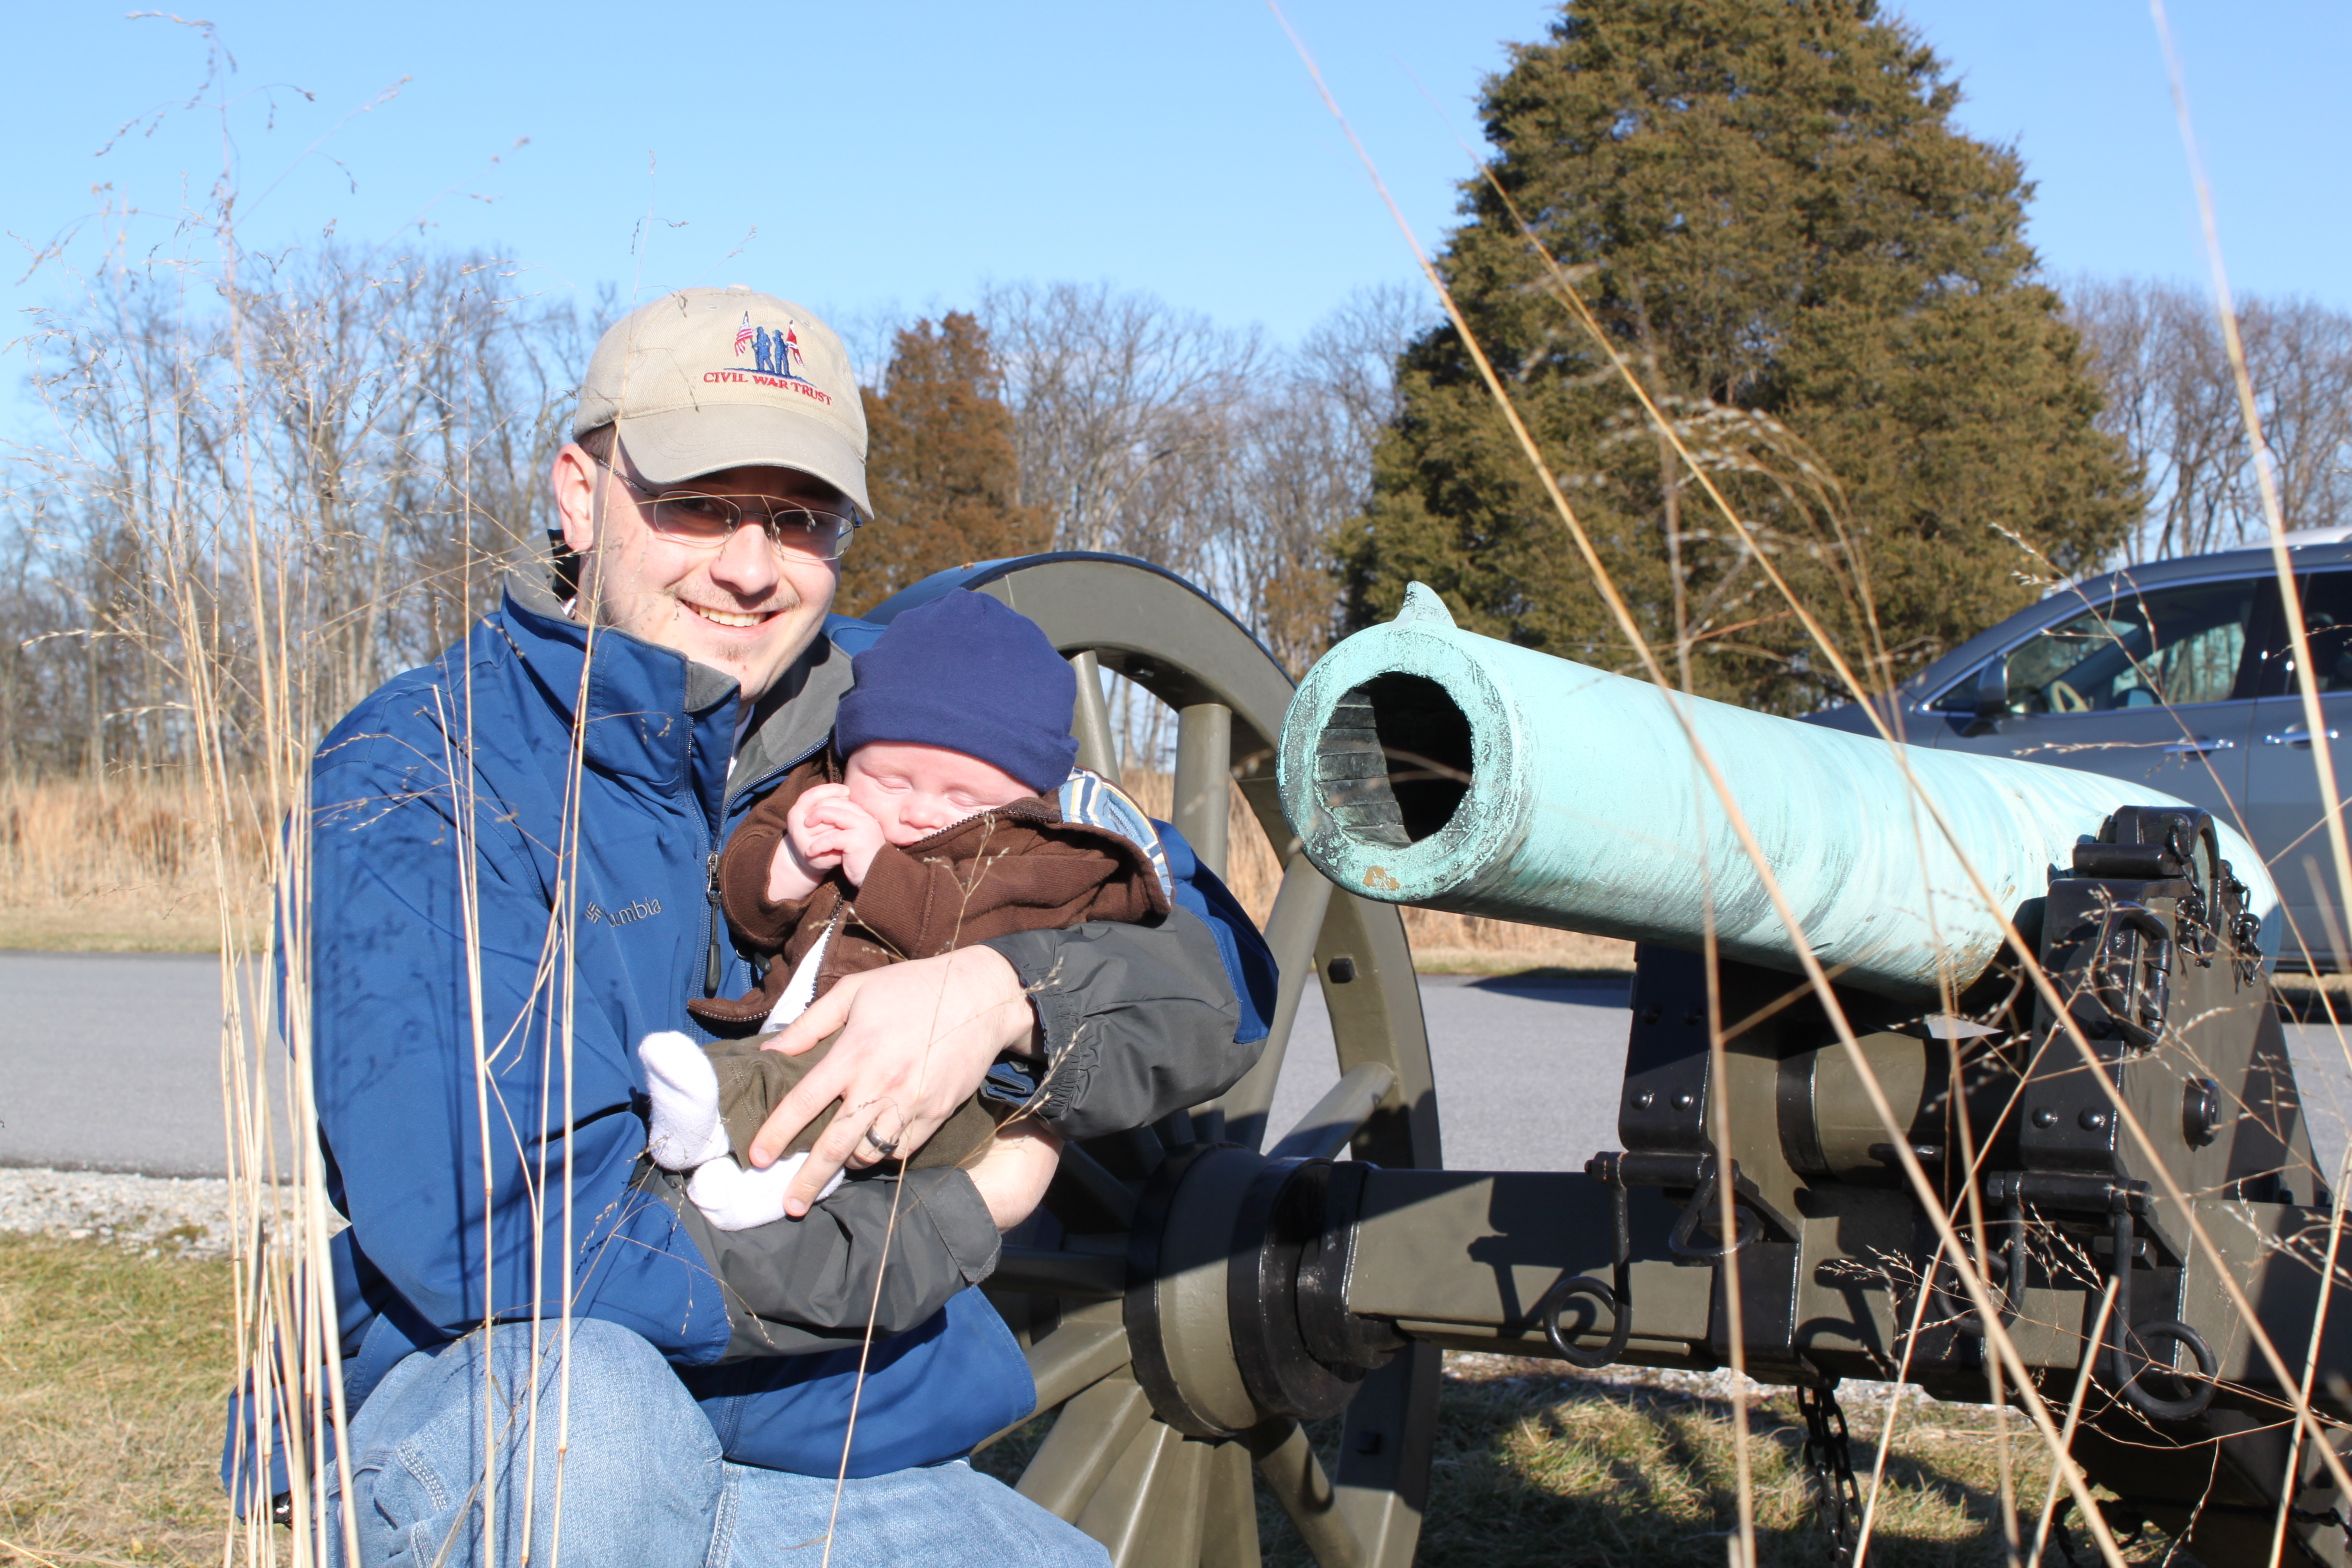
Another important part of the artillery is the carriages that the weapons are mounted to for field use. A gun without a carriage is pretty useless. During the Civil War, these were made from wood for ease of construction and to keep them lightweight. The problem with wood carriages in a static, “museum” atmosphere is that they don’t weather very well. The carriages at Gettysburg (and on every battlefield I’ve ever been to) are reproductions made out of steel and painted to appear as they would have. All the normal pieces are present on these copies, though:
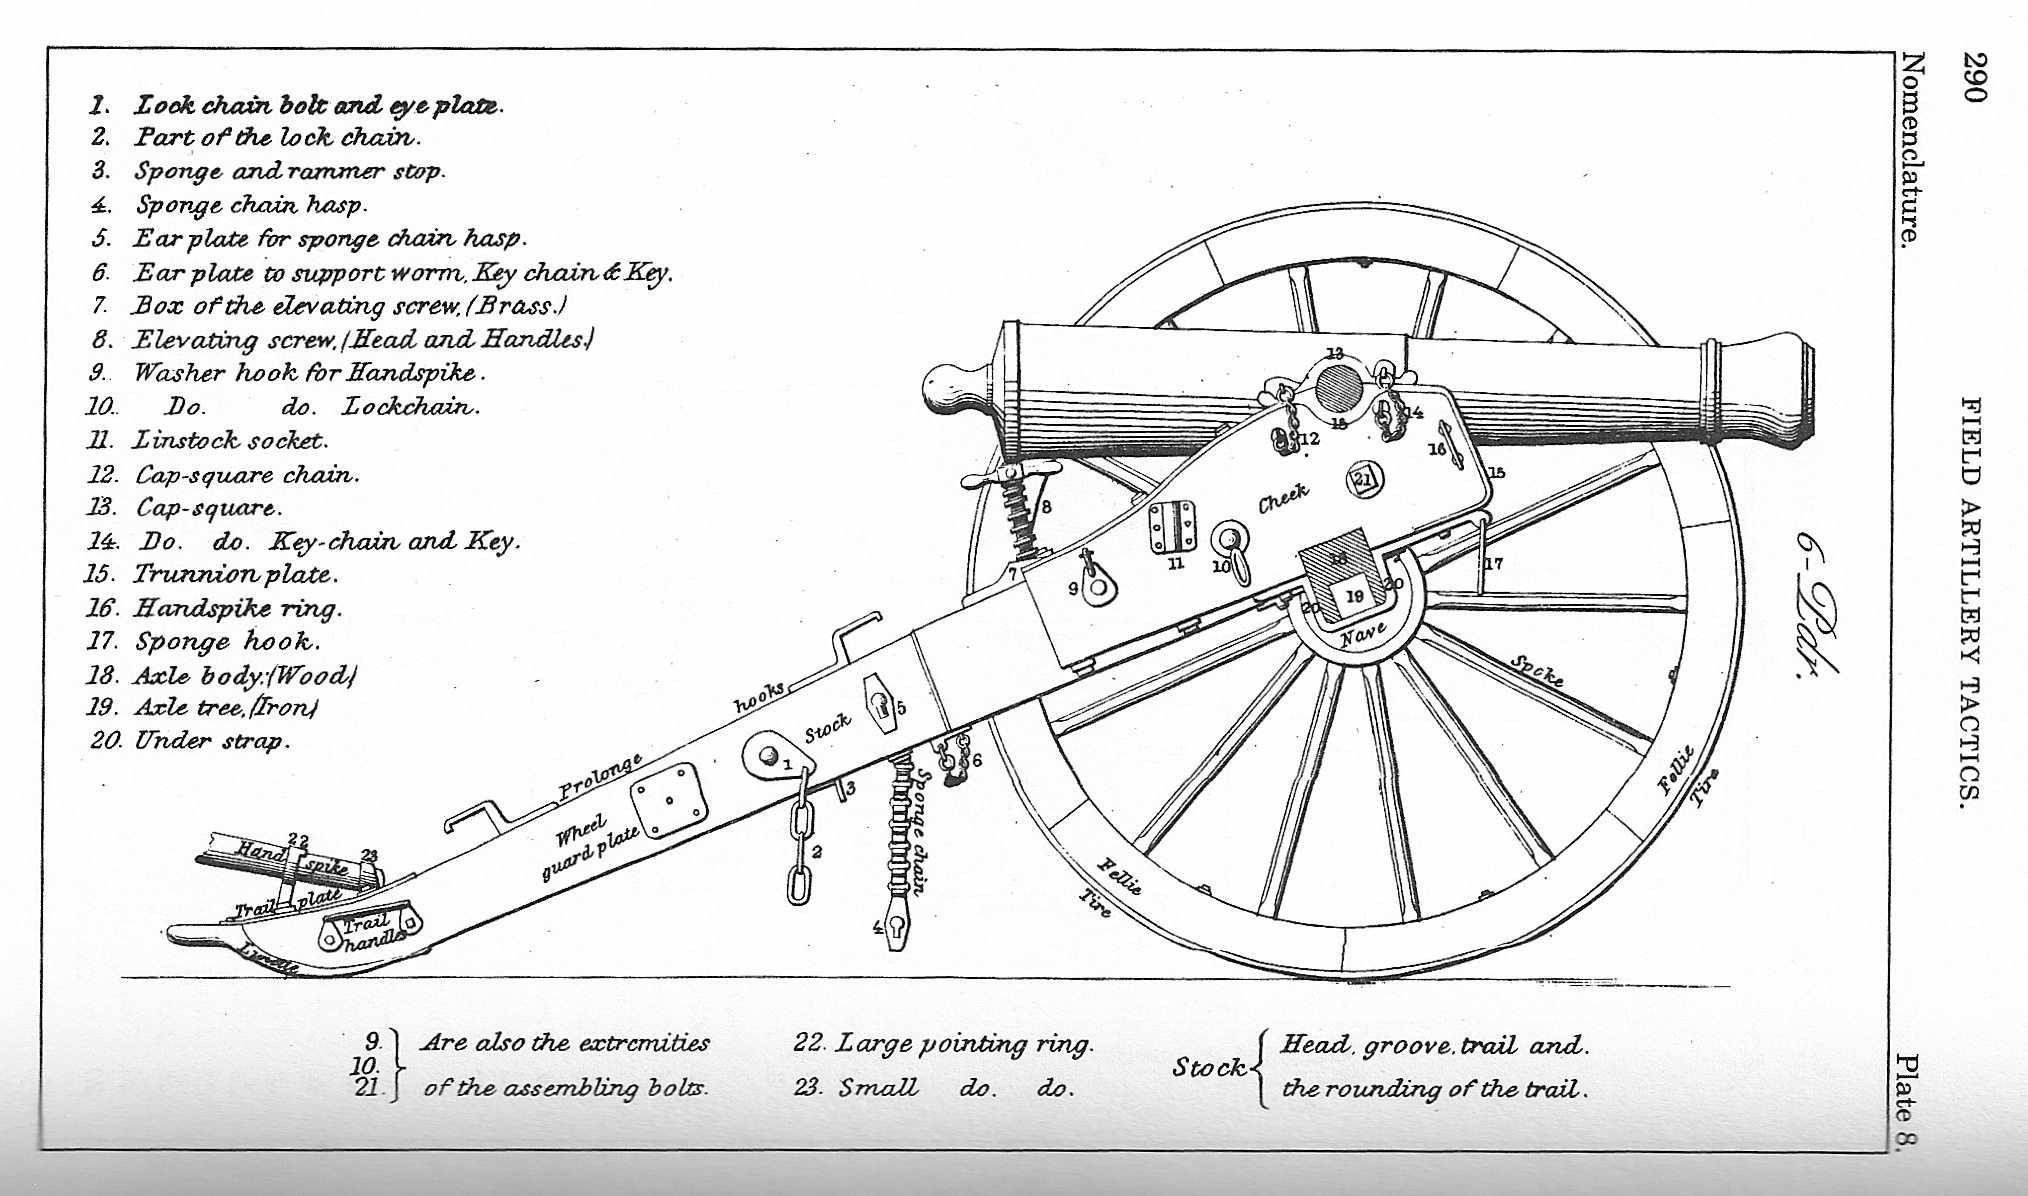
Terms like “prolonge” and “elevating screw” tend to come up in official descriptions of battle action, so it’s handy to know what parts these are referring to.
Now that the basics are out of the way, I’m planning to do a series of posts on this topic. Among the other things I want to cover are the mechanics of how these pieces were fired; how they were arranged into sections, batteries, and battalions (including command structure); and a few posts on specific weapons in the Gettysburg collection that are unique or interesting.
Stay tuned!

