Network Rebuild
I’ve spent some time lately redesigning my home network thanks to some new (to me) equipment that I found on eBay. This post is a breakdown of what I’ve done so far (and maybe a bit about my plans moving ahead).
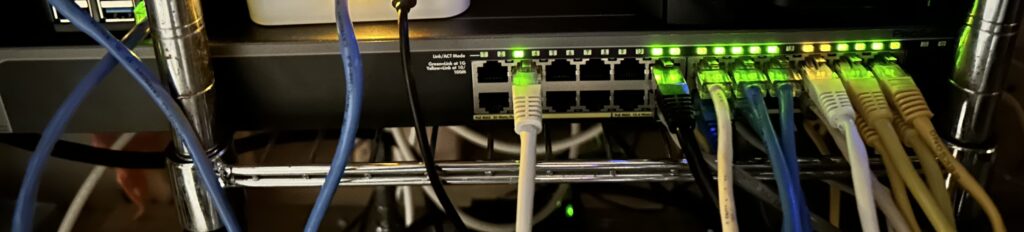
Core Switch
For a few years, I’ve had a really nice router that allowed me to create separate subnets for different purposes. Up to this point, I’d only had small, “dumb” switches, so for each new subnet that I wanted to create, I needed a completely separate router interface and switch. It got out of hand really quickly, becoming a rat’s nest of different consumer-grade equipment.
A few weeks ago, I found a used NetGear “smart” managed switch. In addition to 24 gigabit Ethernet ports, it also has 4 SFP ports for later expansion. All the ports support at least PoE (802.3af) with 8 of the ports supporting the more powerful PoE+ (802.3at) standard. Of course, it allows for VLANs, and link aggregation, too. This one piece of equipment has enabled everything else that I’ve been able to upgrade. It’s a really powerful addition to my home LAN.
I’m not going to lie – this took a little while to get set up. It wasn’t immediately obvious that the aggregate links I was setting up on the switch for my uplink to the router, and for one of my servers, weren’t using LACP by default. This manifested as unreliable links – not broken ones. Most traffic would get through, so it was hard to pin down exactly what was broken when I’ve also just moved EVERYTHING else at THE SAME TIME. I made this move as a total heart transplant as far as the network was concerned, because I felt a lot of pressure to get the Internet back up quickly for the other members of my household. In the end, trying to rush caused me to miss things in the troubleshooting process. There were several cycles of reverting all the changes and starting from scratch. I also could have done a better job of finding documentation and doing a written plan of action first.
In the end, everything worked out, and we have a MUCH more capable network now.
Wireless Access
Prior to having the ability to do separate VLANs on the same switch, I had to run totally separate hardware stacks for each subnet I wanted to provide. The same was true for Wi-Fi access: there were multiple access points, each tied to its own subnet and with its own distinct SSID.
Why not put in an access point solution that was also VLAN-aware, and since I now have a PoE-capable switch as well, take advantage of that at the same time? This would also let us get rid of the $15/month we were paying to lease our main Wi-Fi router from our ISP. That was going to be the next phase of the plan. I decided on a Ubiquiti UniFi U6-Lite Wireless Access Point, and was able to find a refurbished one for sale to save a few bucks.
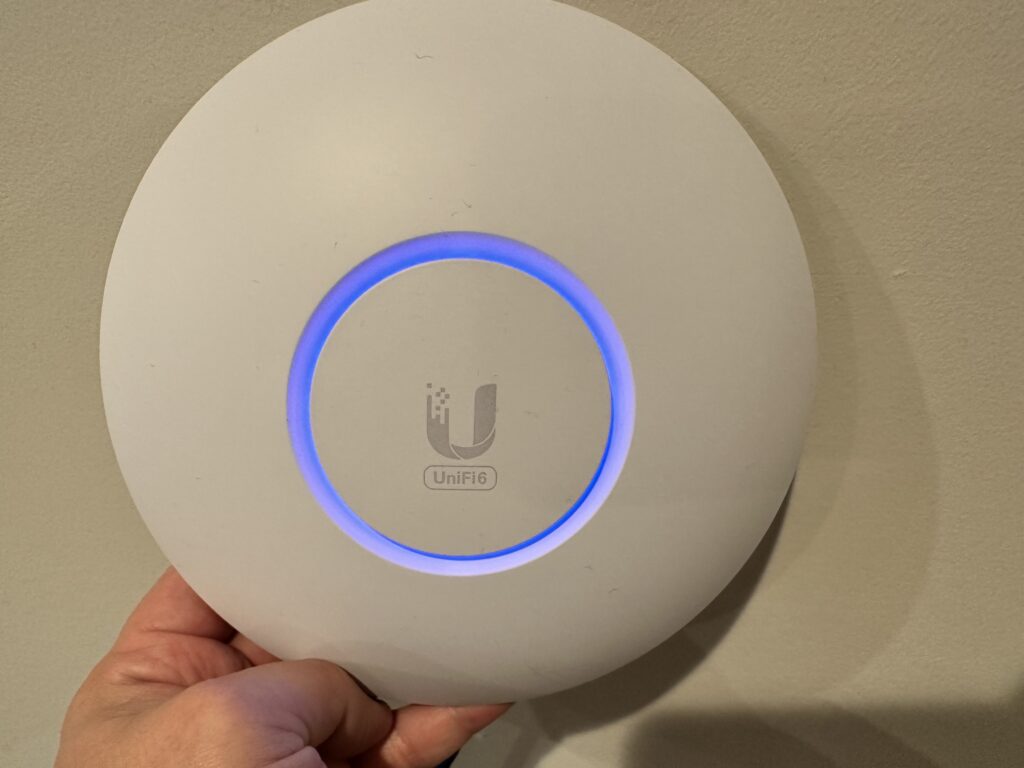
I already had some experience with Docker, so I decided that I would run the UniFi Network Controller software myself within a container. I know – it’s sort of overkill for a single access point setup, but that’s the easiest way to get the VLANs going the way that I wanted. It was super easy to deploy the container, but I had a little trouble getting the access point to adopt at first. It turns out that my VLAN configuration wasn’t quite right on the switch: I really needed a separate management VLAN for the access point and controller to live on so that all the other VLAN tags would work correctly – after a little bit of experimentation, I found a config that worked.
That’s been a theme of this project so far: if I was more experienced with VLANs, or with LAG configuration with the switch, then this whole thing would have been almost plug-and-play. But isn’t that why we have home labs? So we can play with these technologies and gain experience?
Returning to the task at hand – the UniFi Controller software is really wonderful. There is SO MUCH data about your network and how it is running, and it’s beautifully-presented. My kids really enjoy seeing the animated visual representation of traffic flow that can be turned on within the topology section of the dashboard. Very cool stuff!
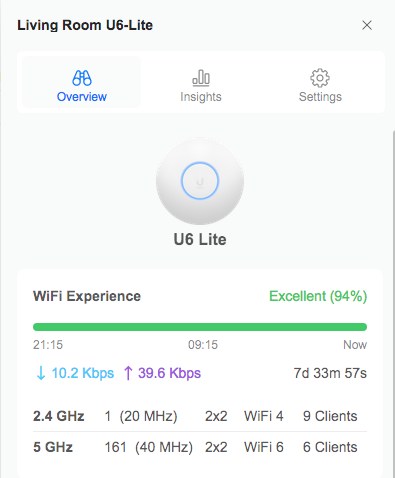
In addition to our regular “Home LAN” Wi-Fi, we now have separate SSIDs (and VLANs, each with their own appropriate restrictions) for my kids to use, for IoT devices in the house, and even for guests (with a super-slick captive portal built in!) I’m very impressed with the UniFi system.
Servers and Services
So what are we going to do with all these new network capabilities? Well in my last post about this general topic, I talked about a lot of the things that my boys and I had been playing with in our home lab – we’re still doing those things, but at a larger scale and with better organization now.
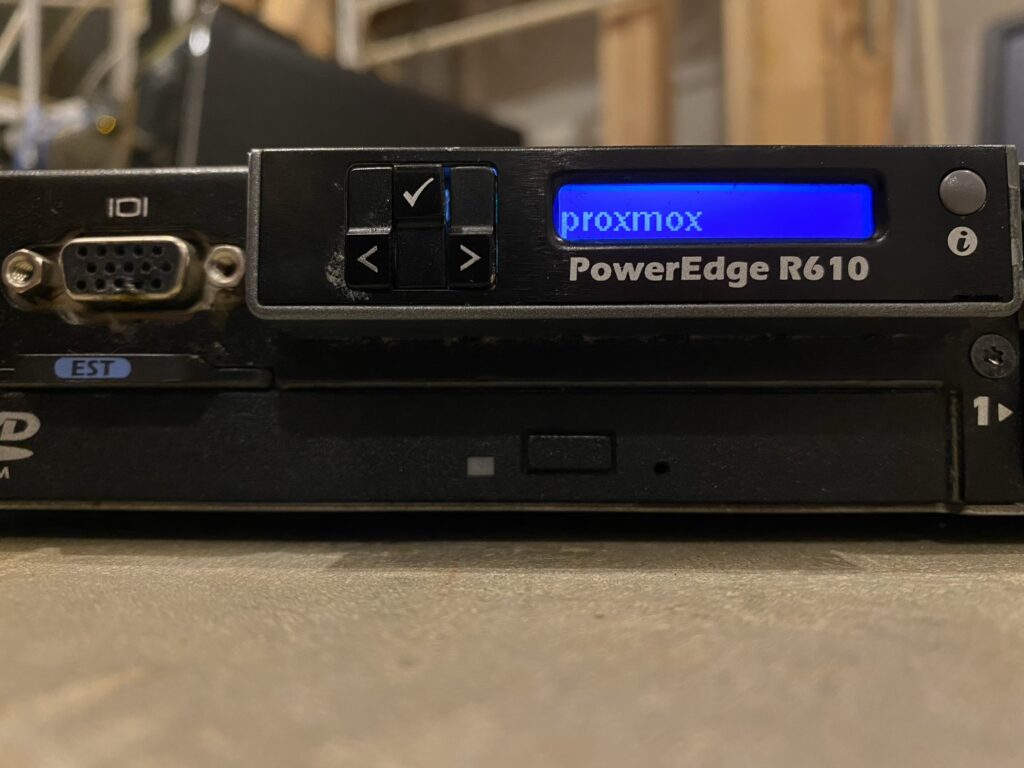
For starters, I’ve really come to love Proxmox. Since I last wrote here, we’ve upgraded our virtualization server from an old desktop to a used 1U rackmount server that the boys’ grandfather found for us on a local marketplace site. The new machine is a Dell PowerEdge R610 with 2 Xeon X5675 CPUs (for 24 total threads), 80GB of RAM, and 2.4TB of storage. It’s a monster of a machine, so I don’t keep it on all the time – I only use it when I want to play with a really complicated system or set of systems together. I’m able to keep it off because it has an iDRAC integrated lights-out management system that allows me to send a network signal that turns the machine on remotely.
For a few years, I’d been running most of the network services that need to be on all the time on small, inexpensive single-board computers. These have been really great because they don’t use a lot of power or make any noise, and have been reliable enough and fast enough for our purposes. As I’ve gotten more used to having the power of Proxmox around, I’ve started to see the limitations of my old way, though. And similarly to the issue of each subnet needing its own networking, each service that I wanted to limit to a particular subnet needed its own server for that subnet in order to remain truly isolated.
Now that I have proper VLANs, why not set up a lower-power server and run a single trunk connection? Whenever I need to add a new VLAN, it’s as simple as adding a new tag on that server’s interface and the switch port. Proxmox makes that process really easy.

So that’s what I’ve done. I’m replacing 3 separate single-board computers with a single laptop we were no longer using. I put a little more RAM in it, installed Proxmox, and set up a few VMs for hosting internal and external services. All the websites I host for our family are now containerized (including this one). I have a single VM backup to run (which takes just a couple minutes) and all that data is safe. This setup will also make the eventual migration of the sites to new hardware a breeze.
For containerization, I’m still using Docker. I feel like I was a little late to that party, and I had some trouble wrapping my head around it at first, but I see all the benefits now. I know that I can run LXC containers within Proxmox, but I haven’t messed with that too much. I really like the interface that Portainer supplies, and I feel like I have a setup that works really well for our purposes. I might experiment a little in the future (it IS a home lab, after all) but for now, Docker is our “production” setup.
For the Future
Things are working really well for now. I’m so pleased with how everything has come together since ripping out all my old networking and rebuilding around a commercial-grade switch.
I think the next thing I’d like to do is replace my current network storage setup with a proper NAS. I don’t think I’d want to use the UI that comes with the types of systems that you get from something like a Synology or QNAP – I’d probably just use them as a raw pool of storage, and run something like NextCloud for the “friendly” interface to all that storage. I just need a big hard drive that I can talk to over a couple of TCP ports. 🙂
Next, I’d like to improve the reliability of my hosted services by setting up a modest Proxmox cluster. There are a lot of ultra small form factor, so-called “1-liter” desktops on the secondary market – largely as they come off of corporate leases, it seems. My own experience (and what I’ve seen from other home lab enthusiasts) seems to suggest that with enough RAM, they’d work out really well as Proxmox nodes. I’m not sure if I’d go so far as to set it up as a high-availability cluster, but being able to shuffle VMs back and forth as I move around the underlying hardware, or do updates, would be of great benefit.
I’m excited about the possibilities that are available for the boys and I to explore. I’m sure there will be more posts coming as we build more things!