Since I’ve become more involved with amateur radio – including getting my Extra class license – I decided that I wanted to get a vanity call sign. My original call sign, KB3RLM, was assigned sequentially by the FCC when they gave me my initial license. That’s how it works for everyone at first.
A lot of people stick with their initial call sign for their entire lives, and that’s totally fine to do. Once you establish yourself on the airwaves, your call sign is how everyone knows you, so it can be tricky to go through a change because then you end up having to re-introduce yourself. It’s a lot like getting a new phone number.
So why bother changing? Well, there are several different types of call signs, so lets break down the structure of the system quickly:
All U.S. call signs start with either an A, K, N, or W. The original one that I had was what is called a “2×3” – a two-letter prefix, followed by a numerical region code, and then a three-letter suffix. The region code of “3” is assigned to licenses from Delaware, DC, Maryland, and Pennsylvania. One of the advantages of the sequential system is that it’s easy to estimate how long someone has been a ham (at least within your own region). I got KB3RLM in the summer of 2008, while my son Isaac got his KD3BSR in the summer of 2025.
If you have at least a Technician license, you can apply for a “1×3” which in the U.S. begins with K, N, or W, followed by a region code, and then a 3-letter suffix. These are fairly popular because these used to be handed out sequentially until they ran out of them, and a lot of folks try to get their initials in the suffix. The most sought-after call signs are the “1×2” (like my friend N3RY has) and “2×1” (like my friend WQ3Y has). These are the shortest call signs that you can get and people who are serious about making a LOT of contacts in a short amount of time (like during radio contests) find these to be very desirable. This is especially true of folks who operate with Morse code (“CW” in ham lingo). The “1×2” and “2×1” call signs are only available to holders of the highest-level Extra class license. That’s your incentive to study hard!
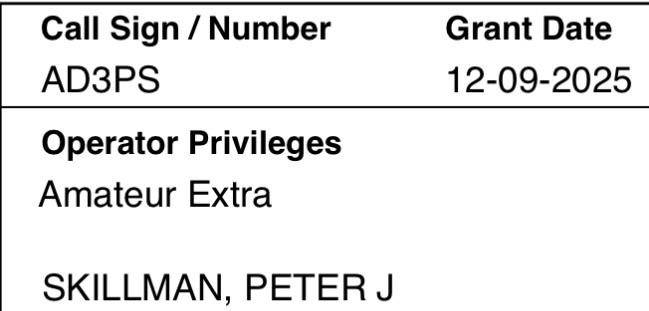
But contests don’t appeal as much to me. When I applied, I was trying to get a “1×3” that incorporated all three of my initials in the suffix. Unfortunately, I hit a snag because of the 2025 U.S. Federal Government Shutdown and the call sign that I wanted had it’s expiration date extended after I had applied. The call sign that I ended up with – which is still a very fine call sign – is AD3PS.
My new license paperwork.
This is a format we haven’t discussed yet, the “2×2”. It was originally available to the holders of the old Advanced class license (beginning with a K, N, or W), and since the Extra class is a higher license, we can apply for them as well. In fact, a “2×2” that begins with an A is ONLY available to Extra class holders, and if you ask for a new sequential call sign on your paperwork when you get your Extra license, you’ll get one of these.
So my new call sign immediately identifies me as an Extra class ham, from Maryland / Delaware, and I was able to get one with my initials, PS, in the suffix. I’m pretty happy with how it all turned out.
If you’re thinking about getting a vanity call sign, I can highly recommend the websites radioqth.net, which has a very useful search tool; and ae7q.com which has a TON of different ways to look up licenses and even does application predictions. Once the change goes through, be sure to check out this post by Colin Cogle for a checklist of all the things you need to update in our digital ham radio world. All of these sites were very helpful in getting me through the process.
There is a lot of spirit in the building I work in. It’s a really terrific environment. There is a core group of folks who find ways to do little celebrations throughout the year, and it makes work a genuinely fun place to come every day.
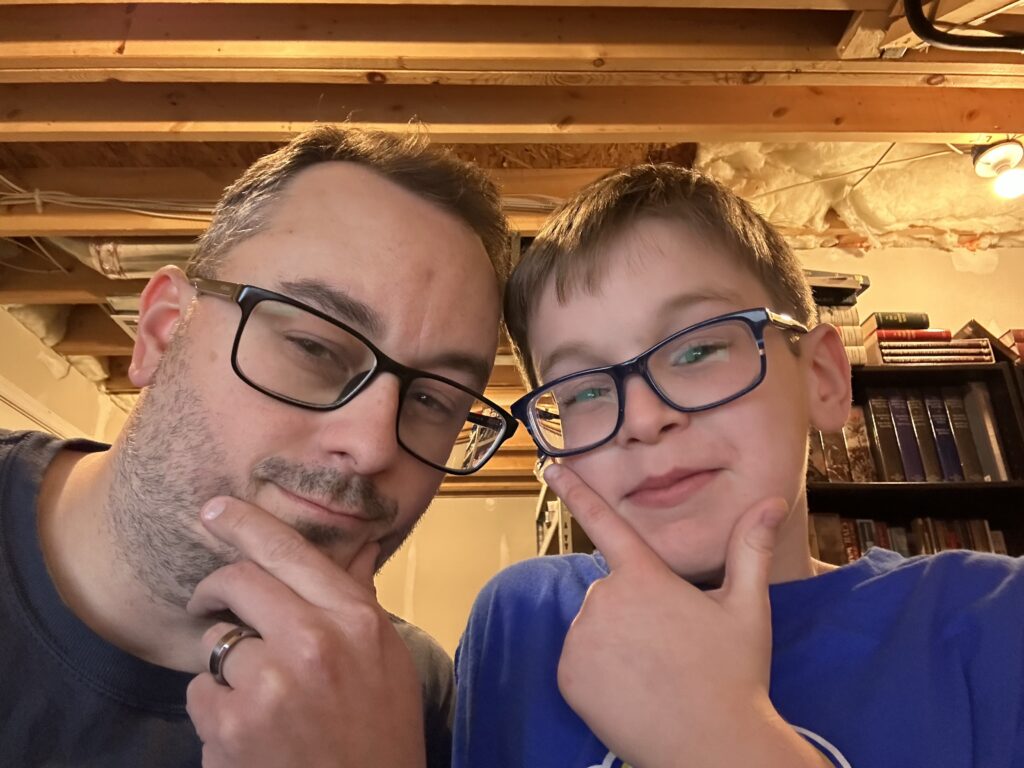
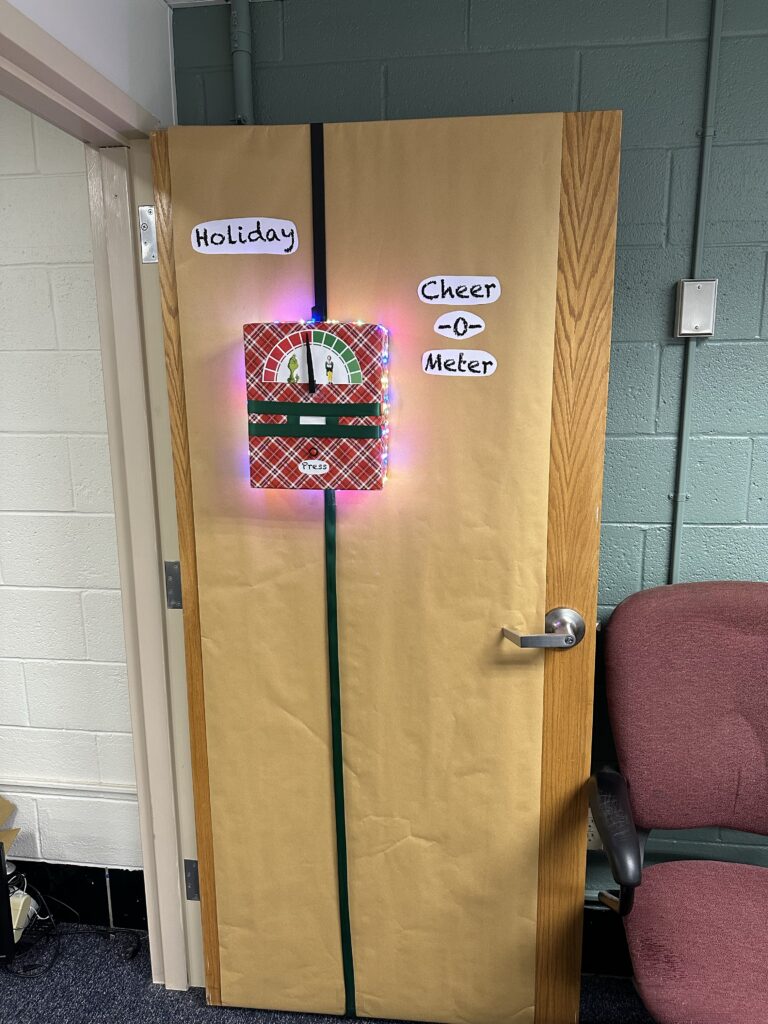
Among the events planned this holiday season is a door decorating contest. Now as the sole IT guy in my building, I have my own office space with a door and I’m kind of on my own. I’m not particularly creative or “crafty” but I started to think about how I could bring some nerd flavor to the contest. I knew I wanted to use an Arduino microcontroller and a few of the assorted electronic parts I have around the house. The thought occurred to me to create some type of Holiday Cheer-o-Meter.
The more I thought about it, the more excited I became. When it comes down to it, I wasn’t as concerned with competing – I just wanted to see if I could make my vision come together and actually work. I also thought this would be a fun project to bring the boys in on. I explained what I was thinking to them and Isaac immediately wanted to help with the circuit design and programming. The Sunday before Thanksgiving we got to work.
How can we make it work?
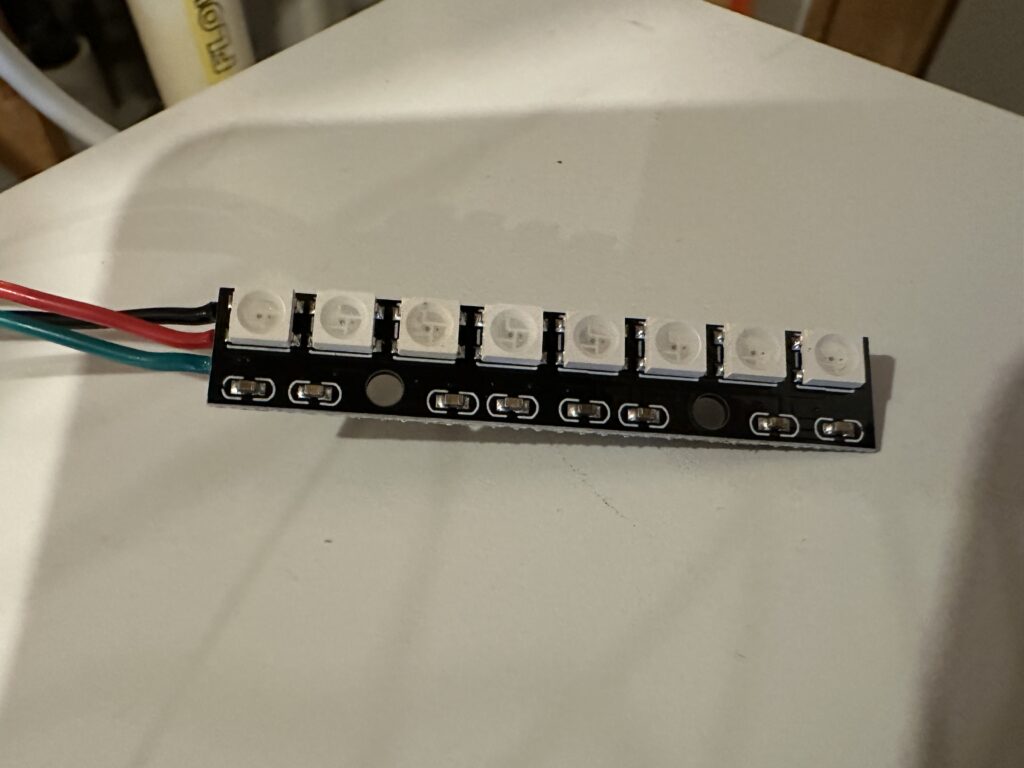
Being a holiday decoration, it’s going to have to incorporate some lights. It would be nice if I could run them all from the Arduino, and if I could do fancy things with at least some of them. I found some cool RGB LED arrays on Amazon that are controlled with a WS2812 chip. This means I could have 8 color-changing lights in a tight row while only using 1 of the control pins on the Arduino. That would become our “scanner.” While we were out with family at Homestead Gardens, I also found some very tiny (and inexpensive) battery-powered string LEDs. Since these used 3 AA batteries, they would be easy to run off of the 5V power rail in the Arduino.
The cool RGB LED array we were able to use in the project.
The meter itself would be made from a servo motor, allowing us to control the position in degrees with some simple code. For a fun twist, we also found a “pitches” library that allowed us to program music to play through a small piezo buzzer when the meter showed its reading.
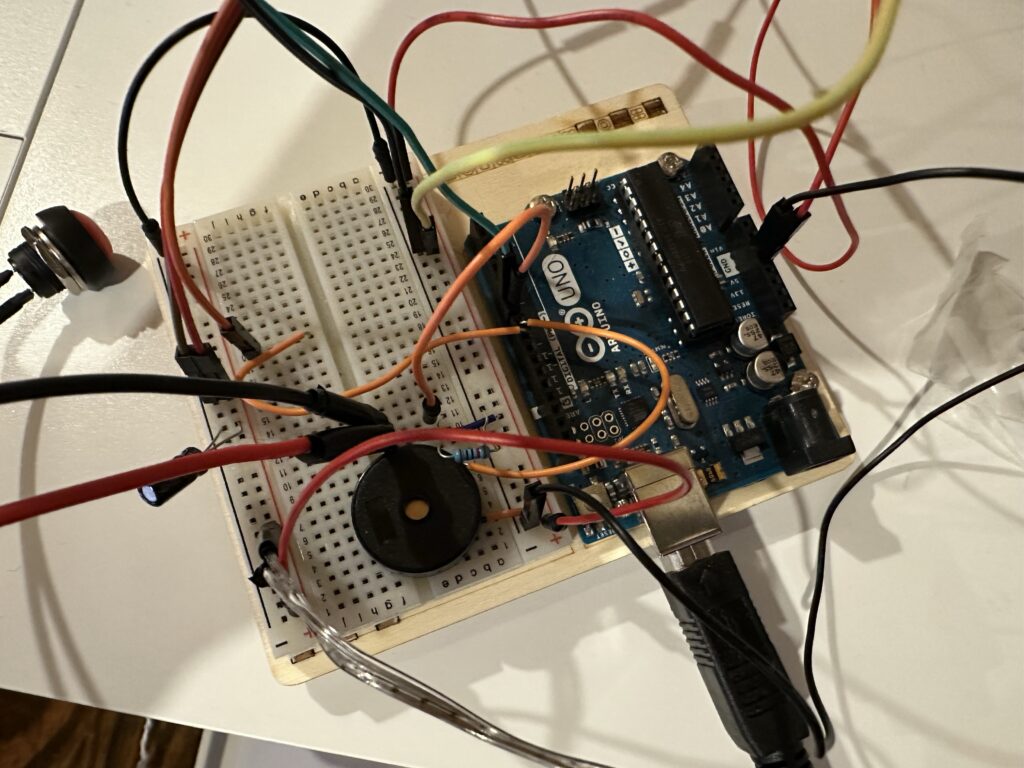
All told, it took a little more than 2 hours to do a tiny bit of soldering, put together the circuit on the breadboard, and set up our microcontroller program. It took much longer for me to get the whole thing to look, well, pretty.
The brains of our meter – the Arduino Uno and our rather messy breadboard.
The user interface is extremely simple. A single button starts the “scan”.
Once the button is pressed, the LEDs on the front cycle through red and green flashing sequences. A pseudo-random number between 0 and 4 is generated. If 0 is picked, the whole system bottoms out and the meter displays the Grinch sequence. If a number greater than 0 is picked, another pseudo-random number is pulled between 90 and 180 to set the degree of cheerfulness.
I like to think that the pseudo-random number generator in the Arduino can be affected by the “vibes” of the environment. Quantum entanglement and all. 🙂
This project was extremely fun to make. Microcontrollers like the Arduino make little projects like this pretty accessible these days. So far, the response at the office has been very positive. I’ll be sure to post an update once the competition is over.
The completed door.A cheerful reading.A not-so-cheerful reading.
Over 17 years ago, a co-worker of mine at the Apple Store, Shane (later known as WQ3Y) started talking about getting an Amateur Radio License. He had long been fascinated by the idea, and suggested that perhaps a few of us could start a study / accountability group to make the process easier. It didn’t take much to sell me on the idea. As a technology nerd, I’m always on the lookout for new skills and knowledge that might eventually be useful, and understanding something about how the magic of radio worked seemed like a good idea in a world that was increasingly dominated by Wi-Fi, Bluetooth, and cellular networks.
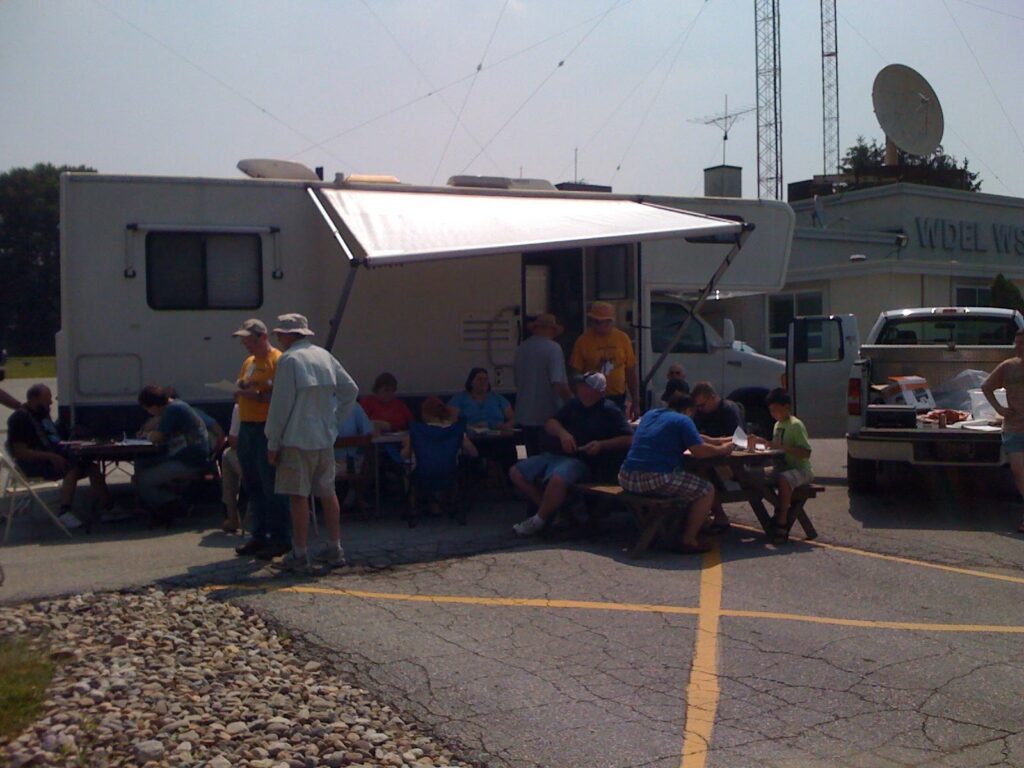
I got a couple of books – one for the entry-level “Technician” license, and one for the next in the series, “General” – and began to study the material. I’m honestly not sure how long I studied, but Shane got his license in January of 2008, and a few months later, I felt like I was ready, too. On a Saturday in late June, I drove up to the studio of WDEL / WSTW north of Wilmington, DE to take my official test at a picnic table in the parking lot along with other hopeful hams.
The few minutes that it took for my paper test to be graded by the 3 volunteer examiners felt much longer. At last, one of them approached me, and gave a late smile. “Do you want to try for General? It doesn’t cost any extra.” That was his way of saying that I had passed. I thought about it for a moment – while I had looked over the General class book, I hadn’t really *studied* it like I had the Technician level material, but I thought it was worth the shot if they were willing to test me.
The scene of my first ham radio license tests in the summer of 2008.
I took the second multiple-choice test and another anxious wait ensued. Once again, the same man walked back over to me. “Want to try for Extra?”
Now in those days, the highest-level “Extra” class license required a Morse code test. I knew there was no way that I could pass that. And I hadn’t ever considered looking at material as advanced as the Extra test was going to throw at me. I decided not to waste anyone’s time, and took my General class CSCE home.
After a few days, on July 8, 2008, I was officially licensed as a General class Amateur Radio Operator with the callsign KB3RLM. Back in those days, there was no fee for amateur licenses.
I’ll admit – I wasn’t as taken with the hobby at first as Shane was. I was more interested in the knowledge than the practical application. Shane got some radios and antennas for his house. He set up a VHF/UHF rig in his car and experimented with APRS, showing it off to me in the days before Apple’s FindMyFriends app was ever thought of. I thought that part of it was really cool, but I never did any of that. I didn’t buy any equipment at all. I learned about EchoLink – a way to participate in VHF & UHF repeaters over the Internet with a computer – and I signed up for that. I even played around with it a few times, but it always felt like I was cheating somehow. My license came up for renewal after 10 years, and I kept it current with the FCC for address changes and the like, but that was about it. Other things happened in life, and my interest waned.
Fast forward to the summer of 2025, and a short diversion.
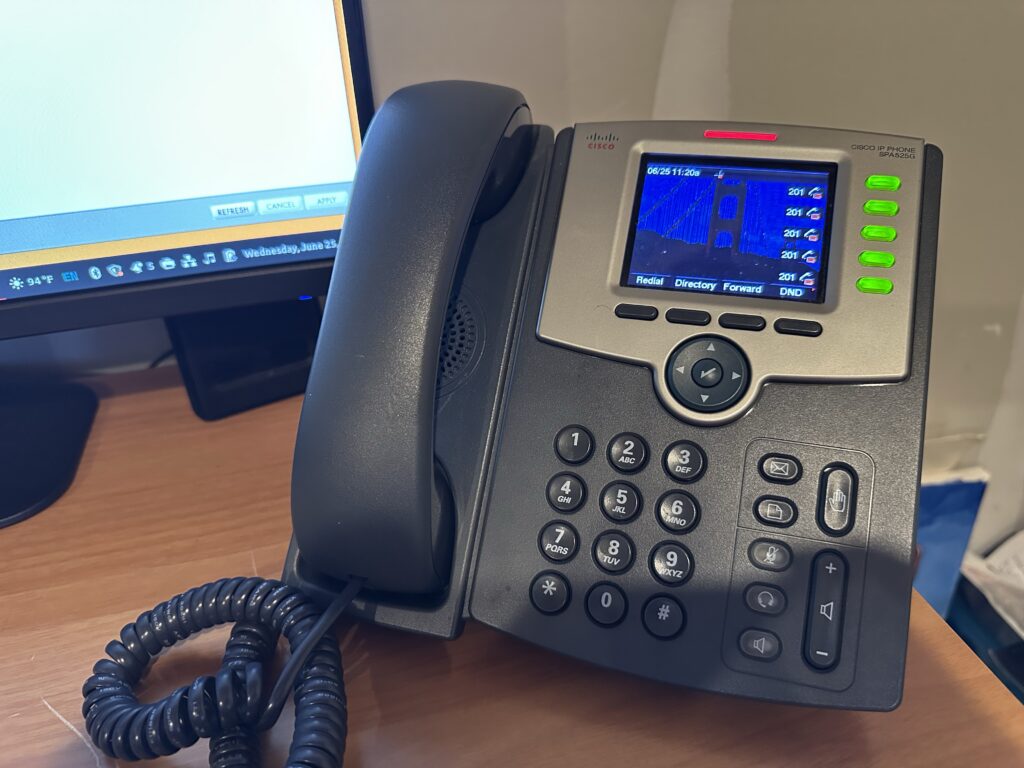
My boys and I got a phone system set up at the house, as I mentioned in a previous post. What I didn’t mention was how I got those lovely Cisco phones in the first place. I had found a listing on Facebook Marketplace advertising FREE Cisco phones. A business up in the Philadelphia suburbs had recently removed their phone system and just wanted rid of the desk sets. I called to inquire about getting 5 of them for us to play with and the woman I spoke with sounded disappointed, “ONLY 5? I’ve got boxes of these things!” To make a long story short, I ended up coming home with close to 50 of them, and I’m happy to say that they all made their way to good, nerdy homes.
But before we could do that, we had to clean them up a bit. Isaac especially enjoyed doing this with me. One by one, we powered them up, updated their firmware, connected them to our phone system, and ran through a series of tests. As I poked around the Internet for information about the particular model we had (the venerable SPA525G2) I found out that they were popular on a service called Hamshack Hotline.
This was a really cool idea. It was a service using very similar server software to what we were, but offering it up to ham radio operators around the world for free. It was a way that you could have a secondary means of communication with your ham buddies, while also messing around with how VoIP worked. Since I had a license, I figured, why not try to fire it up on one of these phones? Literally the day after I decided to do this, Hamshack Hotline announced that they were shutting down. Running the service had become too cumbersome. Luckily, a similar (though smaller) service existed in Hams over IP. I immediately signed up for an account.
As I was digging out my license paperwork so that I could complete my application, Isaac was looking over my shoulder. “What’s this radio license thing all about?” He was instantly intrigued. We had a few conversations about it, and his interest only grew. I told him he’d have to learn enough about radio and electronics to pass a license test. It would take some work, but he was up for it. The prospect of learning some science was exciting for him, so we ordered a book and got deep into studying.
Now, there are easier ways to get on the radio if that’s what you want to do. There’s the Family Radio Service (FRS) and CB radio – neither of these requires any type of license, but they are channelized, use FM and AM, and are limited in power to 2 watts and 4 watts respectively. These restrictions really impact your communication options and range. The General Mobile Radio Service (GMRS) is very much like FRS, but with a higher 50 watt power limit. While this increases range, it’s also where the FCC starts to require a license, just without a test. Simply pay a fee and your entire family is covered for 10 years. All of these services require the use of store-bought radios that are approved by the FCC, and are generally pretty easy-to-use.
What makes amateur radio special is that our license requires us to pass a test (or several tests for the higher-level licenses). We have to demonstrate that we have at least some understanding of how all this stuff works. In exchange for that level of knowledge, we are given much more freedom. Ham radio is for tinkerers – part of our mission is to push the art and science of radio forward through experimentation. We are granted privileges on several frequency bands from shortwave all the way through high microwave without being channelized. We are allowed to operate with up to 1,500 watts of power. We can use FM, AM, SSB, Morse code, and loads of digital modes to communicate. And we can design and build our own radios and antenna systems without needing specific FCC approval. Just about the only restrictions we have are that we have to identify ourselves in our transmissions, and we can’t encrypt our communications – everything must be in the clear. And of course, we aren’t allowed to intentionally interfere with anyone else’s transmissions, and we’re expected to know enough to not accidentally interfere either.
One thing we have going for us is that there are so many helpful educational resources for prospective hams these days. Isaac and I not only dug into the book together, but we used the study materials and practice tests at HamStudy.org, and the videos on the Ham Radio Crash Course YouTube Channel. Over the course of a month, Isaac started to get more comfortable with the material, and started doing better on the online practice tests. When he was consistently passing them, I started to look for a way for him to do an official test.
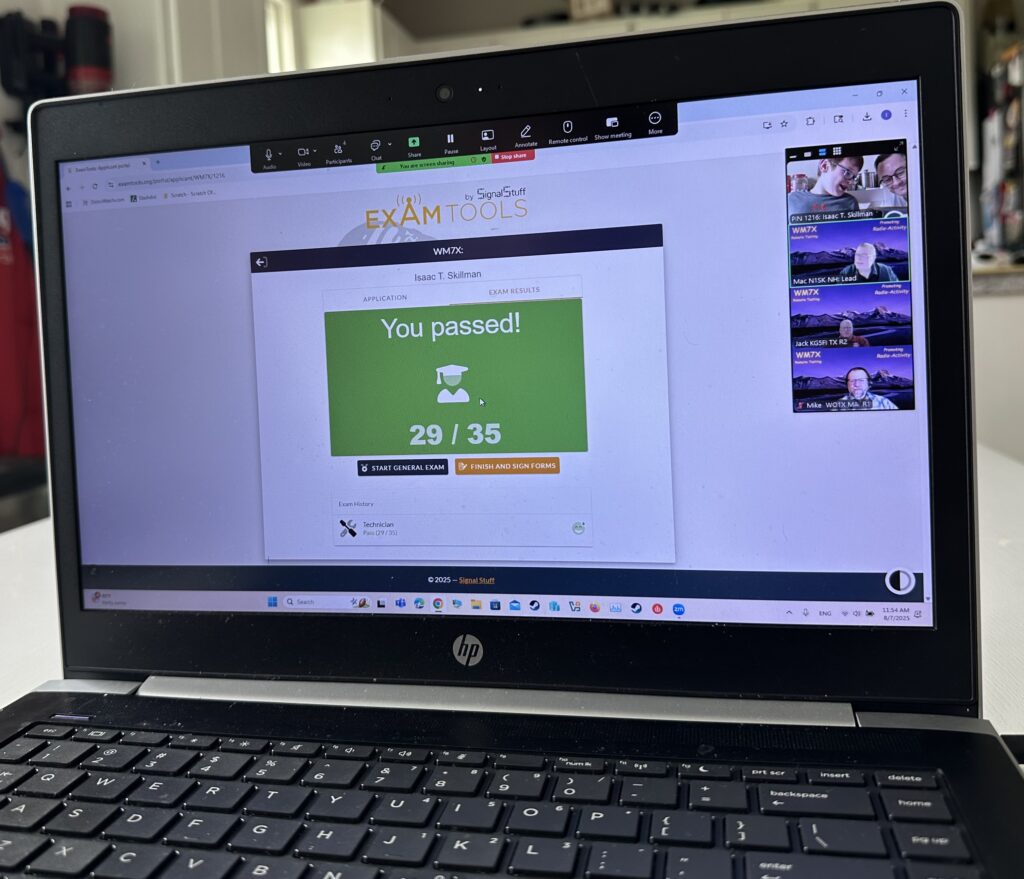
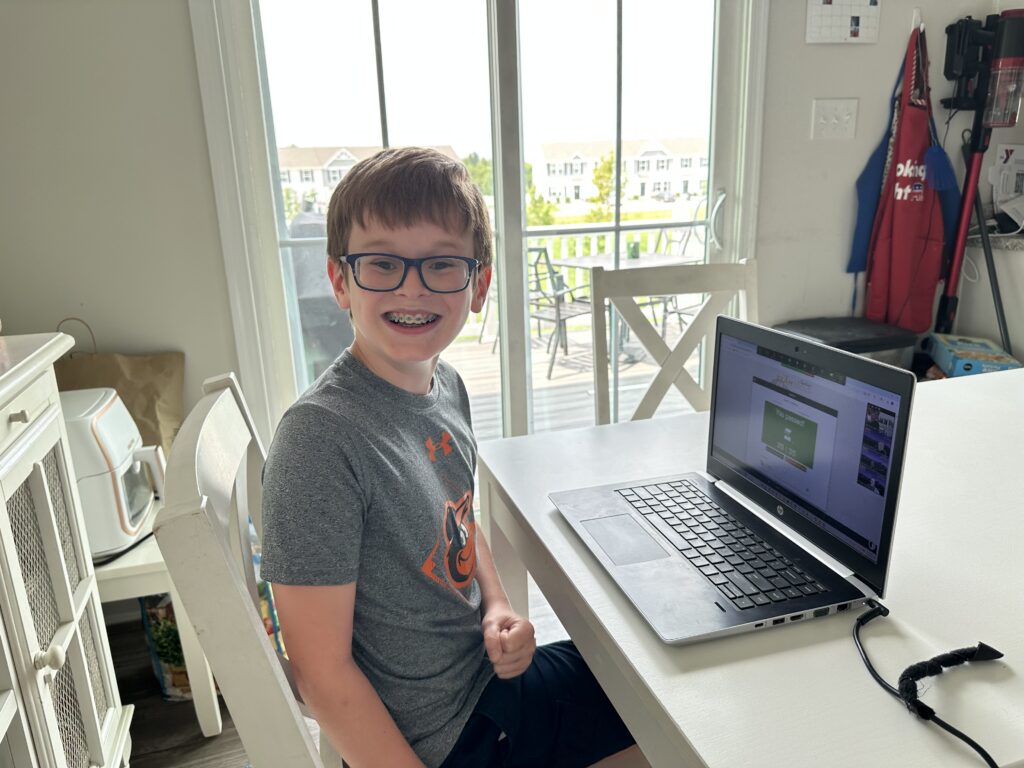
Initially, I was looking for an in-person session just like how I had gotten my license. The ARRL even has a nice search function on their website that can be used to find one. Unfortunately, there weren’t all that many offered in Delaware this past summer, and the ones that were a little farther out didn’t work for our schedule. That’s when I found the WM7X Online Testing VE Team. They have available spots every day, and as long as you can get your computer on a Zoom session, you can do a proctored online test using the same ExamTools system Isaac had been practicing with. Seemed like a good option. We registered on a Thursday morning and Isaac was testing within the hour.
Since he is a kid, the VEs (Volunteer Examiners) allowed me to sit next to him, as long as I remained on camera and didn’t help him in any way. Isaac was definitely nervous to take the actual test, and I was nervous with him. I tried to keep track of how he was doing on the 35-question, multiple choice test in real-time, but I couldn’t tell what the result was going to be. Isaac answered all of the questions, and hit the “Submit” button at the bottom of the page. One of the VEs “graded” the test, and the result popped up on screen: he had PASSED!
Isaac’s test score.A very happy new ham!
The next day, we got the registration fee email from the FCC, and by Saturday morning, Isaac had his license and callsign: KD3BSR. If you’d like to read about Isaac’s experience with getting his license, he wrote about it on his website.
We immediately set him up with his own EchoLink account, and he made his first contact on Sunday morning with N3RY on the W3VPR repeater – which has since become one of my favorite places to hang out.
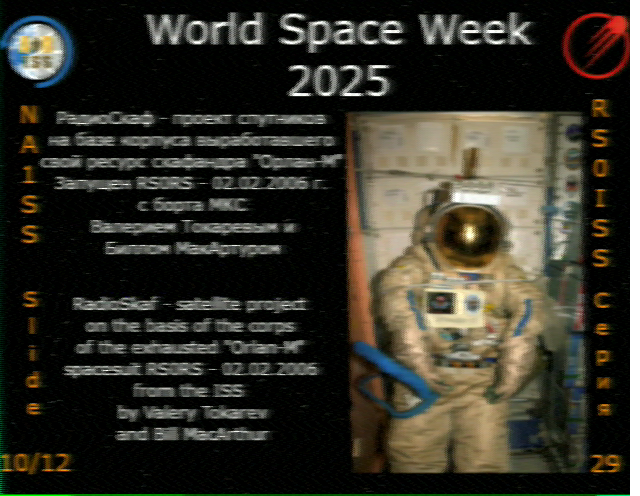
We soon got a pair of TIDRADIO TD-H3 hand-held VHF/UHF radios, and have gotten familiar with a few of our local repeaters. Isaac really lights up when he gets to be involved in the conversation with the other guys. We’ve also been having fun with amateur radio signals from the International Space Station; decoding some of the SSTV (Slow Scan TeleVision) images they were transmitting in honor of World Space Week 2025.
The cleanest SSTV image we got from space during World Space Week 2025.
Seeing the excitement Isaac has about this technology – and also the sense of accomplishment he has in having earned his way into the ham radio club – has been really invigorating for me. He’s so proud of his Technician credential, and I’m proud of him for sticking with it to reach his goal.
His experience inspired me to jump back in myself. I’m happy to say that after Isaac passed, I picked up some study materials – including the EXCELLENT course on W4EEY’s YouTube channel – and was able to pass my Extra exam with WM7X acting as my VEs as well! In the coming months, I plan to build out an HF station that will enable us to make long-distance – and even worldwide contacts.
Isaac is already working on catching up. 🙂
For now, I’ll end the post with the traditional ham farewell: “73!”
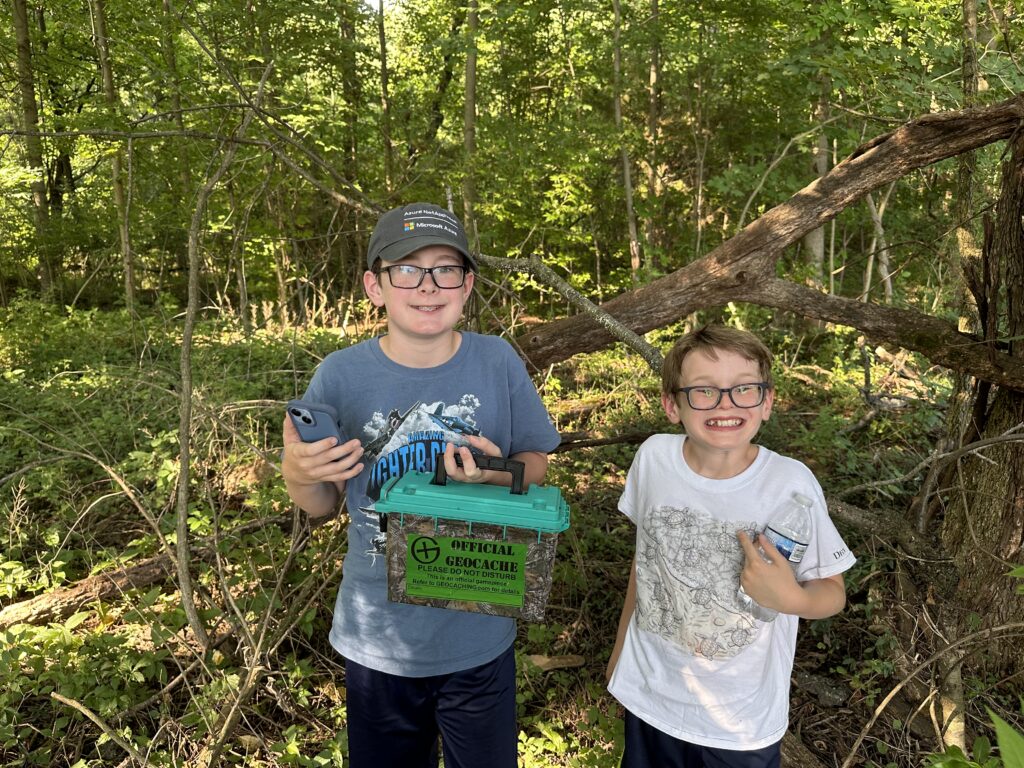
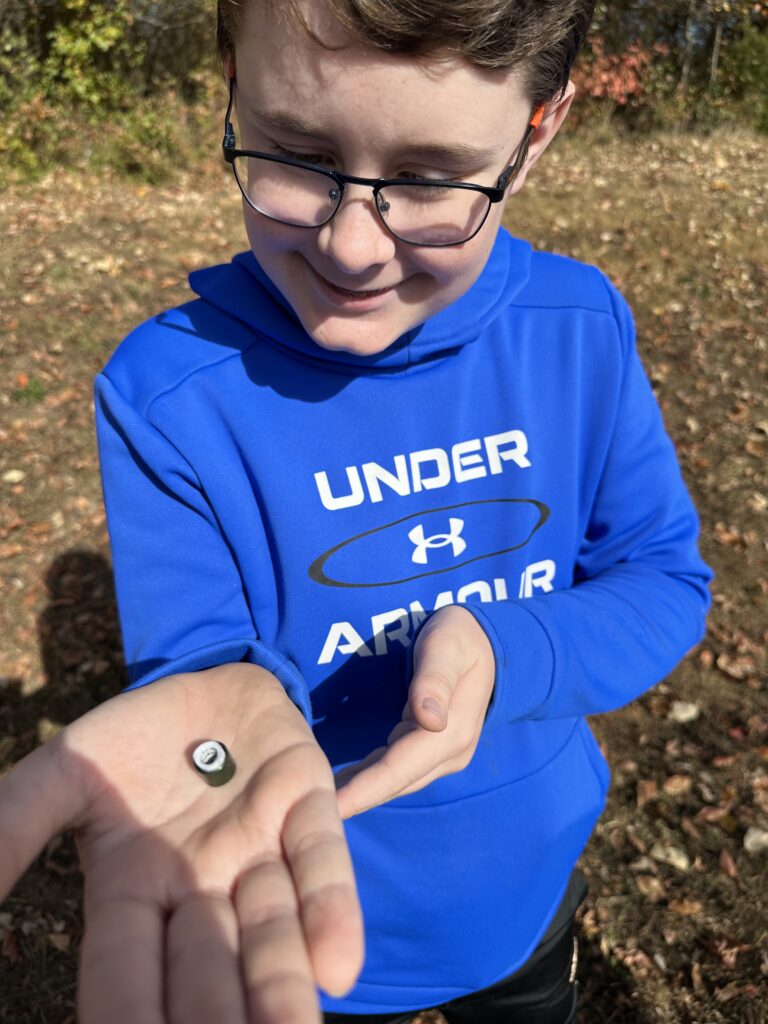
When John got his own phone last summer, I was looking through my own apps to see which ones might interest him. One of the first ones that jumped out at me was the Geocaching app. It had been years since I had gone geocaching – certainly before the boys were born – so they had never heard of it. What a joy it was to introduce them!
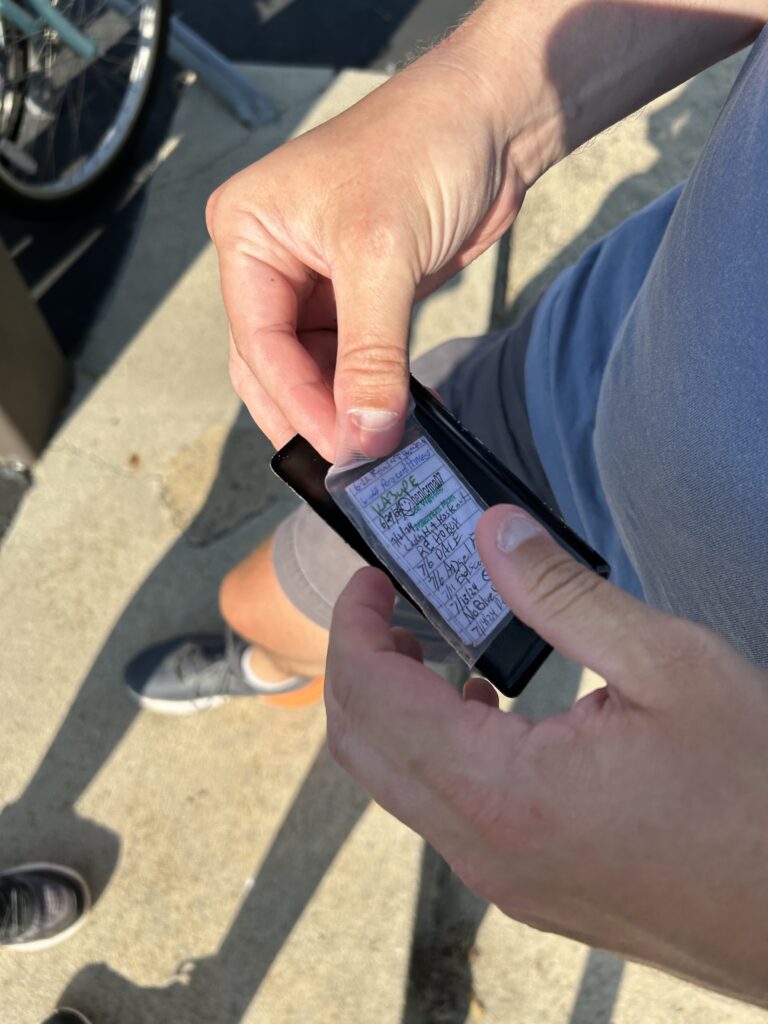
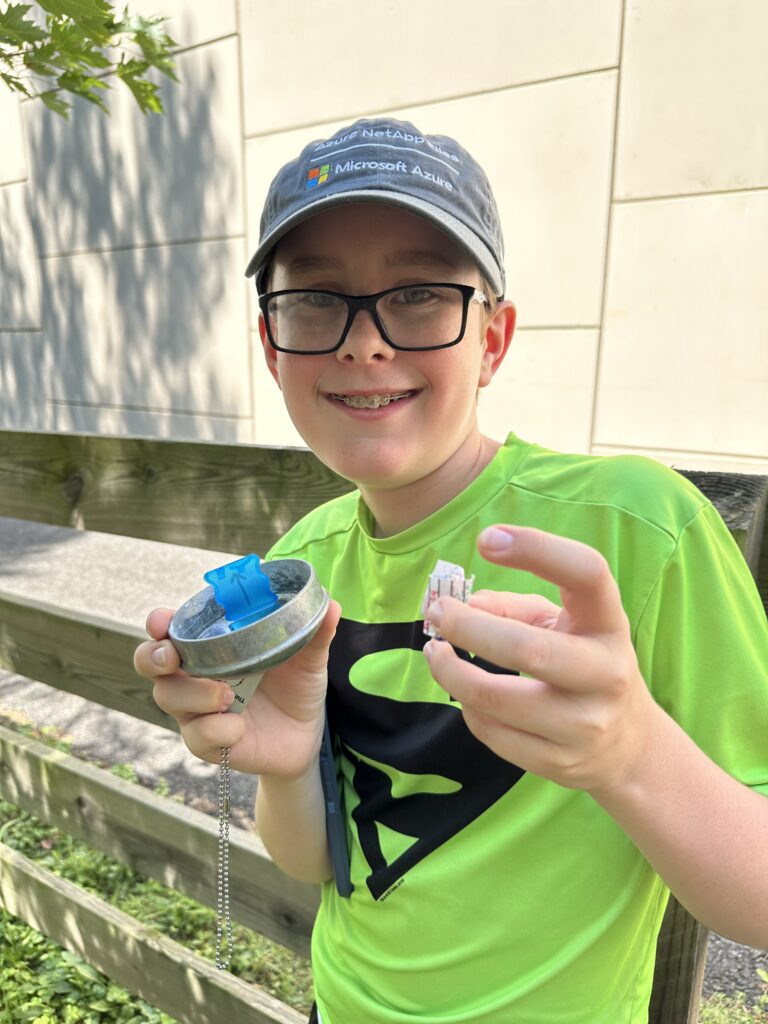
For the uninitiated, geocaching is something of a scavenger hunt with a nerdy component. The object is to try to find secret caches hidden out in the real world. The original idea is that these would be large enough to hold trinkets to trade with strangers, along with a paper log to sign proving that you found the cache. Increasingly, the ones we seem to find are micro-caches, only large enough for a very small rolled-up log.
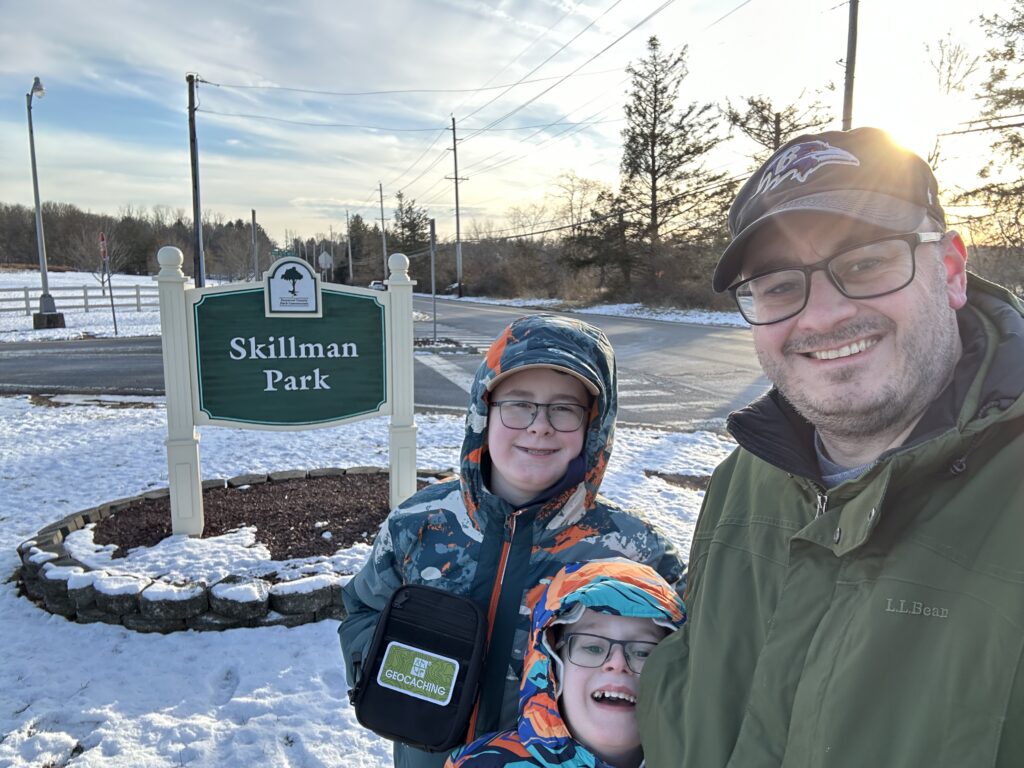
Winter geocaching at…some random park?
So how do you find these caches? There is a website and app where people post GPS coordinates of the caches they have hidden. Many times they also include a hint to help you find just the right spot. As people find the caches, they make note of their discovery in the online database and leave a “thank you” to the maintainer. It’s a great way to get outside while still having some nerdy fun. Back in the old days, I would have to research potential caches on the computer at home, and then note the coordinates for when I was out with my portable GPS unit. These days, an iPhone already has everything you need to go geocaching built into one device, so it’s super easy to just pick up when you find yourself with a little unexpected free time.
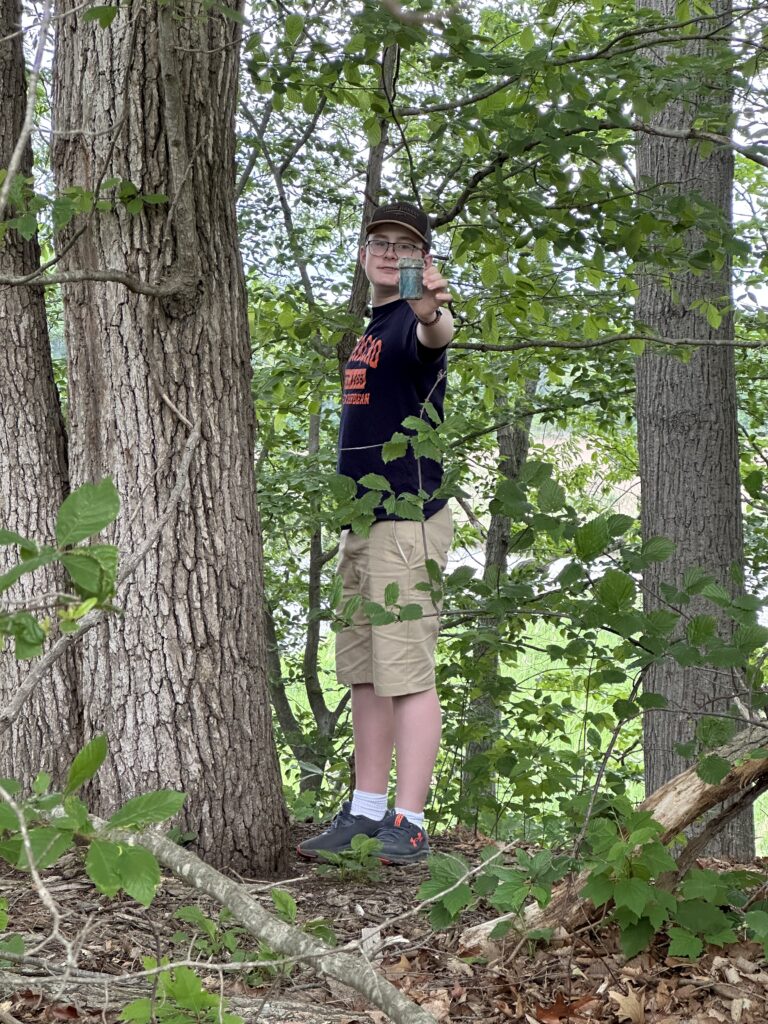
It’s got to be around here somewhere….Found it!
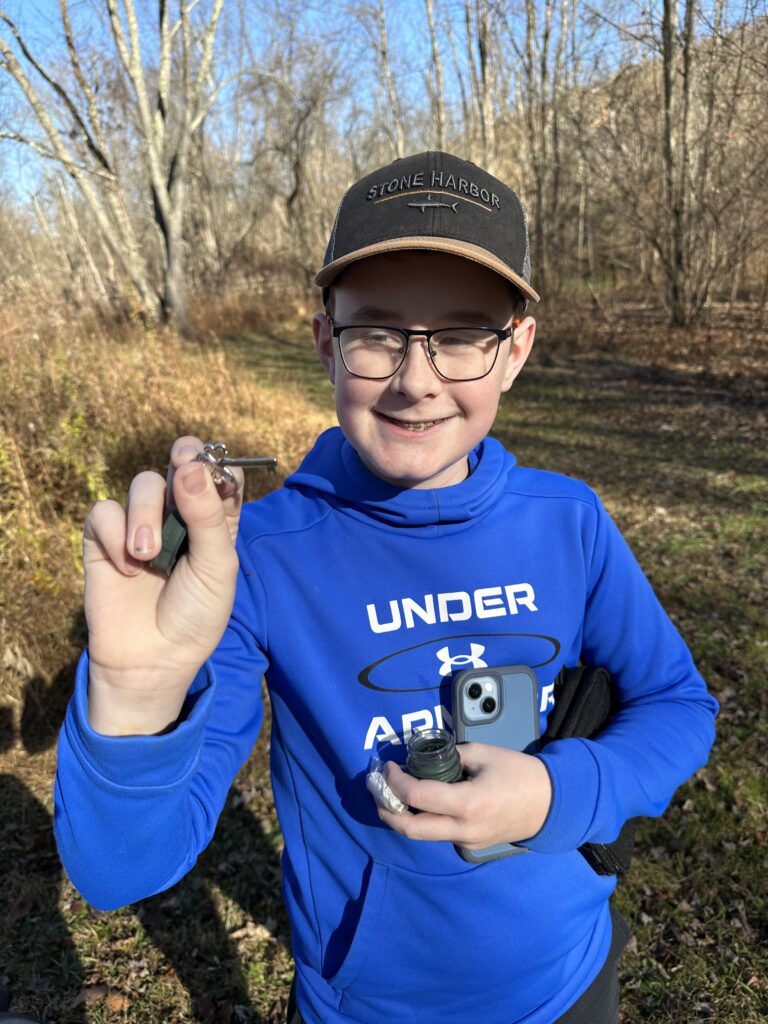
It’s become a favorite hobby for John, and we try to plan little excursions for it every month or so. As of today, John has 61 total finds and has even tried his hand at hiding 2 different caches himself, though with limited success. Being a maintainer can be difficult.
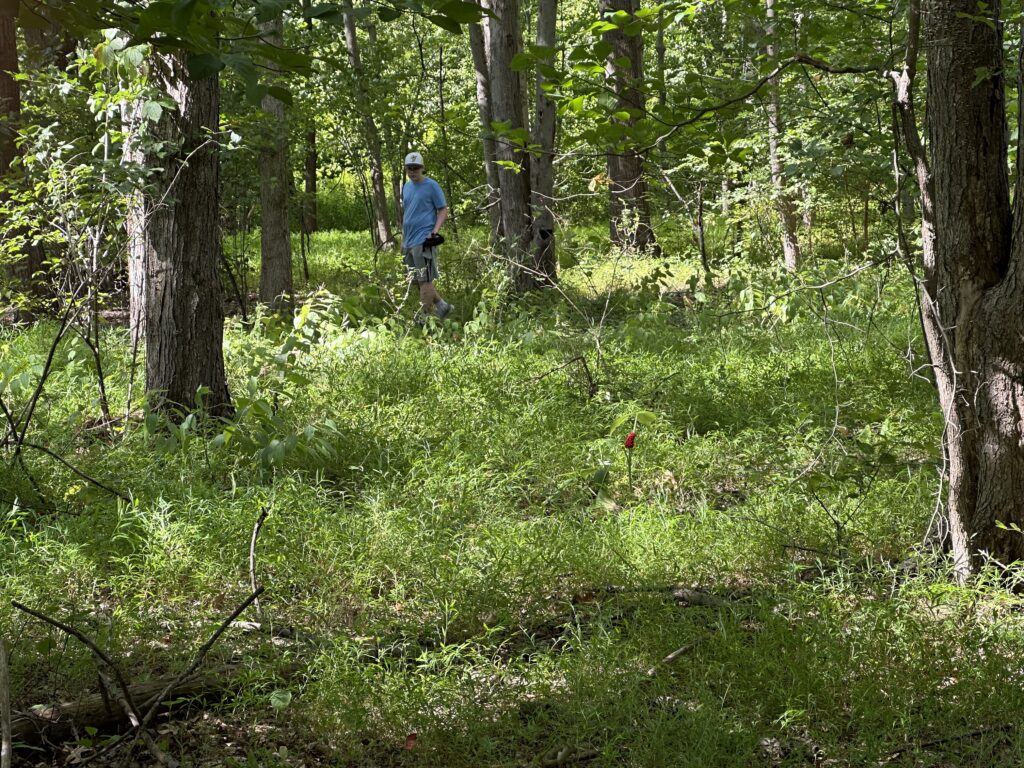
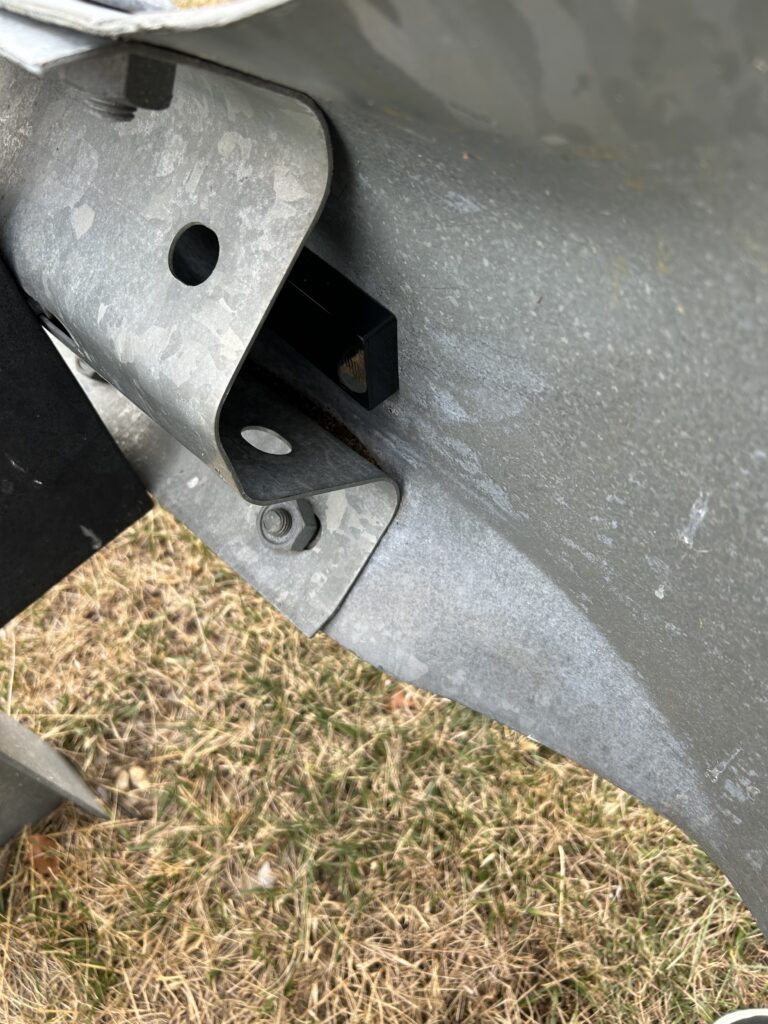
We’ve had a lot of fun getting out to search for caches. Some of the hides are quite creative and I’m always surprised at the lengths people will go to make their cache a unique experience for others to discover. Magnetized key boxes get a lot of use in the geocaching community, but there are also companies that make specialty weather-proof containers designed for geocaching.
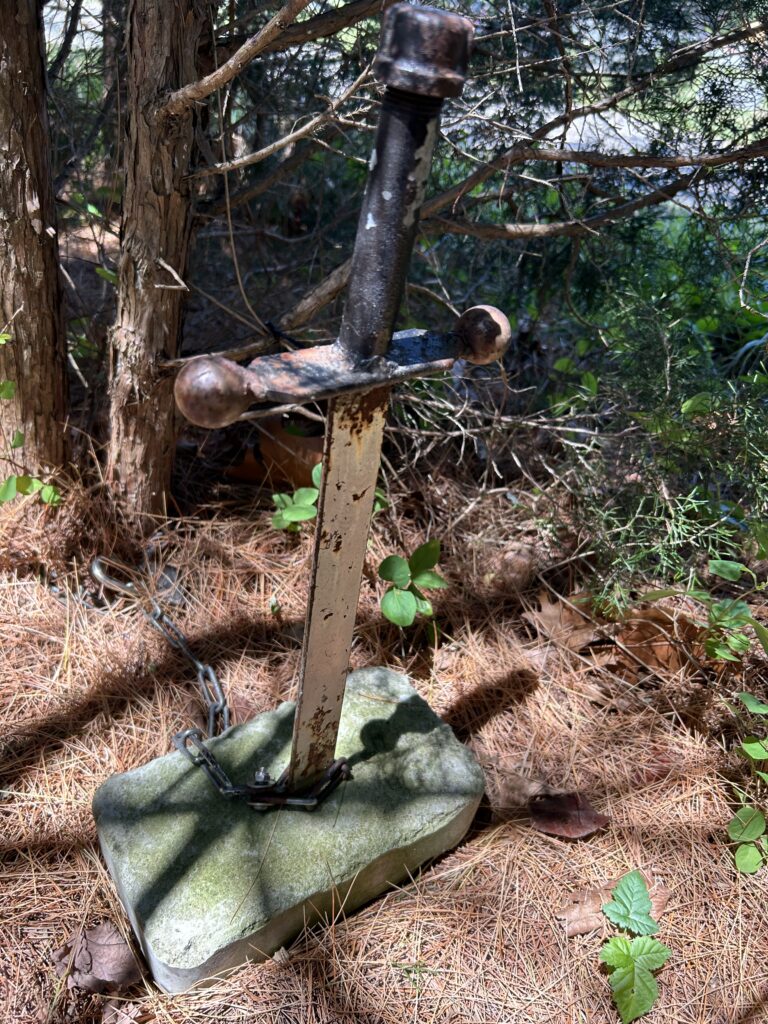
Large waterproof boxes make for good caches.This one was made to look like an electrical outlet cover on a street lamp pole. Clever.This one took us a while to find – and no spoilers – it was hidden in the metal top of a fence post!A hidden magnetic cache along the road.A super tiny micro cache with just enough space for a tightly-wound log.A key…but to what?This is probably the most creative cache yet – a custom made “Excaliber” container.Once we solved the location puzzle, the cache itself was a puzzle. Which cap hides the log?
Since this is an outdoor activity involving finding stuff, we’ve been able to make it mesh quite nicely with my historical marker hunting. More than a few times we’ve been able to do both at the same time – now that’s a win-win!
Since we have moved to Delaware, one of the places that the boys and I love to visit over and over is the Air Mobility Command Museum at Dover Air Force Base.
For one thing, its a free museum that’s only about 30 minutes away, so it doesn’t take much justification for us. But what keeps us coming back is the staff. The docents are largely retired Air Force folks who love to share the stories of the aircraft they worked on during their military service. They are always so knowledgeable and welcoming – especially on days when they host Open Cockpit events.
Most of the museum’s extensive collection is outside. Favorites there include the VC-9C that served as Air Force 2, the massive C-5A, and the KC-10.
The VC-9C.The boys and me in front of the C-5A.The KC-10.
The first time we visited the museum, we got to go inside the C-5A. We entered on some air stairs near the rear cargo door, and I noticed a model of the Wright Flyer hanging from above near the cargo door. I asked the docent about it, and he directed my attention toward the front of the cargo compartment where an American flag was hanging near the ladder up to the cockpit. He explained that the span from that Wright Flyer model to the flag was the same distance as the Wright Brothers’ first flight. Incredible that within the span of just 65 years, aircraft technology had progressed that far. It’s still my favorite story from our visits.
Inside the museum building – which began its life as Hangar 1301 during WWII – the coolest aircraft are the C-47 Skytrain which actually dropped paratroopers during the D-Day invasion, and the B-17G. My wife Emily particularly enjoys seeing that one as her “pop-pop” served as a radio operator on a Flying Fortress during WWII.
The C-47.The B-17G
As I alluded to, we have been to the museum several times. Some days, it’s “just because,” but we have also made the trip for special events like their Open Cockpit days.
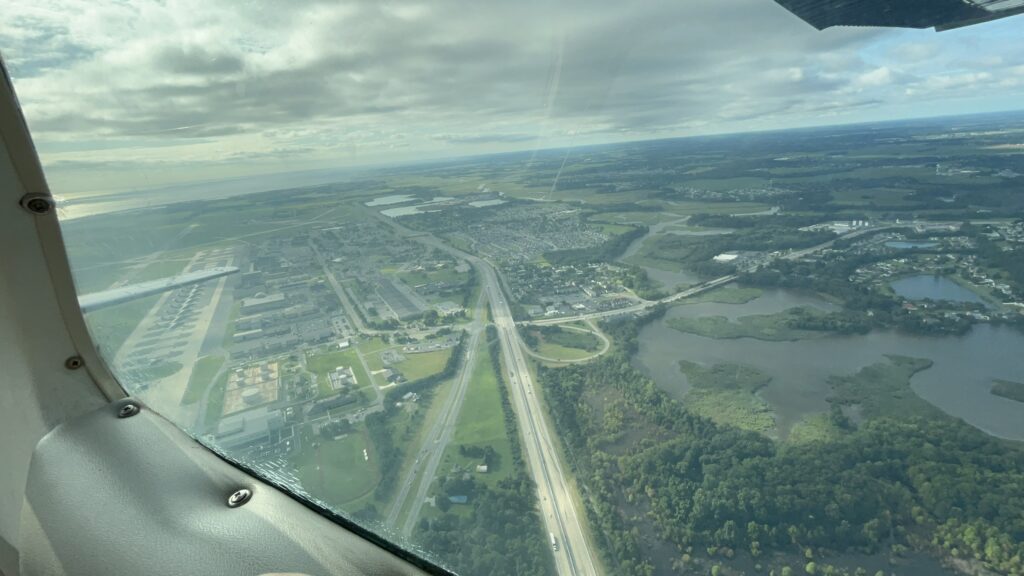
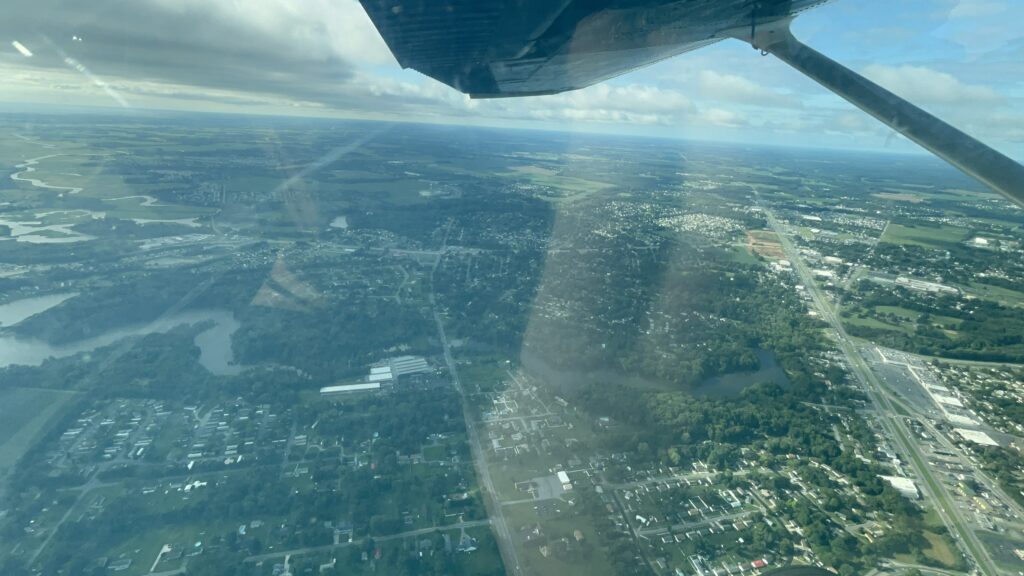
During the summer of 2024, the boys were even able to go to their really cool week-long, half-day summer camp program. They spent a week learning about aircraft, spacecraft, land navigation, and other STEM topics. The highlight of the camp was most definitely a 30-minute ride in a Cessna courtesy of the Dover Aero Club. John took his phone along and got some photos of the ride.
A cut-away Cessna showing the parts of an aircraft.Crossing DE-1 in a Cessna.The view from ~2,000 feet.Isaac enjoys the ride.Two happy guys in a Cessna!The boys ended the week with a special Chick-fil-A lunch!
It’s been almost a year and a half since I last posted here. It’s just so easy to use Facebook for “life updates” these days, and that’s where most of my friends and family go to look for that sort of thing. With the hustle and bustle of life, it’s easy to neglect your blog. That said, here’s my attempt at a general life update.
History
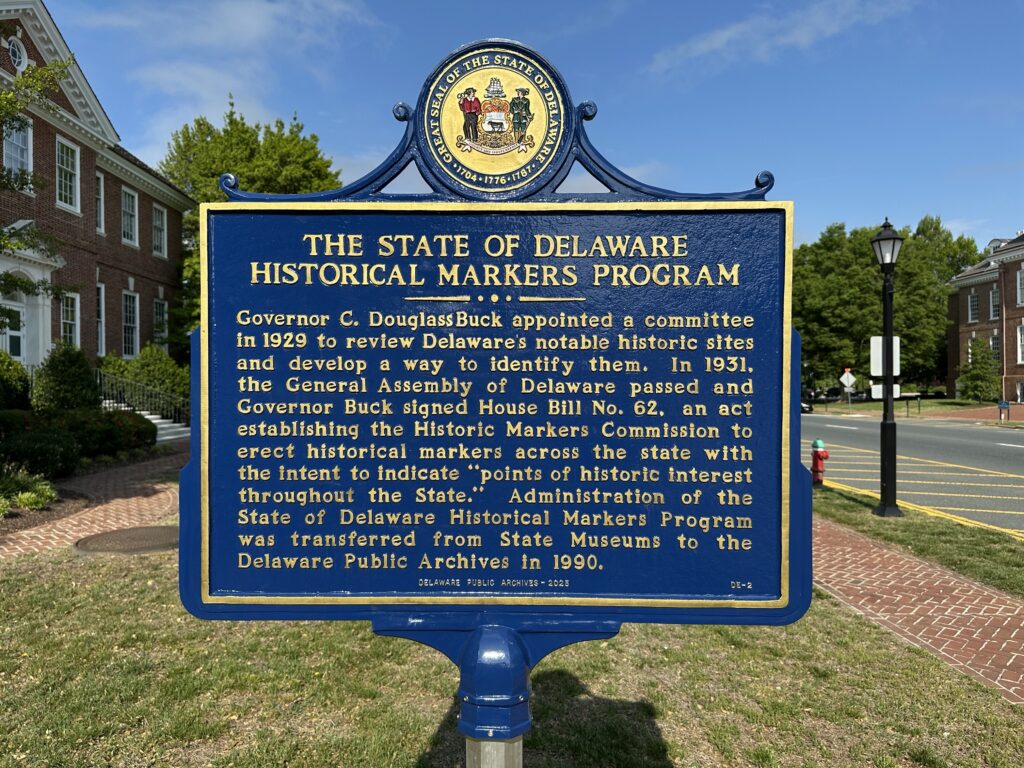
I’m still fairly involved with the HMdb. While I’m out and about, I’m always on the look-out for new markers. I’ve really been working to improve our collection of roadside markers from the Delaware Public Archives (whose own online listings of markers are incomplete and rather disjointed). This is a never-ending task as new markers are added, but I’m confident that our listing of these is complete for now.
The database continues to be the first place that I go to research the history of an area – seeing pins on a map just works for my brain with trip planning.
Perhaps the most “meta” historical marker ever created. I got to add this one to the HMdb.
As of today, my contributions are good enough to rank me as 70th all time out of 7,683 individual contributors to the database. I have submitted a total of 583 markers, 1,489 photos, and 412 links to other websites. I’m very proud to be part of the team.
Technology
Sadly, not much has changed in my home lab since the last update. There are of course new versions of software, and a few new applications I’ve been playing with, but the large hardware changes I’ve been wanting to do are still on the back burner for now. I’m hoping that I can return to those in the new year.
Our most significant addition has been a new in-home phone system using FreePBX and several Cisco SPA525G2 desk phones. The boys have really enjoyed being able to help build this and play with it. Once I get some better back-end hardware, I’m planning to hook our system up to the outside world through a SIP trunk with an actual phone number. Stay tuned for more posts about this topic.
We got a phone system working thanks to these awesome Cisco phones!
Speaking of things that deserve their own posts, I’ve re-entered the world of ham radio. That story will be fleshed-out soon.
Other News
Since he got his own phone last summer, John has picked up an interest in Geocaching. We try to plan an outing for that every month or so, and it’s a good excuse to get outside and move a little while still doing something nerdy. Sometimes, I’m able to get some historical markers at the same time so, win-win!
Also late last year, both of my boys worked through classes at our church and became full communing (and voting) members. It’s fun to watch them grow up and begin to enter adulthood in small ways like that. As rough as these middle school years can be (yes they are BOTH in middle school now) this is also the time when they are truly becoming themselves.
Thanks to some free tickets he got as part of a school reading program, Isaac took me to a Delmarva Shorebirds game this past spring. The boys and I have now been to games at all the Orioles minor league affiliates’ stadiums.
Also coming in a future post: I got a passport for the first time last year! There must have been a specific reason for that….
People who have followed this site for some time know that I am very interested in history. I love taking road trips to experience it, and I especially love getting to share history with others – both in-person, and through the medium of the Internet.
To that end, I’ve been a great admirer of the Historical Marker Database since its inception. Their mission of cataloging all the outdoor history markers that we come across in our daily lives always struck me as being very worthwhile. I’ve used it as a reference when planning my own trips (or when I was in a hurry and was really curious what was on that sign I passed earlier in the day). For almost a decade, I have been a “Contributing Correspondent” to the database, submitting markers that I had found that were not yet included. Recently, I’d become a lot more active, submitting well over 100 markers so far in 2024.
Because of that increased activity, a couple of days ago, I got an unexpected email from the publisher of the website:
Nomination to Contributing Editor
Pete,
I am pleased to announce that the Board of Editors here at the Historical Marker Database have nominated you to become a Contributing Editor. Your entries are complete, well-illustrated, well-edited entries that are always ready-to-publish….
J.J. Prats
Almost immediately, I very happily accepted the nomination.
I can’t really put into words how much it means to me to be trusted to be so involved with a project that has meant so much to me, and that I think is important as a resource on the Internet. Obviously, it is a big responsibility, and I hope that I am equal to it. And it is an absolute thrill to see my name on the About Us page. I’m not sure if I’ll get over that for some time.
I may start posting more content here that is explicitly related to historical markers, or my journey in discovering them. I’m sure that it is work that we will never be finished with.
Emily and I had gone up to visit her Nana at the senior living community that she moved in to. We planned to have dinner together in their dining room and just enjoy the company.
As we were waiting for our food, I noticed a series of prints hanging on the wall depicting various aspects of the papermaking process. Some of the prints were photos and maps labeled as from the “Nonantum Paper Mill”. It piqued my interest because of the excellent lecture from Scott L. Mingus that I attended a few years ago on the History of Papermaking.
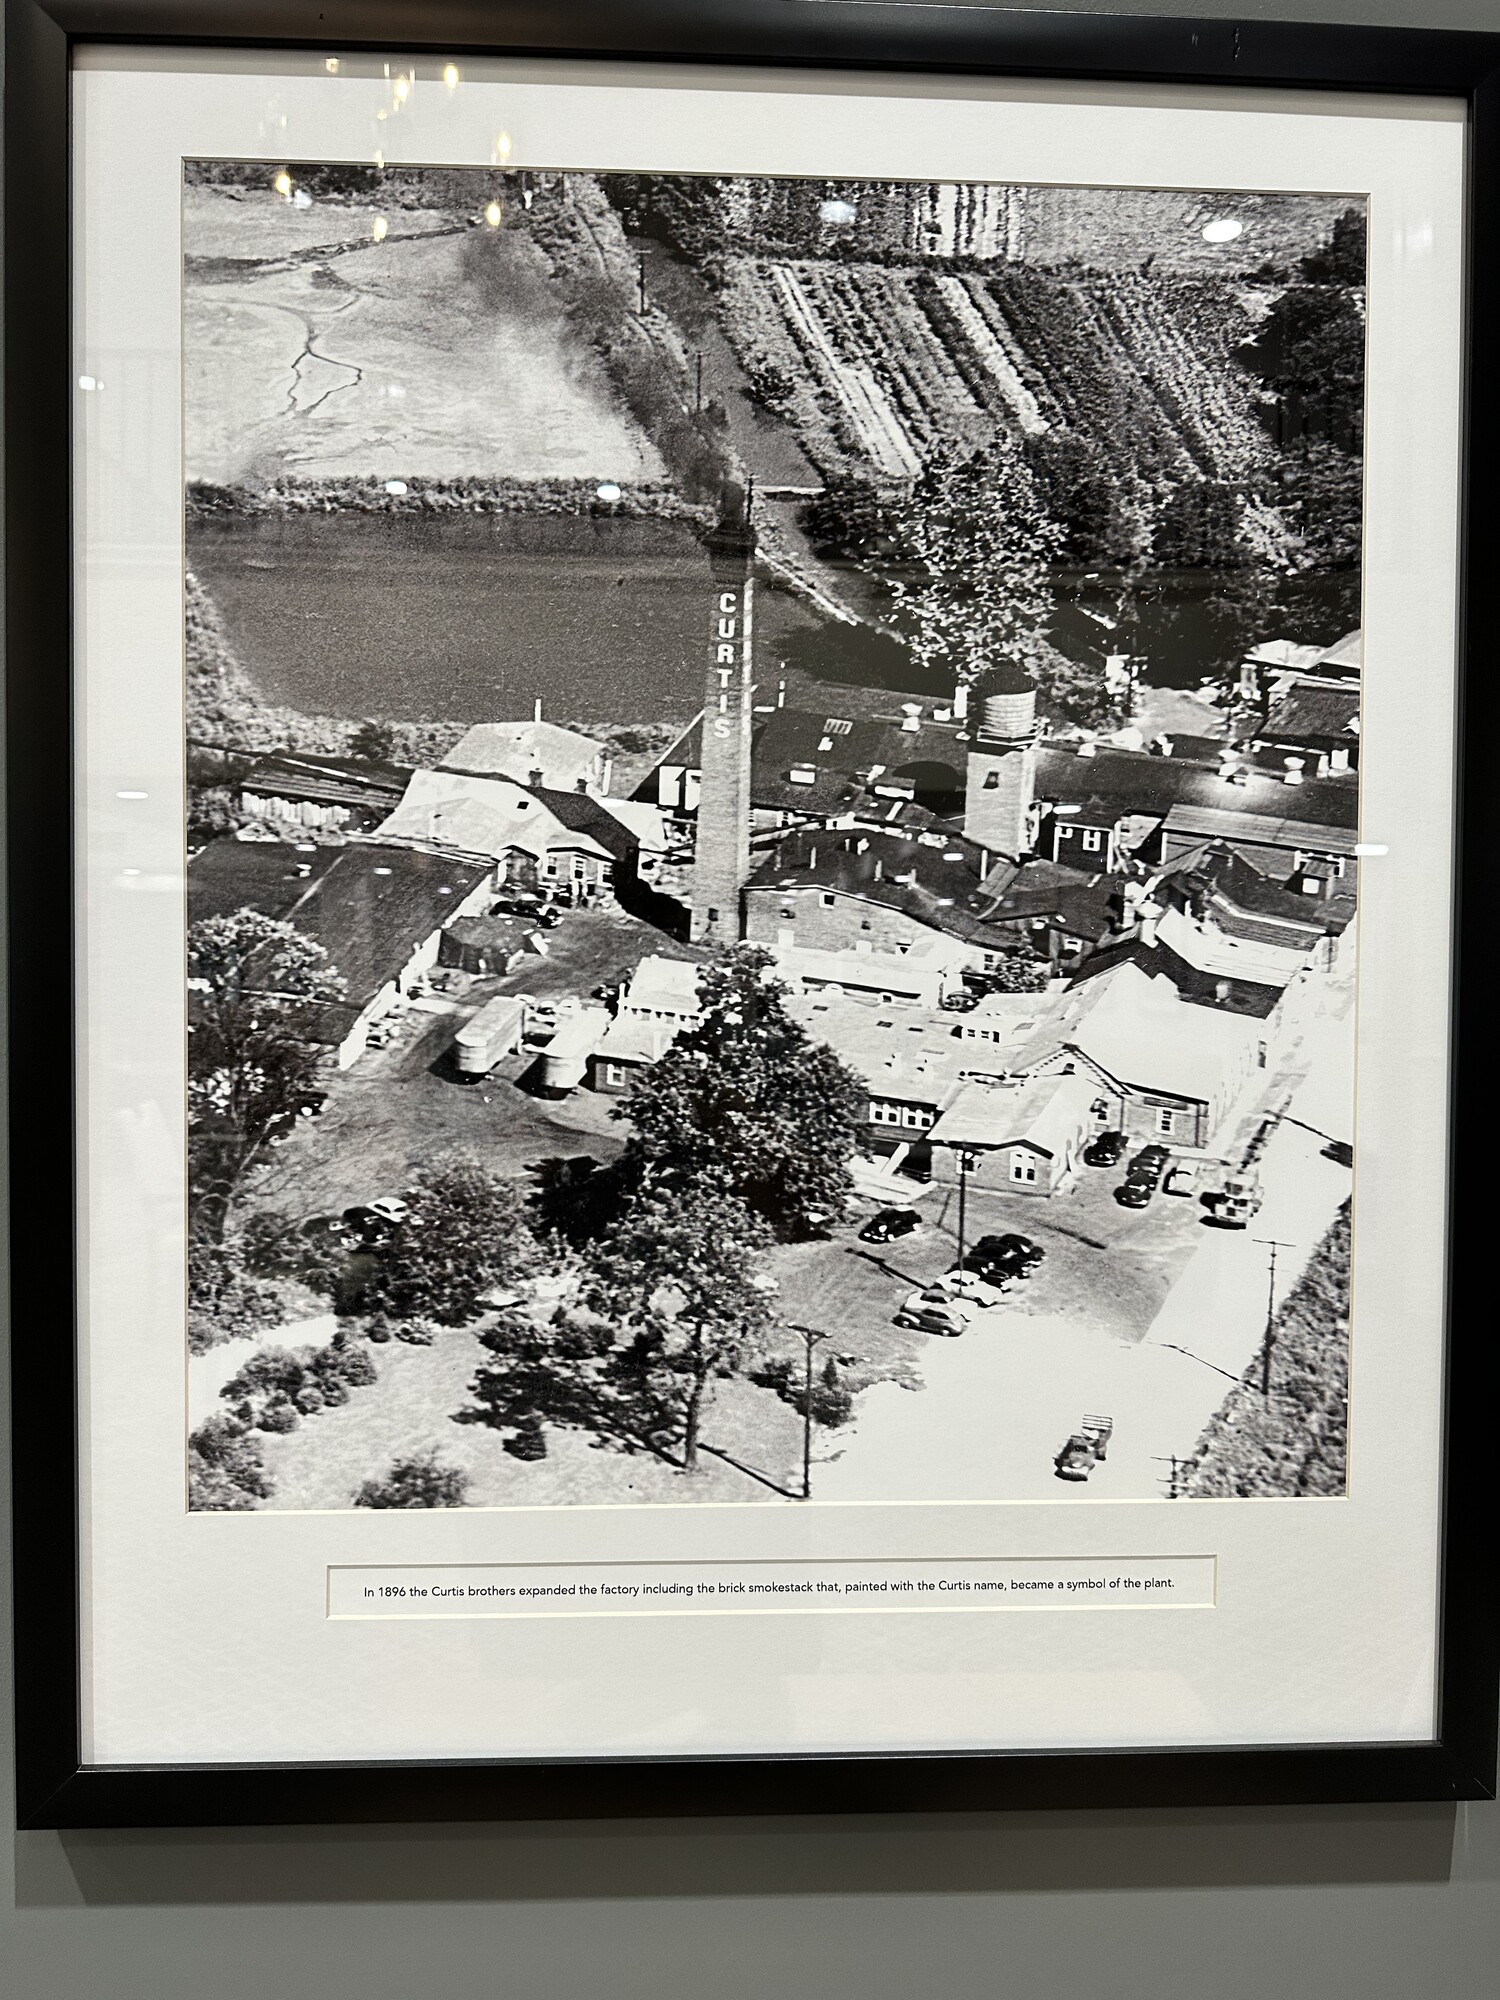
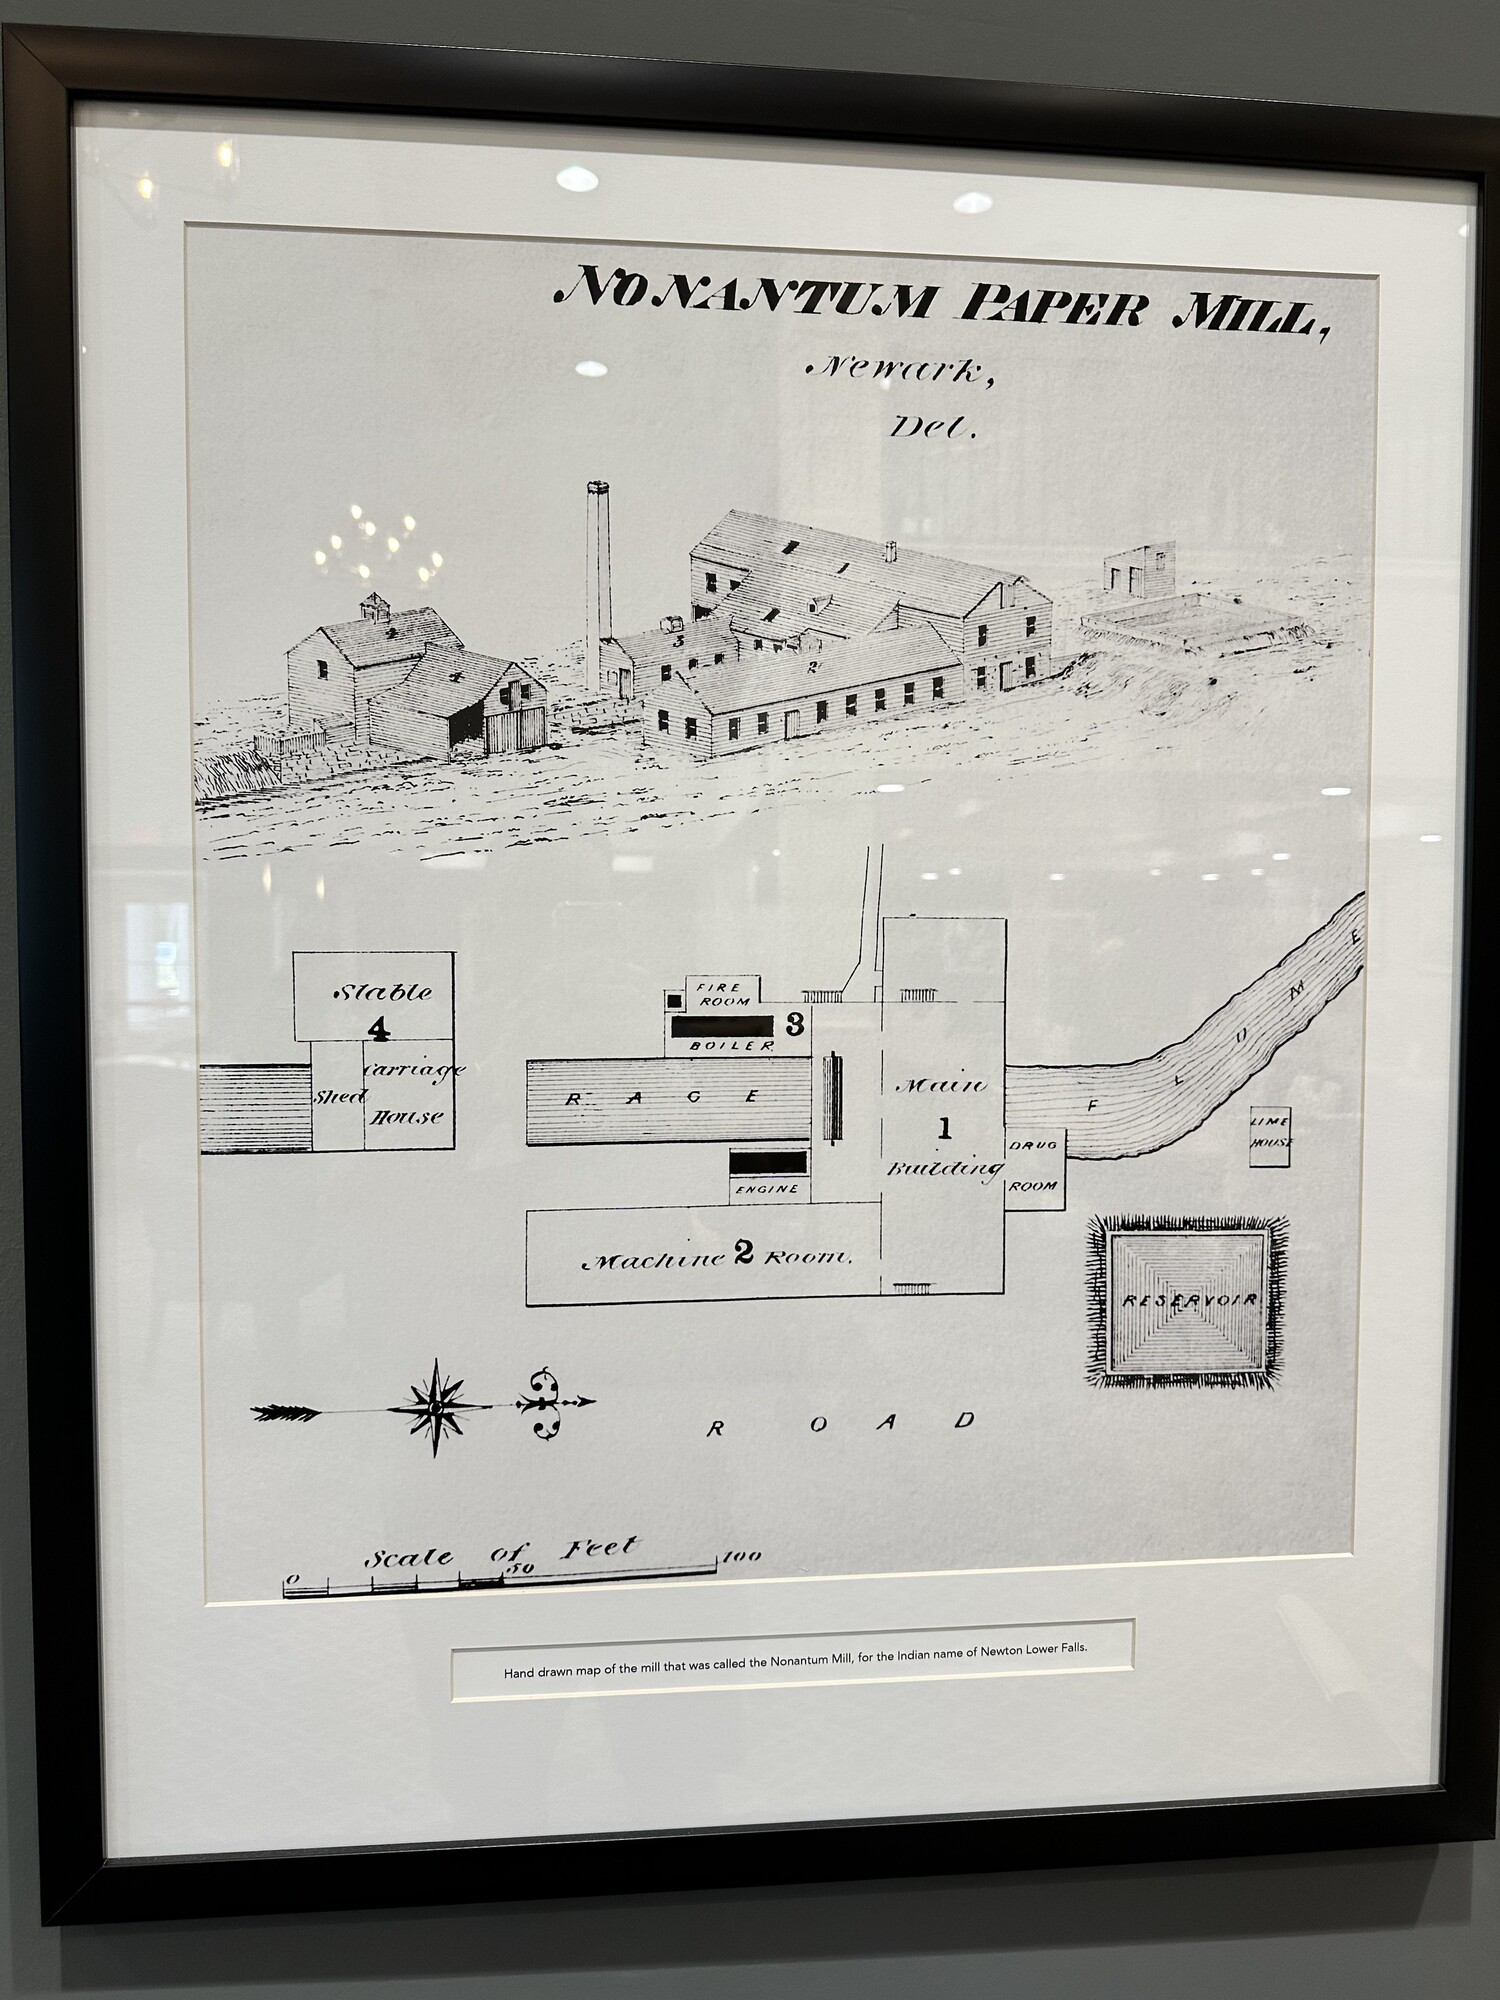
An aerial photo of the paper mill hanging in the dining room. – Photo by the authorAn old map of some of the mill buildings. – Photo by the author
The three of us got to talking about it at dinner, and the ladies told me that the old mill was nearby on the aptly-named Paper Mill Road. Emily agreed to drive over to check it out when we were finished with our visit.
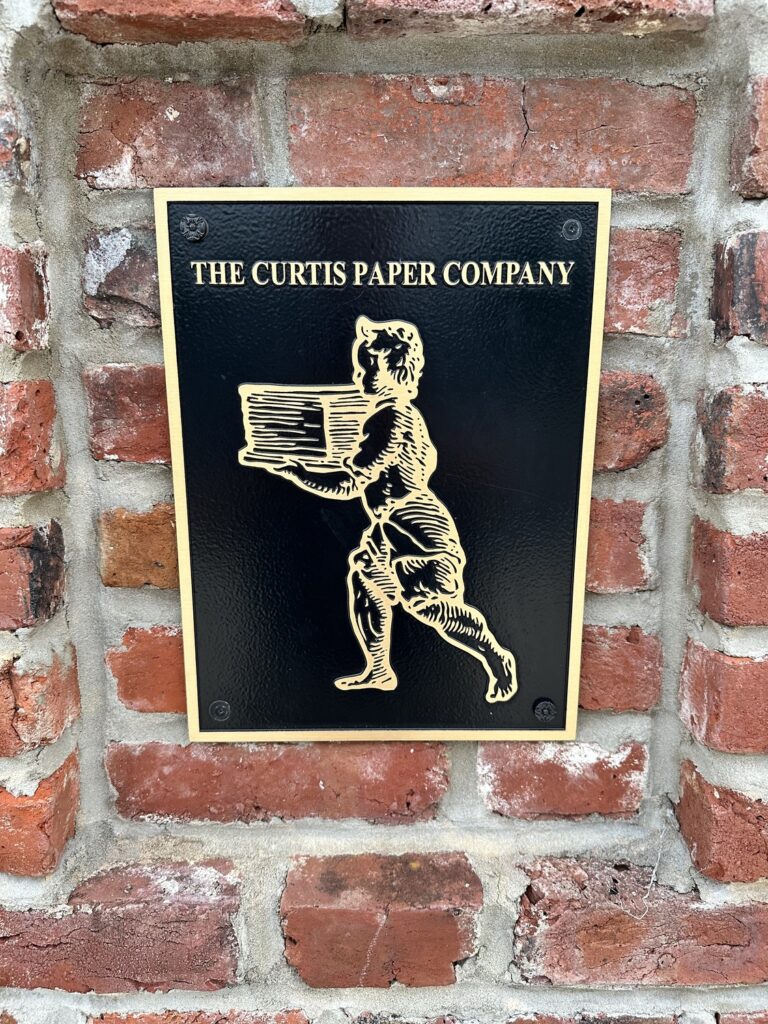
A plaque with the brand of the Curtis Paper Mill is at the site today. – Photo by the author
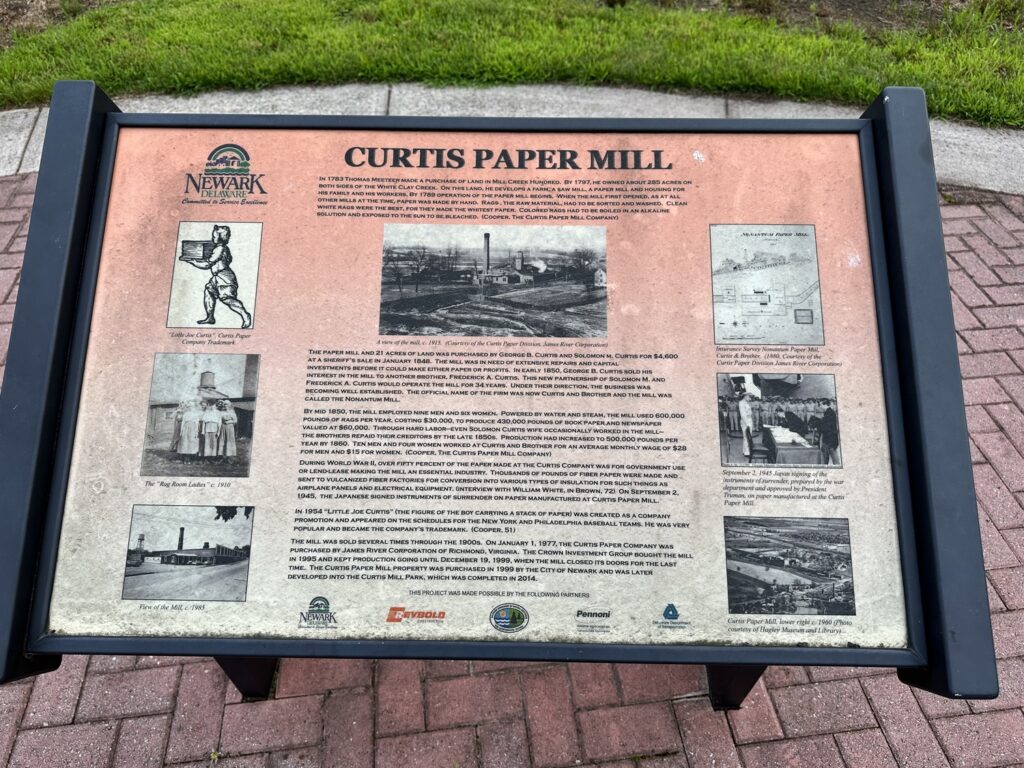
The City of Newark converted the site into a park several years ago. The mill had closed down in 1999. None of the old buildings still exist, but I think the mill race is still there – I need to go back to investigate further. A wayside marker told the story of the mill – and I was able to add it to the HMDB during my visit.
The Curtis Paper Mill wayside marker. – Photo by the author
Most notably, during WWII about 50% of the output of the mill was used by the United States Federal Government or for lend-lease. In fact, the paper that the Japanese Instrument of Surrender was printed on was made right there at that now-unassuming spot in Newark, DE.
I feel like I say it all the time, but history is all around us if you give yourself the chance to stumble onto it.
The next morning, we got up and had a quick breakfast at the hotel. It was about a 20 minute drive over to our first stop of the day.
Battle of Plymouth – Civil War Battlefield #167
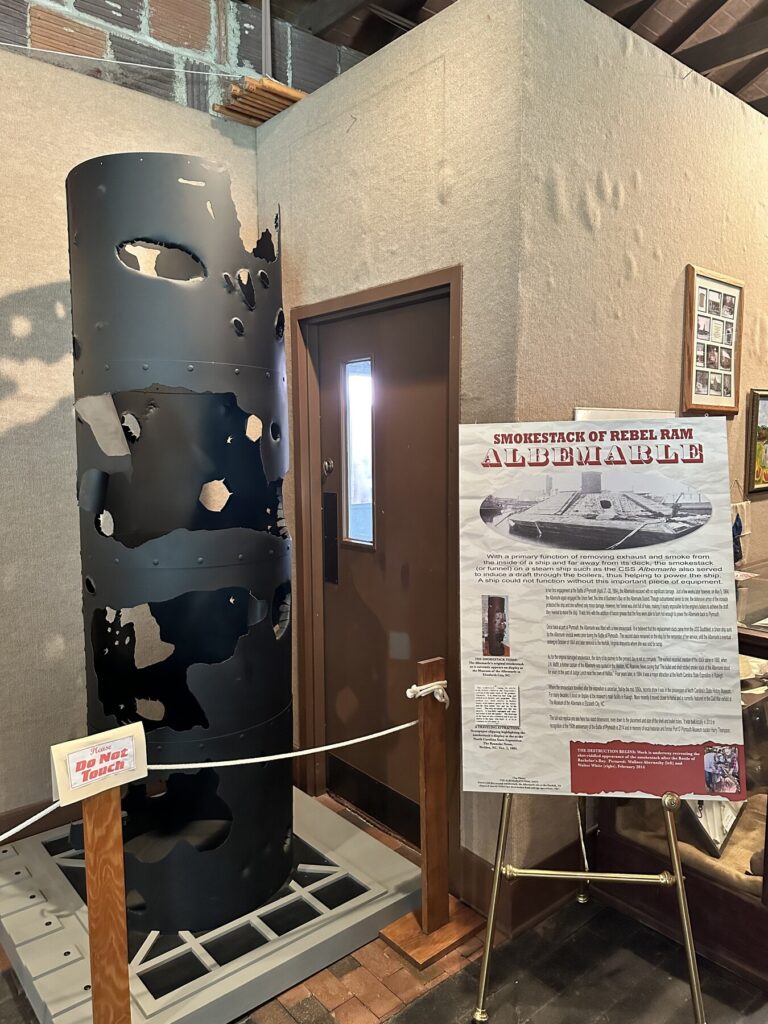
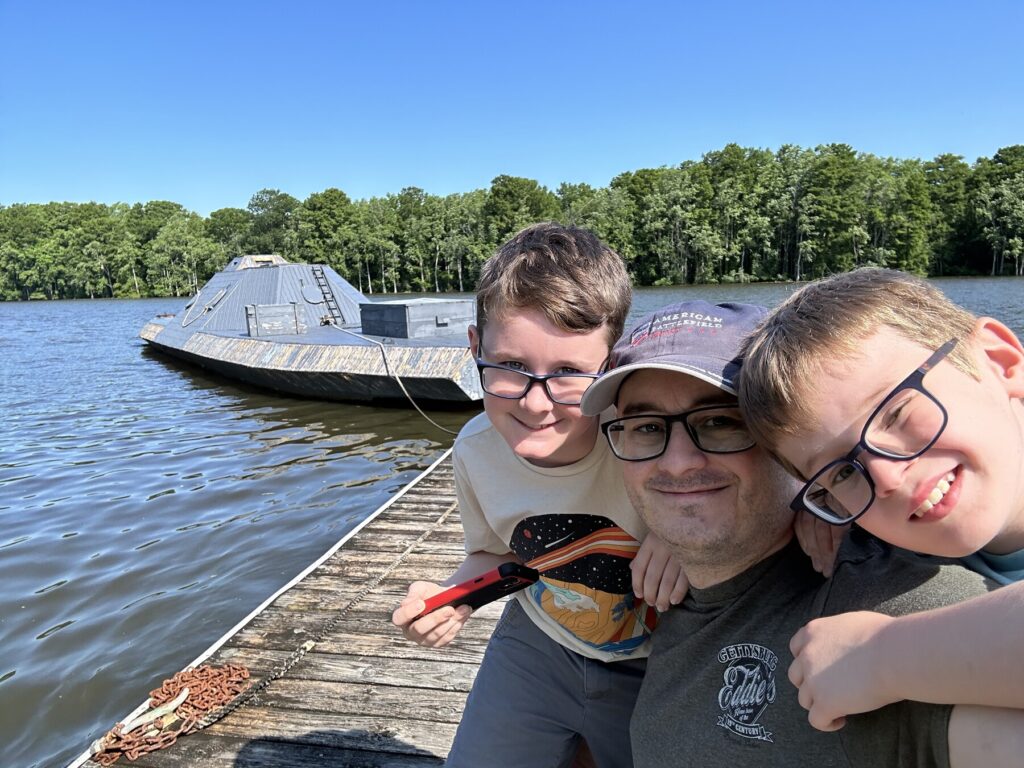
There is a small museum in the town of Plymouth, NC and we spent a few minutes checking out their displays and artifacts. They have a lot of artillery rounds and bullets, as well as buttons and small camp items that were found during digs at known local army camp sites. The 3/8 scale model of the CSS Albemarle that they have floating in the Roanoke River was a highlight for us.
Some of the artifacts in the town museum include part of the smoke stack of the Albemarle – Photo by the author
As for the Battle of Plymouth, Union forces had occupied the town and were using it as a base of operations in the area. Confederates decided to re-take it, and a combined land and naval attack using the ironclad ram CSS Albemarle succeeded in destroying the Federal warships while Confederate Maj. Gen. Robert F. Hoke’s division of North Carolinians and Virginians forced the occupying Union troops out of town.
We just had to get a selfie with the model Albemarle! – Photo by the author
Battle of Albemarle Sound – Civil War Battlefield #168
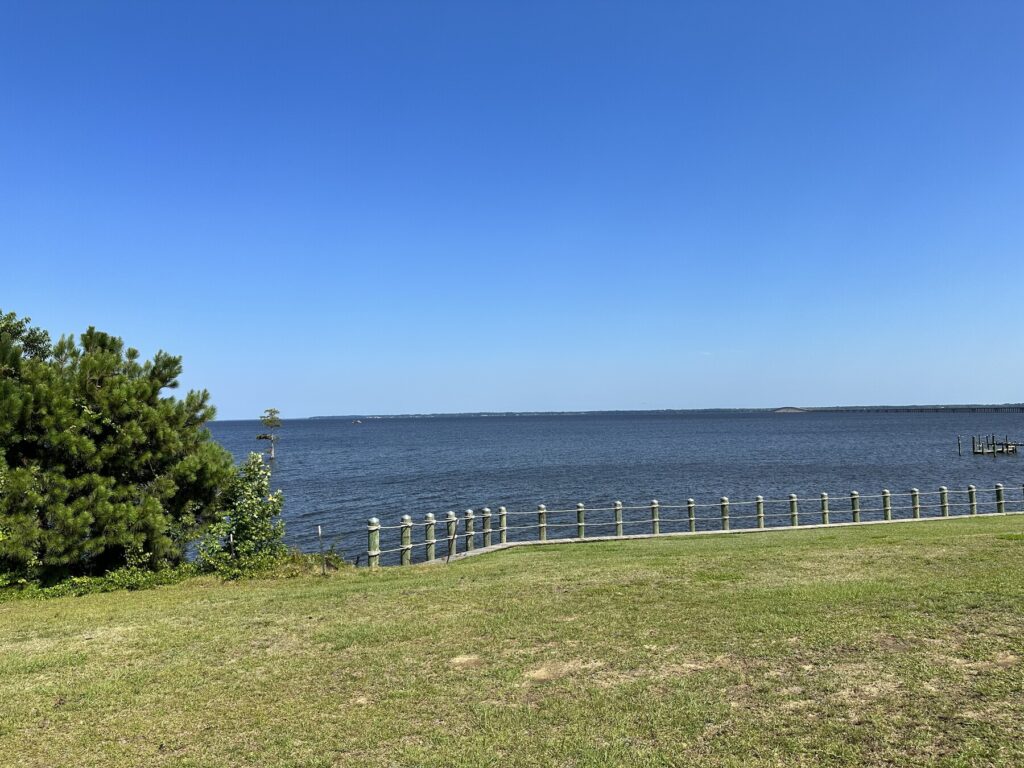
After helping to take back the town of Plymouth, the CSS Albemarle made her way out into Albemarle Sound on May 5, 1864 and found a small fleet of 8 Union gunboats waiting for her. Over the course of the day, the Albemarle held her own against multiple attacks from the gunboats. Attacks involving artillery, ramming, and even attempting to use a net to tangle her propulsion system all failed against the Albemarle. Though badly damaged, she was able to escape back to Plymouth. This fight was a stand-off, but it kept the Confederate naval weapon bottled up in port.
The Battle of Albemarle Sound took place out in these waters. – Photo by the author
Eventually, a raid led by William B. Cushing would succeed in detonating a naval mine (what they would have called a “torpedo” in those days) under the Albemarle and lead to her sinking.
We didn’t go across to Edenton, NC (where there is at least a wayside about this battle) for road trip routing reasons. We were able to get a photo from near where the action actually took place at the Waterside Resort.
Battle of Roanoke Island – Civil War Battlefield #169
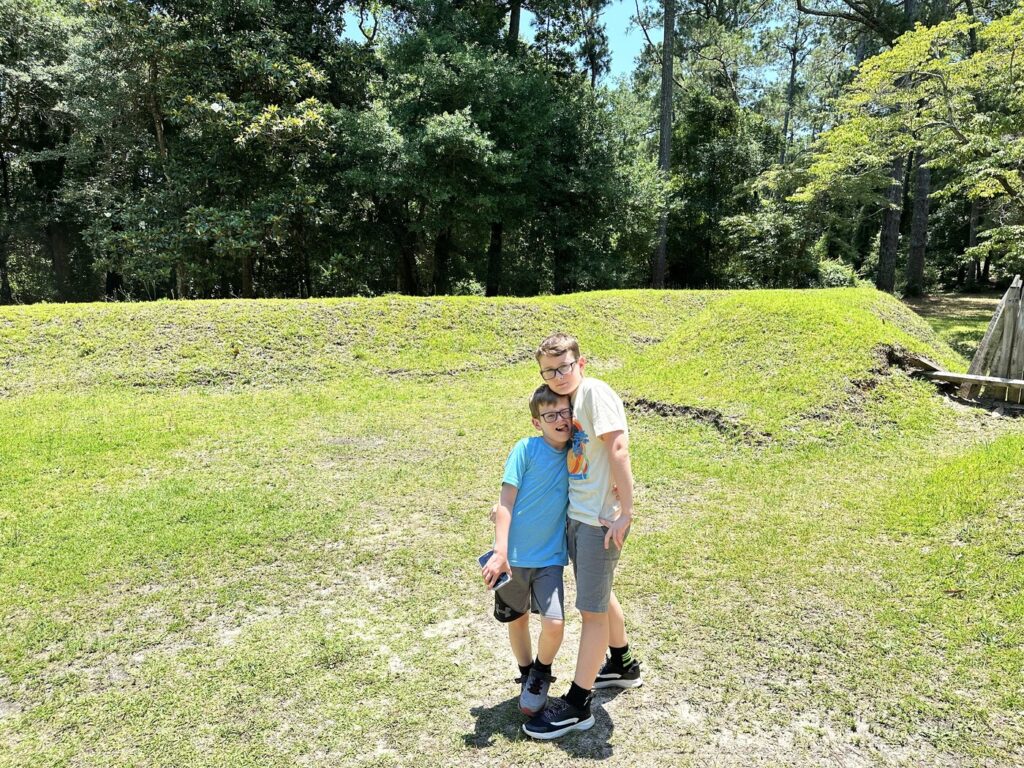
In February of 1862, Union Maj. Gen. Ambrose Burnside was tasked with closing off the Outer Banks to Confederate shipping. As part of that effort, he landed 13,000 troops on the southern end of Roanoke Island and fought his way north. This action became known as the Battle of Roanoke Island. After flushing the rebels from the other forts on the island, the final fighting happened here at Fort Huger. The overwhelmed Confederates had no choice but to surrender.
The view looking out on Croatan Sound from near the spot of Fort Huger. – Photo by the author
We stopped at Pineapple Beach – right off of US-64‘s William B. Umstead Memorial Bridge – to get a few photos and check out the markers. The visitors center at Fort Raleigh National Historic Site – which we would be visiting next – has some info on the fighting here, as well as the Freedmen’s Colony that was established once the island was under Federal control.
Posing in the reconstructed Fort Raleigh – Photo by the author
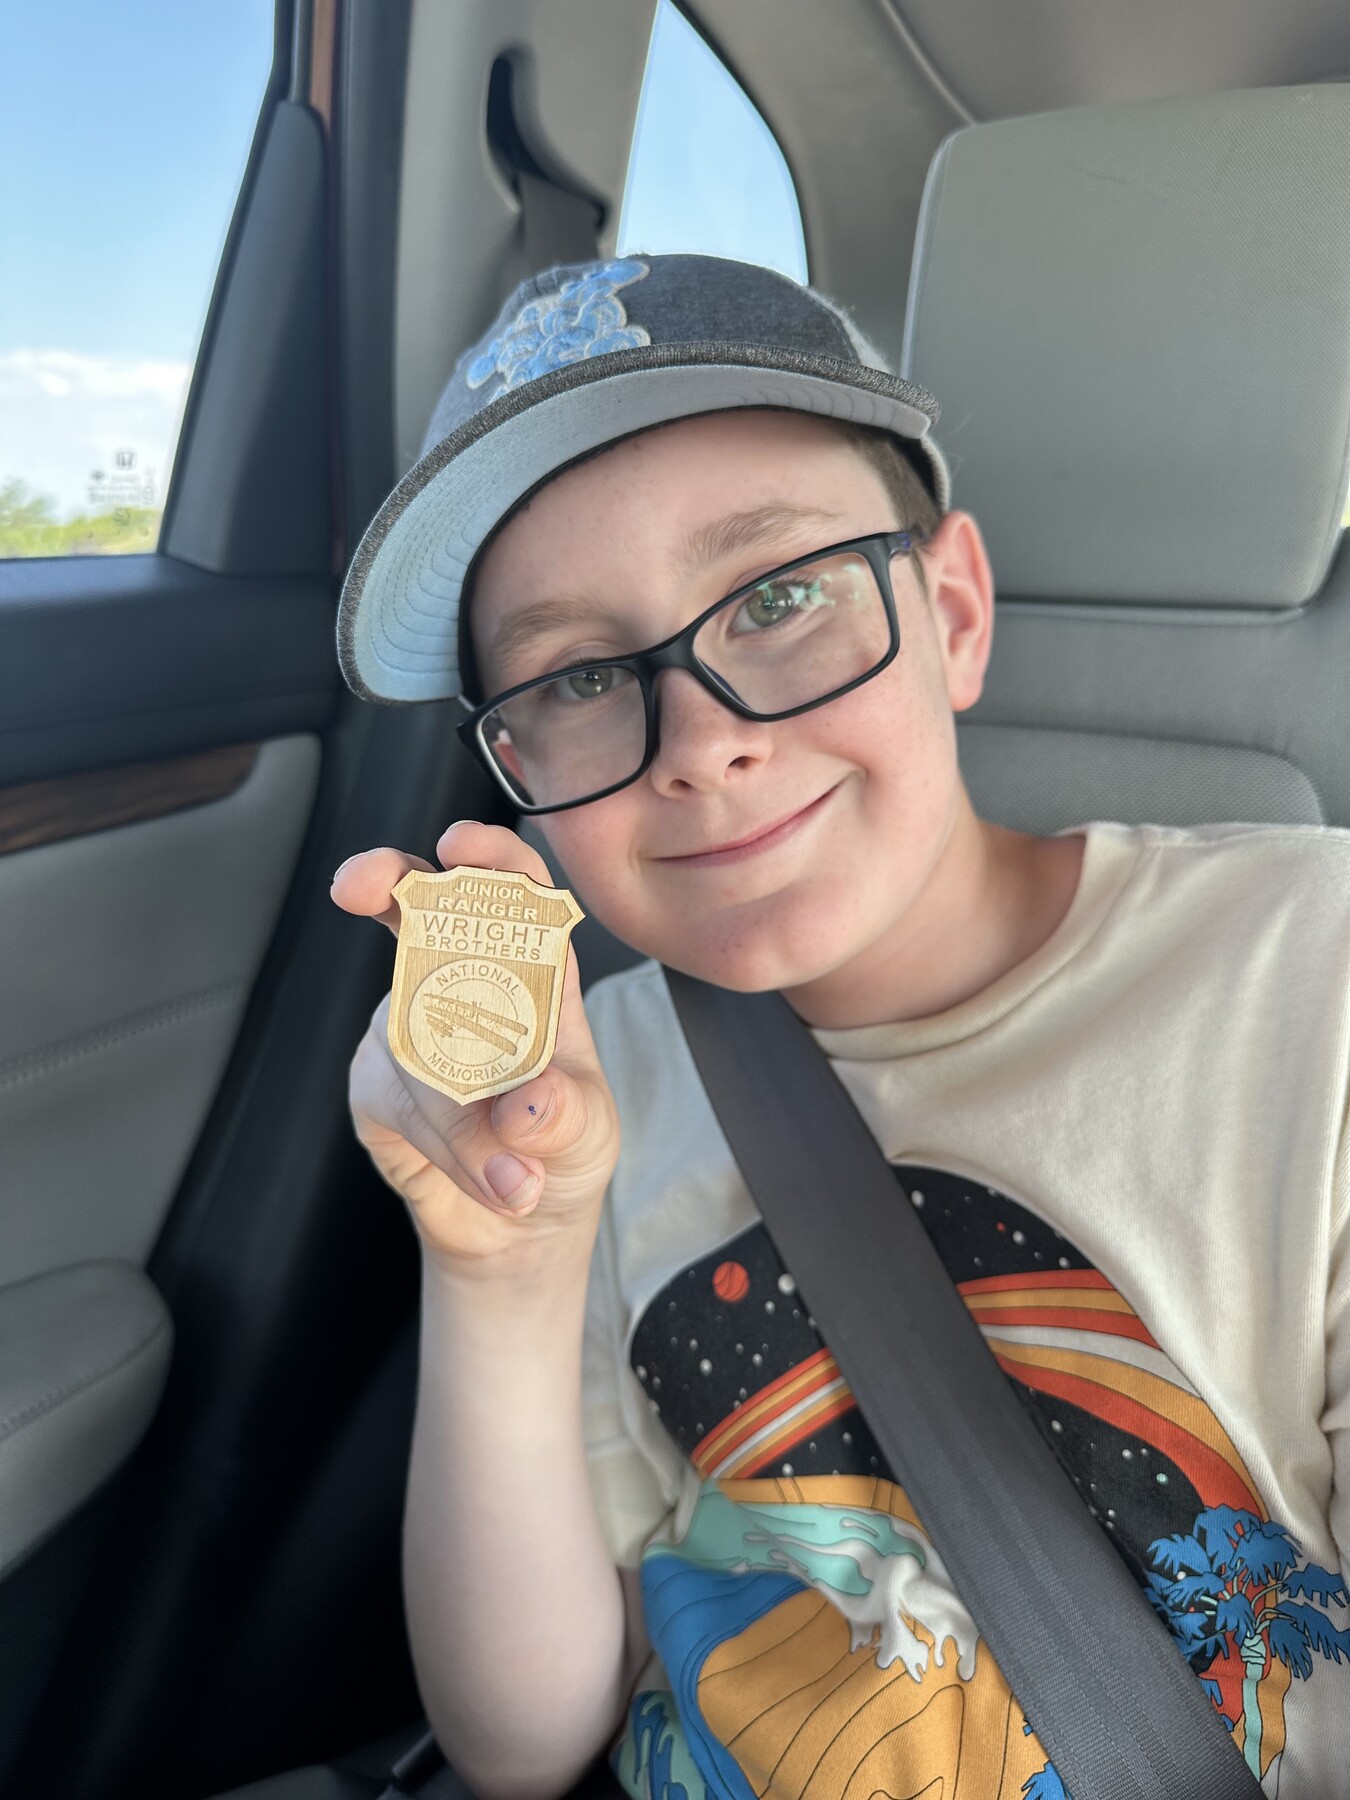
We browsed the museum in the visitors center – critical to the completion of their Junior Ranger program – and checked out the movie, and the reconstructed Fort Raleigh. The rangers were very friendly, and in addition to awarding the boys their badges, gave us bonus Junior Ranger books for the Underground Railroad Network to Freedom. Those would come in handy a little later.
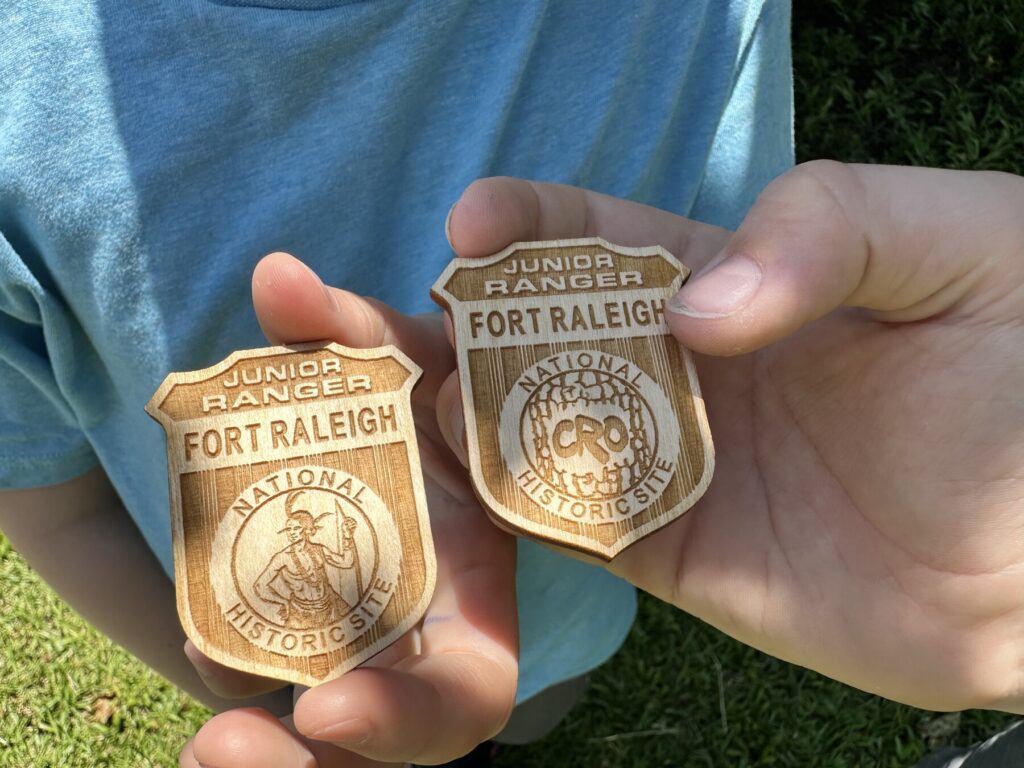
Fort Raleigh has two different designs for their Junior Ranger badges. The boys got one of each. – Photo by the author
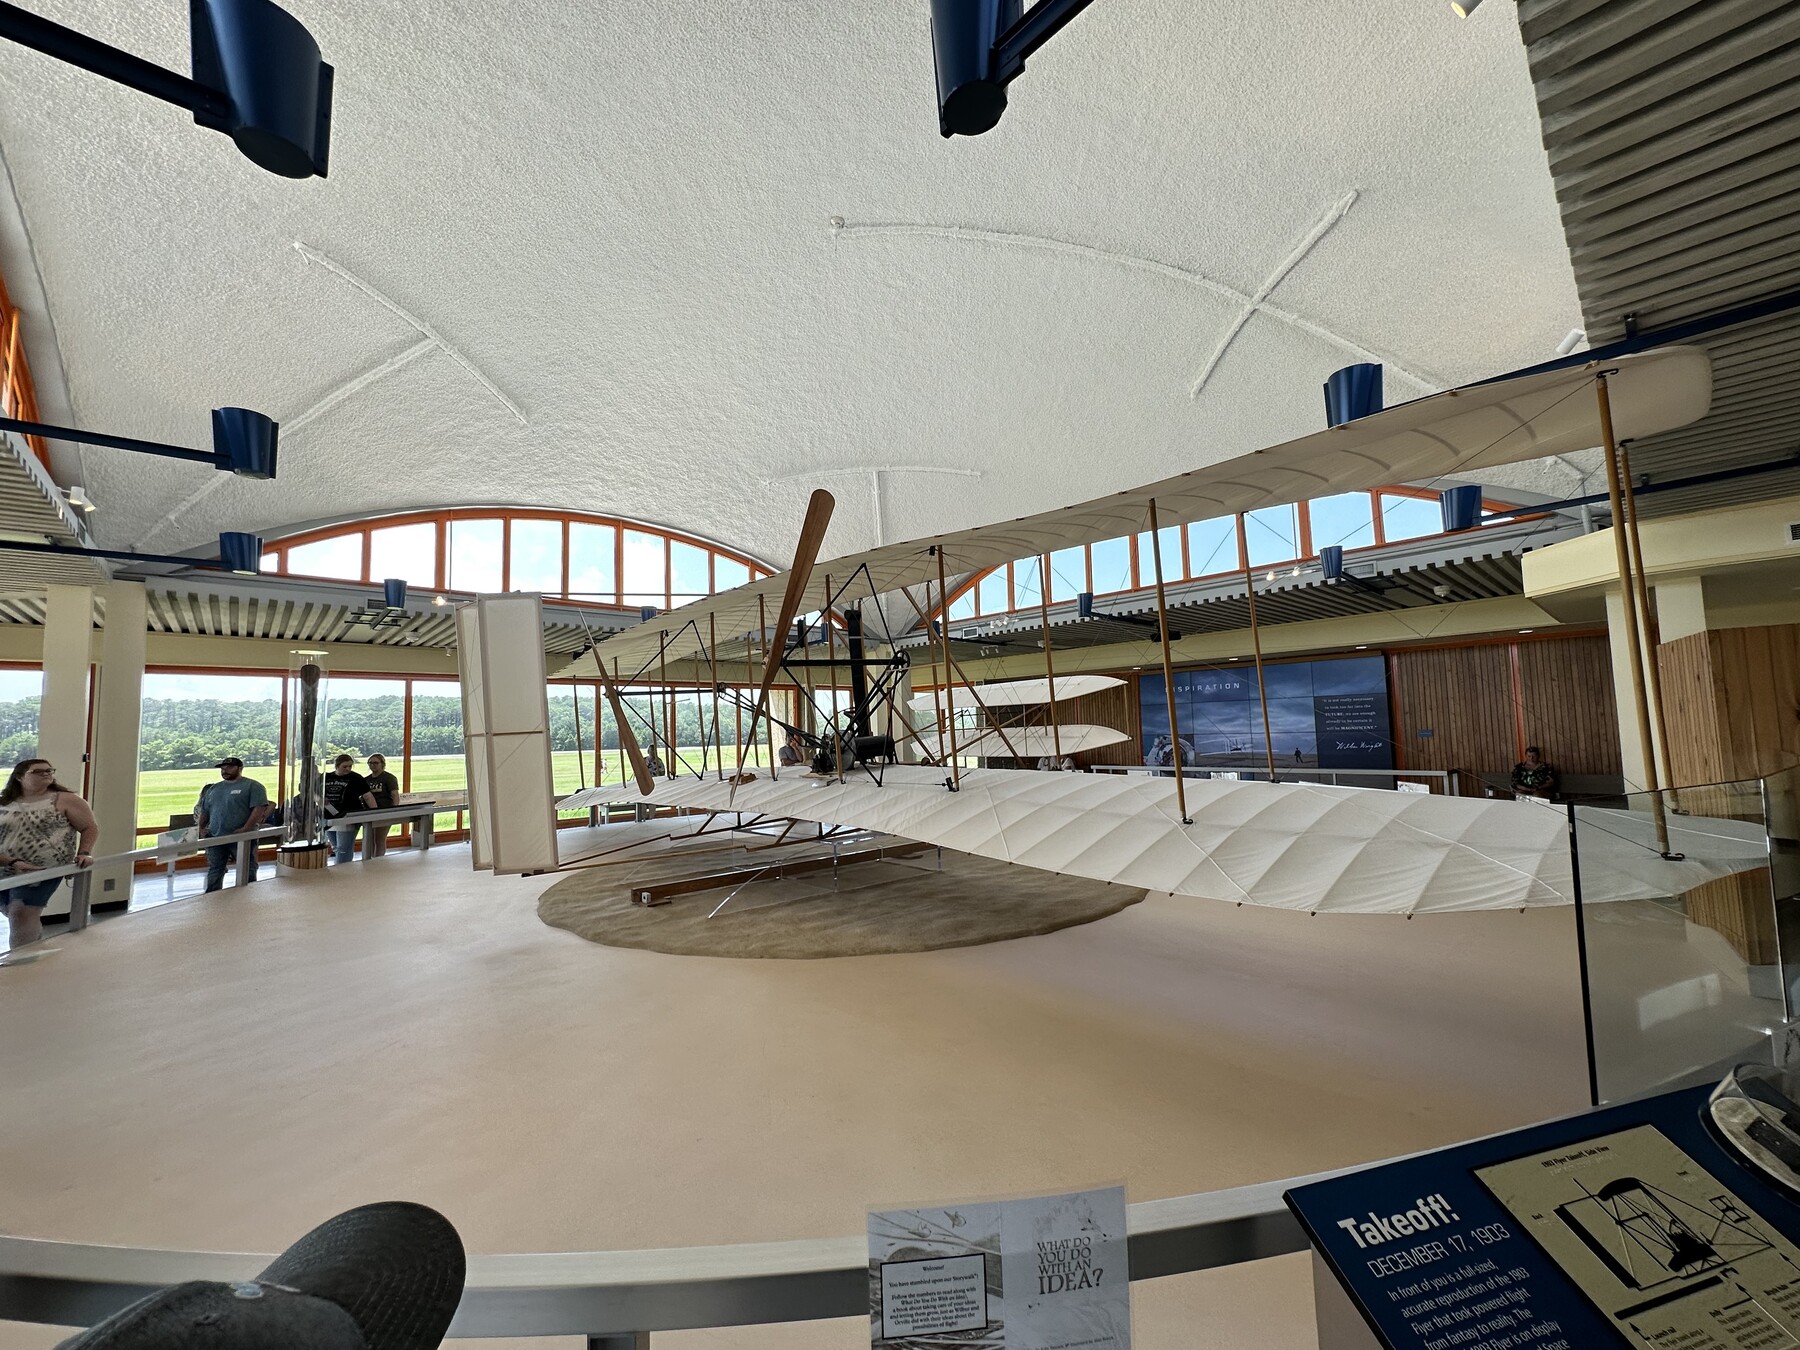
There is a very nice museum in the visitors center that talks about the brothers’ lives and especially their constant experimentation with powered and controlled flight. The 1903 Wright Flyer they display here is only a replica, but they have a few real pieces of the aircraft that were used here. I guess I’m starting to get over my aviophobia, because it was pretty magical to stand on the ground where it actually happened.
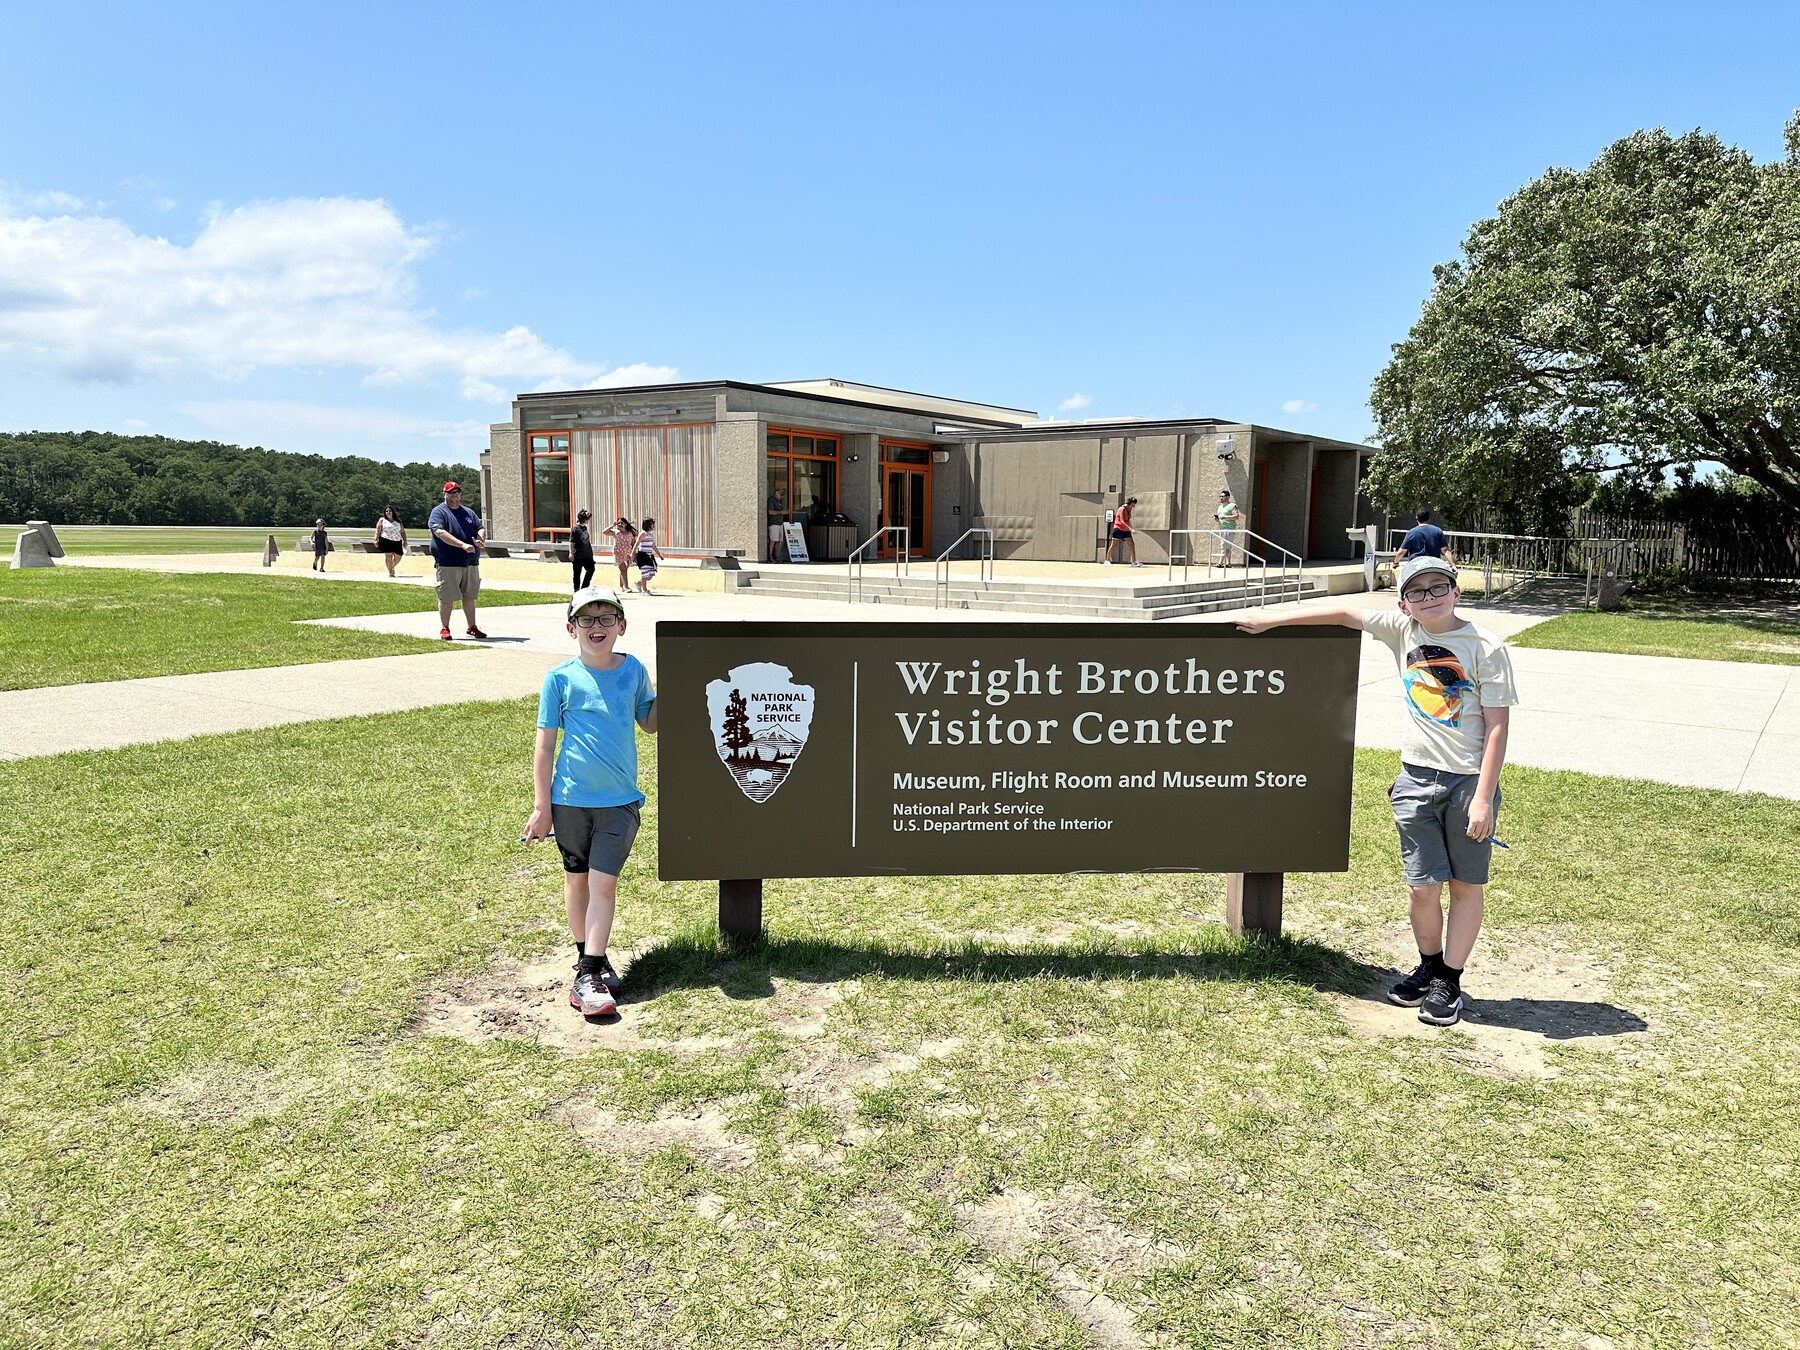
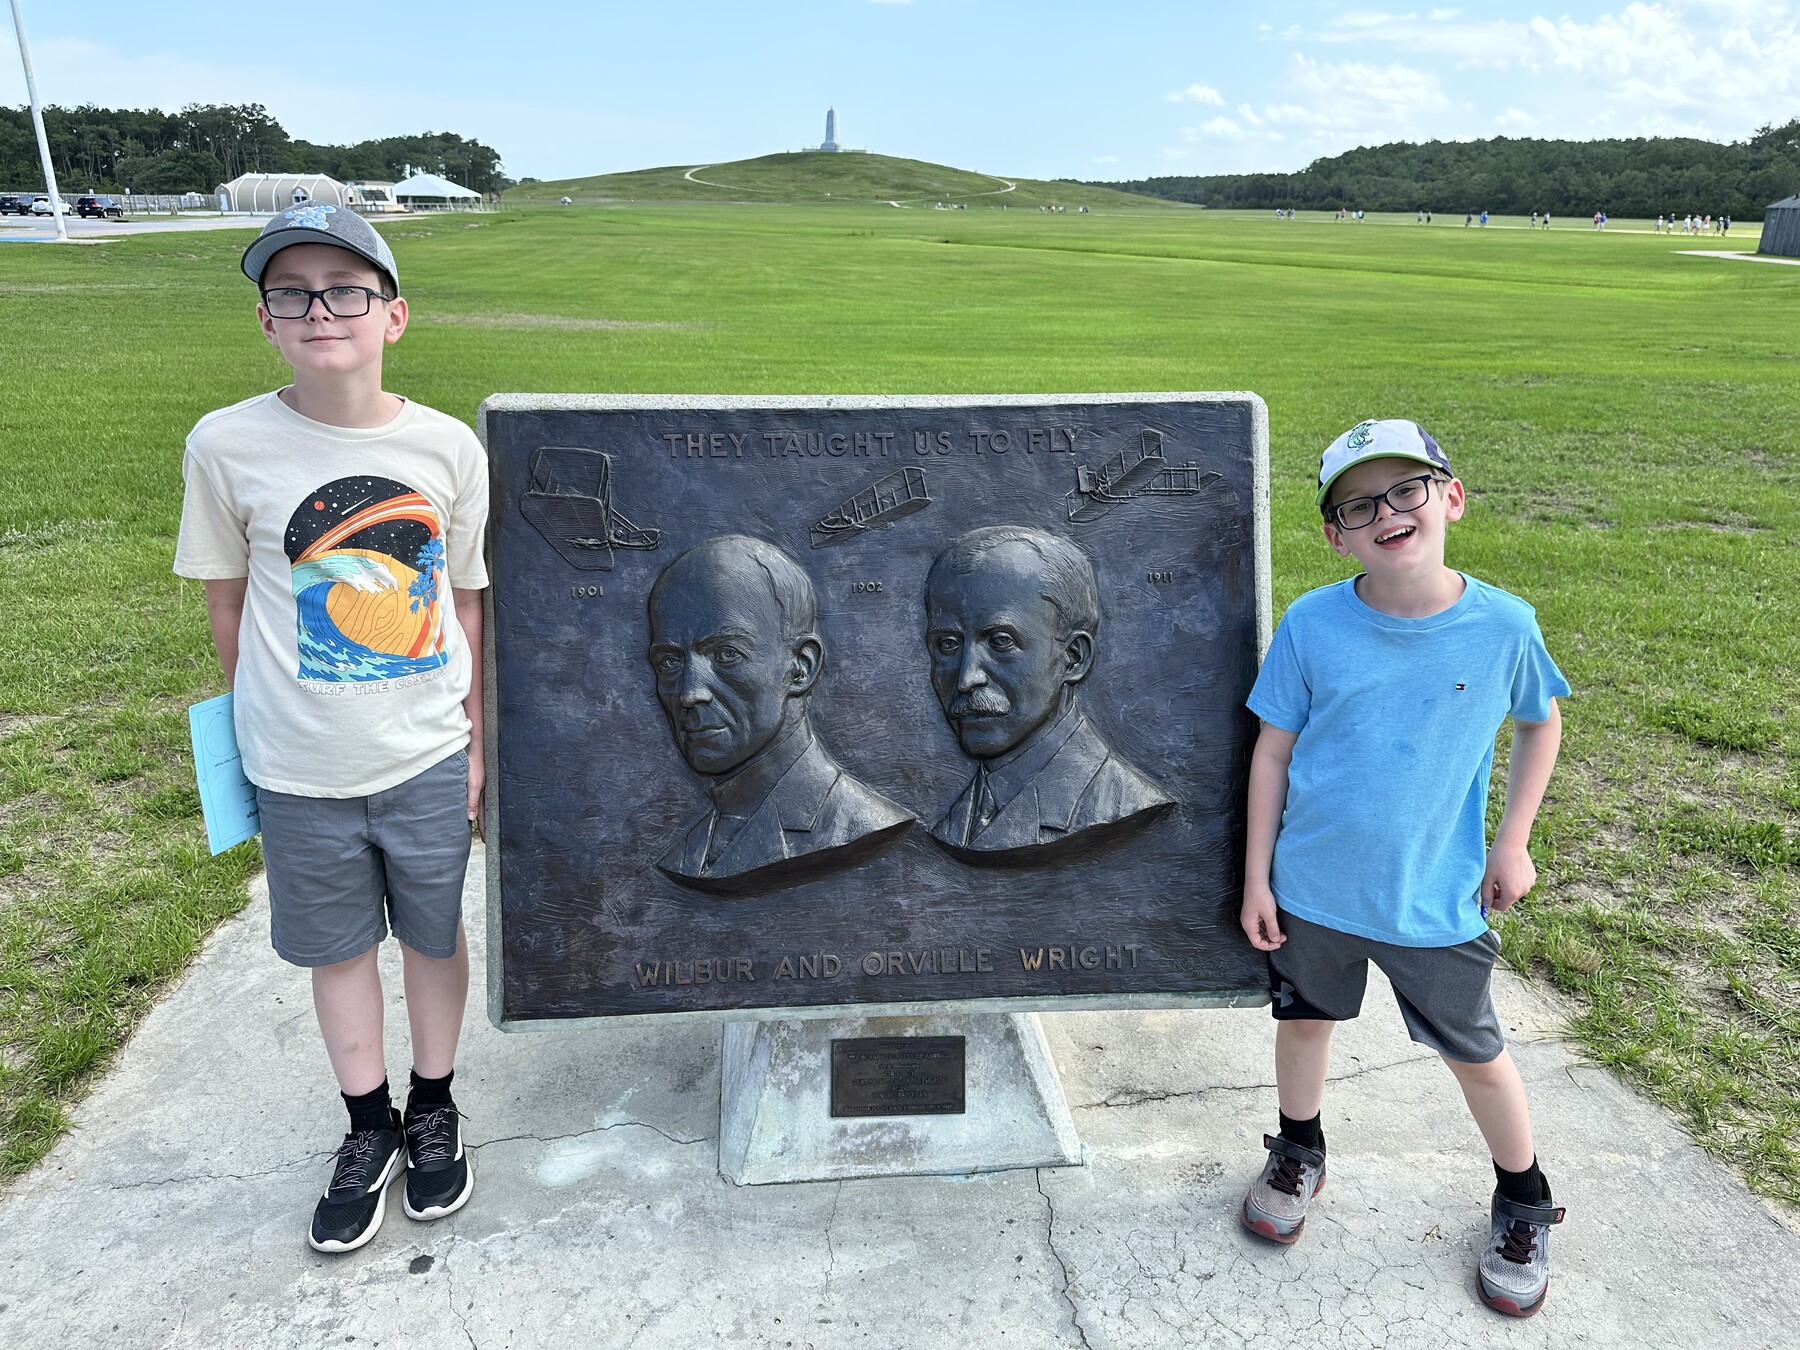
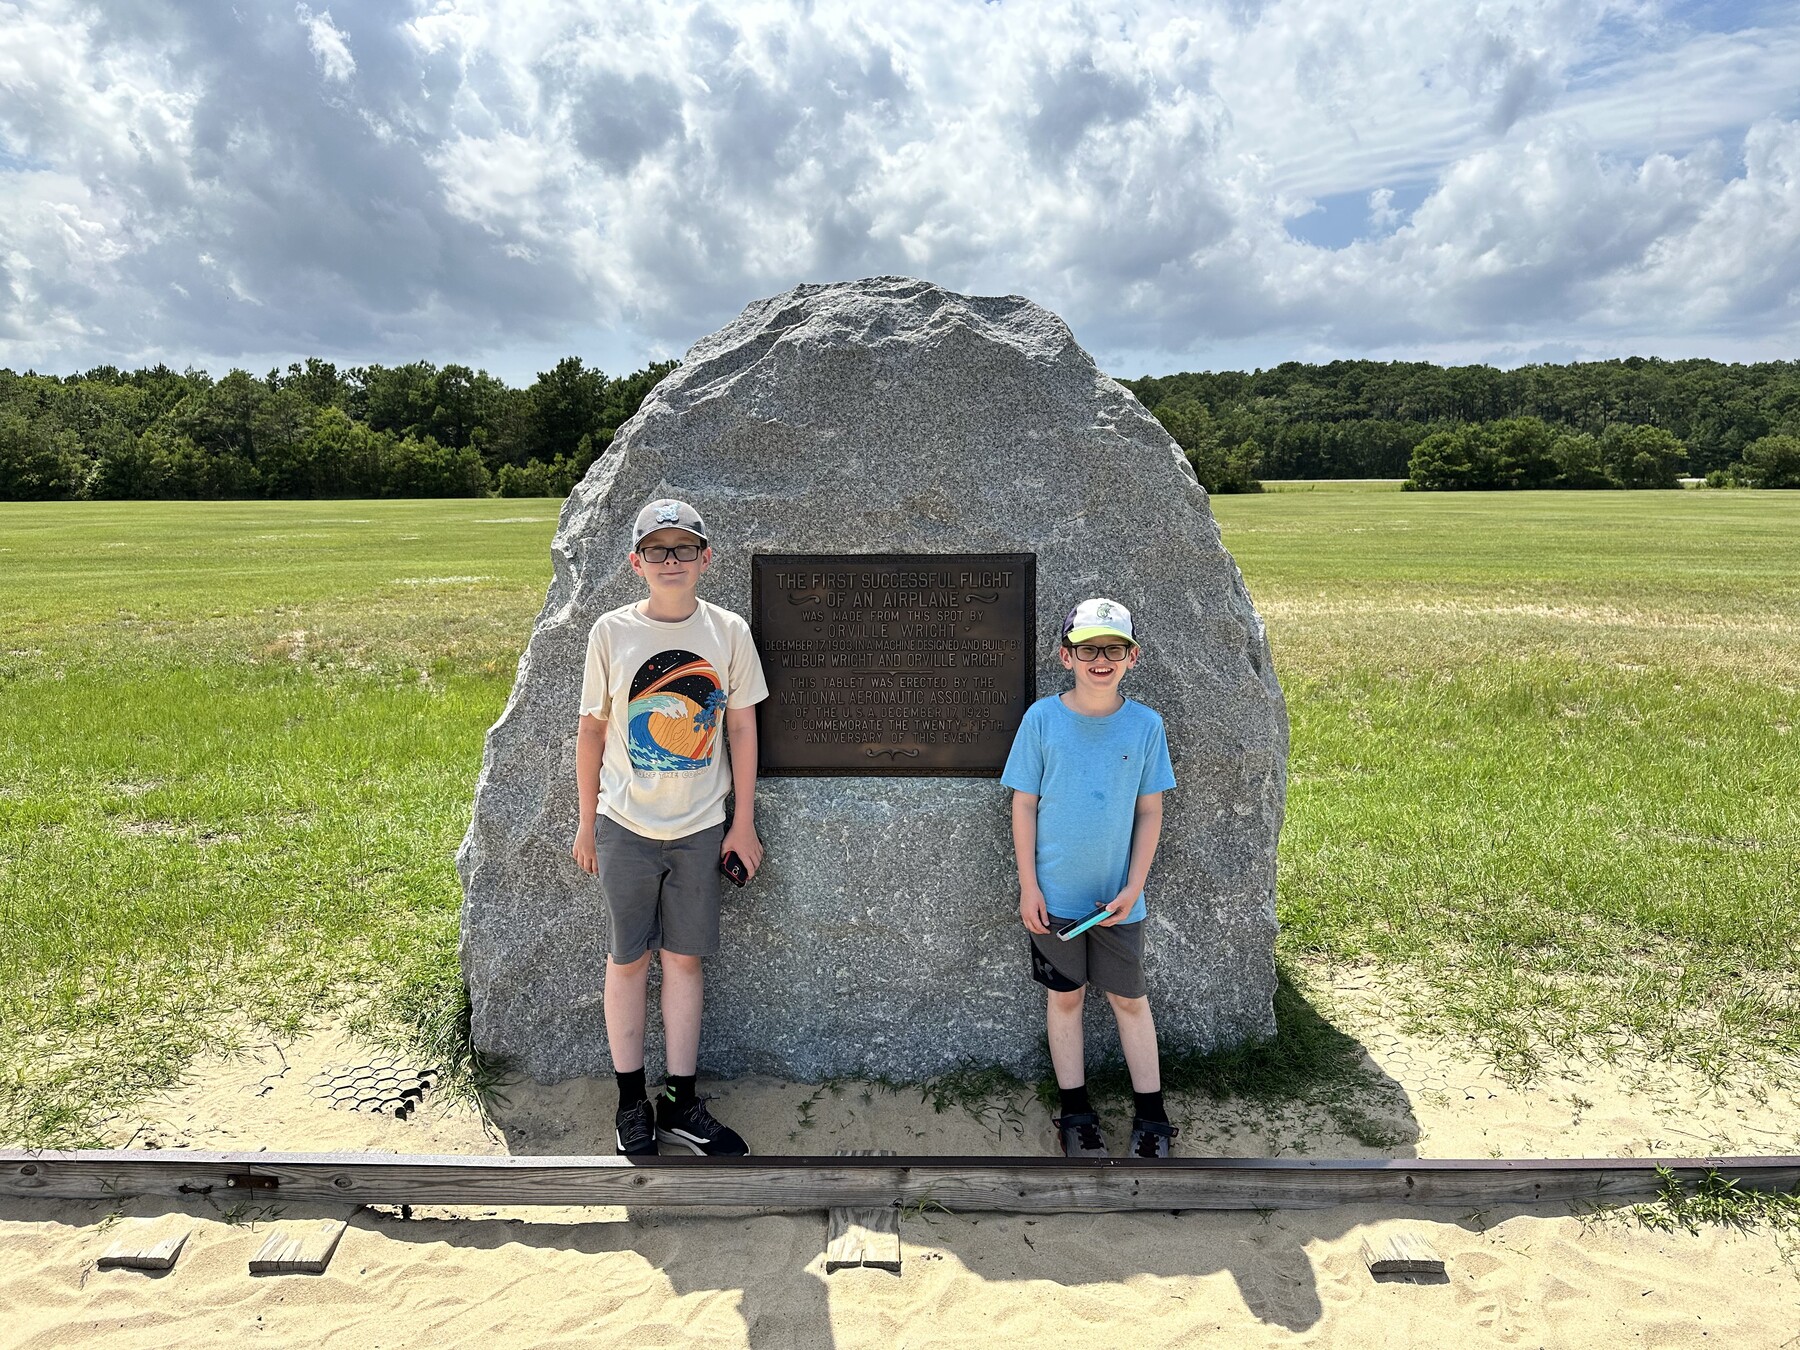
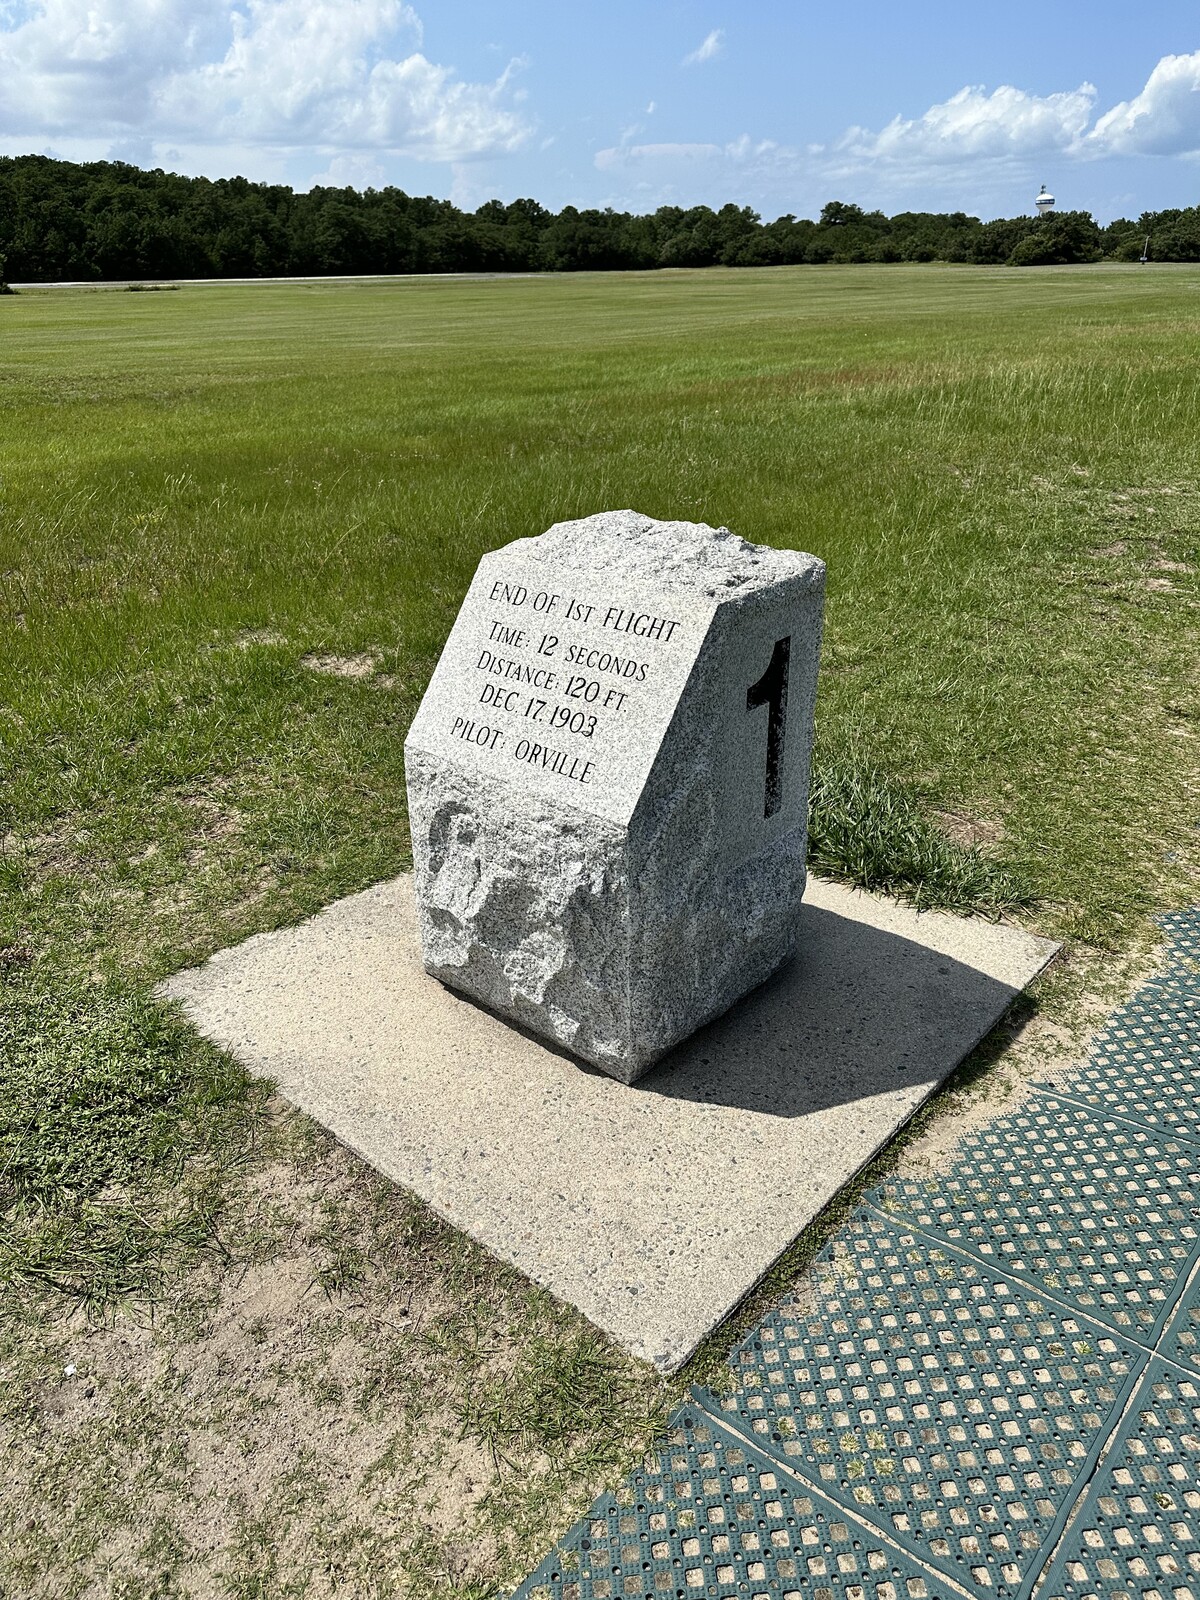
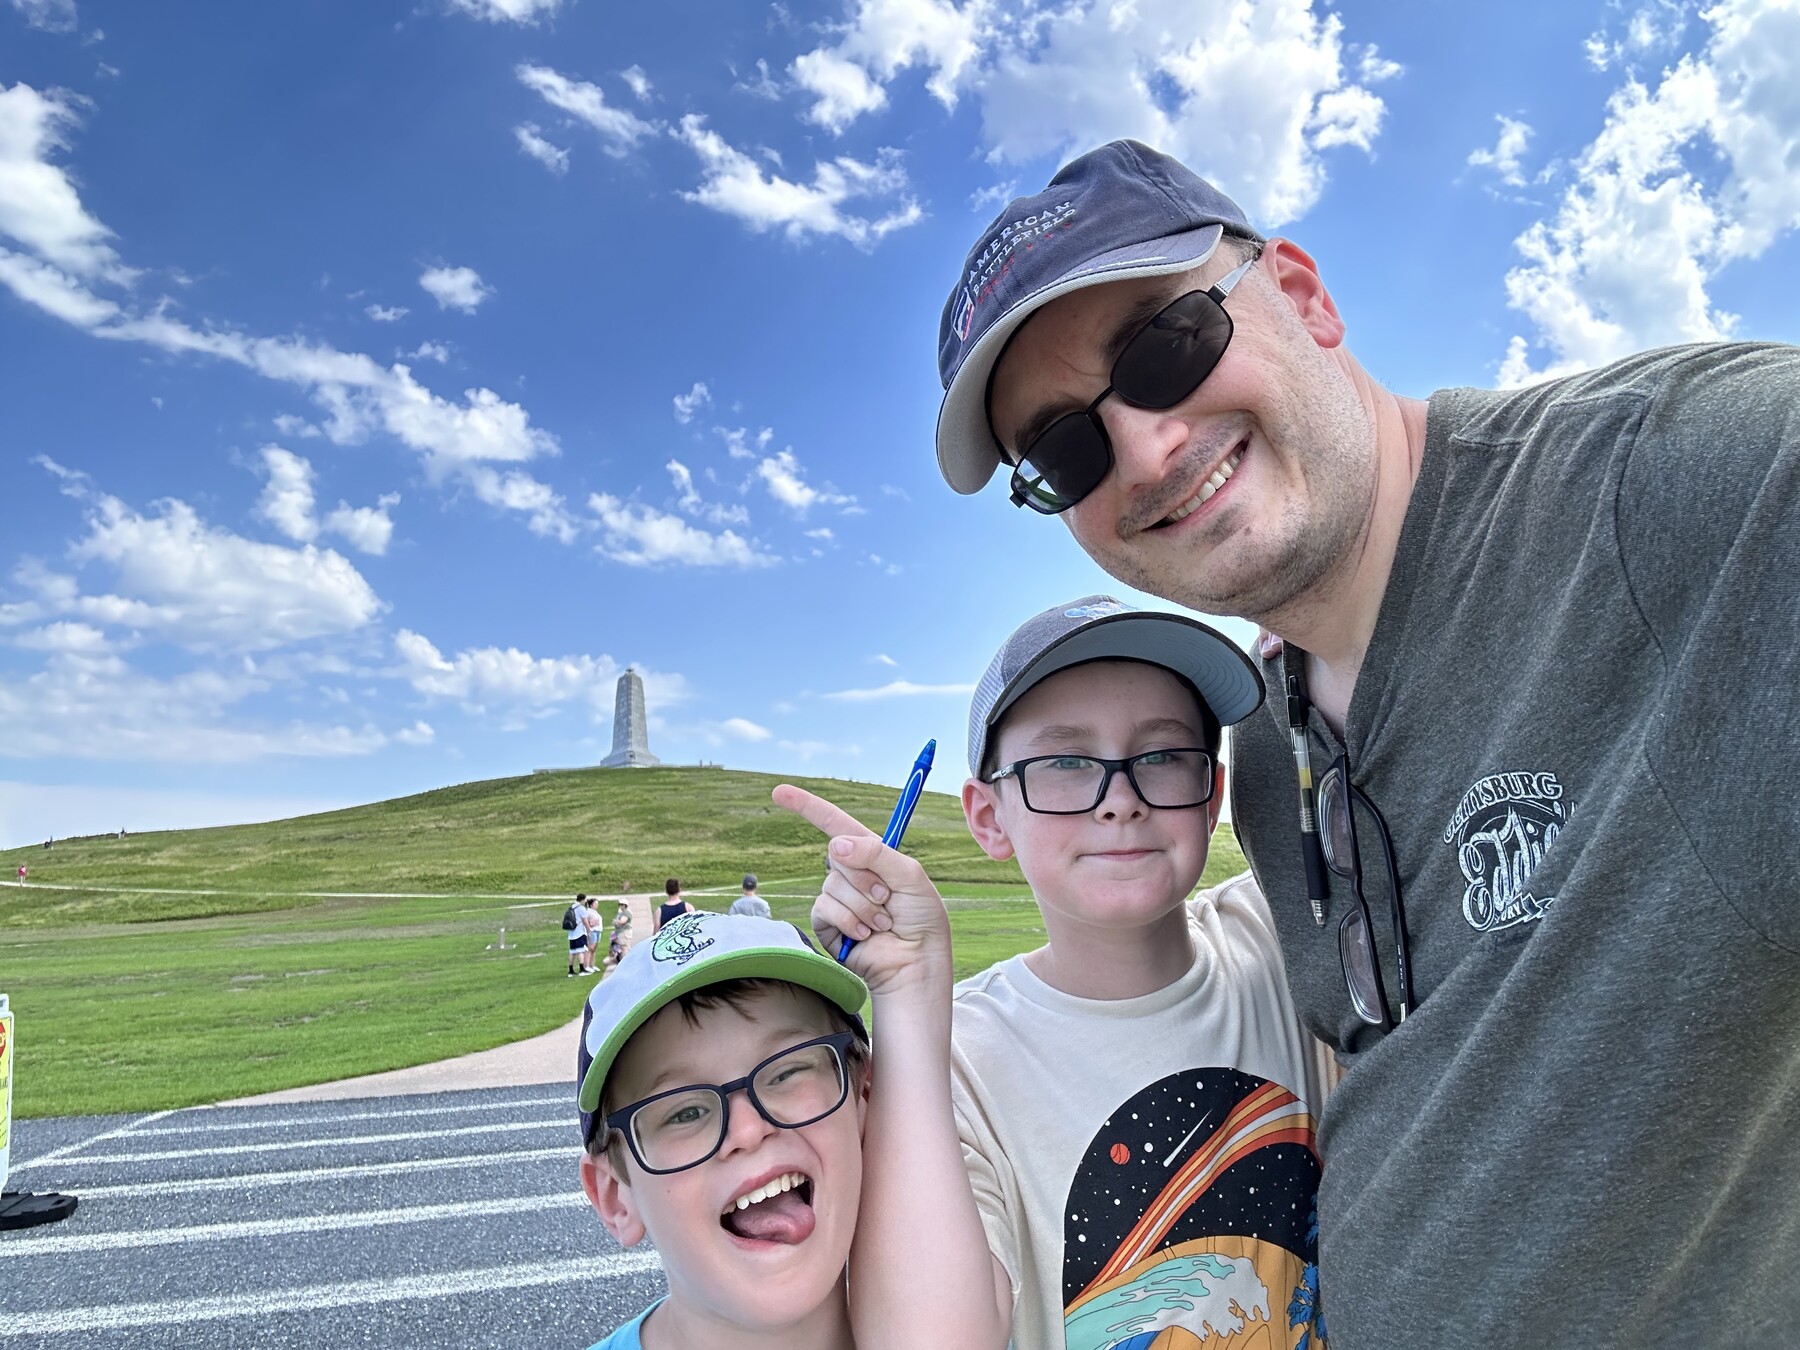
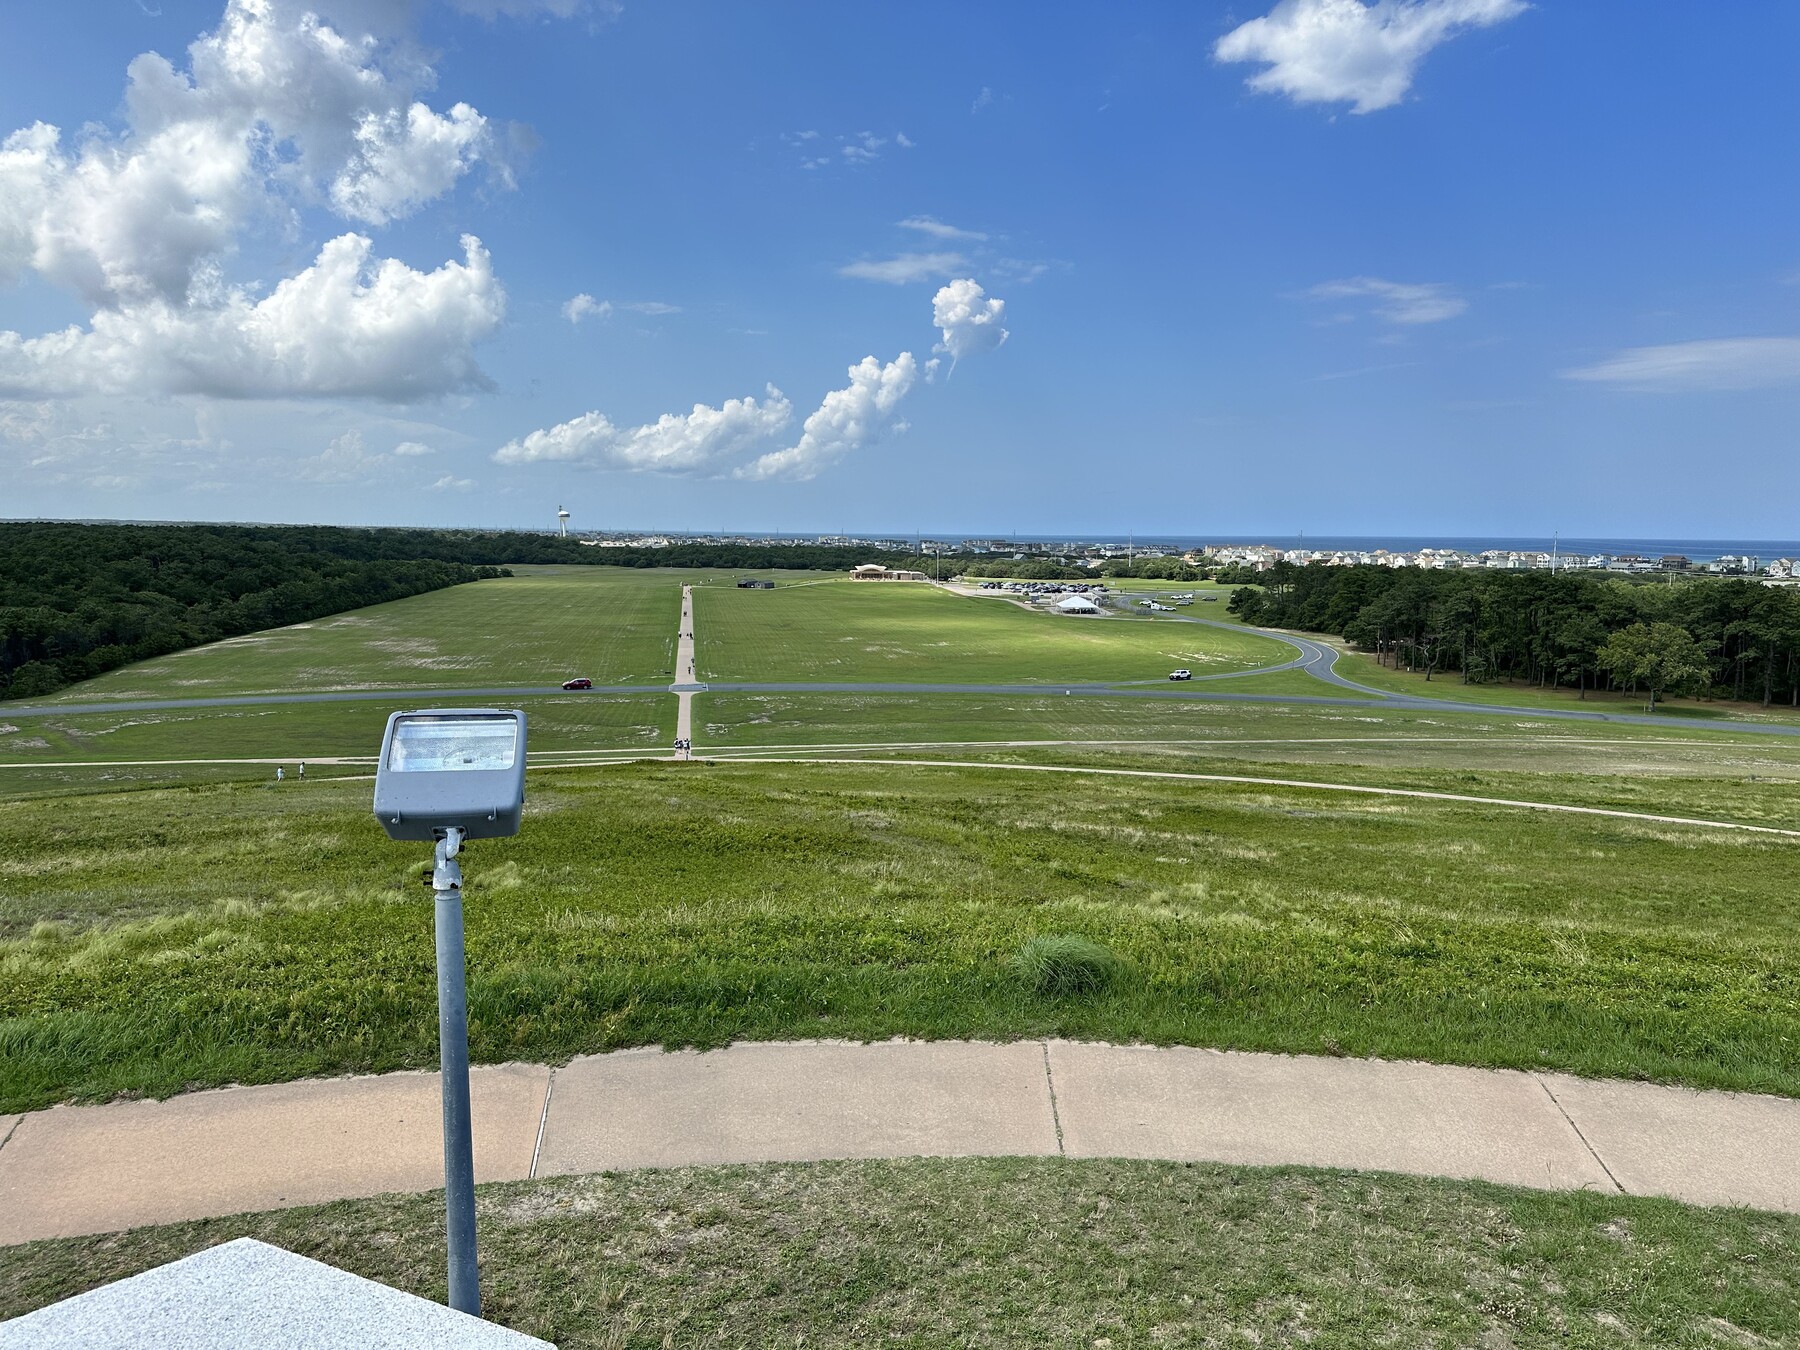
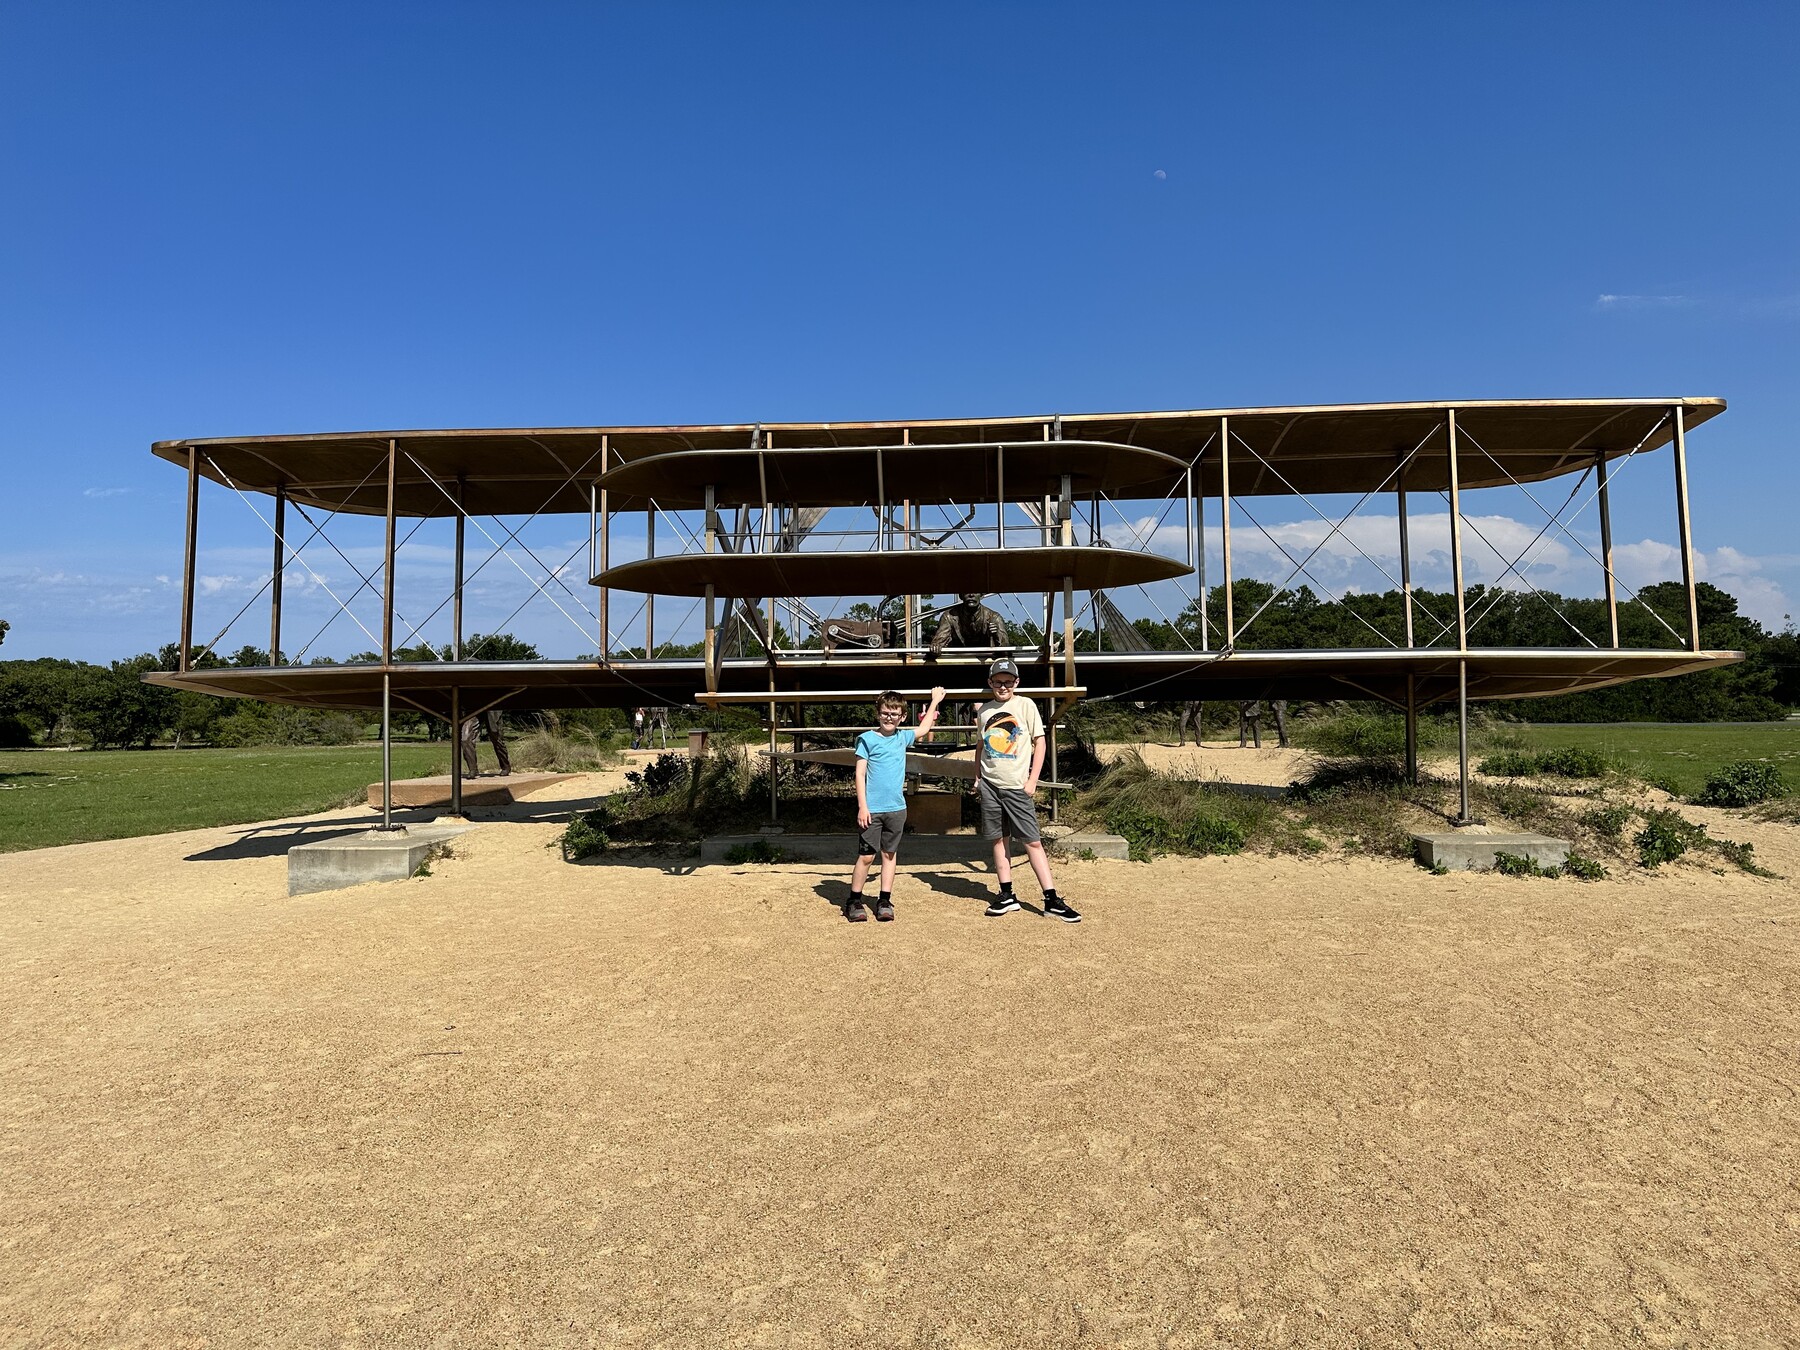
Posing with the sign out in front of the visitors center. – Photo by the authorThe reproduction 1903 Wright Flyer. – Photo by the authorMy brothers with the brothers. – Photo by the authorStanding at the spot where it actually happened. – Photo by the authorThe first flight ended here. – Photo by the author#MonumentSelfie! – Photo by the authorThe view from the top of Big Kill Devil Hill. Awesome! – Photo by the authorThe boys with the sculpture that depicts the first flight. – Photo by the authorJohn with his latest Junior Ranger badge. – Photo by the author
We made the hike up Big Kill Devil Hill so the boys could get their photo with the monument at the top. The view was very impressive.
After our visit, John told me that this was his favorite Junior Ranger badge so far because of the image of the Wright Flyer on it.
Battle of South Mills – Civil War Battlefield #170
There was concern among the Union commanders in North Carolina that the canal through the Great Dismal Swamp could be used to transfer rebel ironclads from Norfolk down to Albemarle and Pamlico Sounds. This would threaten the Federal troops in the area. In reality, there were no such ironclads, but the CSS Virginia at the Battle of Hampton Roads had created a lot of fear.
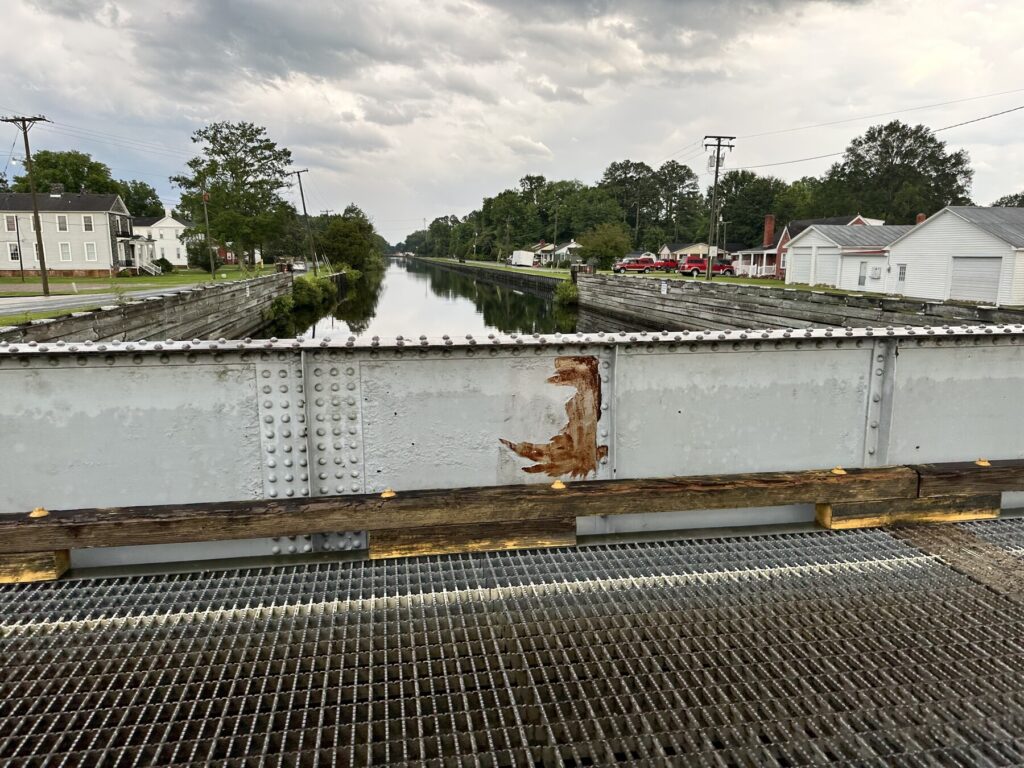
The canal at South Mills. – Photo by the author
To counter this supposed threat, Brig. Gen. Jesse L. Reno was sent with about 3,000 troops to destroy locks along the canal at the Battle of South Mills. Unfortunately, Reno opted for an overnight forced march, so when his troops arrived and encountered only about 900 Confederate troops, they were already exhausted and confused. They wasted hours trying to outflank the southerners, and ultimately left without doing any real damage to the canal.
There is a wayside that talks about the action next to the canal in the town of South Mills.
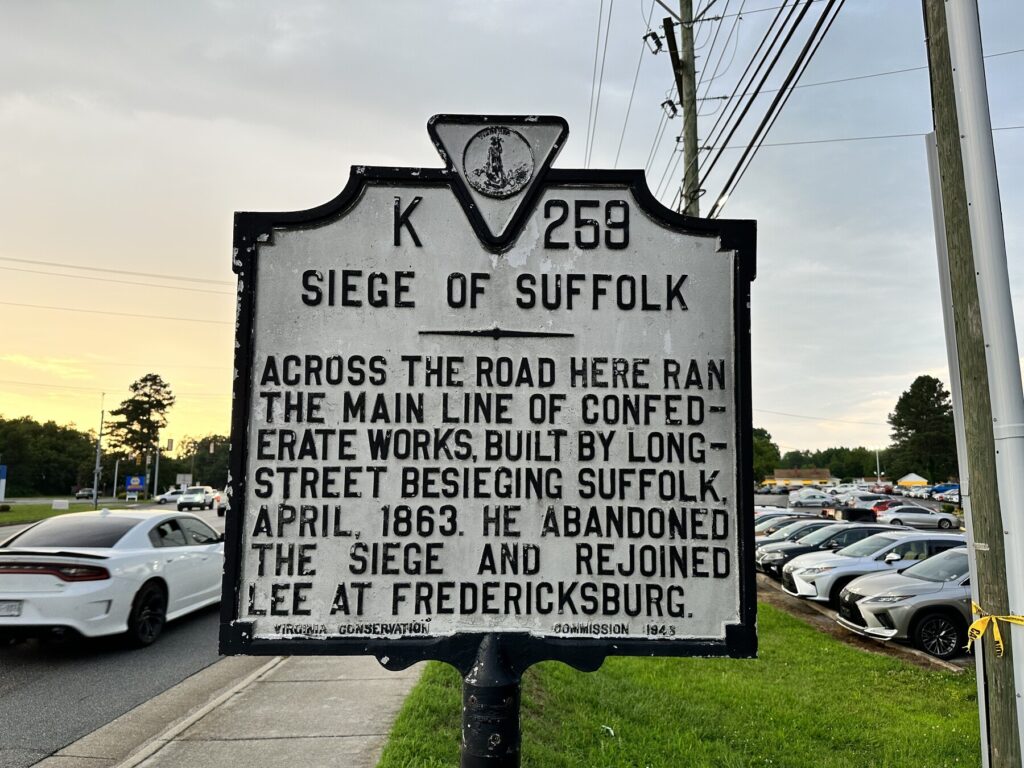
Siege of Suffolk – Civil War Battlefield #171
The “official” battles around Suffolk, VA are a little confusing. The CWSAC seems to list them multiple different ways, with at least two different “Battles of Suffolk” being contained within an over-all “Siege of Suffolk“. For my purposes, I’m listing the “Battle” as being the action at Hill’s Point, while the “Siege” is the action at the Norfleet House. As I learn more about these actions, I hope to get more clarity.
Union troops had occupied Suffolk – mainly as a way to protect land approaches to Norfolk – since the spring of 1862. The following year, Confederates under Lt. Gen. James Longstreet were in the area attempting to gather food and supplies. Longstreet decided to lay siege to the Union forces in order to keep them from interfering with those foraging operations. He was never able to truly *cut-off* Suffolk, but he did keep the Union troops occupied.
A roadside marker describes some of the action around Suffolk. – Photo by the author
A rebel artillery battery was constructed across the Nansemond River from here, at the Norfleet House, to discourage and destroy Union supply ships from coming upstream. While they succeeded in disabling at least one such craft, Union gunboats as well as artillery positions that were constructed here forced the Confederates to abandon their position.
Within a few weeks, Longstreet was ordered to rejoin Gen. Robert E. Lee‘s Army of Northern Virginia at the start of the Battle of Chancellorsville, ending the siege. Though he never captured Suffolk, he was successful in gathering supplies. It’s unclear who the winner was here.
I wasn’t able to get a great photo at the spot that the Union artillery occupied. The area is now a neighborhood, and I didn’t want to get in anyone’s backyard.
Battle of Suffolk – Civil War Battlefield #172
The Battle of Suffolk here at Hill’s Point / Fort Huger is probably the most interesting of the actions around the Siege of Suffolk in the spring of 1863.
Fort Huger was another hastily-built earthwork fort along the Nansemond River that was meant to stop Federal supply ships. On April 19, Federal batteries opened fire on the fort all day, hoping to weaken the defenses there. Just as night was beginning to fall, about 300 Union soldiers landed from river boats near the fort, and assaulted the earthworks from the rear. The fort fell, and over a hundred rebel prisoners were taken.
The remains of Fort Huger at Hill’s Point. – Photo by the author
The fort amazingly still exists. The boys and I walked down close to it to get a photo (earthworks are notoriously hard to photograph, so you may need some imagination). For many years, the remains of Fort Huger were contained within a golf course, but the property is now being converted into a neighborhood. There is still construction happening here, but the fact that there is a path laid out gives me some hope that the remains of the fort may be preserved. I know there is a local group that is active in trying to put together tours. Hopefully they are making some noise.
The boys and I were on spring break and spending some time with their “Nene” and “Baba” in Columbia, MD. One of the things that we wanted to do together was visit the Udvar-Hazy Center of the Air & Space Museum in Northern Virginia.
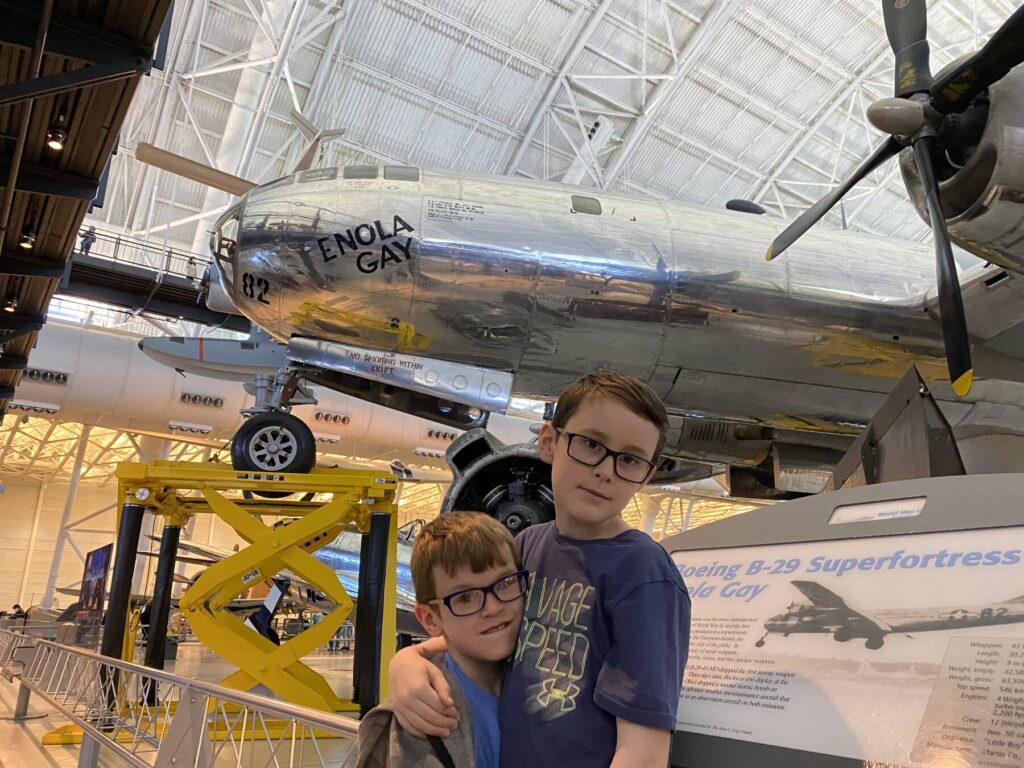
We wandered around the impressively large museum for a while – they have a huge collection of aircraft – some with a particular historical significance. That day, we saw the Bell X-1 Glamorous Glennis that first broke the sound barrier (seemingly out here because of renovations happening to the museum in downtown DC). We also got to see the B-29 Enola Gay and I did my best to explain the complicated history around the use of nuclear weapons at the end of WWII.
The boys pose with the Enola Gay – Photo by the author
Both boys really enjoyed seeing the SR-71 in the collection – which set a speed record on it’s final flight from Los Angeles to Washington, DC, making the journey in 1 hour, 4 minutes, and 20 seconds, to become part of this museum. On the day we visited, they had something of a remote, Zoom-like setup going with a large TV and an expert on the SR-71 who was giving a presentation and answering questions. Isaac got to ask her a couple and felt like it was the coolest thing in the world.
Of course, the Space Shuttle Discovery was also a hit. It’s the centerpiece of the museum’s space wing, and it’s impressive to see not only its size, but to know that this vehicle went into space so many times.
With the Space Shuttle Discovery. – Photo by the author
One of the more interactive exhibits was done by Garmin. They had a computer game-like display with a yoke that was attached to a model plane suspended in a glass box. As you moved the yoke, the plane moved, too, demonstrating the concepts of pitch, roll, and yaw. That was pretty neat.
At the end of our visit, “Nene” wanted to go up in the observation tower. Isaac went along with her, while the rest of us stayed a little closer to the ground.
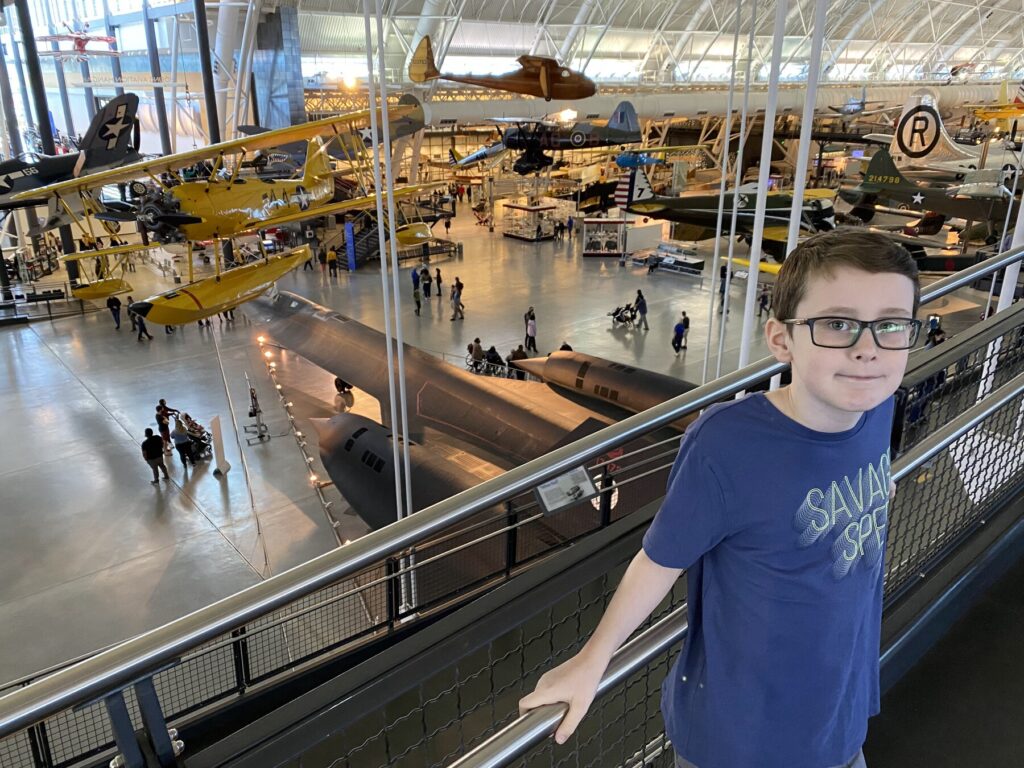
I really like this shot of John overlooking the main floor of the museum. – Photo by the author
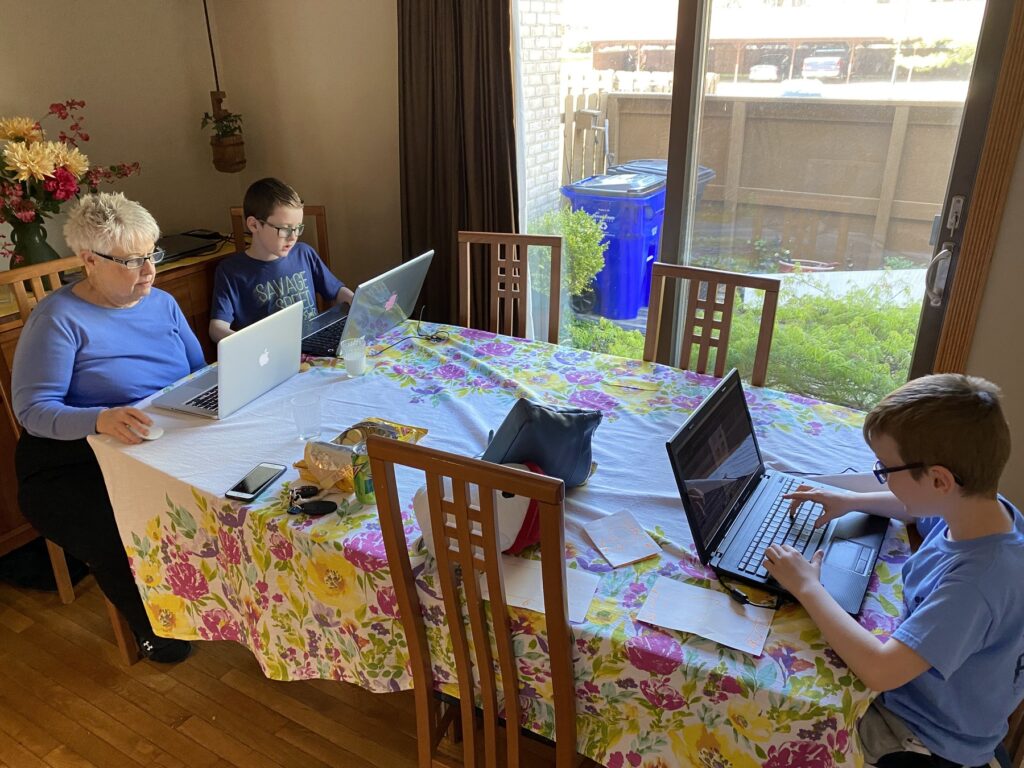
When we arrived back at “Nene’s” house, the boys showed her their latest open source video game obsession: Minetest. We had set up a server for the boys to collaborate on building structures together, and much to their delight, “Nene” fired up her computer and joined them. It was a very sweet cross-generational moment.
LAN party at “Nene’s” house! – Photo by the author