Also today, 150 years ago, a spy named Harrison that General Longstreet had hired returned to the Confederate camp near Chambersburg, PA with a story that was hard to believe.
Not only did he claim that the Union Army of the Potomac was on the move, but that it had already crossed the Potomac river with all 7 corps, and was rapidly heading their way. He also knew that Hooker had been replaced by Meade as the overall commander of the Union forces. In light of this, General Longstreet took Harrison to see General Lee immediately.
Lee found this information especially troubling. Why was a hired spy telling him this rather than his own cavalry? What was J.E.B. Stuart doing if he wasn’t providing intelligence? Though he didn’t like it, Lee had to act. He sent orders to all his commanders, currently spread all over south central Pennsylvania, to use the road network to concentrate the army in the vicinity of a town called Gettysburg (or maybe Cashtown).
150 years ago tonight, those moves started to happen. It would be a race – one that Lee felt he had to win – whoever could bring their army together first would have a decisive advantage in the coming conflict.
150 years ago this evening, the Confederates made their furthest advance into northern territory at a little town on the Susquehanna river called Wrightsville, PA.
One of Lee’s loose objectives was to threaten a major northern city, and Harrisburg was the closest one along his route out of Virginia. Being the capitol of Pennsylvania though, it was pretty well-defended. General Early, in command of the eastern-most vanguard of the Army of Northern Virginia, came up with another plan: he’d send the brigade of Brig. General John Gordon downriver to find another bridge to cross, and then take Harrisburg from the rear. Wrightsville (about 30 miles away) had such a bridge – the longest covered bridge in the world, in fact.
The militia stationed at Wrightsville had spent the last 2 days trying to construct defenses, but their commander, Colonel Jacob Frick, knew they couldn’t hold out against the brigade of veteran Confederate troops that showed up at about 5pm that night. After fighting for about an hour, he ordered his men to pull back, cross the bridge, and burn it so the Confederates couldn’t follow.
When an effort to put out the flames failed, the Confederates left town and regrouped to set up for a more direct attack against Harrisburg. They wouldn’t get to make that attempt though, because a new set of orders arrived from General Lee. The Army of Northern Virginia had to come together to meet the threat of the rapidly-advancing Union army.
Joe Hooker had been slow to move the army north. That much was irritating. But when he demanded to be reinforced with troops from the Harper’s Ferry garrison, that was quite enough. When the request was refused by General Halleck, Hooker sent back a message threatening to quit if he didn’t get his way. Lincoln and Halleck were only too happy to accept the resignation.
Major General John F. Reynolds
Of course, this created a new problem: who should replace him? The most capable General in the Army of the Potomac – and the one Lincoln had the most confidence in – was Major General John Reynolds, commander of the I Corps. The job was offered to him.
Reynolds was no dummy, though. He had seen what happened to the previous army commanders: one misstep and your career was finished. This would be the 7th commanding General in the eastern theatre in just over 2 years. For Reynolds, the answer was thanks, but no thanks.
His second choice was a much different man, a quieter man: George G. Meade. At about 3:00am, 150 years ago today, Major General Meade was awakened at his camp in Frederick, MD by a messenger from Washington, DC. He had no idea what was going on. His first thought was that he was being arrested for some reason. Alas, he was told that he had been promoted – and that he didn’t have a choice in the matter. Out of a sense of duty, he accepted the charge.
Major General George G. Meade
The situation was grim. Meade knew where his own troops were, but Hooker had kept all his subordinates in the dark about the over-all plan. The positions of the rest of the army’s corps was completely unknown to him. There was a lot of catching up to do.
Meade started thinking about his options. The orders from Washington (roughly the same ones Hooker had, though Meade was given a little more freedom) were twofold: 1) Destroy the Army of Northern Virginia; and 2) Protect Washington and Baltimore. The first required aggression, the second a conservative nature. This contradiction in orders would cause political problems for Meade when the campaign was dissected in hindsight. For now though, he continued the move north with the aggressive and capable General Reynolds in charge of the westernmost sector – the area where the rebels were most likely (and actually turned out) to be.
At the same time, he developed a defensive position – the Pipe Creek Line – that he was hoping to draw Lee into once the fighting began. Acting defensively on ground that he had scouted out and fortified was the best way Meade could see to achieve both of his objectives.
He wouldn’t have to wait long to see how it was going to play out. In just 3 days, Meade would face the biggest test of his career.
When rumors started to spread in late May that the Rebel army was on the move, Governor Curtin got nervous. He put out a call for volunteers to defend the state should the Confederates make it as far north as Pennsylvania.
Not many came out. The farmers of Pennsylvania remembered the previous fall – when a similar call came out before what became the Battle of Antietam. They missed their harvest time, and many hadn’t been paid for their efforts like they were promised.
Some of the men who did join up in the face of the crisis were students from Pennsylvania College (what is now Gettysburg College). Along with other volunteers, they got formed into a make-shift regiment in Harrisburg, and became the 26th Pennsylvania Emergency Militia. 150 years ago today, those men got their first taste of combat.
By mid-morning, Jubal Early’sConfederate division was approaching the outskirts of Gettysburg. They were within sight of a little stream called Marsh Creek. The 750 very green men of the 26th PA Emergency Militia were camped on the east bank of the stream, and when they saw the Confederates approaching, they started packing up to leave. They knew they were no match by themselves for a sizable invasion force.
There was a brief exchange of fire between the units, and the Union men took about 50 casualties – most of them men who became prisoners. The retreat continued east of town – a Confederate cavalry detachment in hot pursuit. Another minor skirmish took place at the Witmer Farm, this one producing almost 200 prisoners for General Early. The Confederate forces took virtually no casualties in these two actions.
While these seem like minor events, they certainly meant something to the men who took part – especially the rookies on the Union side. They also had a huge psychological impact for both sides. The southerners continued to believe that this whole excursion would be a cake-walk, and the northerners (especially the civilian population in south-central Pennsylvania) felt increasingly defenseless and frightened.
Little did everyone know that they were less than a week away from the largest and bloodiest battle in the history of the western hemisphere, and another turning point in the war.
I got busy at the end of last week and didn’t get a chance to post about the last of the cavalry battles on the road to Gettysburg: the Battle of Upperville, 150 years ago on June 21st.
This would be the one last push to try to get into the Shenandoah valley and see what General Lee and the Army of Northern Virginia was up to. This time, the Union cavalry had the support of Col. Strong Vincent’sbrigade of infantry. This proved to be a decisive advantage for the Federals. Stuart’s Confederate cavalry fought hard for several hours, but couldn’t hold up against the combined Union cavalry, infantry, and artillery. Eventually, the southerners were forced back into Ashby’s gap, losing an artillery piece in the process.
Surprisingly, the northern forces didn’t keep pushing. Stuart succeeded in denying the Federal cavalry the intelligence on Lee’s plans that it needed. The very next day, General Stuart got permission from General Lee to take off on another of his “Wild Rides”. Not to spoil the ending, but this one won’t end so well for J.E.B.
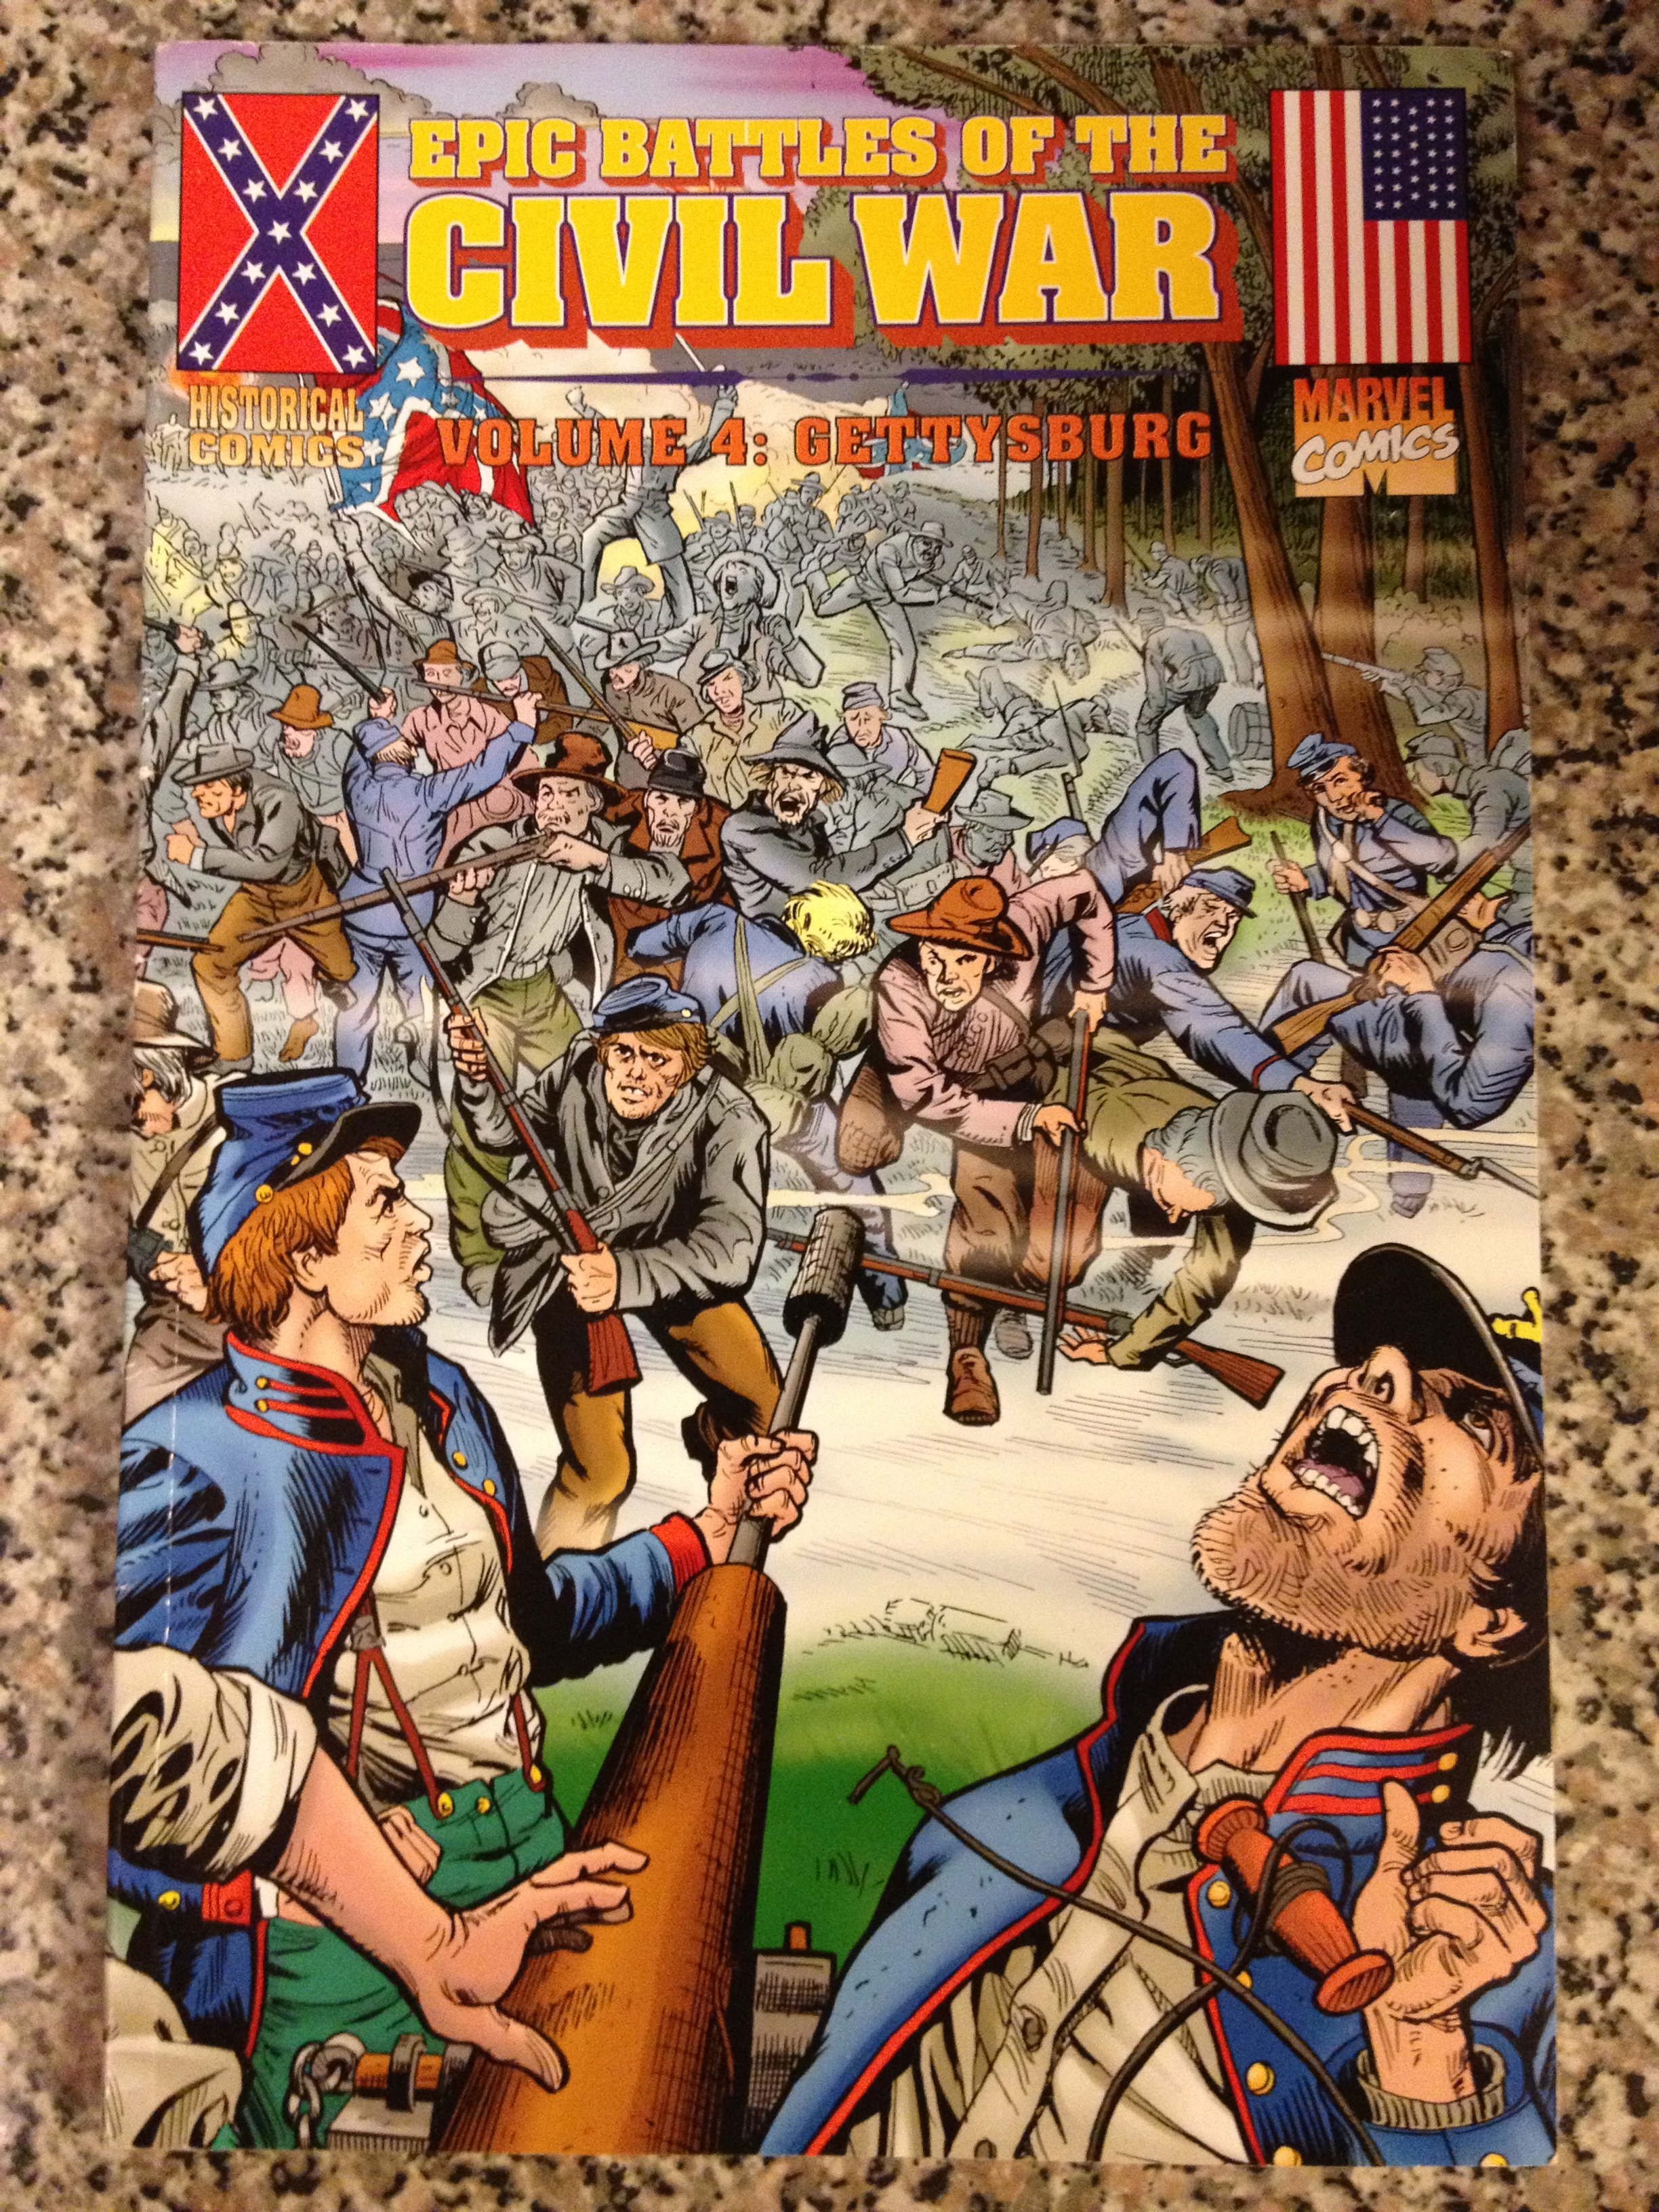
A few days ago, I found and ordered on Amazon, the comic book: “Epic Battles of the Civil War – Volume 4: Gettysburg“. I’d seen this particular comic come up (somewhat jokingly) in conversation among some of Gettysburg’sheavy hitters, and I just had to check it out. The book was the result of a collaboration back in the late 1990s between the Historical Souvenir Company and Marvel Comics, so there’s an expectation that it would be well-produced. Sadly, it’s a bit of a jumbled mess.
Marvel Comics’ Gettysburg issue.
The 48-page book starts off with an overview of the campaign – it doesn’t get to the first day of the battle until page 12 – and when it does, it does a pretty poor job of conveying the flow of the battle. It’s just panel after panel of guys in dialogue. Sometimes they discuss battle plans or results, other times the panels are telling a human interest story, but through short chunks of dialogue that aren’t well-explained. I know the Battle of Gettysburg pretty well, and I have trouble following what’s going on. There are 2 maps in the entire book, and neither one has any troop positions laid out on it. Maps are critical to understanding the flow of any battle, and aren’t comic books supposed to be for visual people?
The hastily-inserted human interest stories – things like Jennie Wade’s death, or Sarah Broadhead’s “mess of beans” – not only break up the flow of the battle, they make the whole thing read more like a collection of facts than an actual story.
And it gets worse when there are things that are suspect in those “facts”. For one thing, the book continues to perpetuate what Garry Adelman calls, The Myth of Little Round Top – we’re told in General Warren’s voice that it was “the key to the Union’s entire position”. General Sickles is portrayed – as is the popular myth – as being cool, calm, and collected after having his leg blown off. The somewhat questionable story of Lt. Bayard Wilkeson cutting off his own leg with a pocketknife is presented as fact. General Heth is shown expressing his desire to General Hill to go into Gettysburg looking for shoes – a story that he almost definitely made up later to make himself look better. And while it gets points for mentioning the oft-overlooked fight at the East Cavalry Battlefield, it completely misses the point of that struggle (it wasn’t because Stuart was supposed to secure the Confederate left – he was trying to attack the Union rear).
There are other things that are visually wrong. In the frame showing the leg story, General Sickles and his aide – both Union officers – are shown in grey coats. During the late-night council of war on July 2, one of Meade’s generals is shown wearing 3 stars (a rank which not only hadn’t been issued to ANY general at that point, but would have obviously out-ranked Meade himself). There is a woman wearing a 12-star flag with 13 stripes (starting and ending with white ones) on her blouse. Come on.
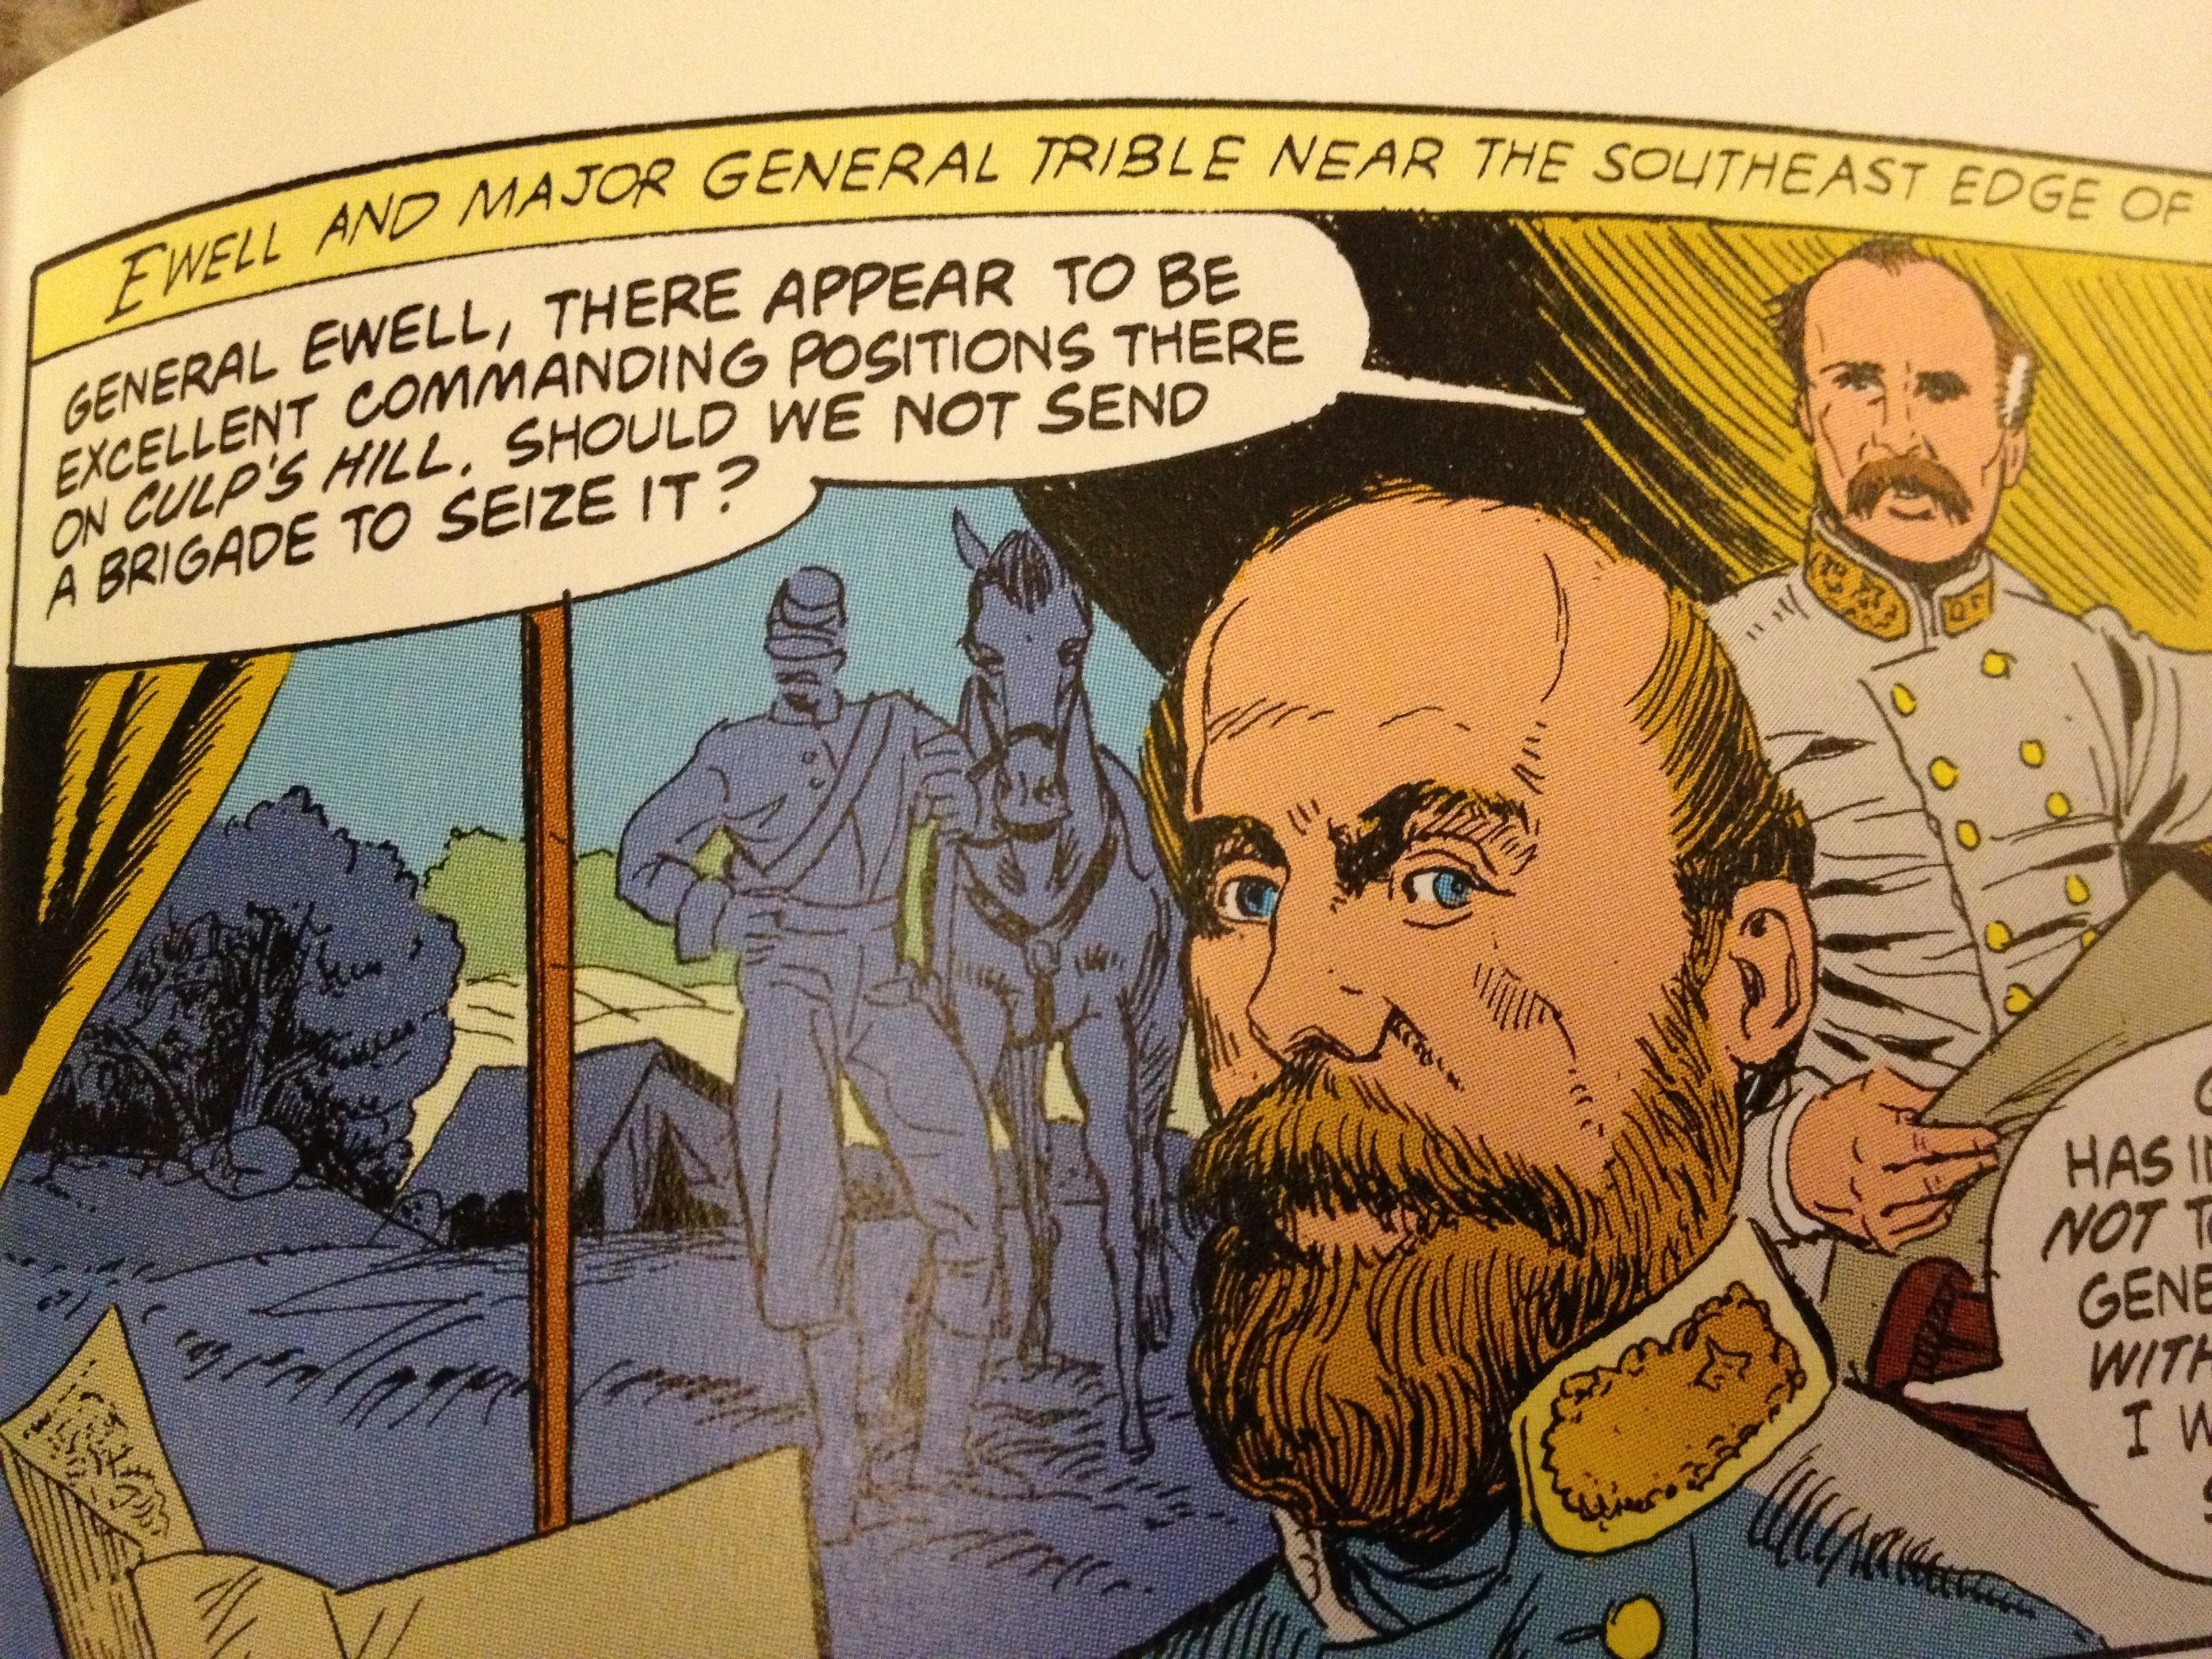
My favorite “typo” in the book comes during the description of the argument about whether to attack the Union position on Culp’s and Cemetery Hills that happens between Confederate Lt. General Richard Ewell, and Confederate Major General Isaac TRIMBLE:
General “Trible” loses the argument with General Ewell.
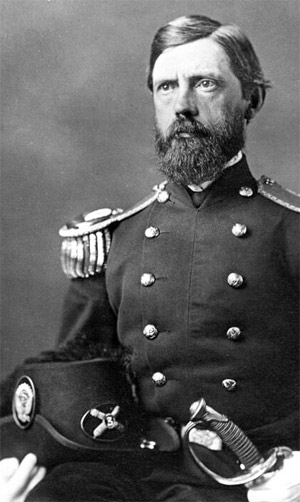
I’ll admit: at first, I thought this was a mistake. I only knew of General TRIMBLE being present at the battle, but it turns out that I was wrong. After a little research on the Internet, I found out that there was a Confederate General Trible (even though his name is correctly spelled “Tribble”):
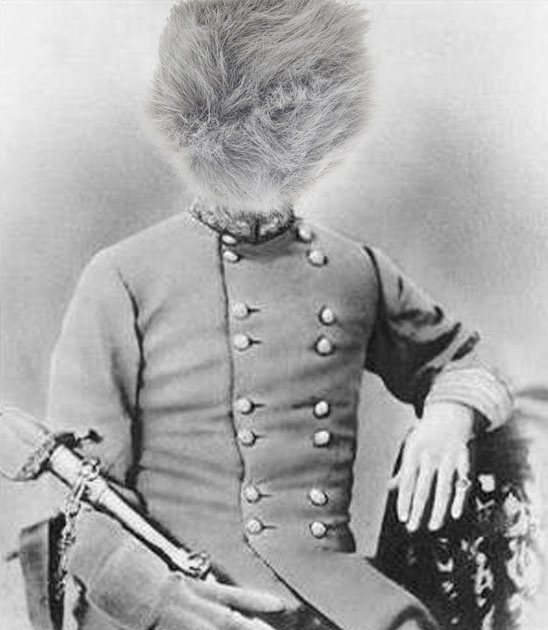
The only known image of General Trible (sorry – “Tribble”).
This is the junction where my Civil War nerd side starts to collide with my Star Trek nerd side. I deeply apologize that you had to witness that.
Seriously though, all of these seemingly little things come together to make the comic historically hazardous for the casual reader who knows very little about the battle. Something like this could be a great introduction for people who “don’t like history”, but instead it reinforces many misconceptions and muddies the telling of the story.
The only thing that keeps me from completely dismissing it is that, much like the old Gettysburg movie has for my generation, maybe there are a few people out there who would casually pick this comic up and have it spark an interest in the battle that propels them to learn more. I won’t hold my breath, though.
One of the things that I’ve become more interested in over the years is artillery – especially the artillery that was used during the Civil War. I started a series a few months ago to explain some of the basics of these weapons – it is best to see that article first to get familiar with the “anatomy” of the guns. Last time, we looked at some examples of bronze guns from the period. Today, I want to explain how to identify some of the different types of iron cannons, using familiar examples from the collection at Gettysburg.
There are a few main types of iron guns that we’ll be looking at today:
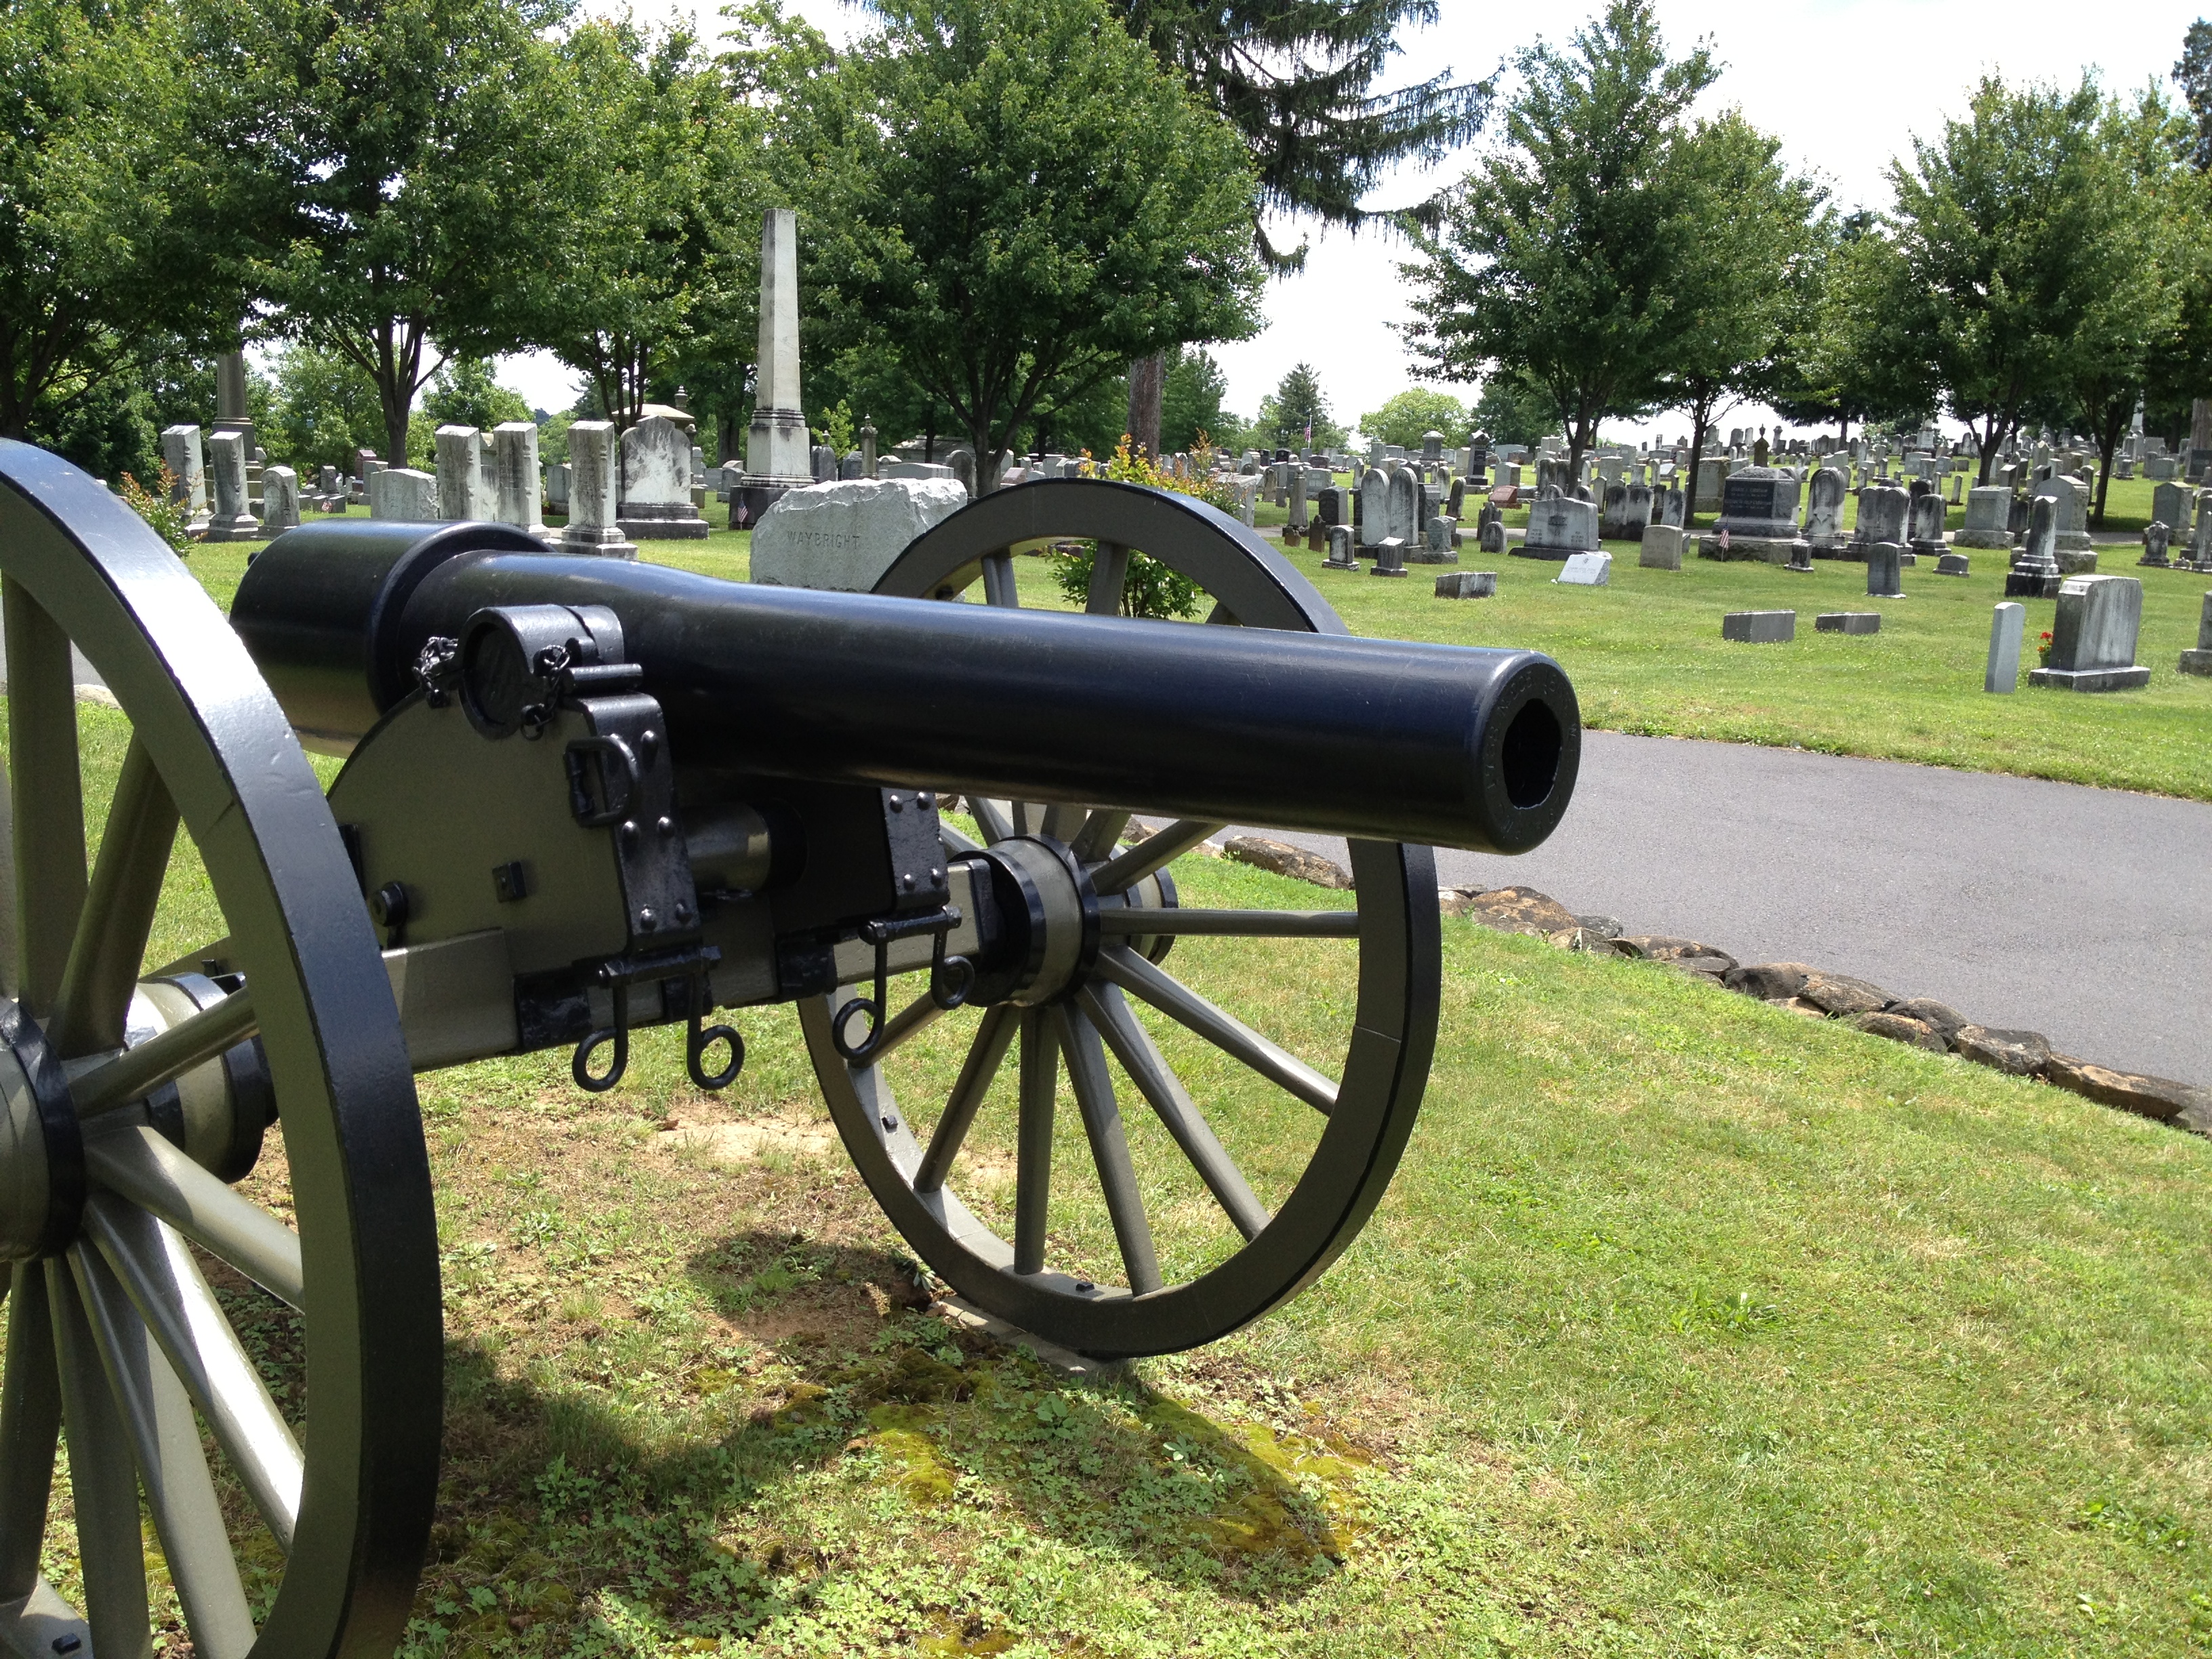
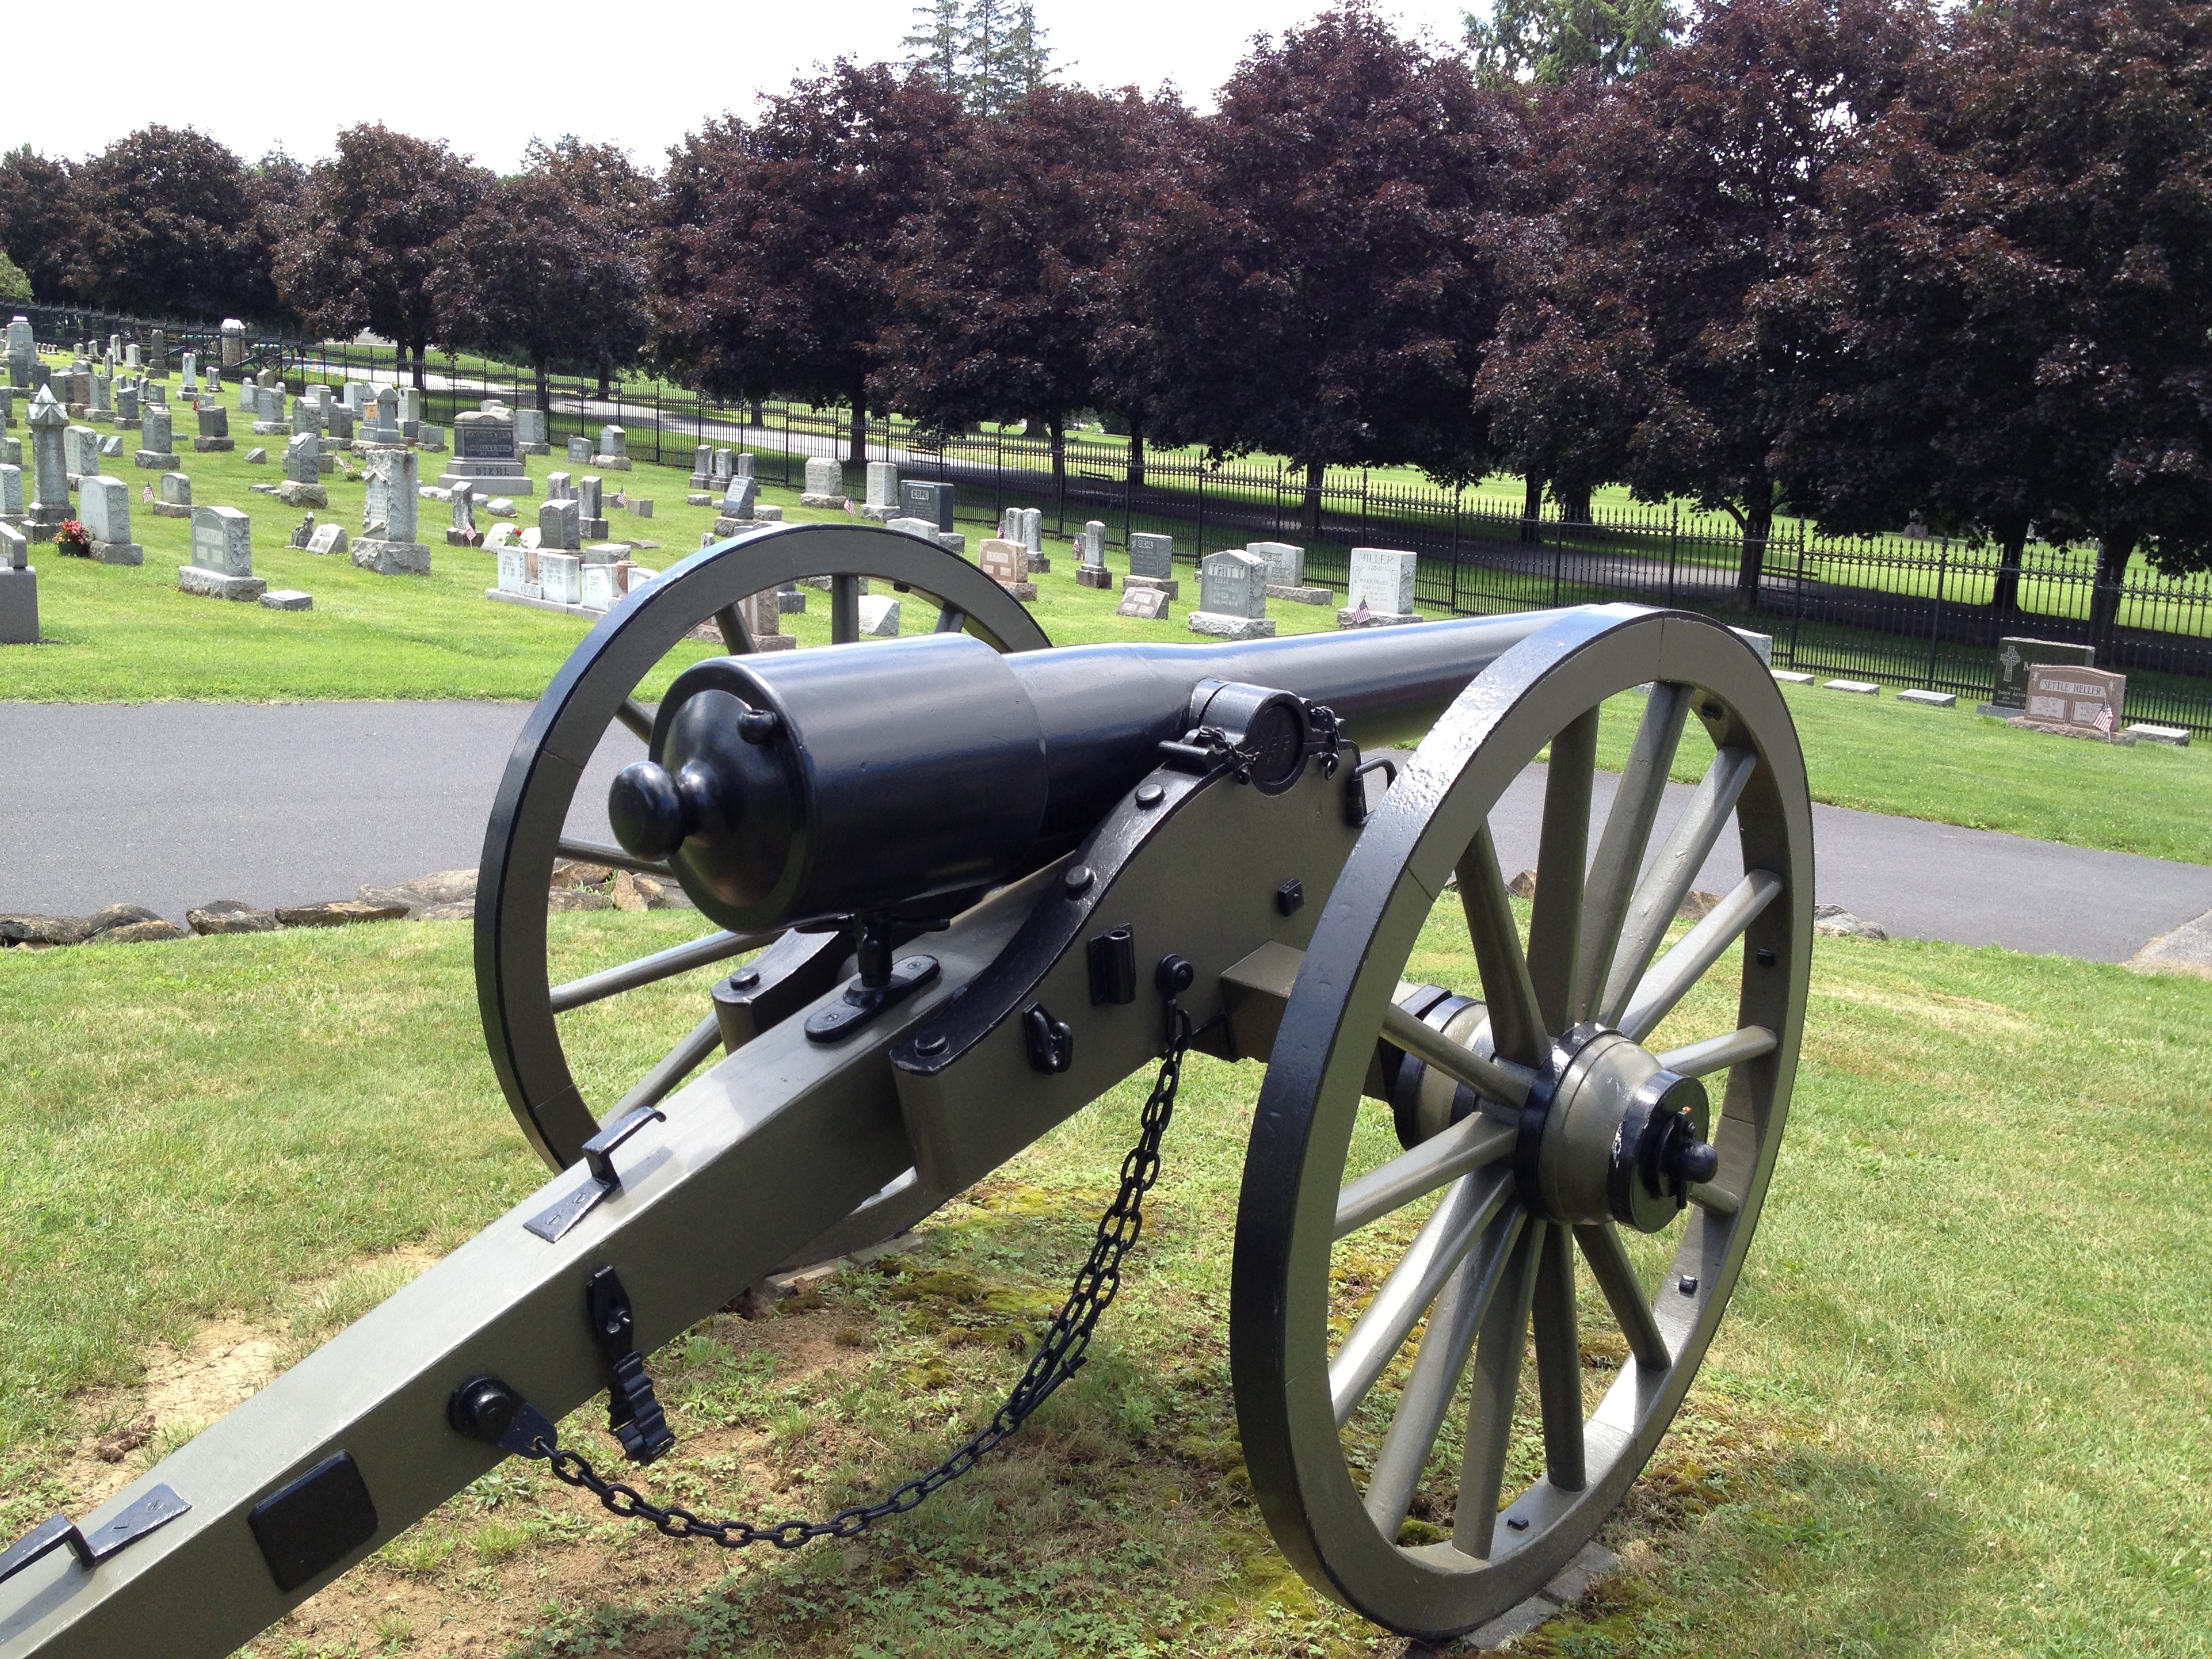
Parrott Rifle
Overview: Designed by Robert Parker Parrott at the West Point Foundry, this weapon was popular in the US arsenal because it was relatively cheap to make. The main part of the gun tube was made from cast iron, and the thicker reinforce around the breech was made from wrought iron. Unfortunately, metalworking technology wasn’t what it is today, and the foundries of the period had trouble fitting the two metals together. Sometimes a gap or bubble would form under the reinforce, and after repeated use, the cannon might burst at that seam. This was more of a perception problem than a real one, but the reputation stuck nonetheless.
Photos:
Front View of the Parrott Rifle.Rear View of the Parrott Rifle.
How to Identify: Look for black guns with a thick band around the reinforce. They’re very unique-looking. Actual pieces will have markings on the muzzle, and an “R.P.P” (for Robert Parker Parrott) and “W.P.F” (for West Point Foundry) on the end of the trunnions. There are both 10-pounder and 20-pounder versions at Gettysburg, with the 20-pounders (like the one pictured above) obviously being somewhat larger. Some of the earlier 10-pounders have a slight muzzle flare. There are plenty of fake Parrotts on the field, too.
Exceptions: Not all the guns of this design were made at the West Point Foundry. There were Confederate copies made at Tredegar and other facilities, and once you’ve seen one, you can tell that they are definitely of a lesser quality. There are a couple Confederate “Parrotts” on the field at Gettysburg right below the Longstreet Tower.
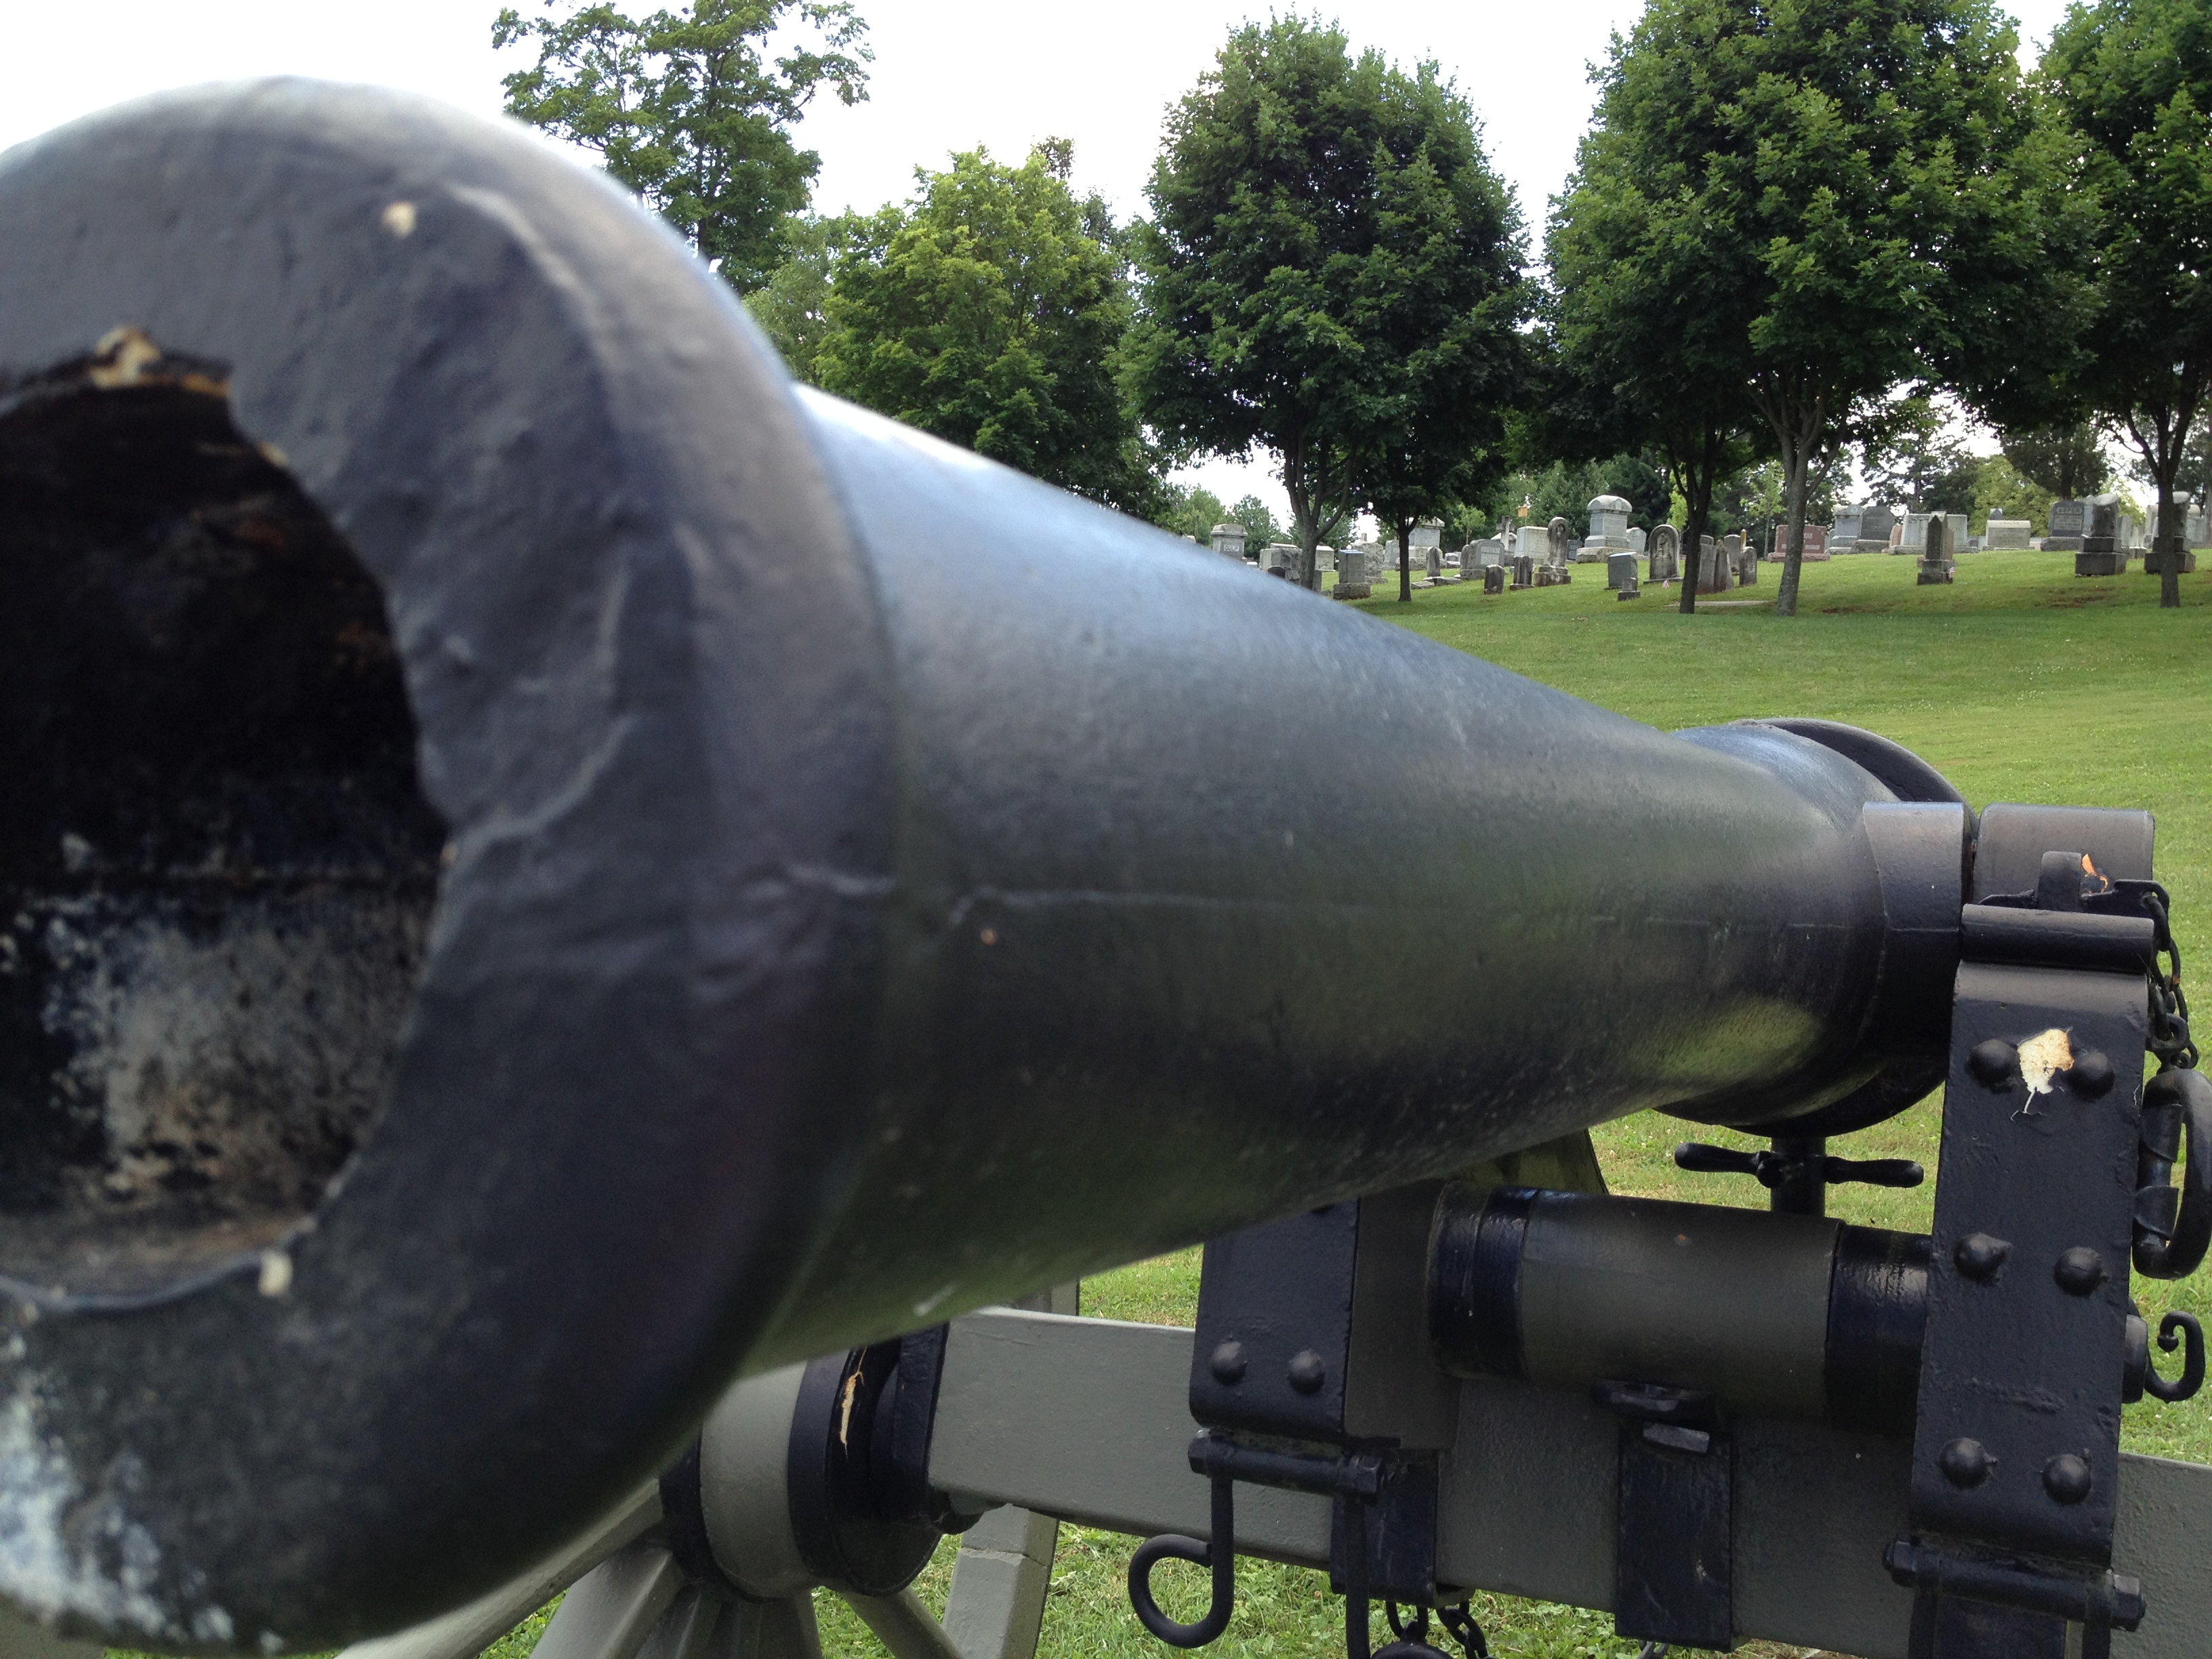
Fakes: As I said above, there are plenty of fakes when it comes to Parrotts. These can be hard to spot from a distance, though. Of course, any gun without any discernible markings on the muzzle, trunnions, or breech is suspect. The best long-distance indication that I’ve found is a horizontal casting seam running the length of the gun. Real cannons aren’t cast in halves like this:
A Fake “Parrott”. Note the casting seam running down the length.
I also noticed on this particular example that the muzzle swell is quite severe. It’s got a short length and a wide diameter. Real Parrott muzzle swells are more gradual.
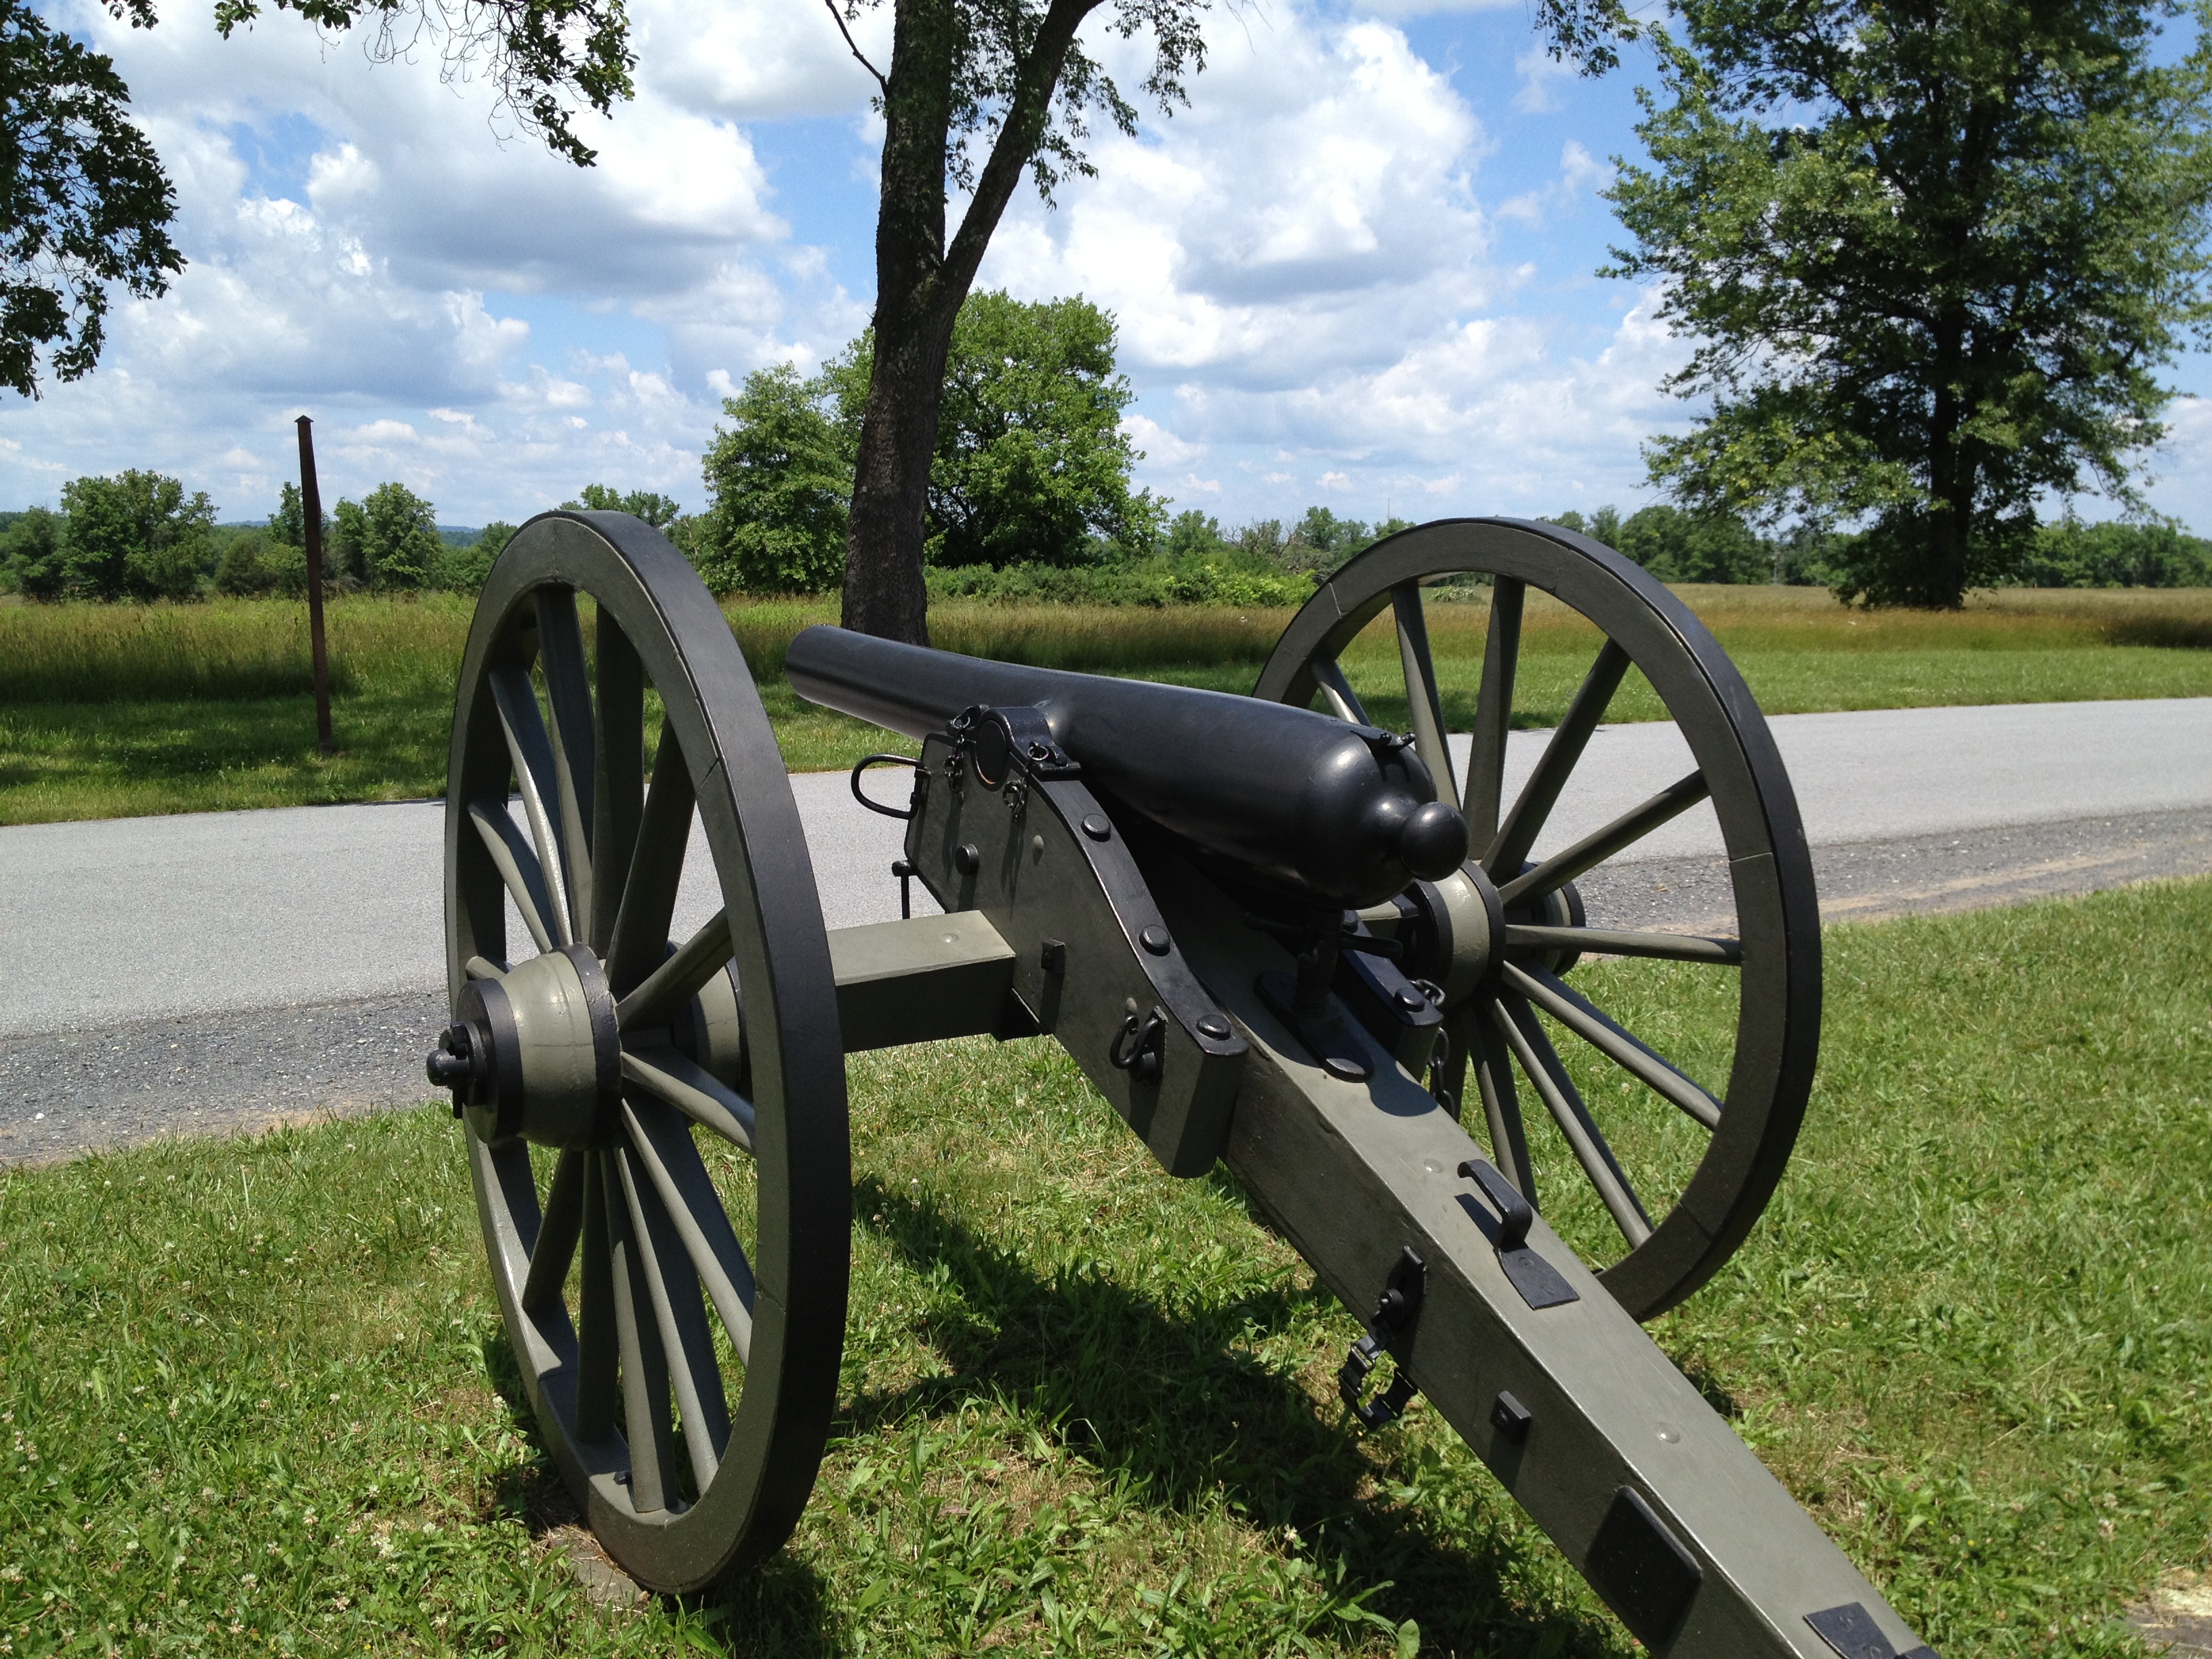
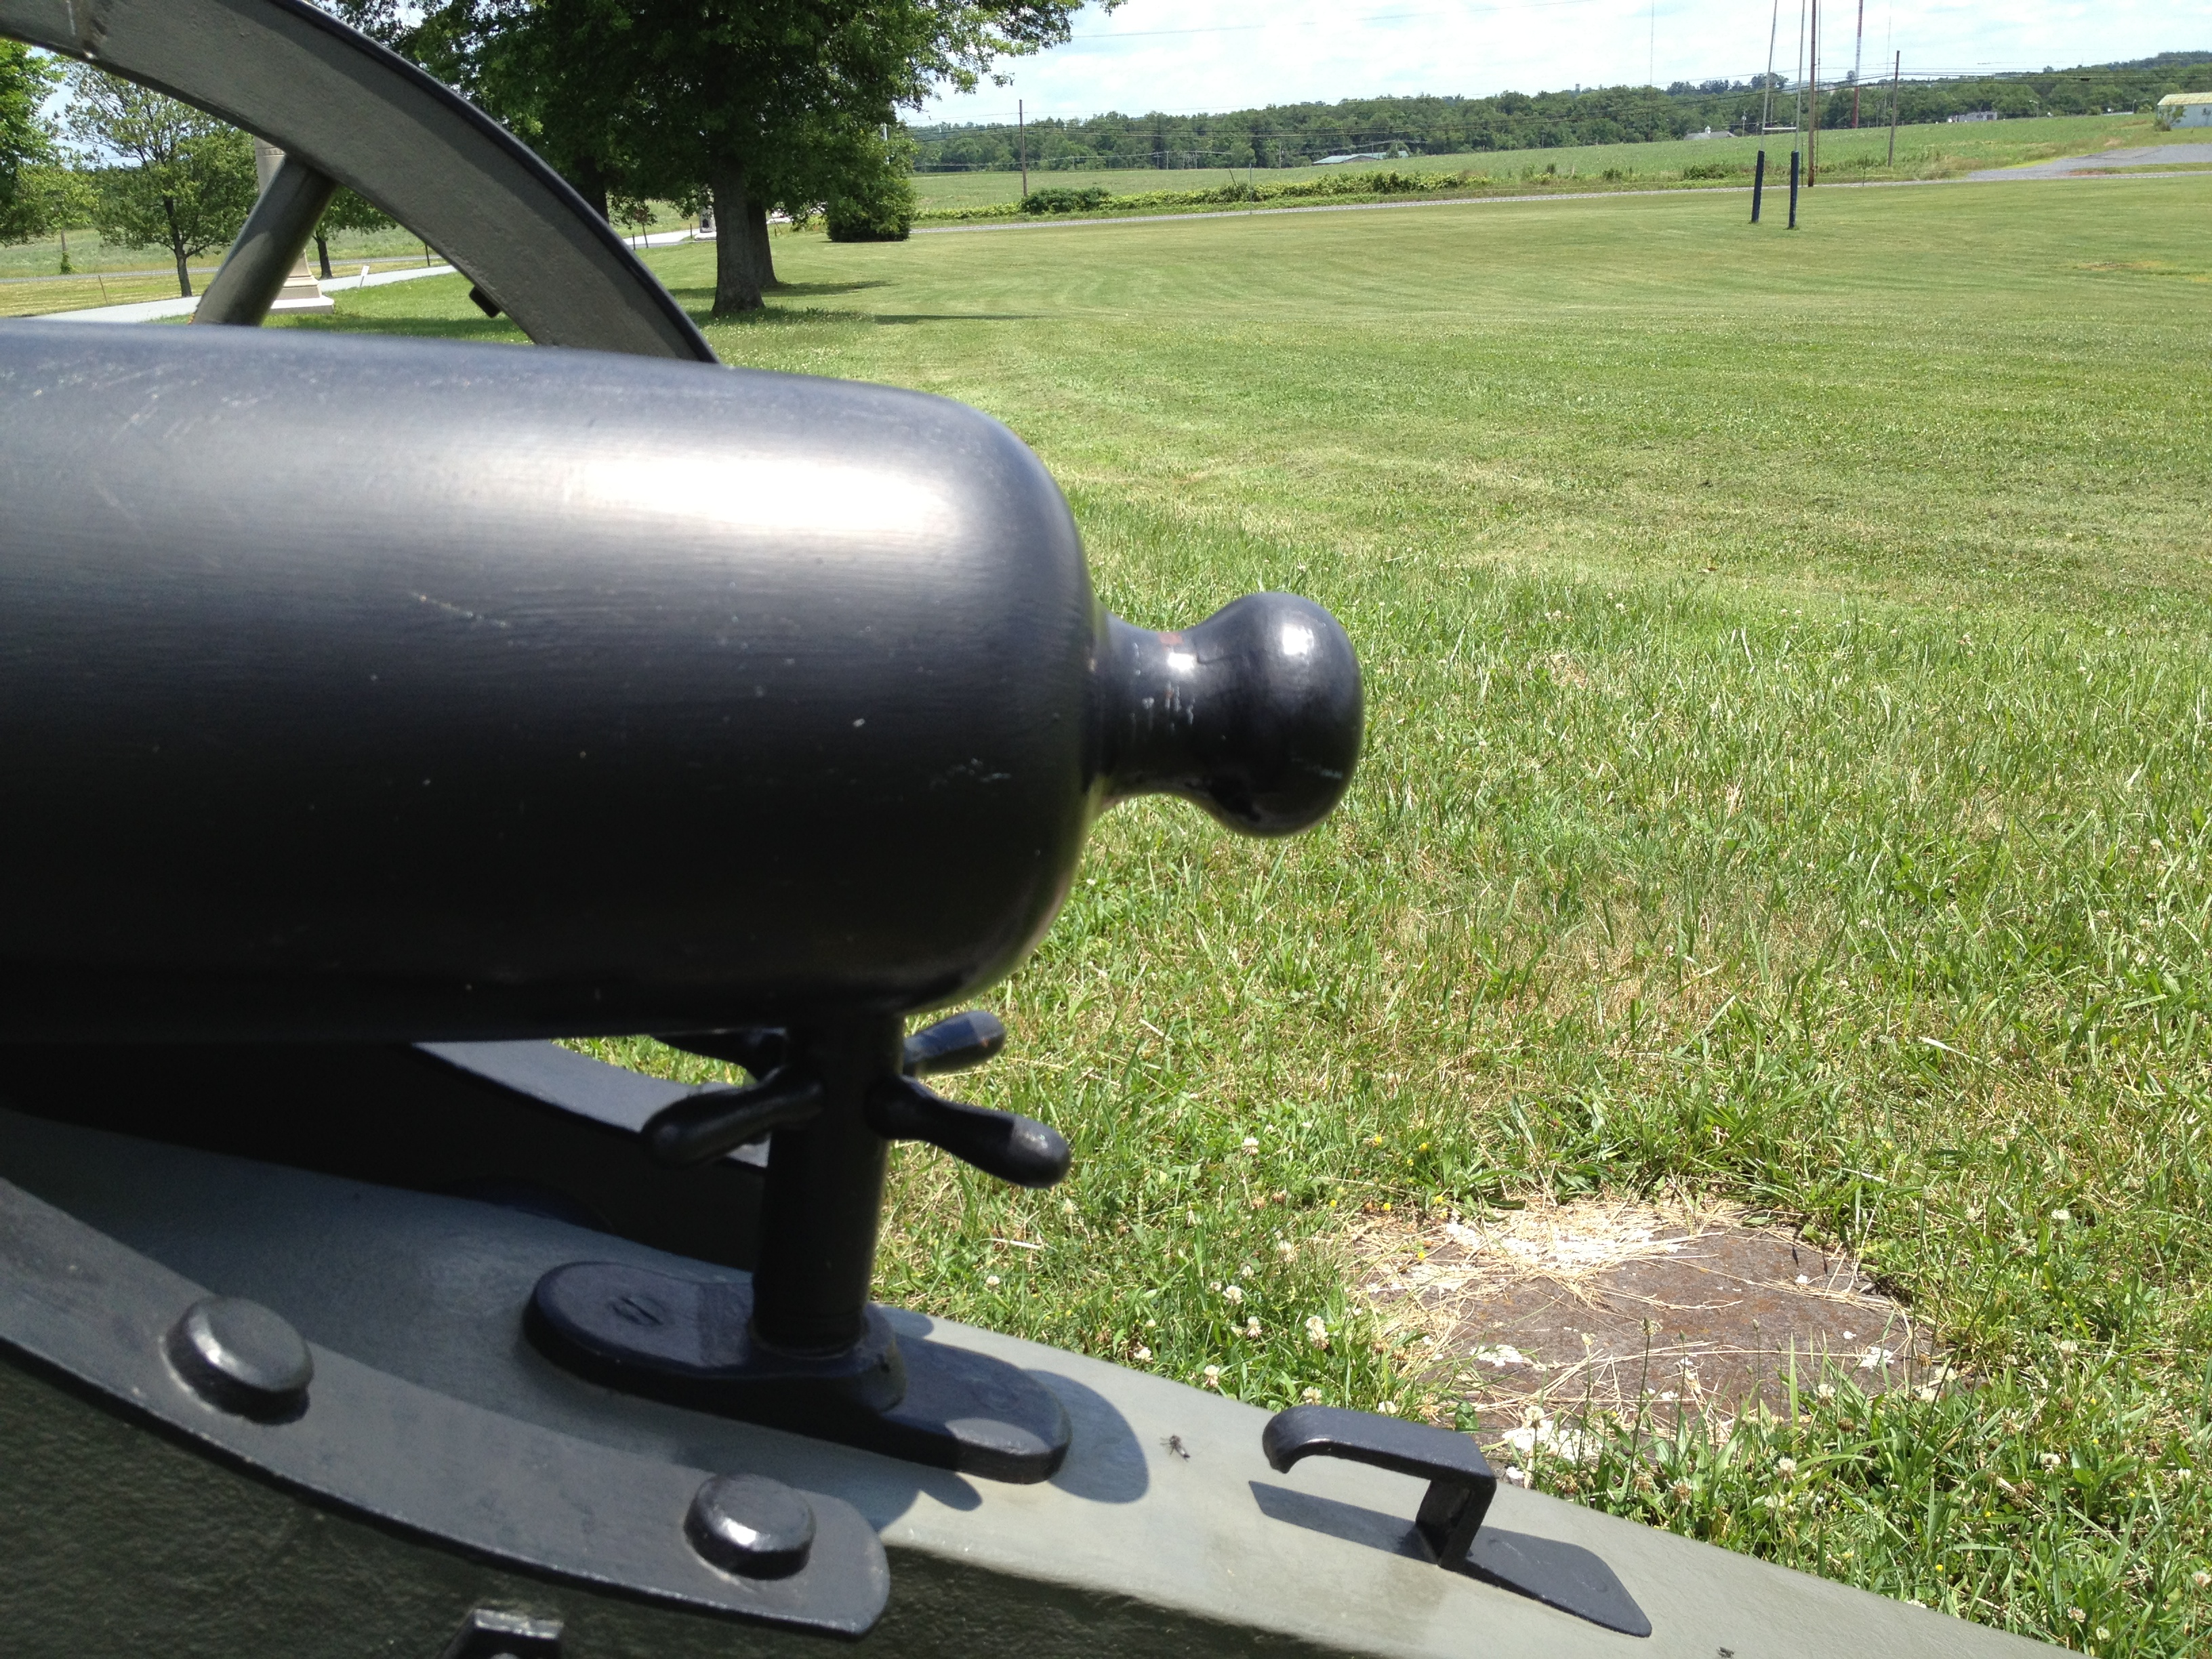
Model 1861 3-inch Ordnance Rifle
Overview: An advanced weapon for the time, this was a very strong and light gun made entirely from wrought iron. These technologically-advanced weapons were made by “P.I.Co.” or the Phoenix Iron Company, headquarted just northwest of Valley Forge, PA.
Photos:
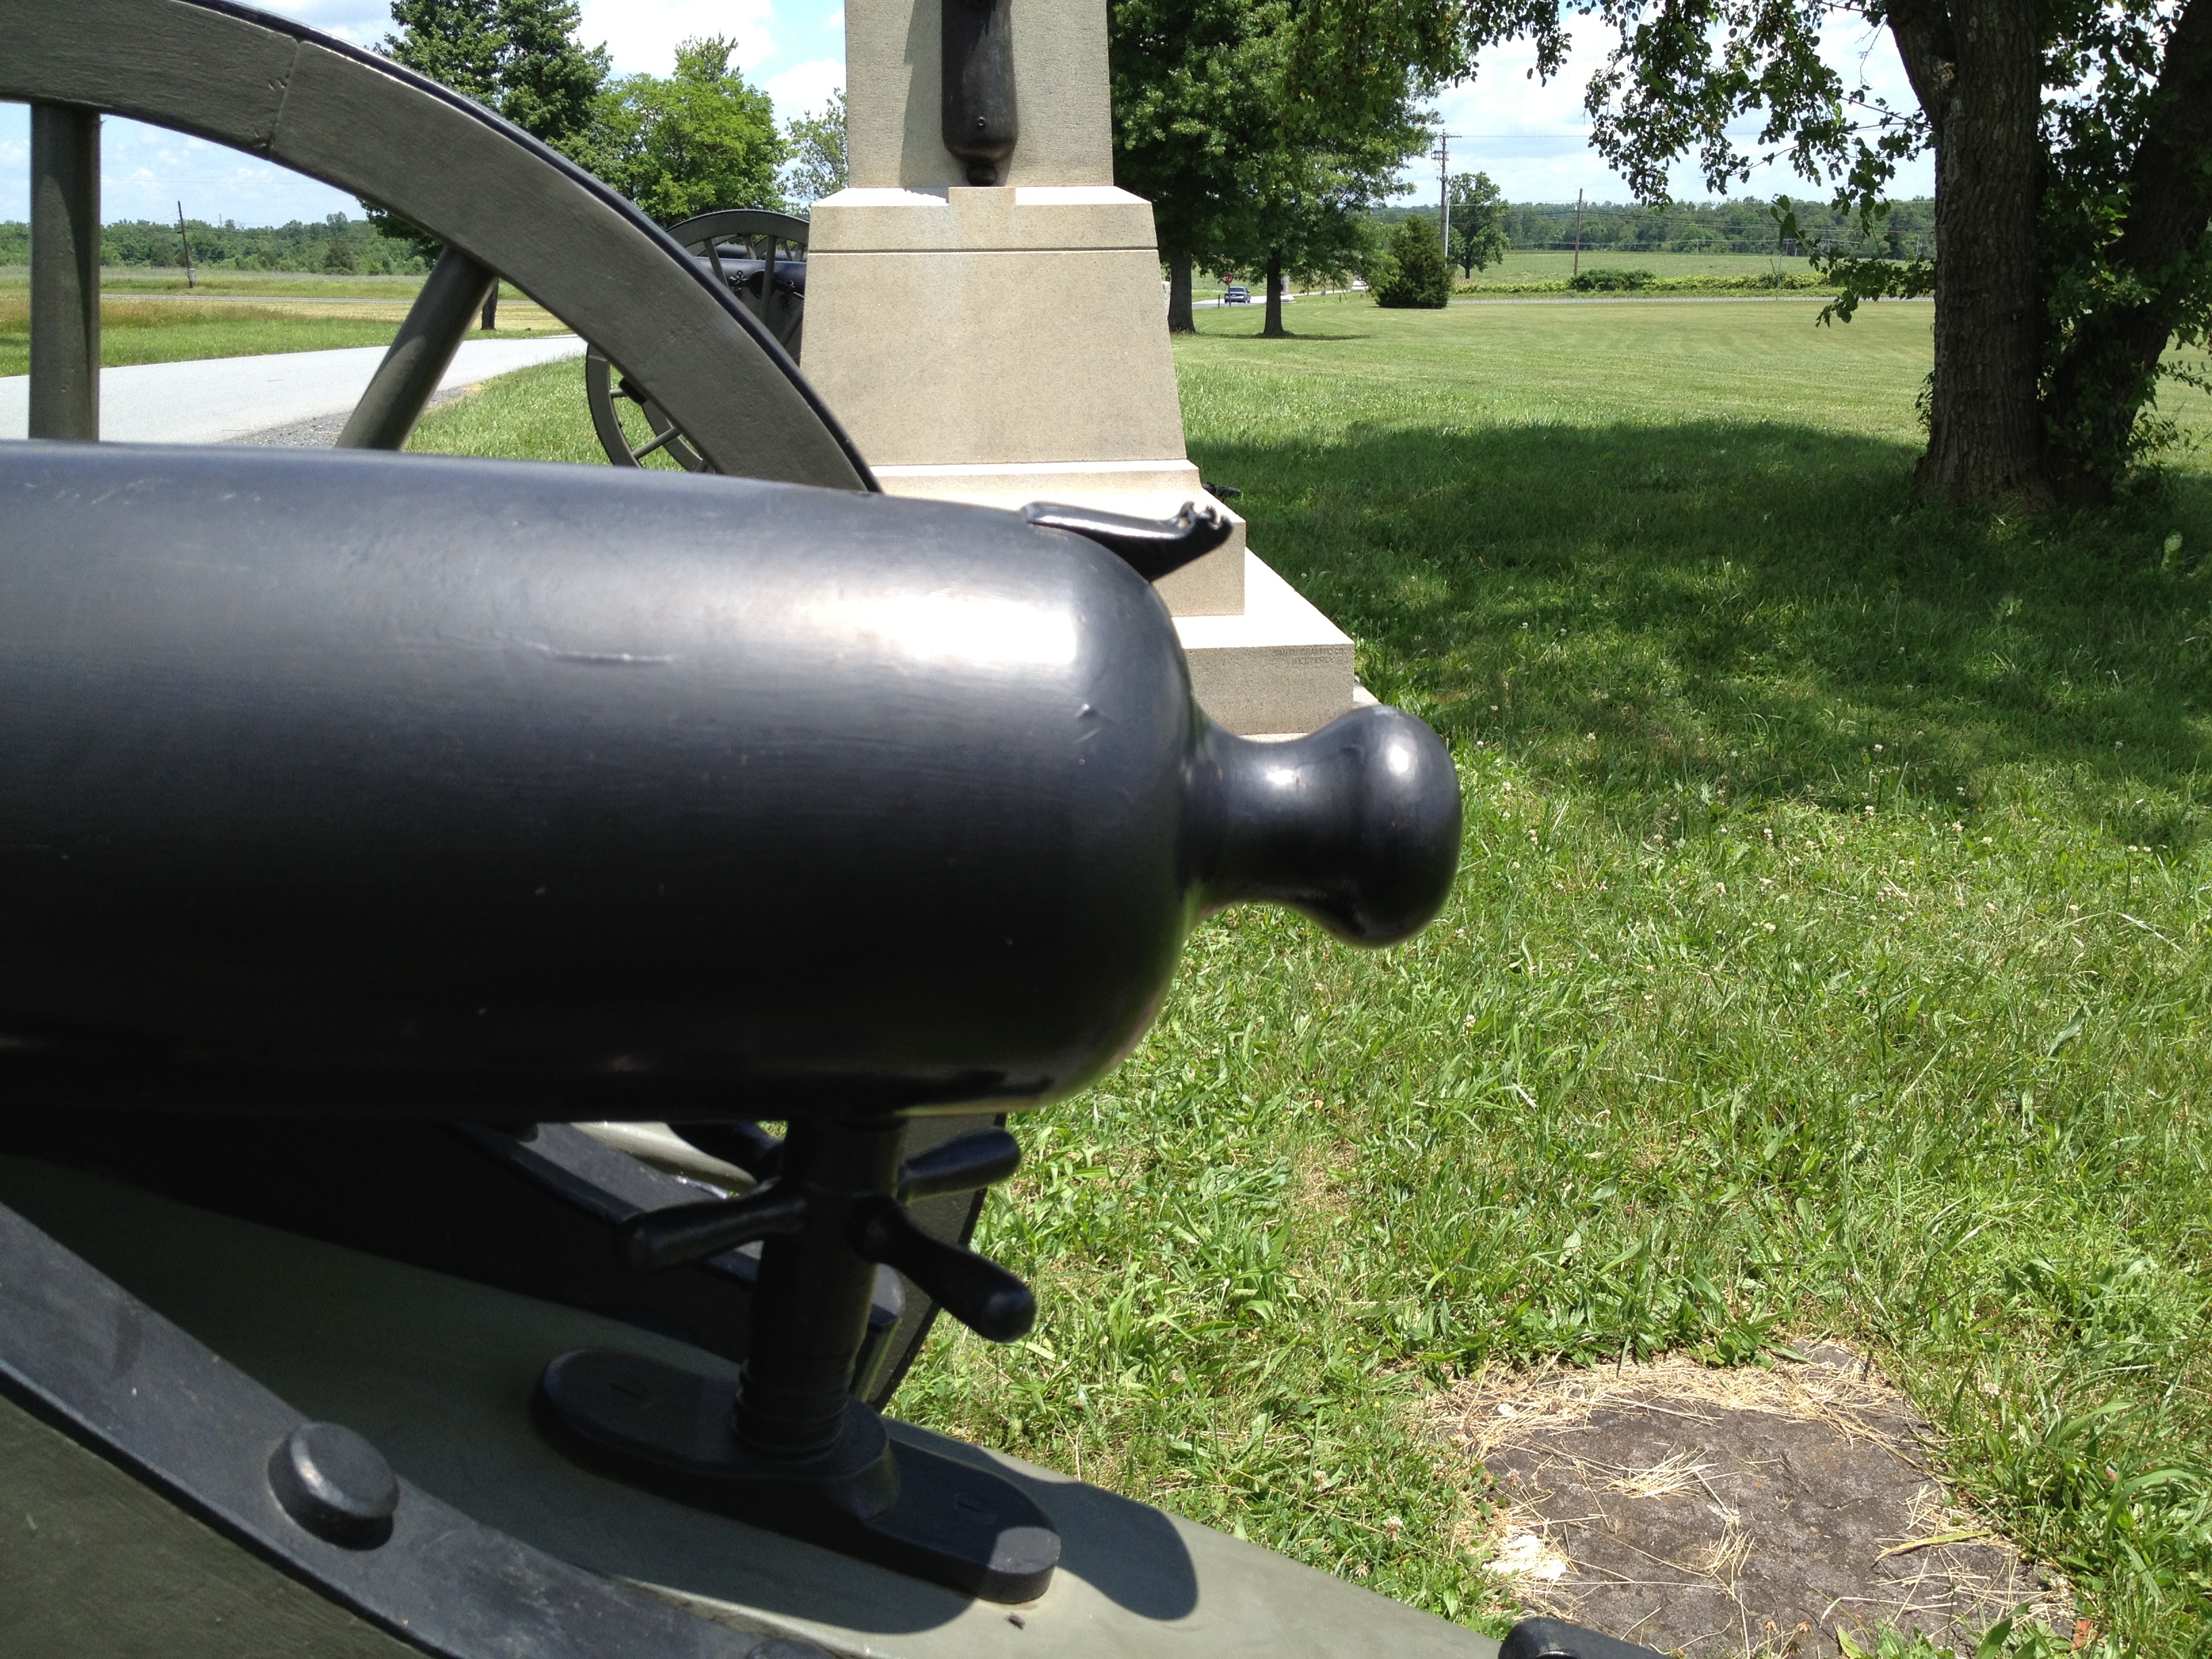
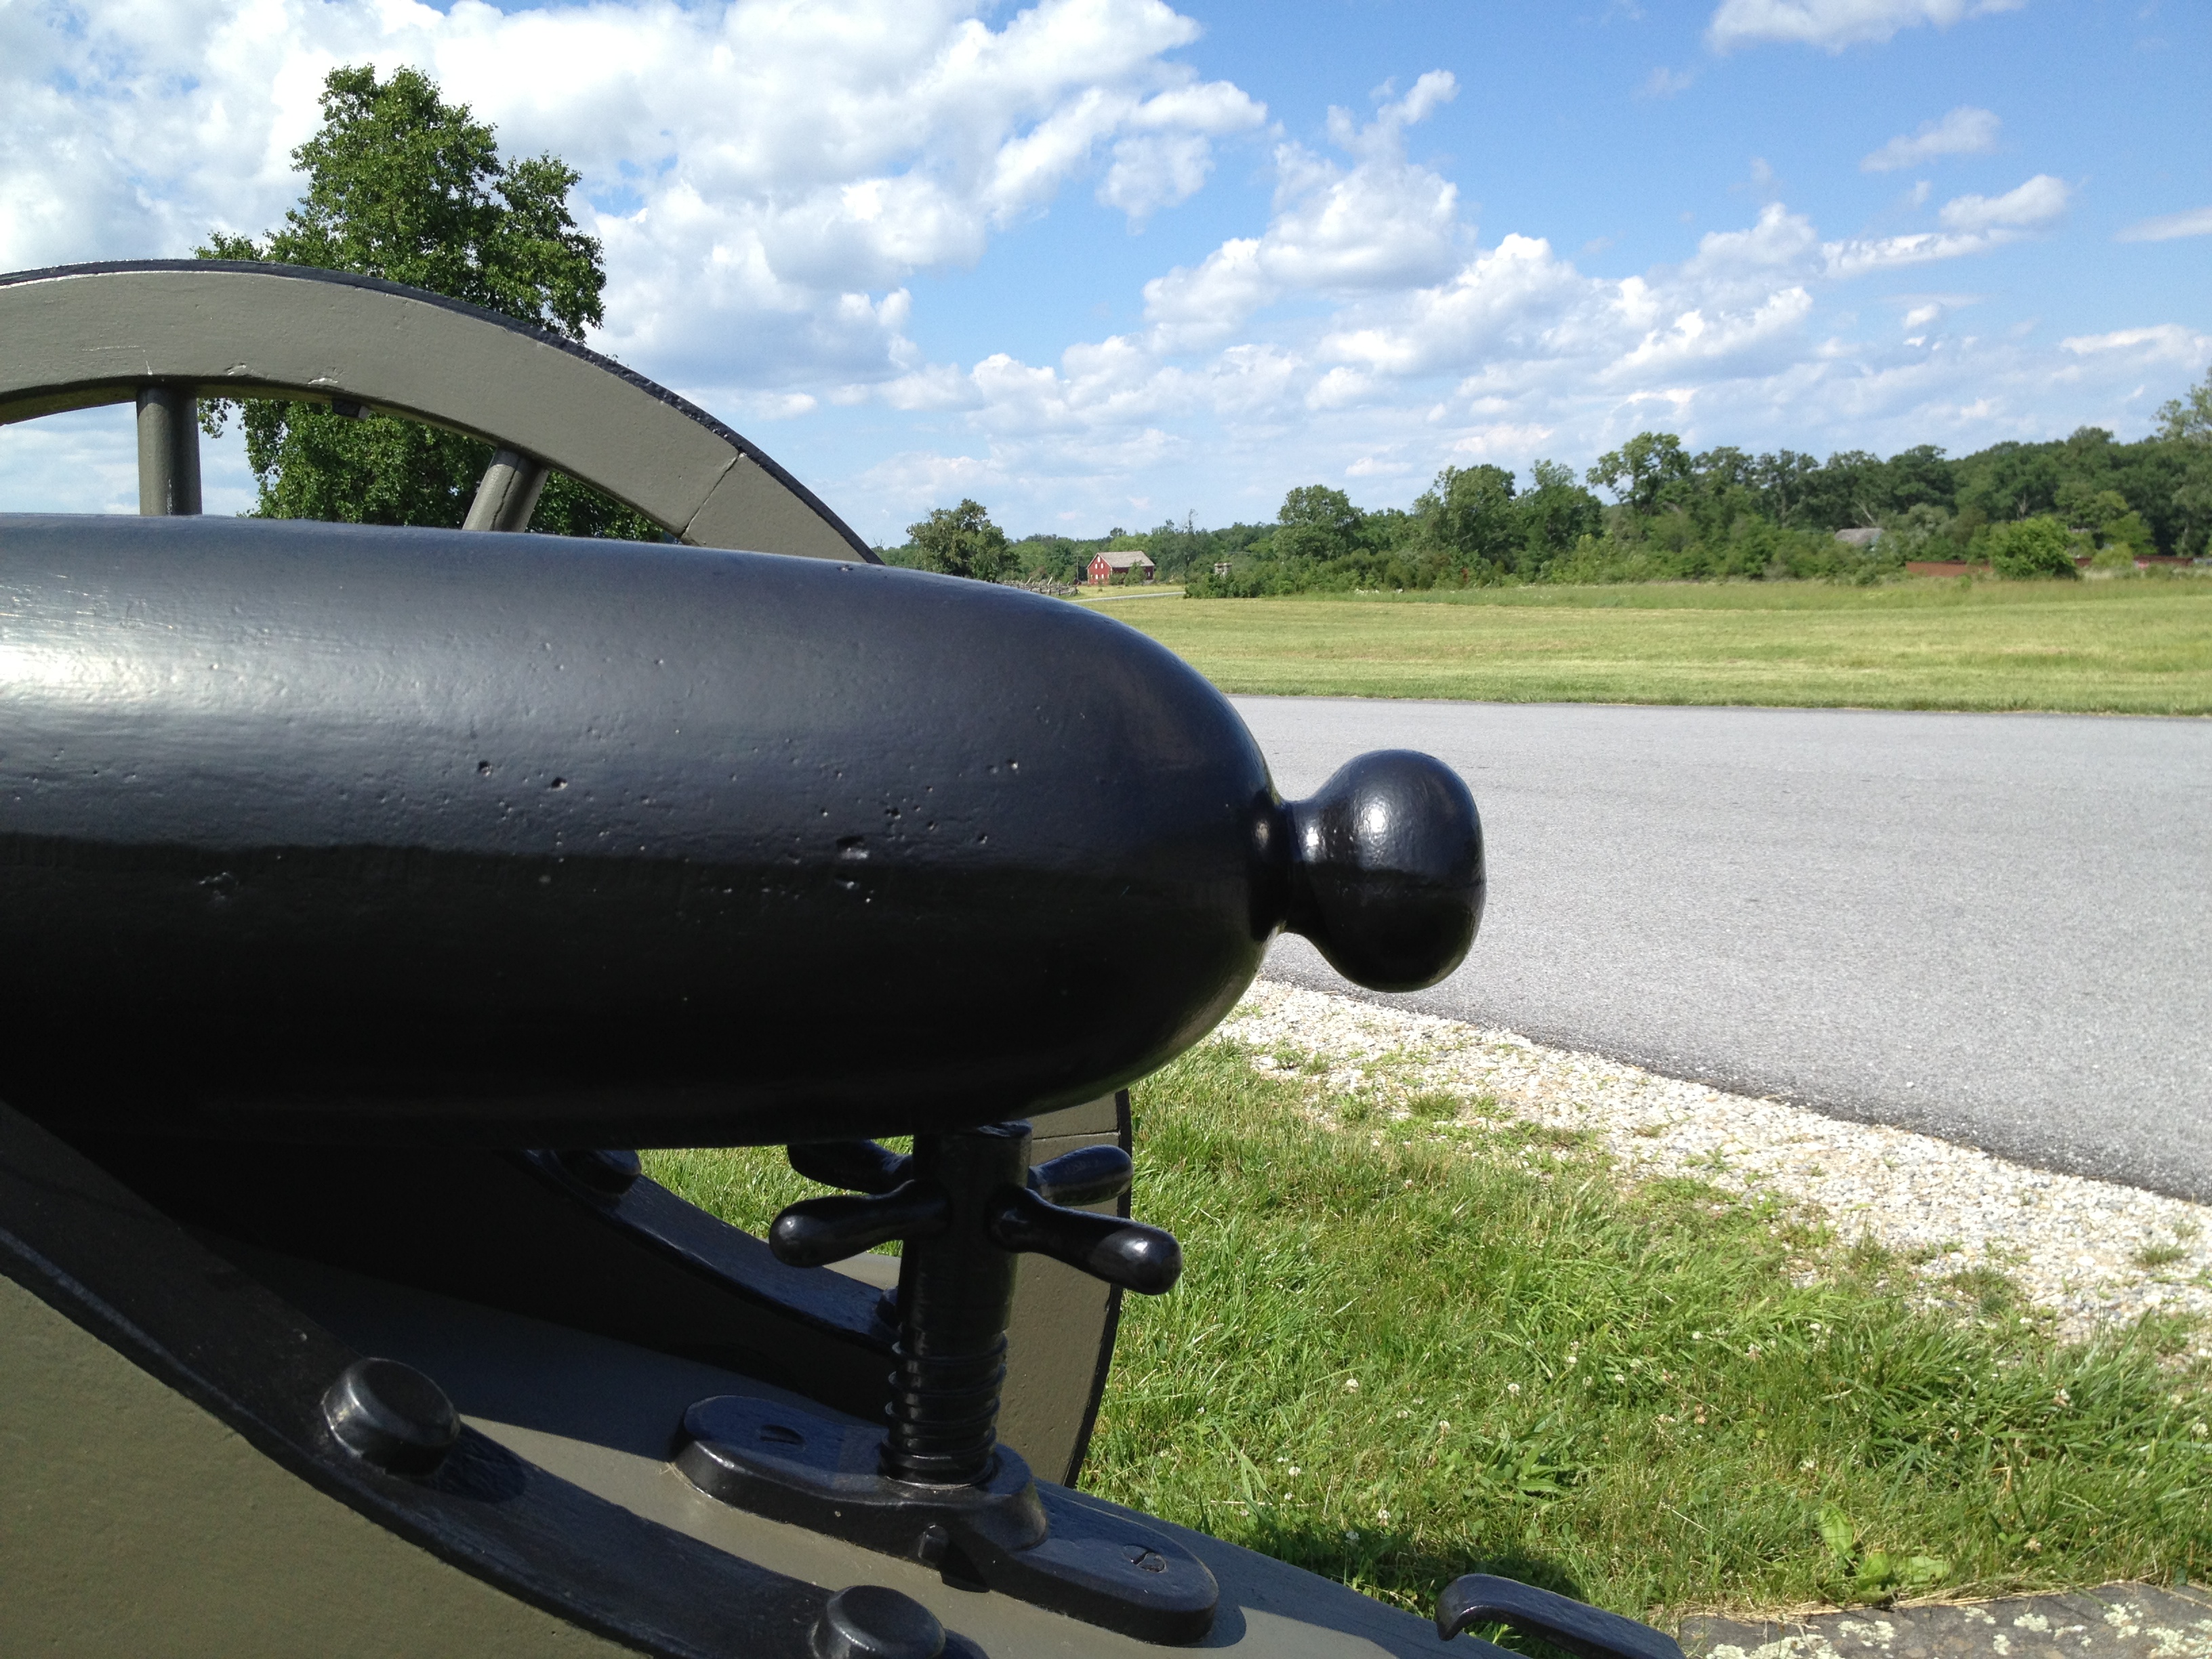
Front View of a 3-inch Ordnance Rifle.Rear View of a 3-inch Ordnance Rifle.The Cascable and Knob on a 3-inch Ordnance Rifle.Another Cascable, this time with a rear sight.
How to Identify: Being iron weapons, the guns on display are all painted black. The 3-inch Ordnance Rifle has a very sleek shape, with a smooth taper going from breech to muzzle. This is the same shape we talked about for the 14-pounder James Rifle in the previous post. It’s obviously pretty easy to tell the difference between this and the Parrott, as there’s no reinforcing band.
Exceptions: Every 3-inch Ordnance Rifle I’ve seen is the same design. Gettysburg does have at least 1 that was made in 1866, so we know for a fact that it was never actually used in battle. There were Confederate copies, too, but I don’t think that Gettysburg has any out on the field.
Fakes: Just like the fake Parrotts, fake 3-inch Ordnance Rifles lack muzzle, trunnion, and breech markings and will also have a casting seam running the length of the barrel. Spotting them from a distance is even easier though, as they have a totally different, much pointier shape at the back. Just look at this cascable and compare it to the real one above (also – see the casting seam?):
The Cascable and Knob on a fake 3-inch Ordnance Rifle.
Whitworth Rifle
Overview: My favorite guns on the field at Gettysburg, these are totally unique British-made weapons. The Confederates had 2 of these at the Battle of Gettysburg, and there are 2 on the field today (though probably not the actual ones that were used in 1863) placed near where they were for the battle – on Oak Hill right behind the Eternal Light Peace Memorial.
The Whitworth design was so advanced, it was actually ahead of its time. The most obvious thing about it is that it’s a breechloader like modern cannons. The gun had a maximum range of almost 6 miles, but this wasn’t as useful as it sounds. In an age when you’re only going to fire at what you can see, any range more than a mile is pretty much wasted. In the case of the Whitworth, the extra range was used for counter-battery work – these were used to pick off enemy cannons outside of the enemy’s range, and they were deadly accurate when used like this.
All of this technology wasn’t without problems of course: the breech didn’t seal properly all the time causing gases to leak out, weakening the force of the explosion. The hinge that opened the breech would seize up frequently if not properly maintained, forcing the gun to be used as a muzzleloader instead. The barrel wasn’t rifled in the traditional sense, but was instead a very severely twisted hexagonal tube. This required very specialized ammunition, which was another problem – especially for the blockaded and agrarian Confederacy. That severe twist also exerted so much torque when the weapon was fired, that the wooden wheels frequently broke off of the gun carriages.
Photos:
Front View of the Whitworth Rifle.Rear View of the Whitworth Rifle.
How to Identify: A very cylindrical weapon, the initial indicator on these is the ring around the barrel at the trunnions. Viewed from the rear, the obvious feature is the opening breech. There are two knobs on the breech for cranking the back open, and a giant hinge on the right side.
Exceptions: I’ve only ever seen the 2 that are at Gettysburg. So far as I know, they all share the same design. One of the ones that Gettysburg has does have a field modification, though. There is a guard on the back of the breech to keep the friction primer from popping out when the weapon was fired. That was not part of the original design.
Fakes: I’ve never encountered any fake Whitworths, though I’ve seen people build their own re-creations of the weapon from old plans.
There had been a small skirmish in Middleburg 2 days before, but now a more sizable force from both armies formed near the town. Once again, the result was a measured Union victory, in that the Confederates were eventually driven from the field (even though the Union forces took heavier losses). The southerners left in order to move farther west and strengthen their own screen against the Union cavalry; preventing them from encountering the main body of the Army of Northern Virginia.
There’s one more minor battle coming before the Union cavalry finally gives up and decides to move on to the north.
As the armies moved north through Virginia as part of what would become the Gettysburg Campaign, General Alfred Pleasonton continued to deploy his cavalry to the west in search of the main body of the Confederate Army of Northern Virginia.
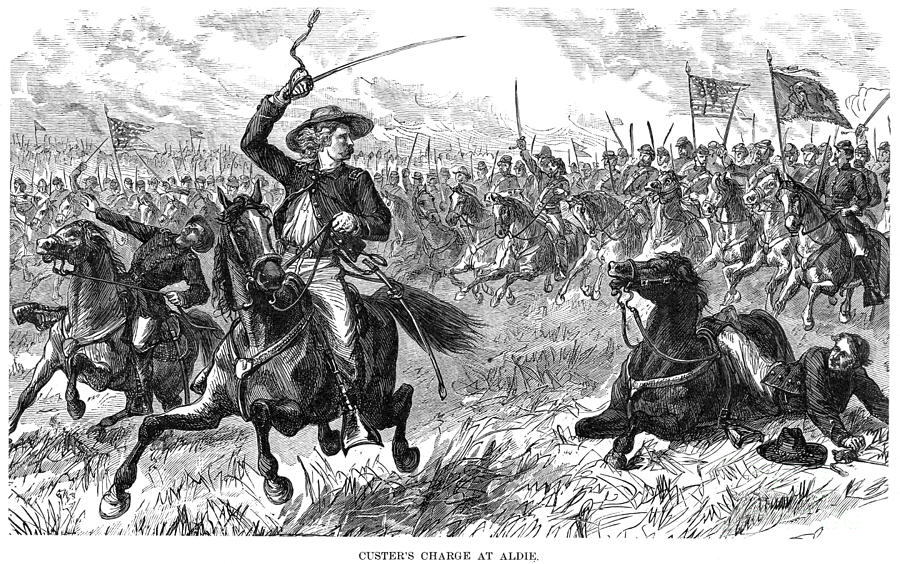
Today marks the 150th anniversary of one of the times they stumbled onto Confederate cavalry – this time under General Munford – the Battle of Aldie.
While a relatively minor engagement, it had some interesting consequences. For one, the Confederates abandoned the field after the fighting, moving back toward the west and the mountains to provide a more effective screen. They’d be pushed back even further over the next few days. This “loss” served to bolster the confidence of the Union cavalry after their good showing at the Battle of Brandy Station about a week earlier.
Captain George Armstrong Custer leads the charge at the Battle of Aldie.
This battle also sparked the rise of one of the most famous cavalry commanders in American history: George Armstrong Custer. Custer was serving on Pleasonton’s staff as a Captain and was able to convince his commander to allow him to take part in the attack on this day. As the 1st Maine cavalry charged forward, the regiment’s commander fell dead and Custer took the lead in his place.
This act of bravery (combined with the fact that he was already a favorite of Pleasonton – the overall Union cavalry commander) led to Custer’s promotion to Brigadier General before the end of the month. As the youngest General in the Union army, he would lead a brigade of Michigan cavalrymen at Hanover and Hunterstown on his way to the East Cavalry Field at Gettysburg.
Of course, he’s most famous for being killed 13 years later with the rest of his command at Little Bighorn. But if not for his part at Aldie, he may never have become more than a mere staff officer.
One of the things that I’ve become more interested in over the years is artillery – especially the artillery that was used during the Civil War. I started a series a few months ago to explain some of the basics of these weapons – it is best to see that article first to get familiar with the “anatomy” of the guns. Today, I want to explain how to identify some of the different types of bronze cannons, using familiar examples from the collection at Gettysburg.
There are a few main types of bronze guns that we’ll be looking at today:
Model 1857 12-pounder Field Gun (The “Napoleon”)
Overview: The most common type of bronze gun during the Civil War was the Model 1857 12-pounder Field Gun, commonly known as the “Napoleon” since this was an American copy of a French design that was popular with the famous general. There were 244 (though not all made from the US pattern) of these present at the Battle of Gettysburg.
While still a seemingly old-fashioned smoothbore, these weapons represented an innovative design, and were officially referred to as Gun-Howitzers, as they could operate effectively firing at either low (like guns) or high (like howitzers) angles. The “12-pounder” aspect of its name refers to the weight of the solid-shot projectile it would have fired. While a rifled weapon is more accurate at long range, the Napoleon’s large, smooth bore (4.62 inches in diameter) made it very well suited to fire canister rounds, making it absolutely deadly against troops at close range.
Photos:
Front View of the Model 1857 12-pounder.Rear View of the Model 1857 12-pounder.
How to Identify: The most obvious clue from a distance is the color, of course. Since the Napoleons are bronze, they will be greenish in color. The shape of the gun is smooth. There are no ornamental beads running around the tube like you see on the older 6-pounders. The tube is tapered from the breech down to the muzzle, which is flared out. The breech of the gun is relatively flat on the back, with a flattened area on the bottom of the tube where the gun rests on the elevating screw. Napoleons generally have markings on the front of the muzzle, and a “US” acceptance mark on the top of the barrel between the trunnions. There may also be markings on the breech, and the ends of the trunnions, as well as a foundry serial number on one of the rimbases.
Exceptions:Gettysburg has a few Napolens in the collection that were rifled. There were 6 of these produced, and so far as anyone knows, these were experimental weapons. They can be easily identified at a distance – while they are shaped like regular Napoleons, they have a fin-shaped front sight on the muzzle as you see on the example below:
Experimental Rifled Napoleon. Note the front sight at the top. Photo by John Dolan.
Fakes:There are a few – about 15 – “False Napoleons” at Gettysburg (and maybe on some other fields, too). Since Napoleons are in short supply, and they share a similar shape, these are actually Model 1841 6-pounders that were modified in the post-war years to look like Napoleons so that they could be placed in battlefield displays. If you look closely, you’ll see marks on the barrel near the muzzle where the astragal was removed, as well as in front of the trunnions where the lip has been smoothed down, and on the breech where the base ring was shaved-down. These guns have also had the first 6 inches or so of their bore increased in diameter to the 12-pound size – the rest remains the 6-pound gage – so that they look right from a distance. This is the easiest clue to know that you’re dealing with a “False Napoleon”. See the section below on the Model 1841 6-pounder to get an idea of what I’m talking about.
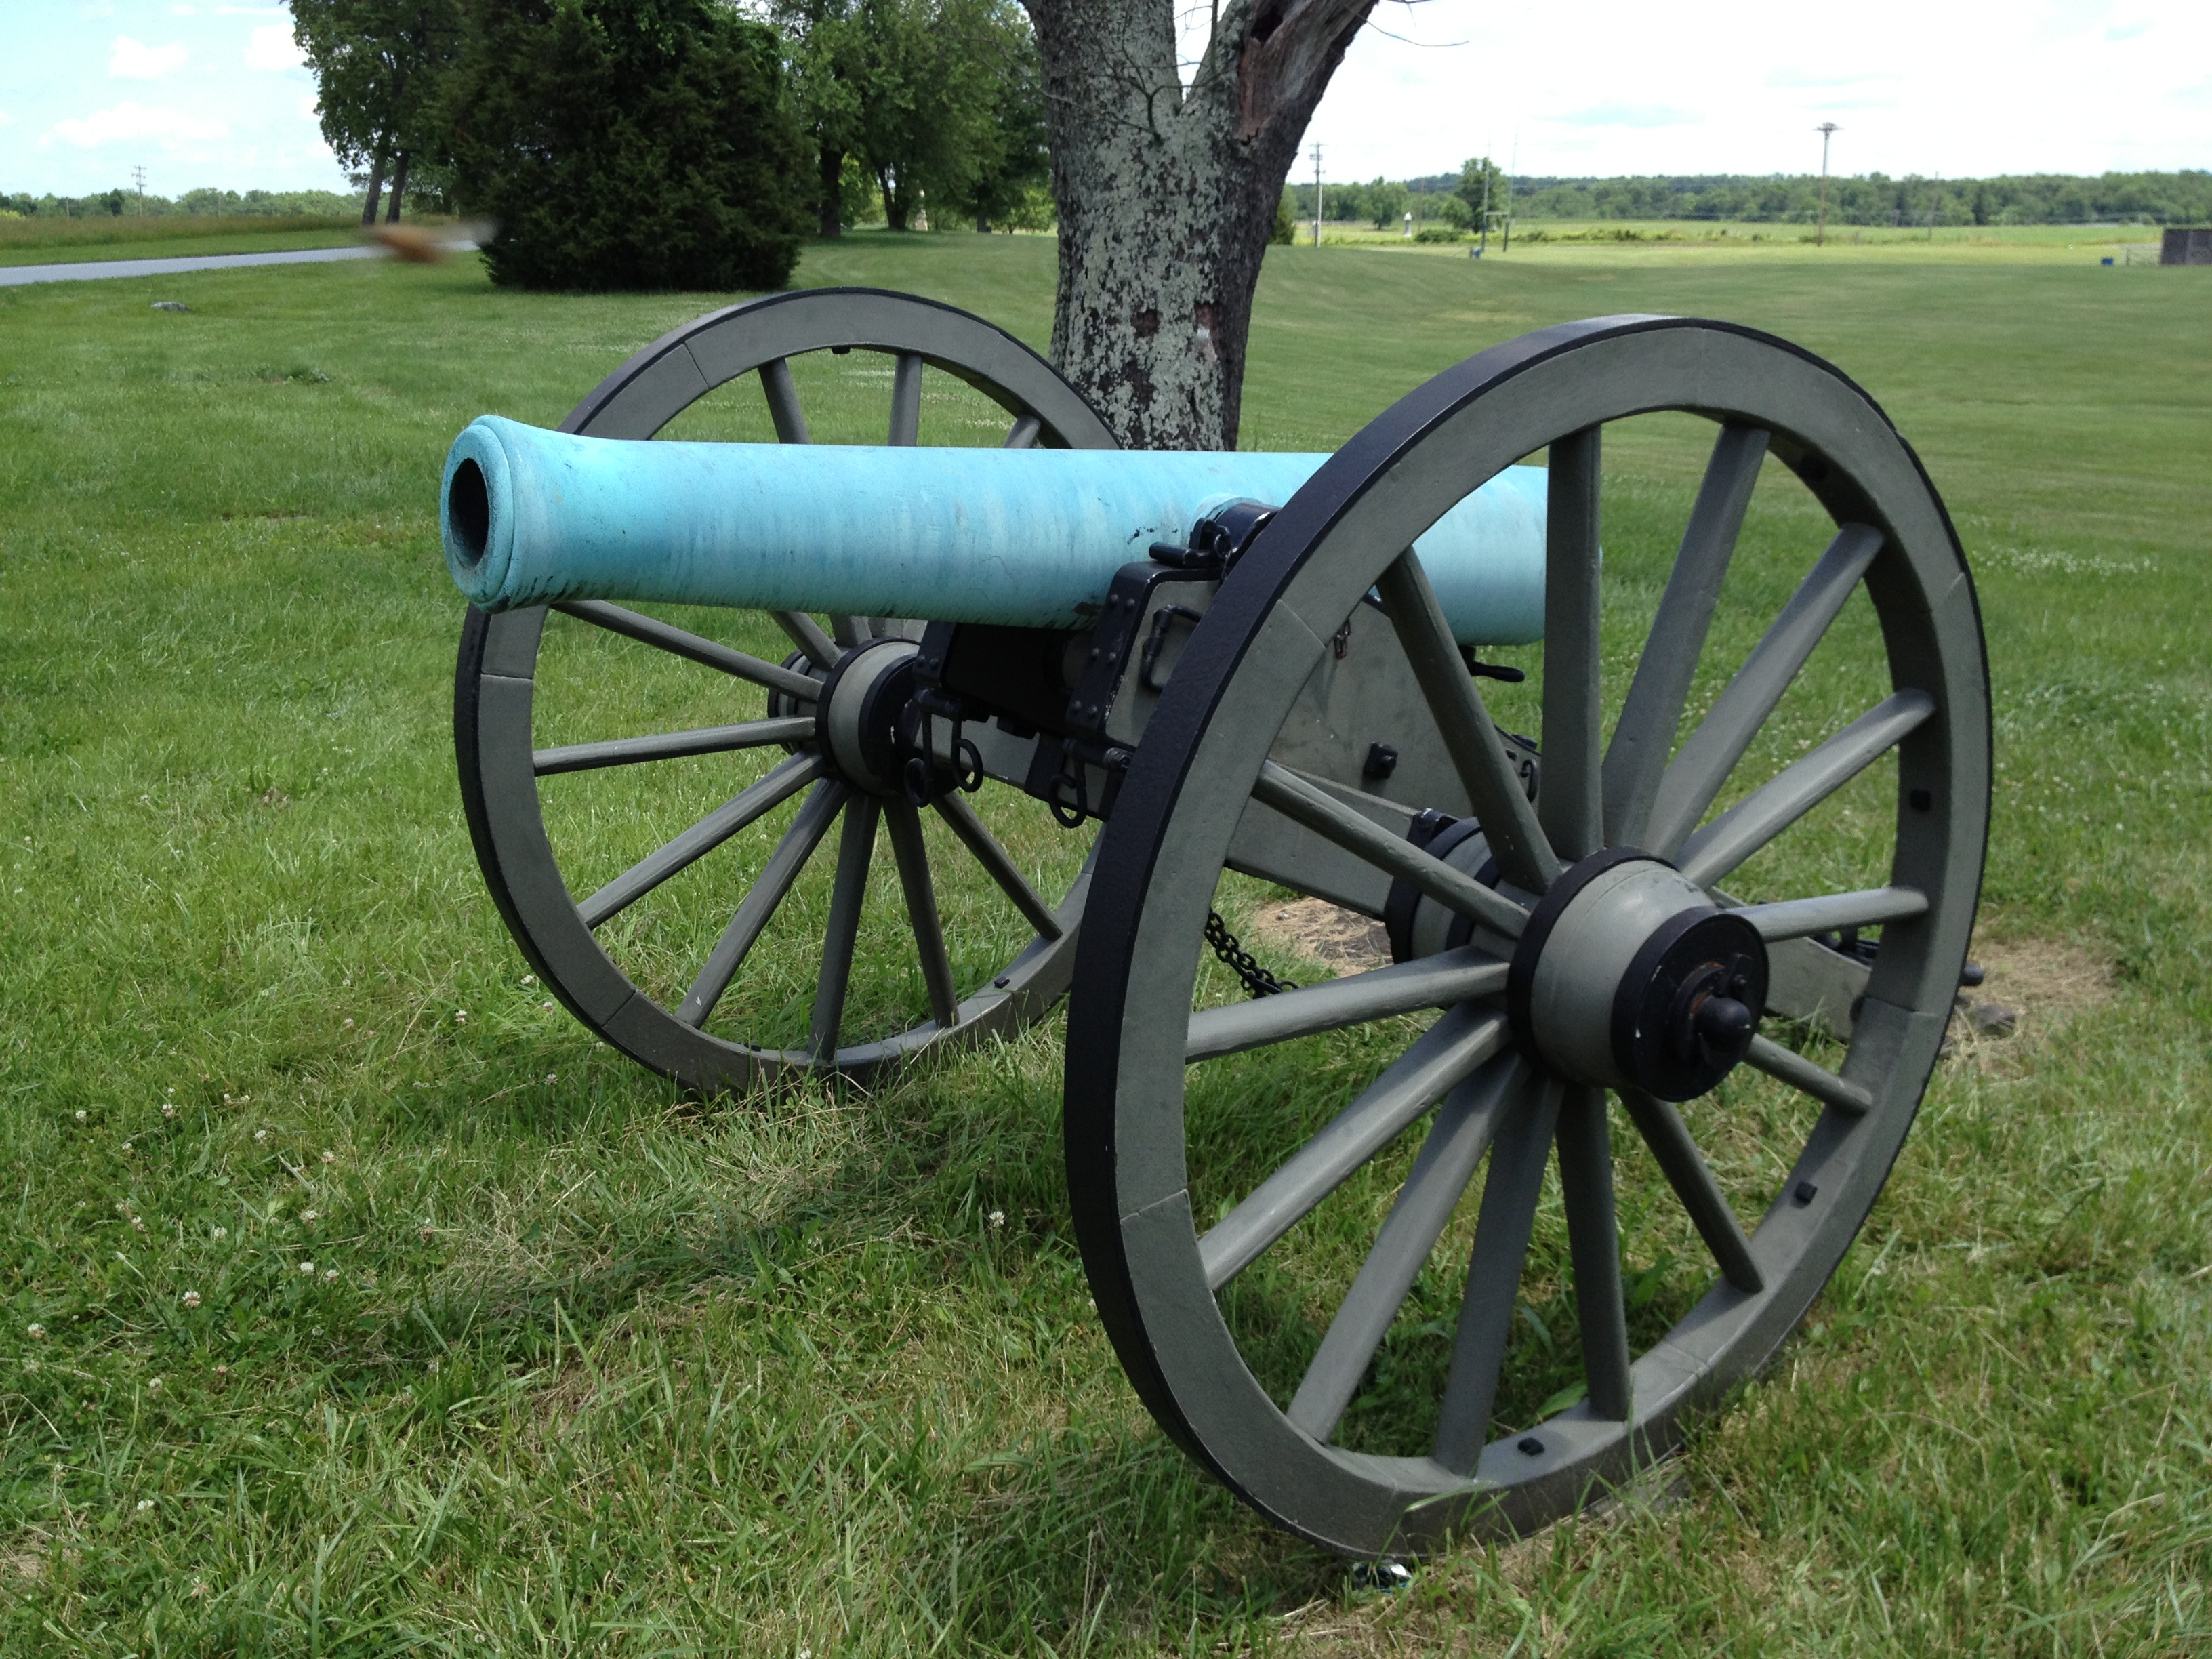
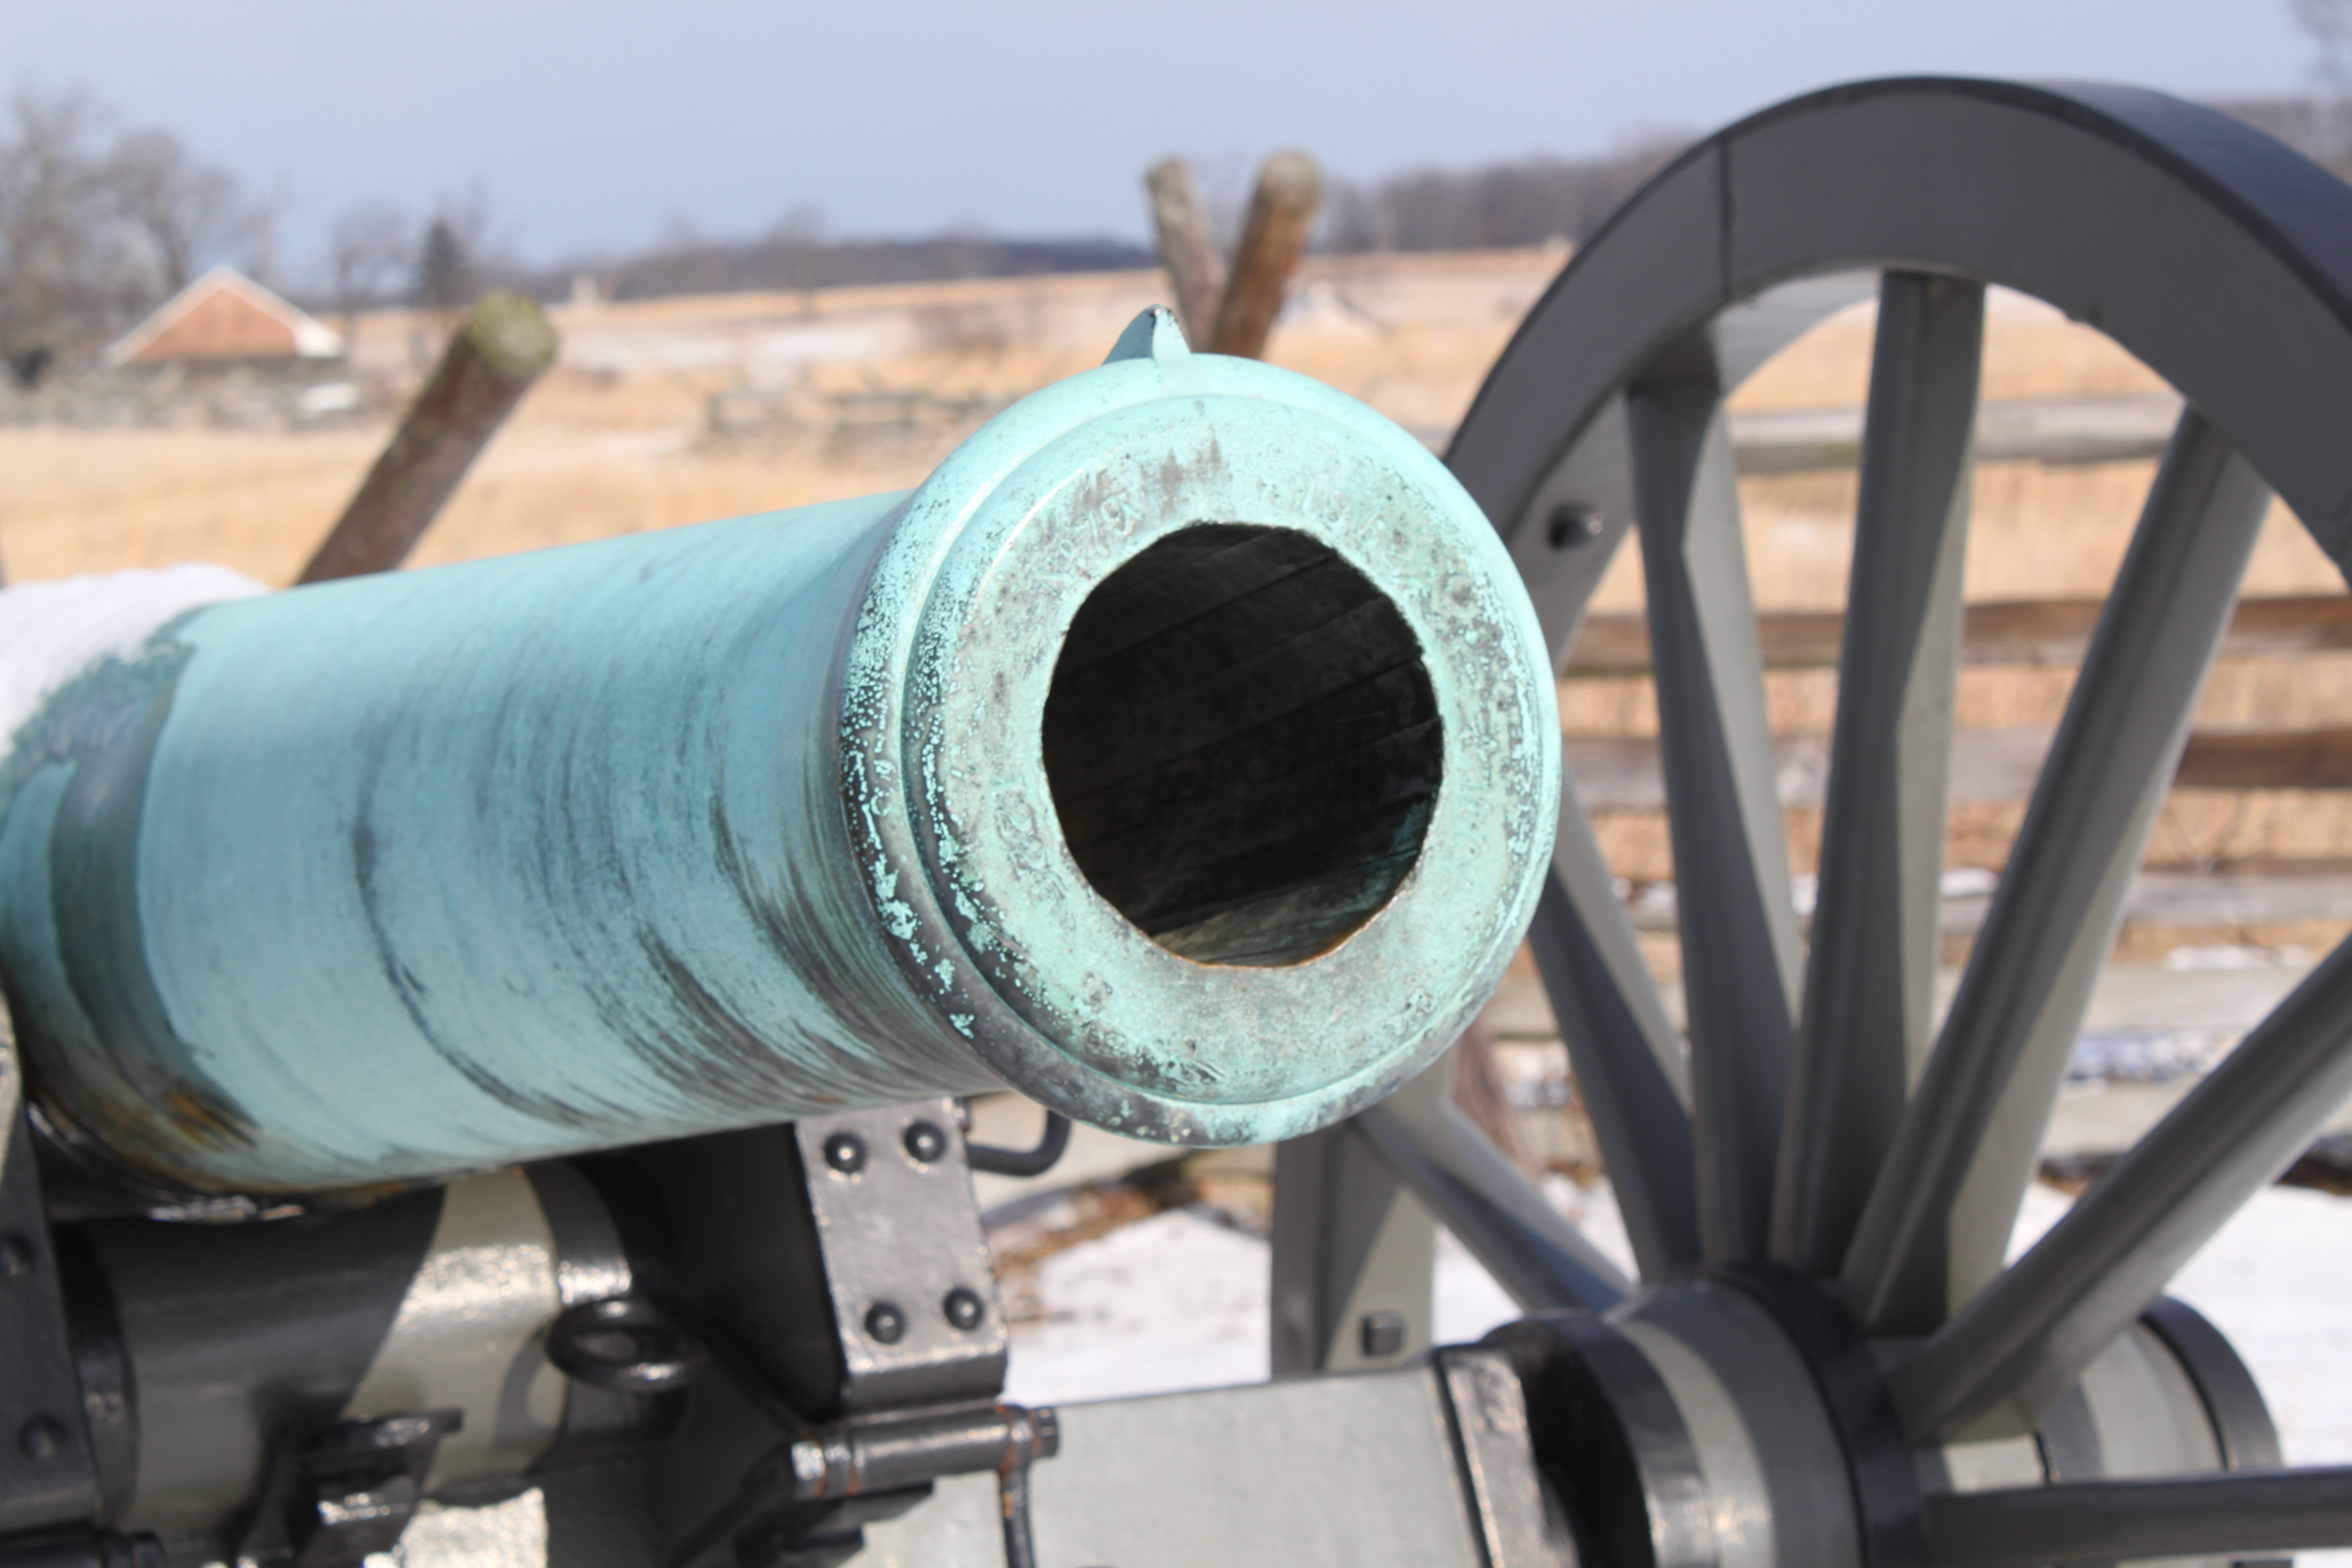
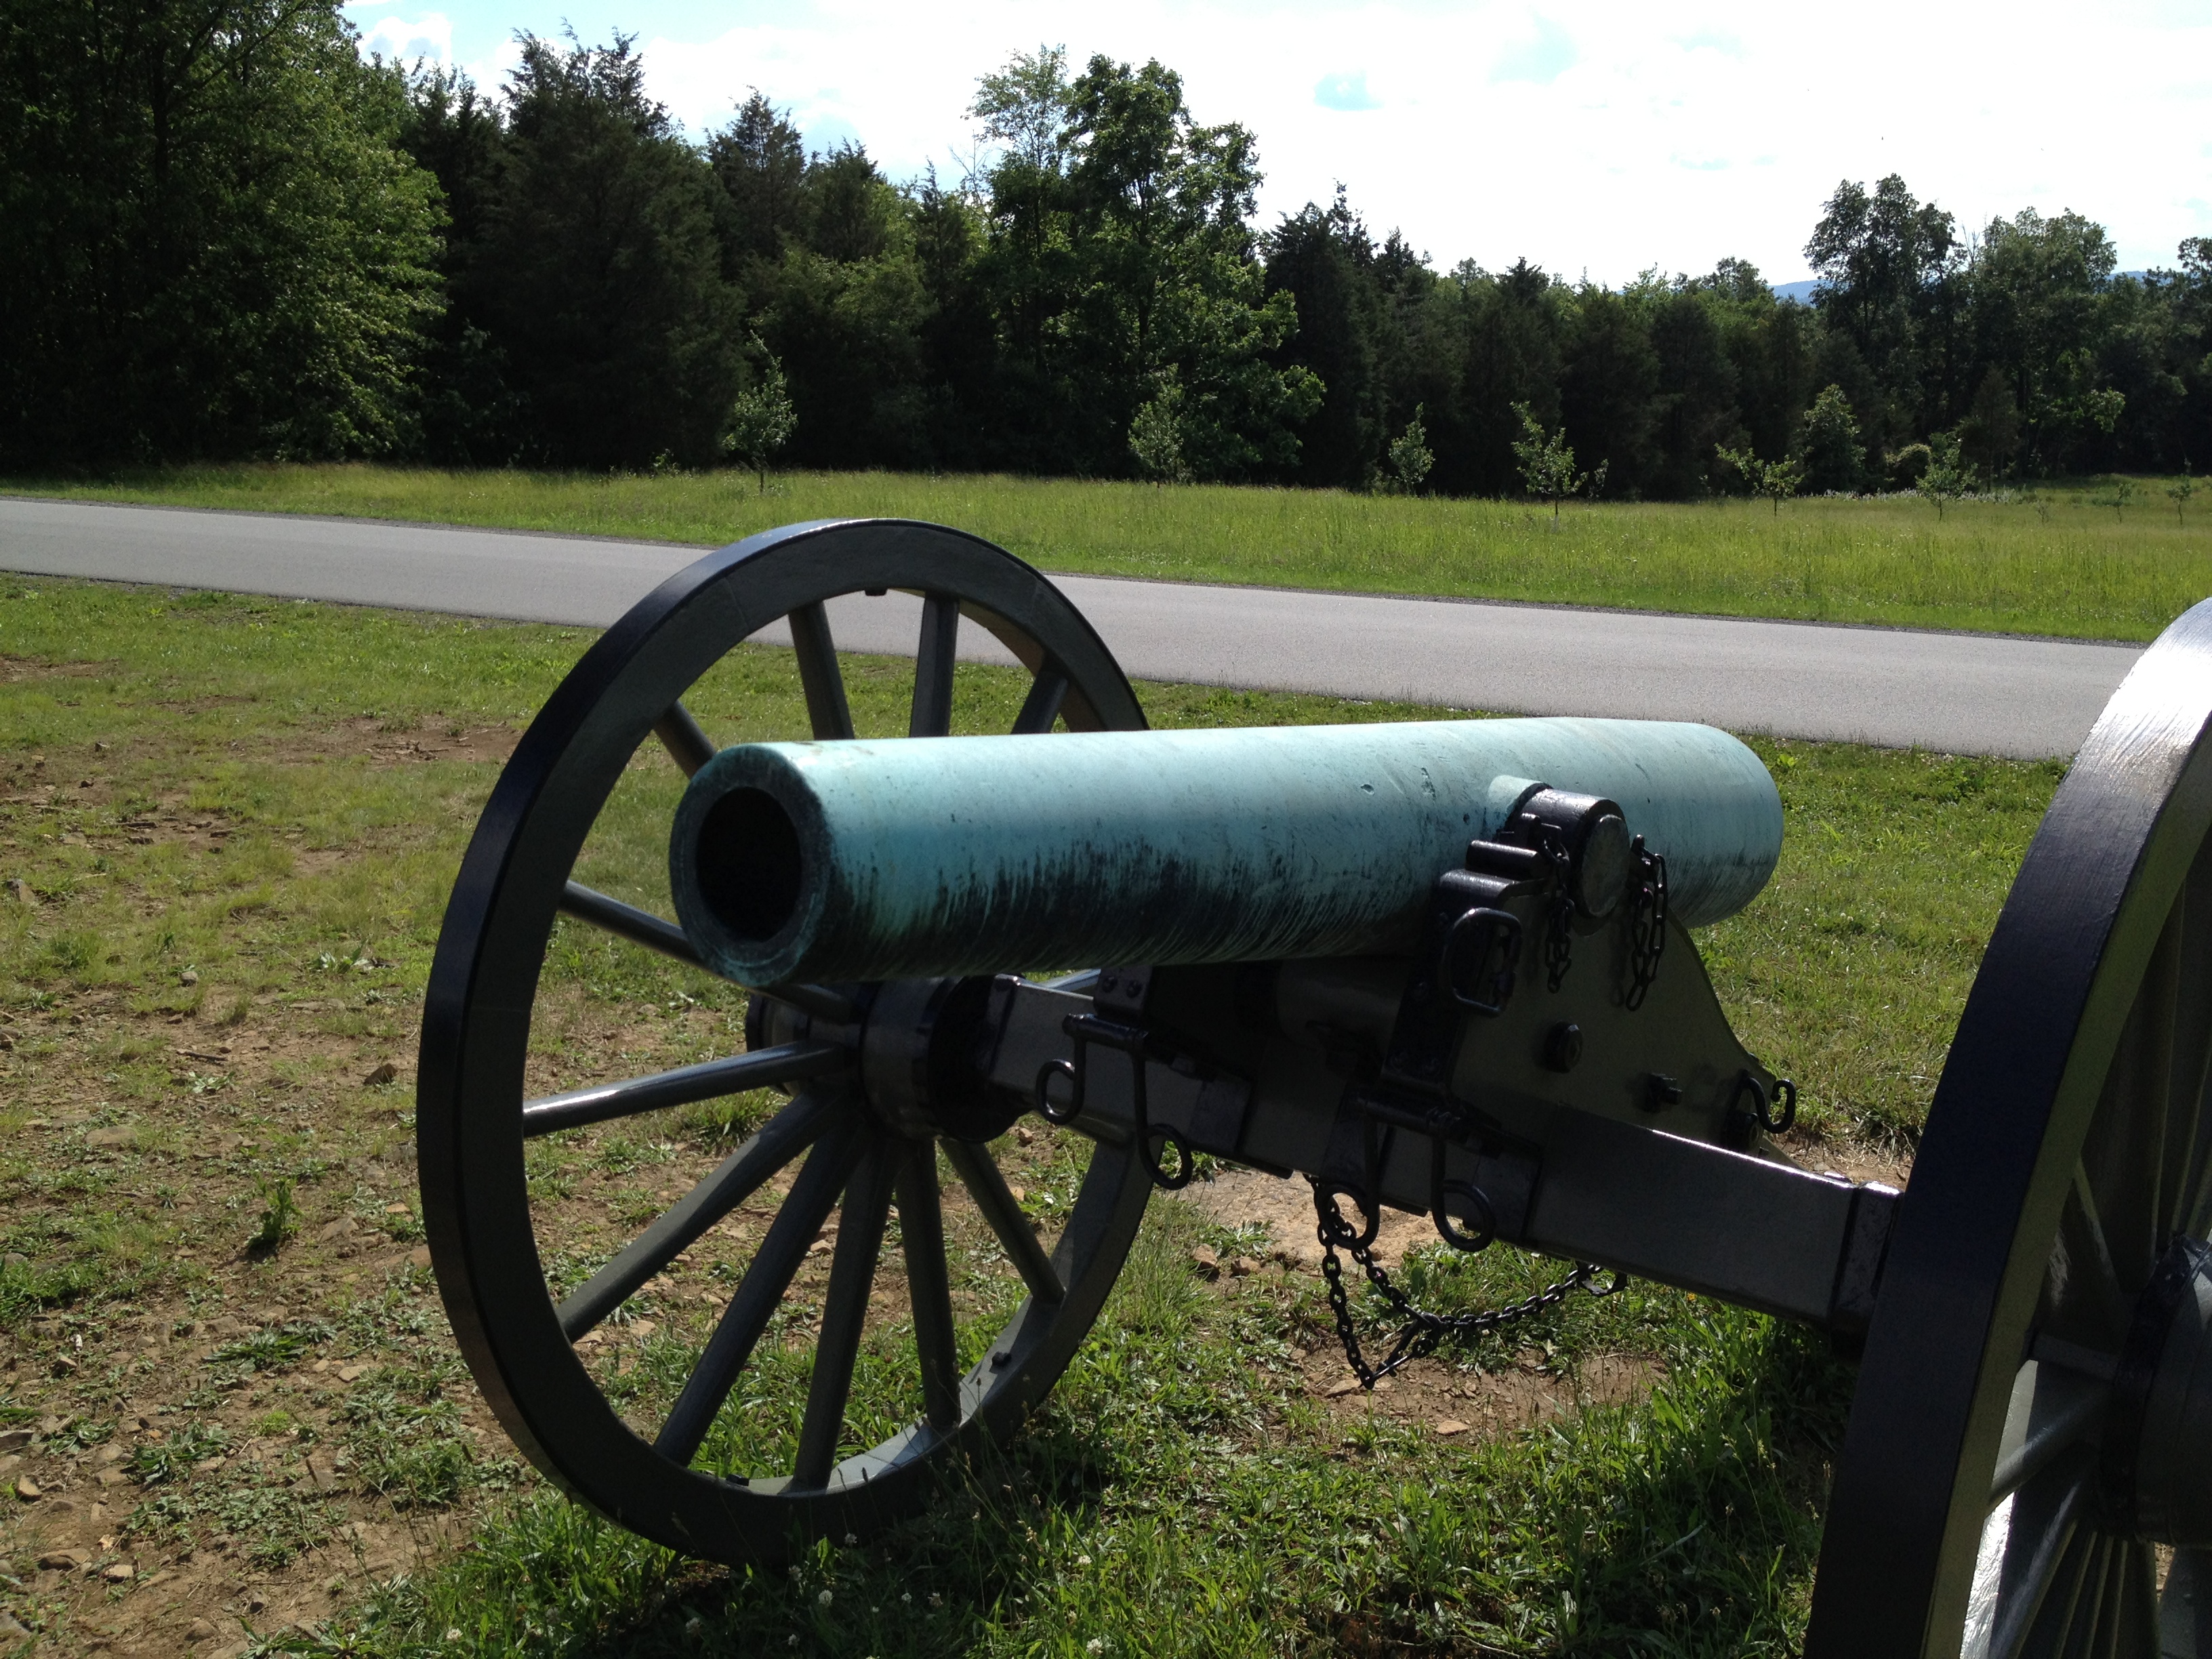
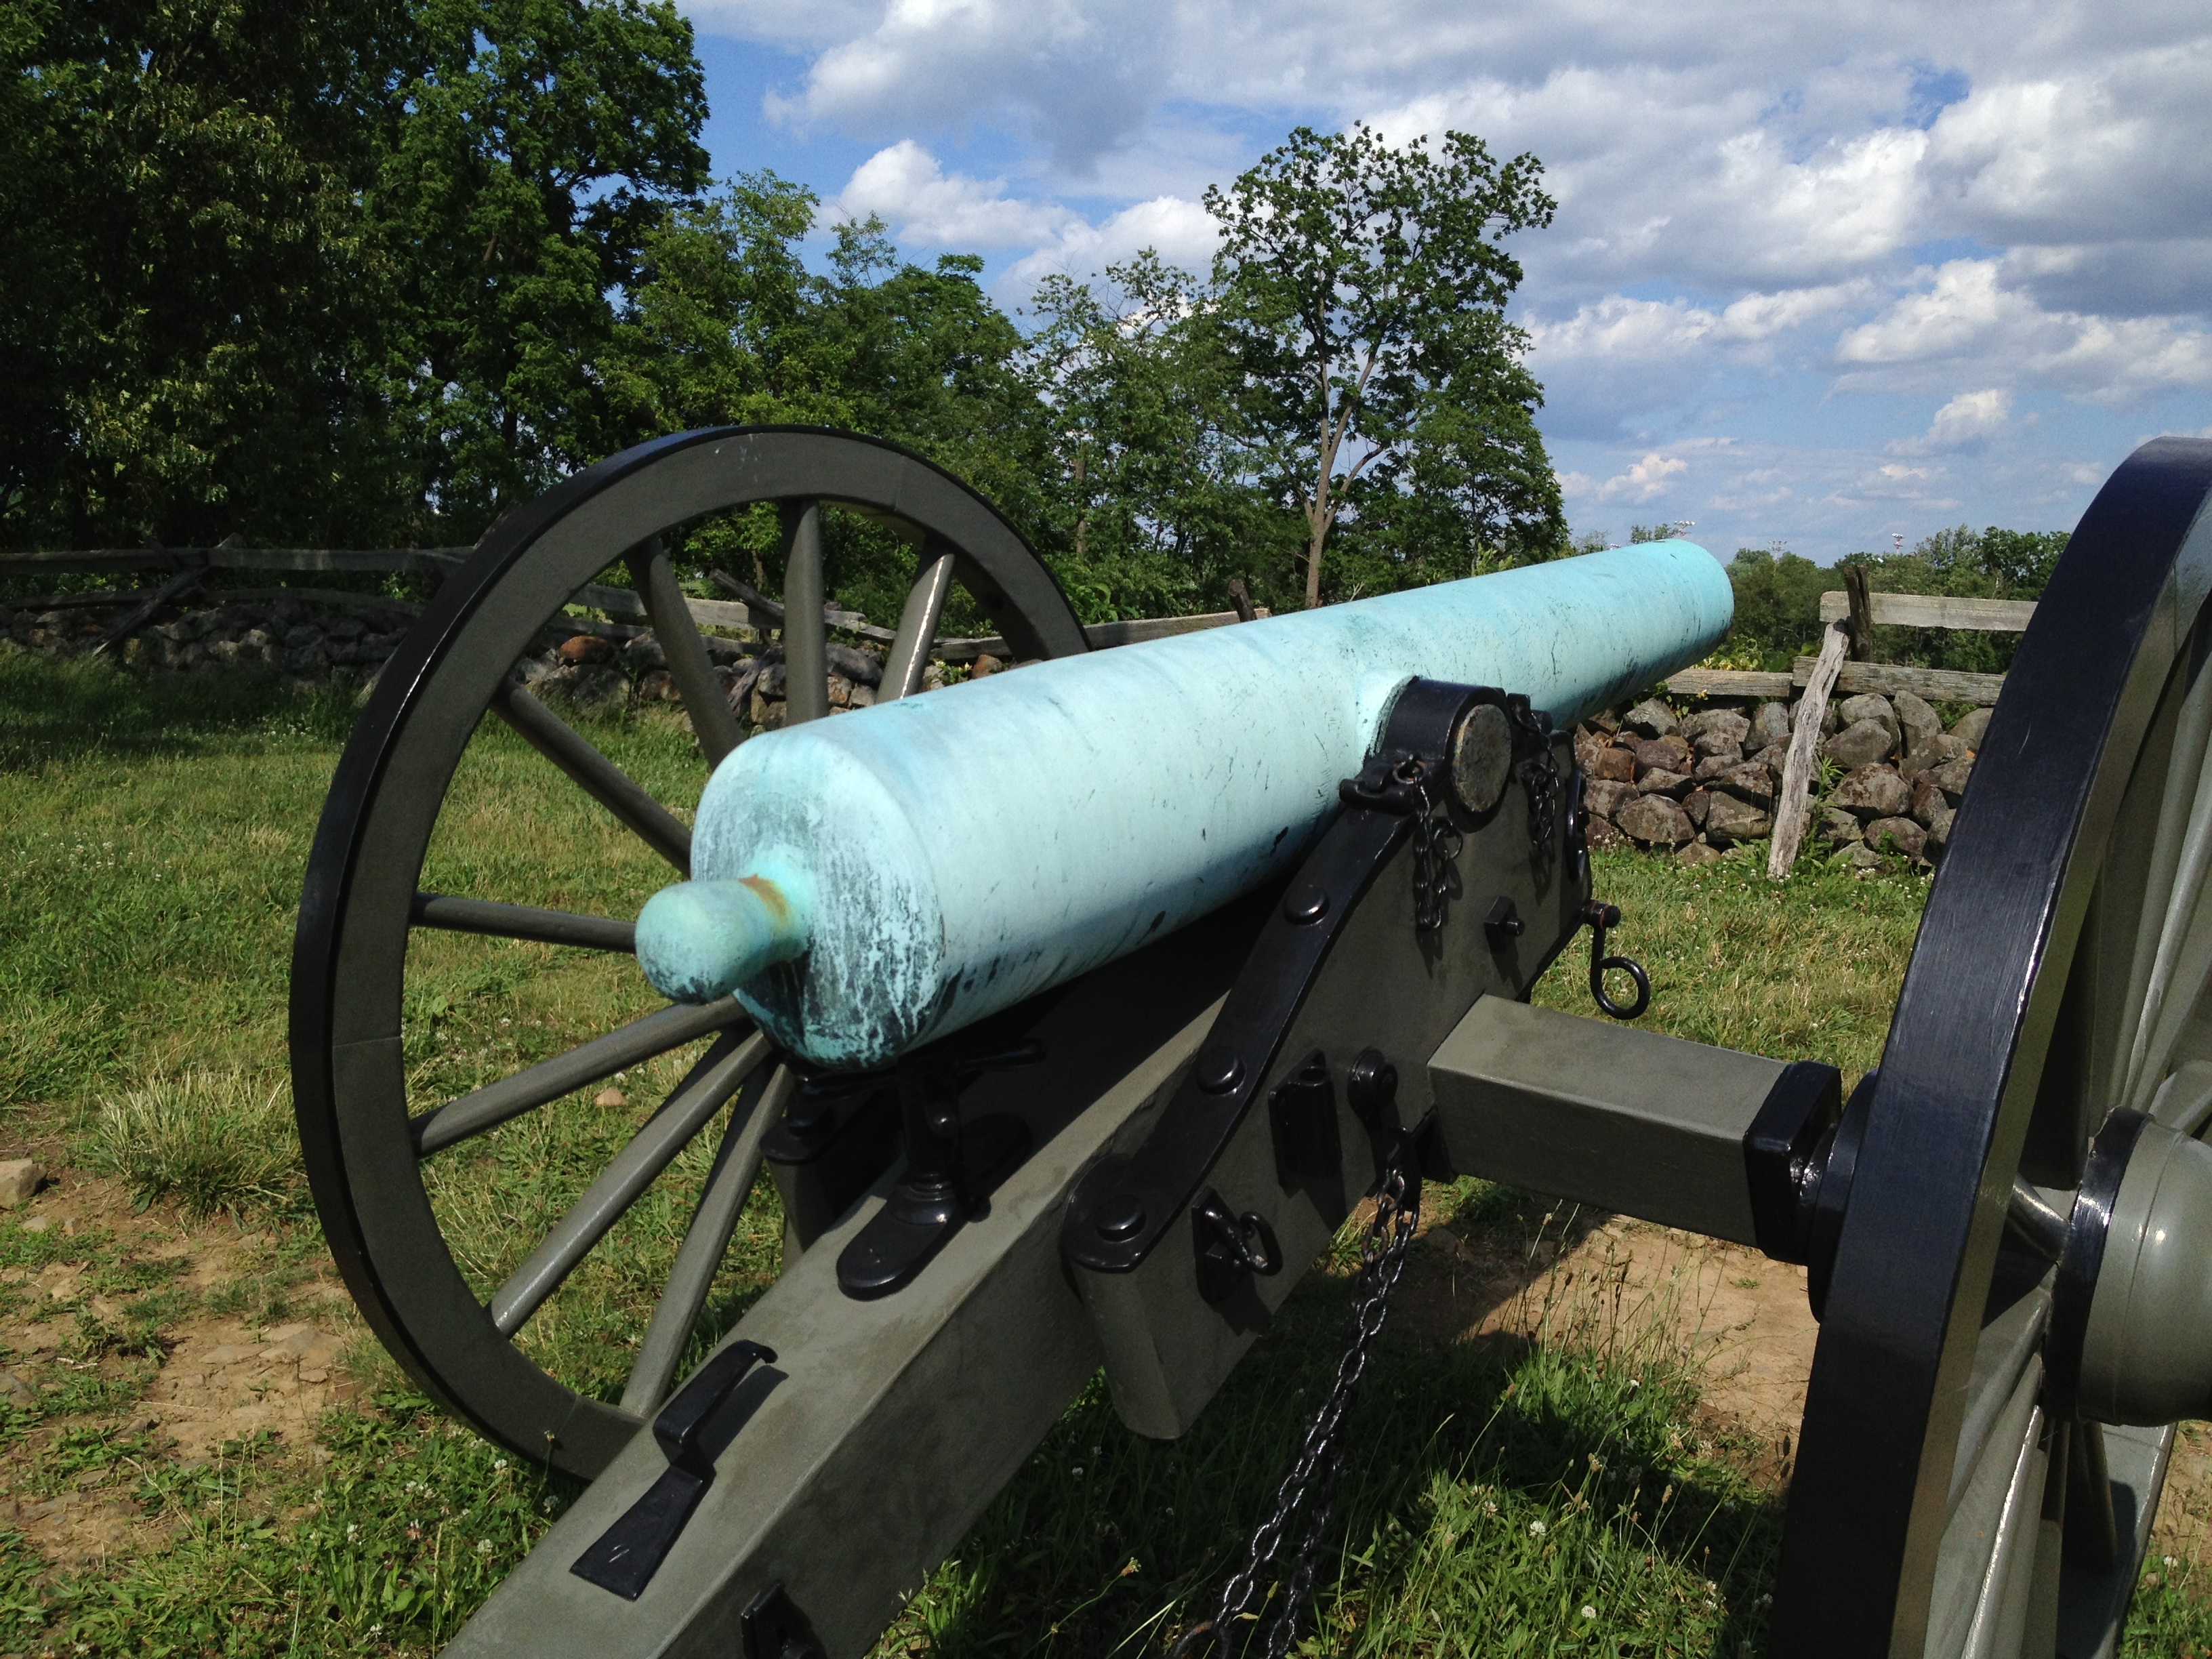
The Confederate “Napoleon”
Overview:This is the Confederate copy of the smoothbore US Model 1857 12-pounder design. Because of a lack of resources (both in material and manufacturing capability) these are generally pretty stripped-down copies. There isn’t a muzzle flare on these, for example.
Photos:
Front View of the Confederate “Napoleon”.Rear View of the Confederate “Napoleon”.
How to Identify:These are about the same size as a US Napoleon, but there is no flare at the muzzle – that’s the main visual difference. The tube still has a taper from the breech to the muzzle. Since the Confederacy had some difficulty acquiring a supply of copper (especially as the war went on) some of their guns have a dingy gray-ish appearance rather than the bright green you normally see on an old bronze gun. This was due to lead or other metals being mixed-in in place of copper in the bronze (though not in the example above, it appears). Like their US counterparts, these will have markings on the muzzle, breech, or trunnions.
Exceptions: There is at least 1 Confederate Napoleon at Gettysburg that was manufactured by Quinby and Robinson. This particular gun has a very simple, flat astragal around the muzzle. There may be other slight variants.
Fakes: None that I know of.
Howitzers
Overview: Not terribly popular for field use (there were only 33 of all types present at the Battle of Gettysburg), these weapons were designed to lob munitions over fortification walls at a high angle. They have short, very cylindrical barrels. Gettysburg has both the 12-pounder and 24-pounder varieties in their collection.
Photos:
Front View of a Howitzer.Rear View of a Howitzer.
How to Identify: The short, cylindrical barrel is your best indication – you just have to learn to eyeball it. As you can best tell from the “front” photo above, there is no taper to the barrel – that’s your best clue. You’ll also note that the howitzer above has an astragal, a slightly thicker reinforce beginning just before the trunnions, and a raised base ring.
Exceptions: In the collection at Gettysburg, there are 2 Austrian-made 24-pounder Howitzers, currently located near the Mississippi Monument. These are easily identifiable by the large handles on top of the barrel at the trunnions.
Fakes: None that I know of.
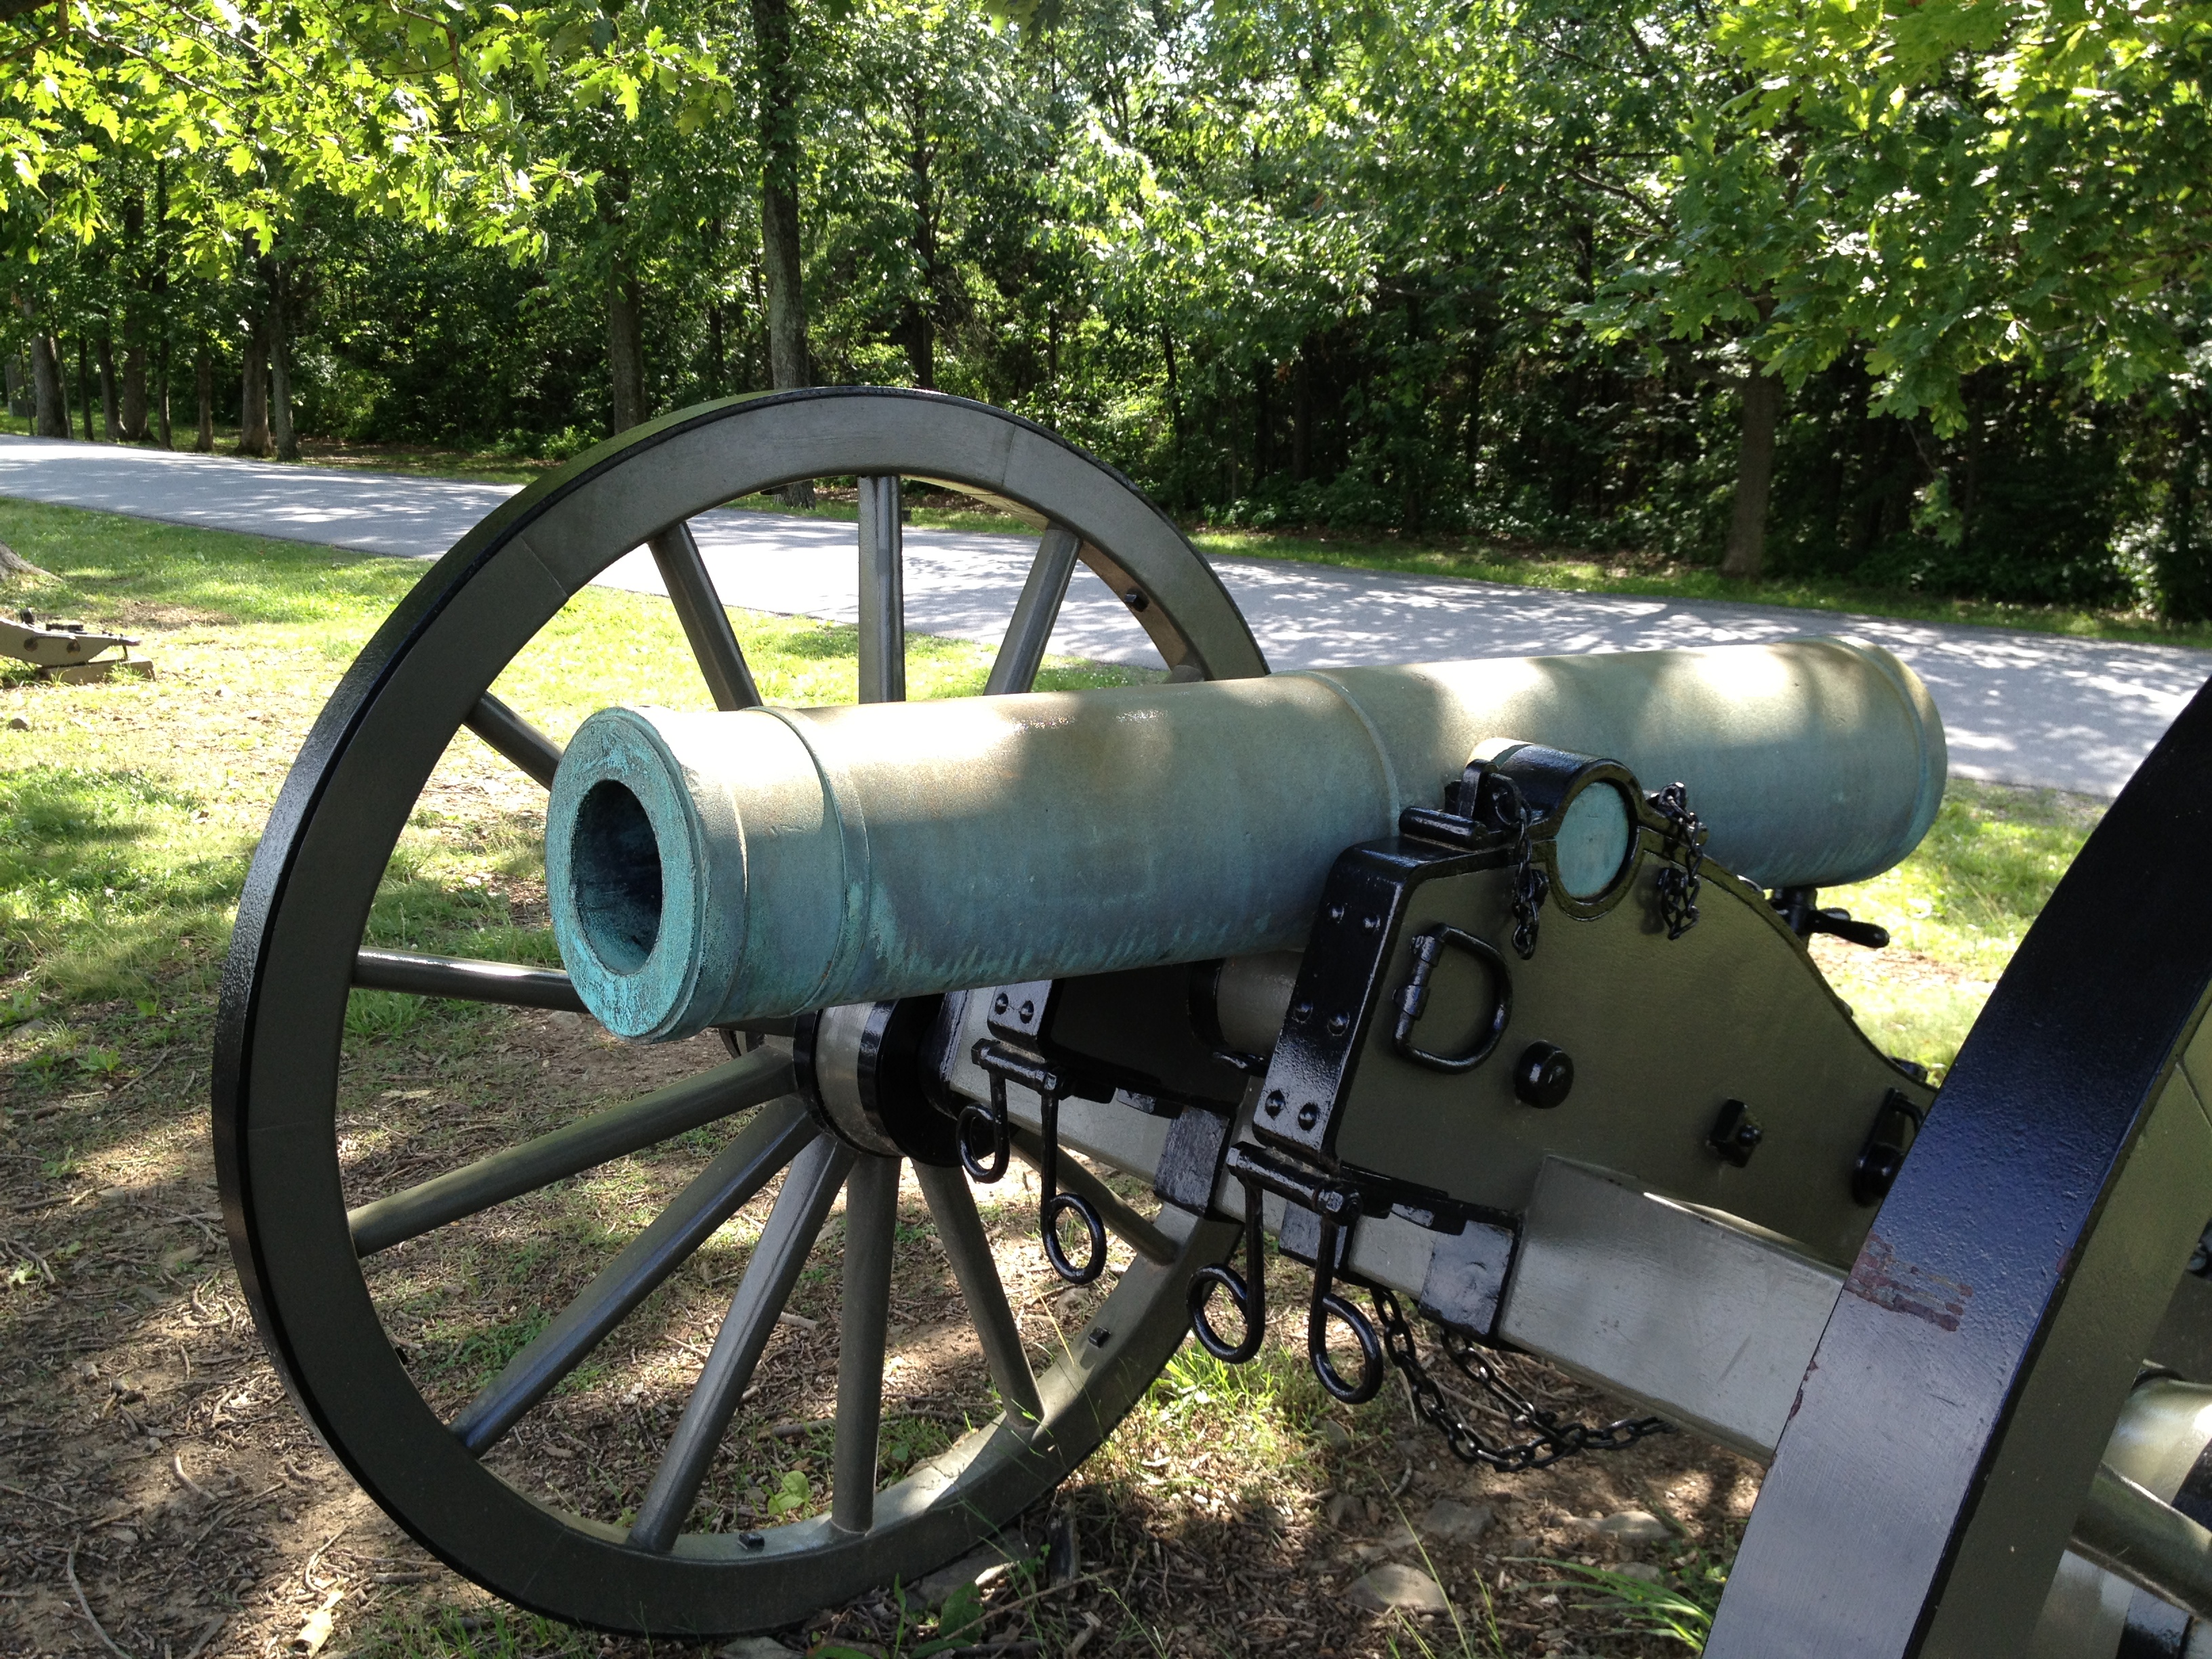
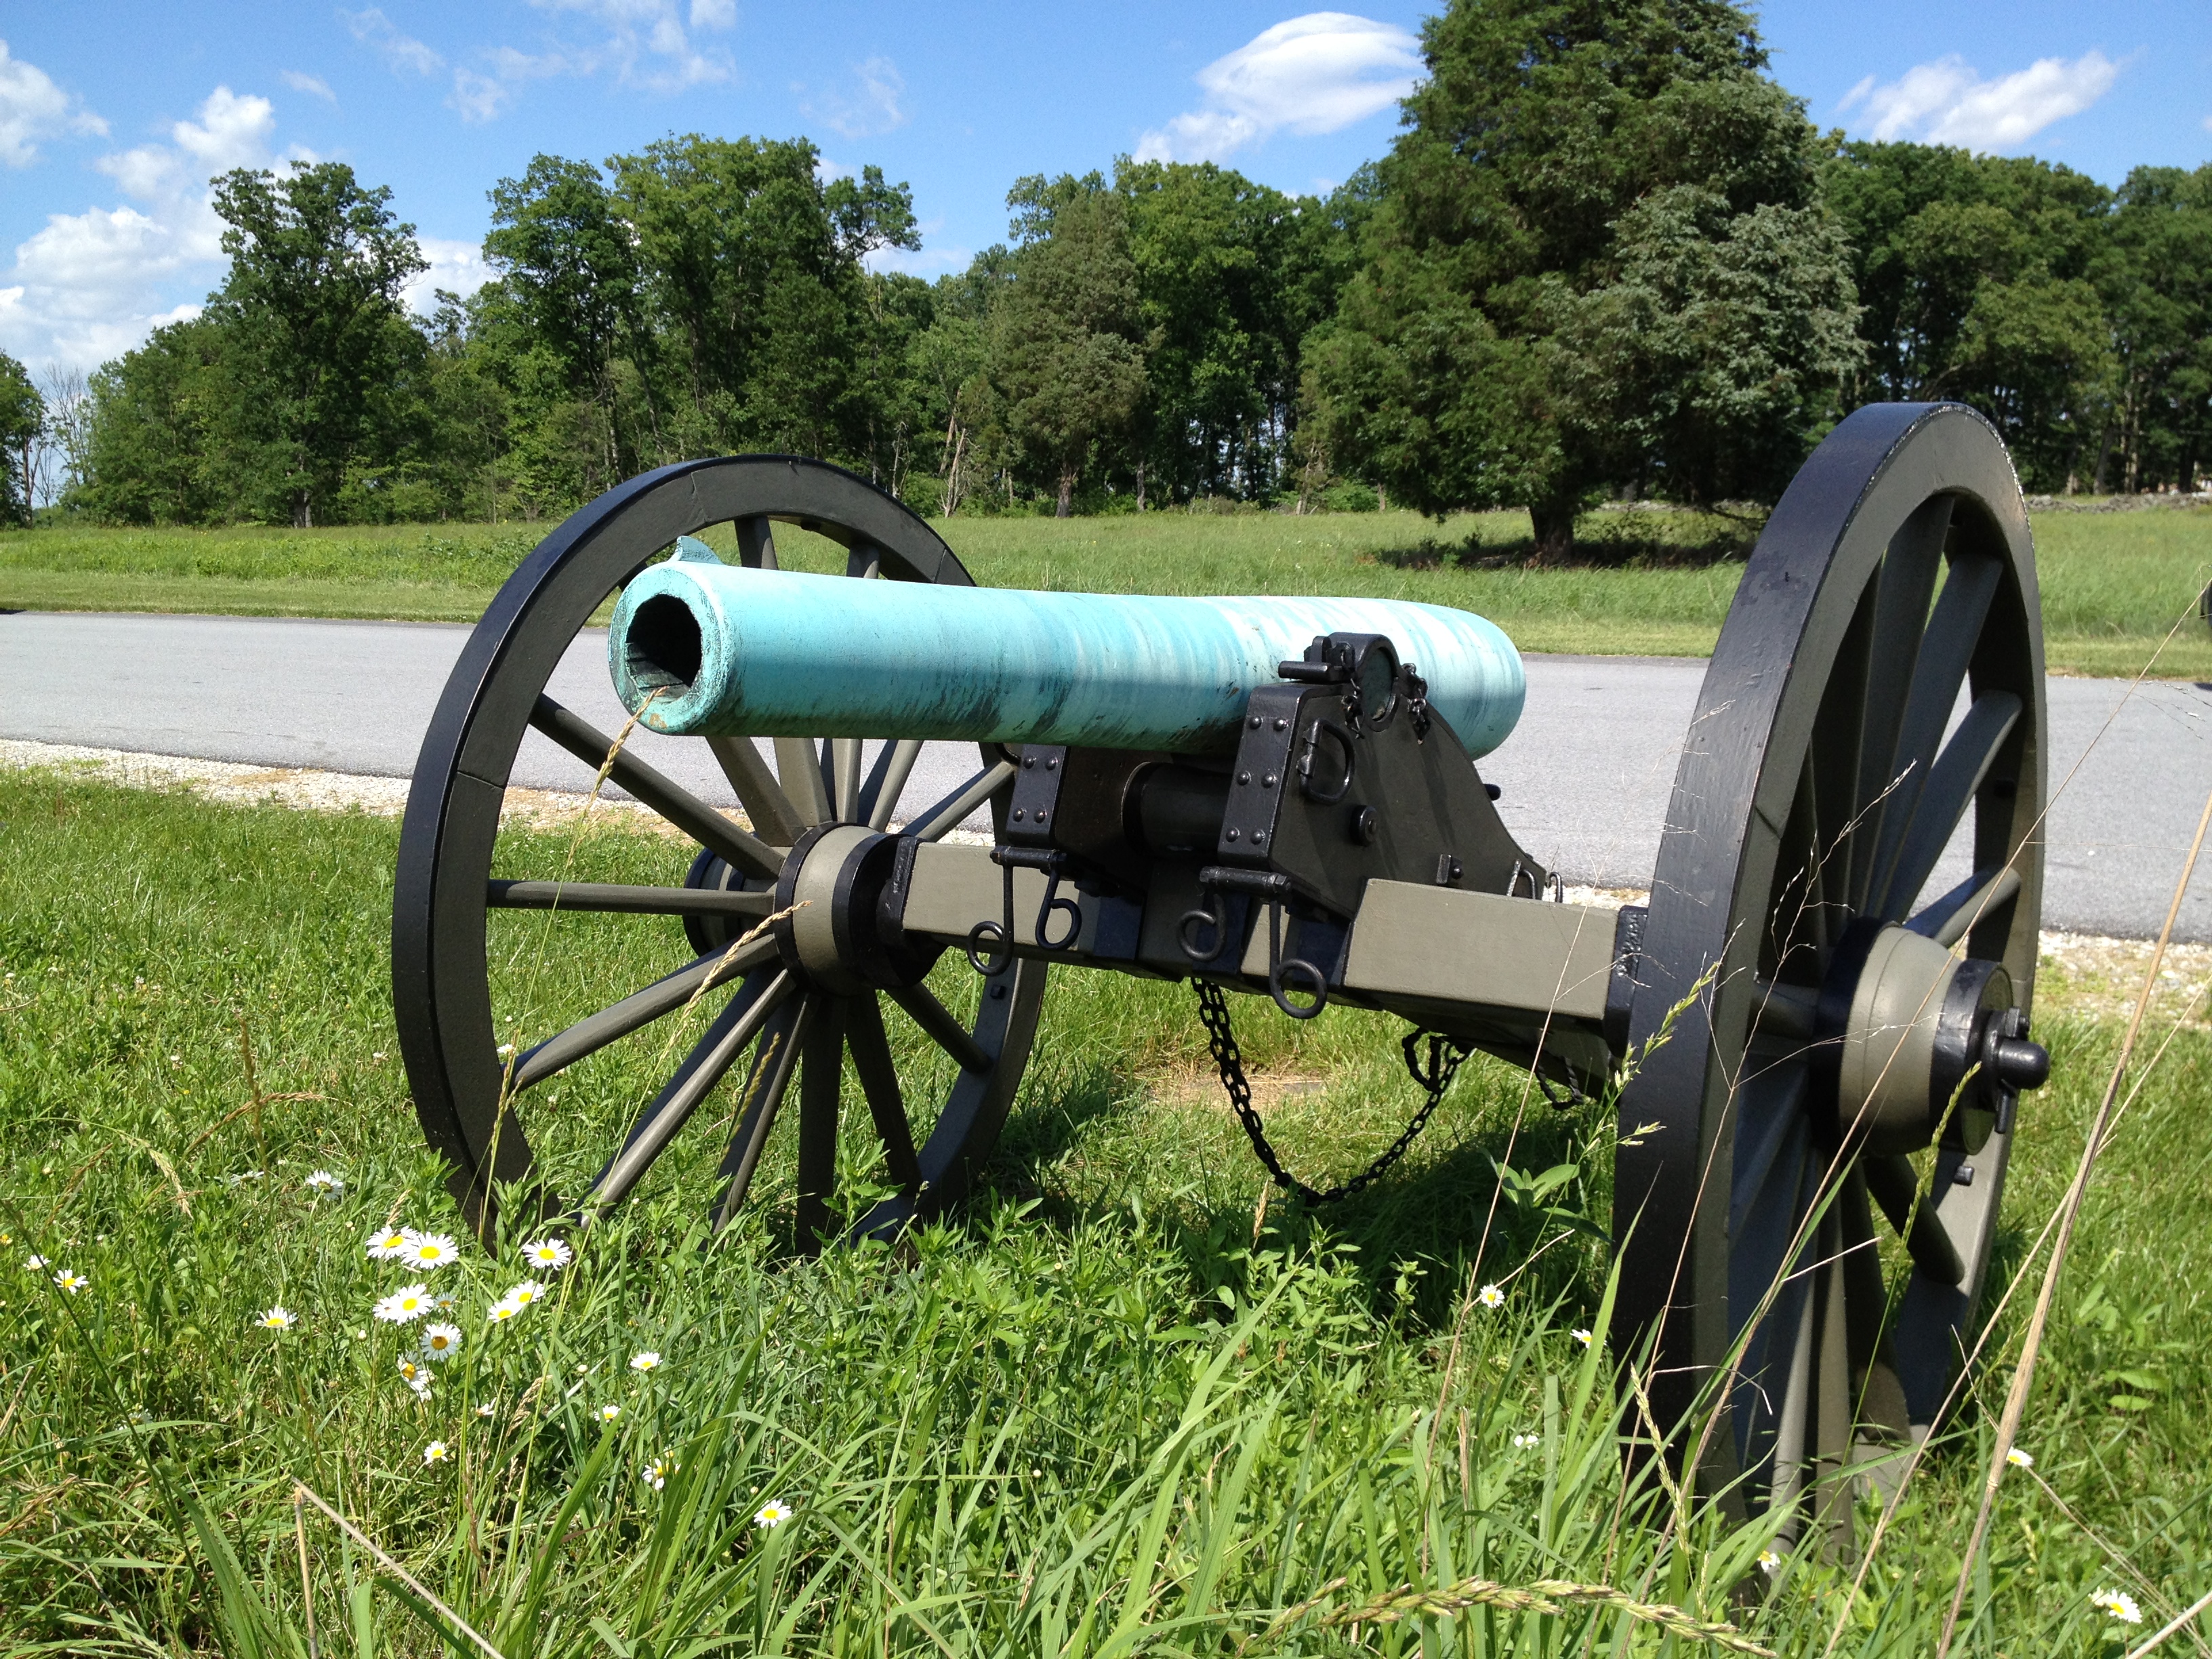
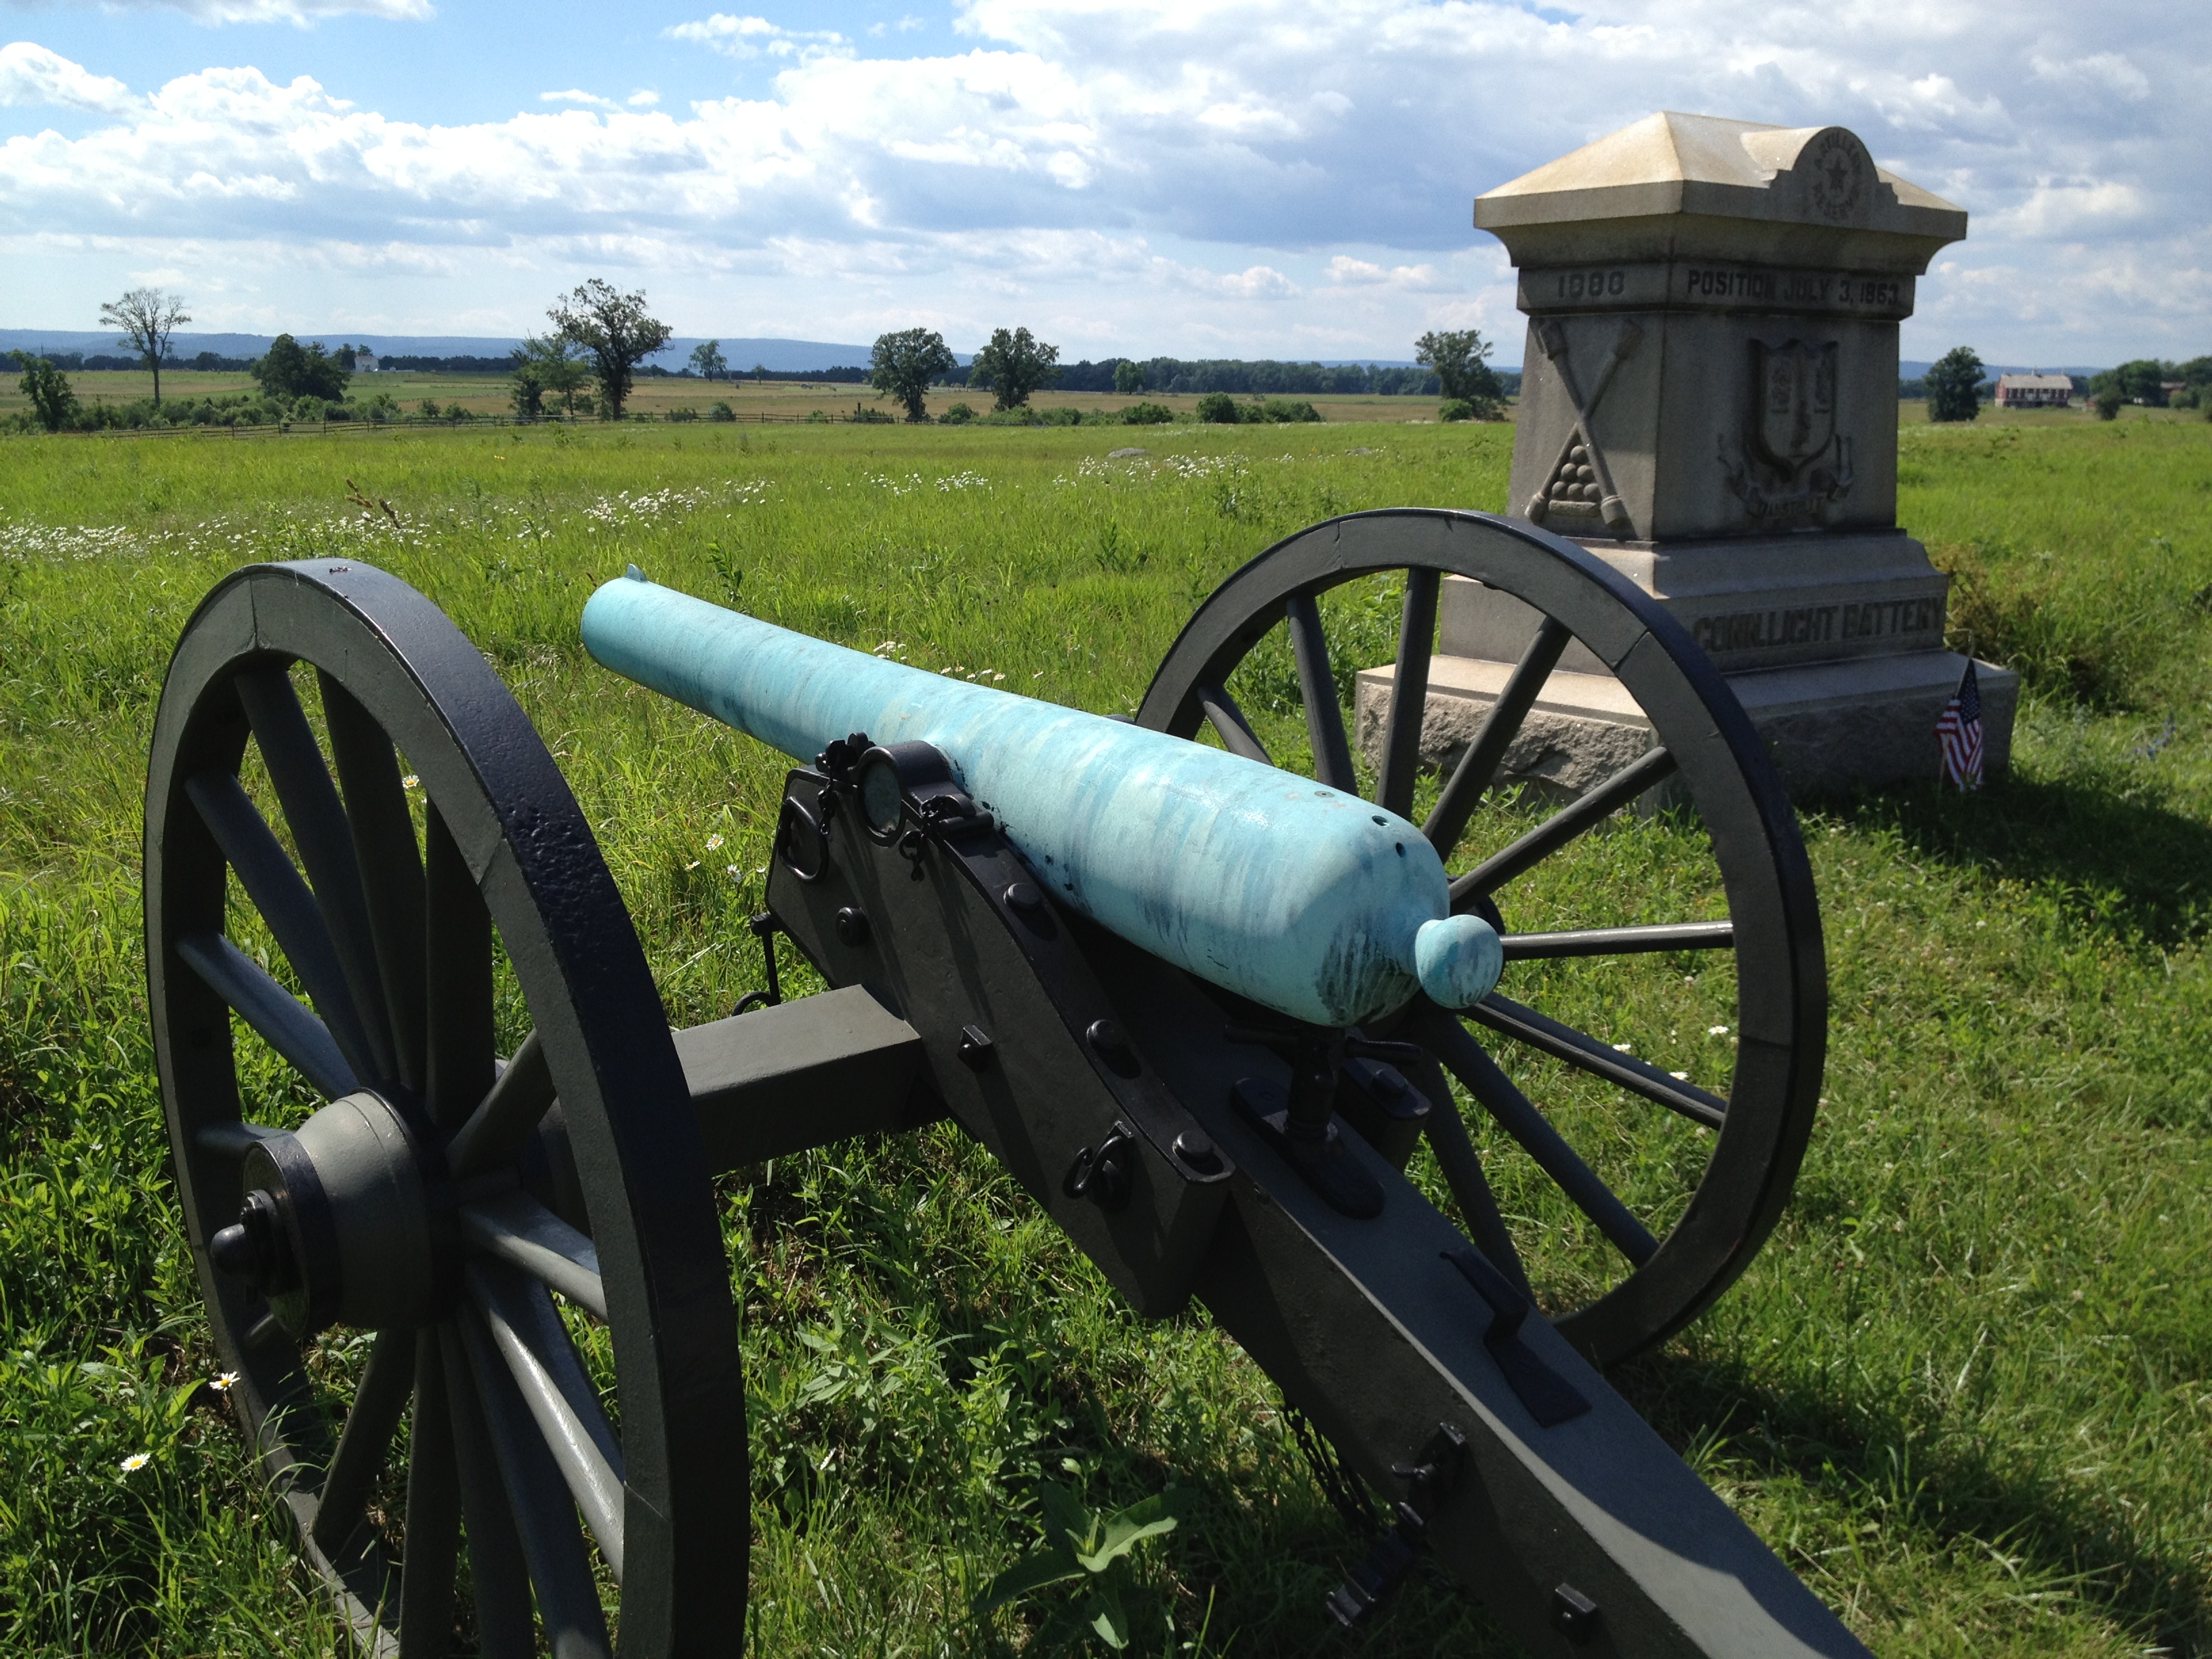
Model 1841 6-pounder Guns
Overview:By the time of the Civil War, the 6-pounder gun was basically a pea-shooter. It was not powerful enough to really be considered serviceable in light of the advancement in weapons like the Model 1857 “Napoleon” 12-pounder, or the newer iron rifled guns. The Confederacy couldn’t always be so choosy though, and they had 1 of these guns in service at the Battle of Gettysburg.
Photos:
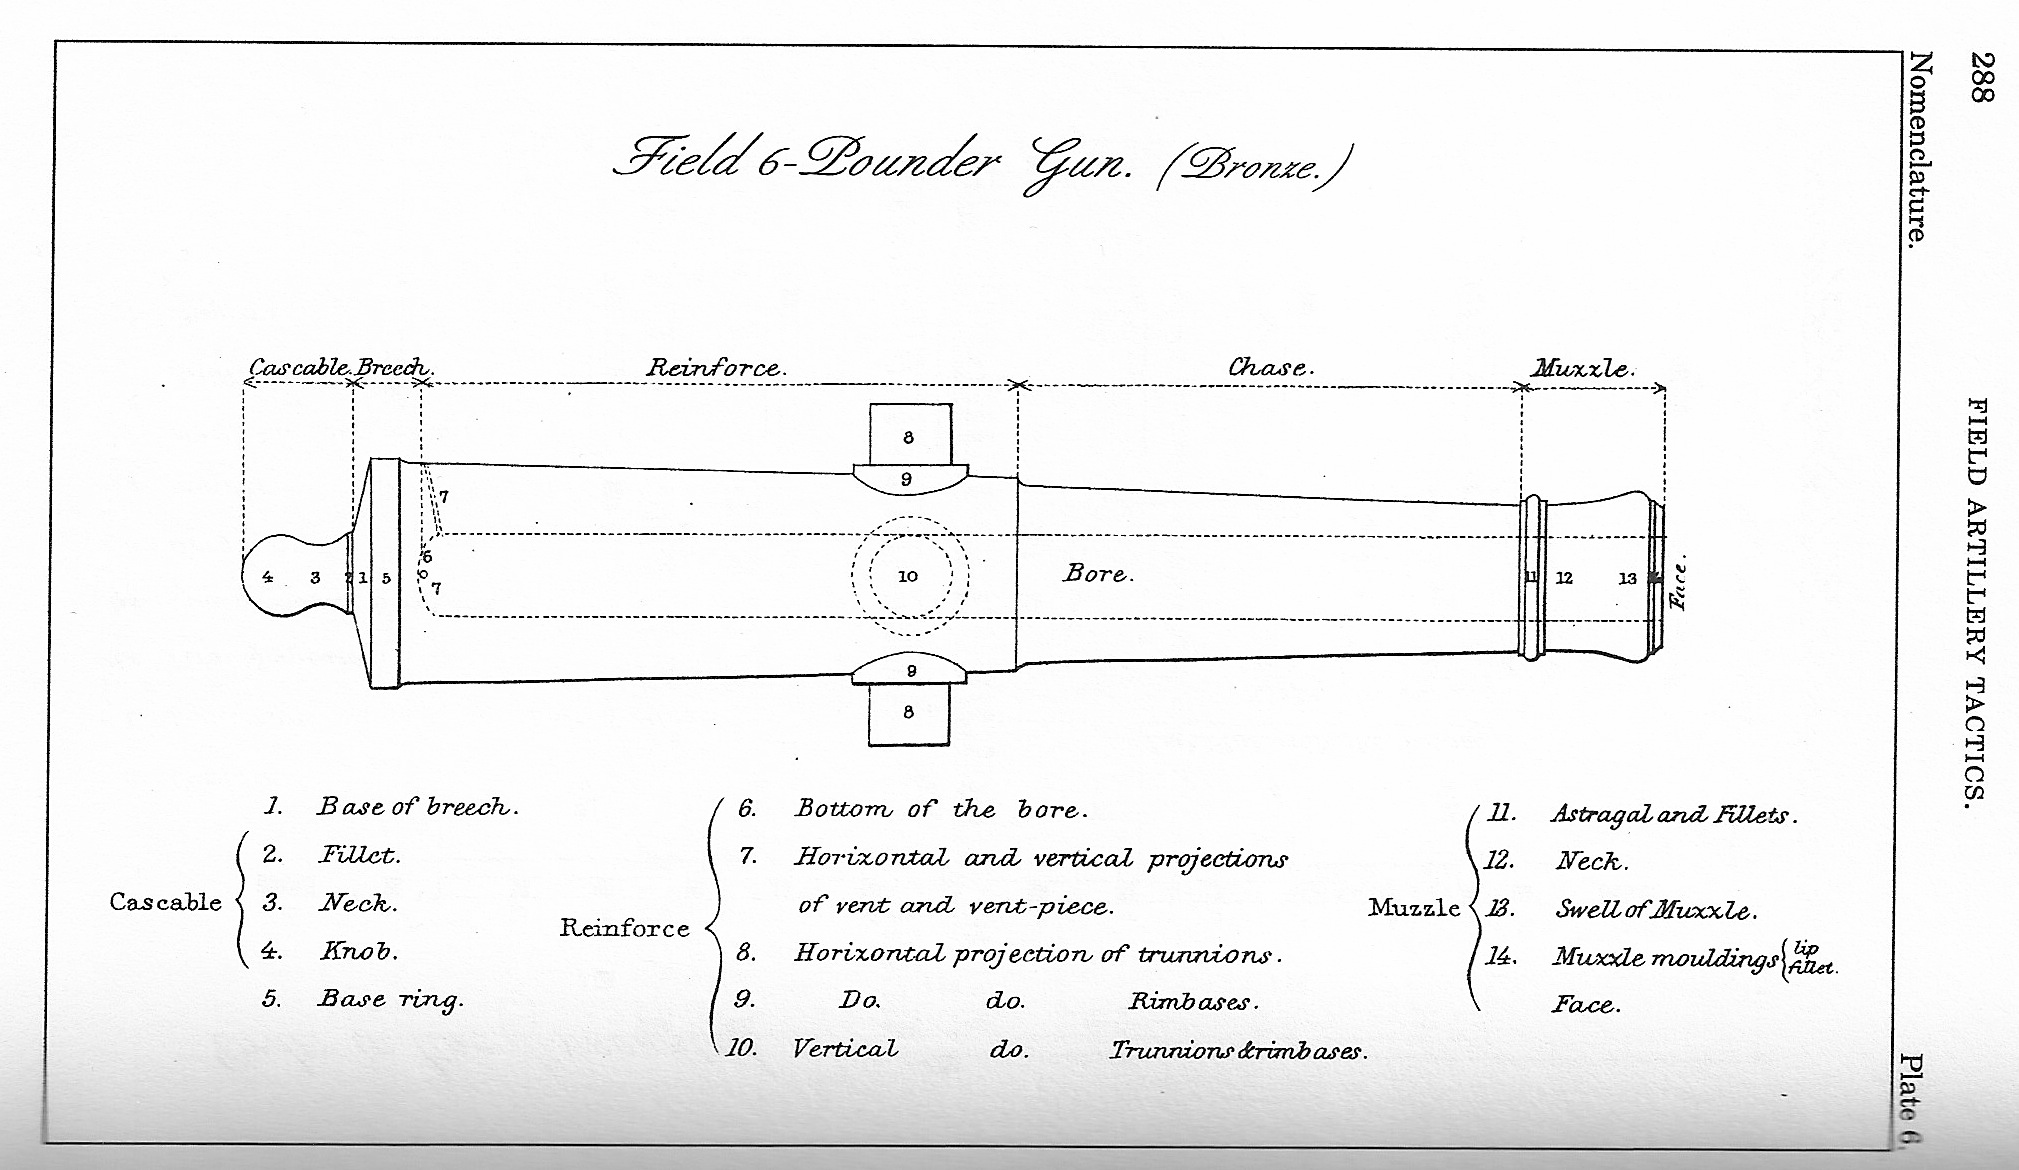
Model 1841 6-pounder Gun diagram. From the 1864 US Army Field Artillery Tactics manual.
How to Identify: While physically smaller than the Model 1857 12-pounder Napoleon, they share a similar shape. Where the Napoleon is smoothly tapered from breech to muzzle, the Model 1841 6-pounder has a thicker reinforce that drops off sharply to the chase just in front of the trunnions, as you can see above. There is also a raised base ring, and an astragal near the muzzle. These elements give the guns a “fancier” look than the Model 1857.
Exceptions: There are 16 of the Model 1841 6-pounders on display at Gettysburg, but only 1 that is still in original condition. It is located along South Condeferate Ave., across from the Texas Monument. The other 15 have been converted to the “False Napoleon” design that I talked about above for battlefield display purposes.
Fakes: Since these weren’t in heavy use during the Civil War and there is plenty of supply, there’s been no need for fakes.
James Rifles
Overview: Another rare weapon (there were only 4 at the Battle of Gettysburg), the James was a relatively unsuccessful rifled bronze gun patterned on the 3-inch Ordnance Rifle design. Since bronze is a soft metal, it had a tough time holding rifling – repeated firings would wear the grooves down. Unlike the experimental rifled Napoleons, these guns were designed from the outset to be rifled. They fired a slightly heavier 14-pound round.
Photos:
Front View of a James Rifle.Rear View of a James Rifle.The Breech and Cascable Knob on a James Rifle.
How to Identify: As I explained above, this weapon is a bronze copy of the 3-inch Ordnance Rifle pattern, so it looks like a green 3-inch Rifle in its shape. It has a nice smooth taper down to the muzzle, and that fin-shaped front sight that the rifled Napoleons have. The 2 that are on the field at Gettysburg are along Hancock Ave., south of the Pennsylvania Monument.
Exceptions: As far as I know, there aren’t any variations on the James pattern, although there was a Confederate copy of this design.
Fakes: None that I know of.
In the next installment, we’ll look at some of the iron weapons on display at Gettysburg, and how to tell them apart.